
Introduction
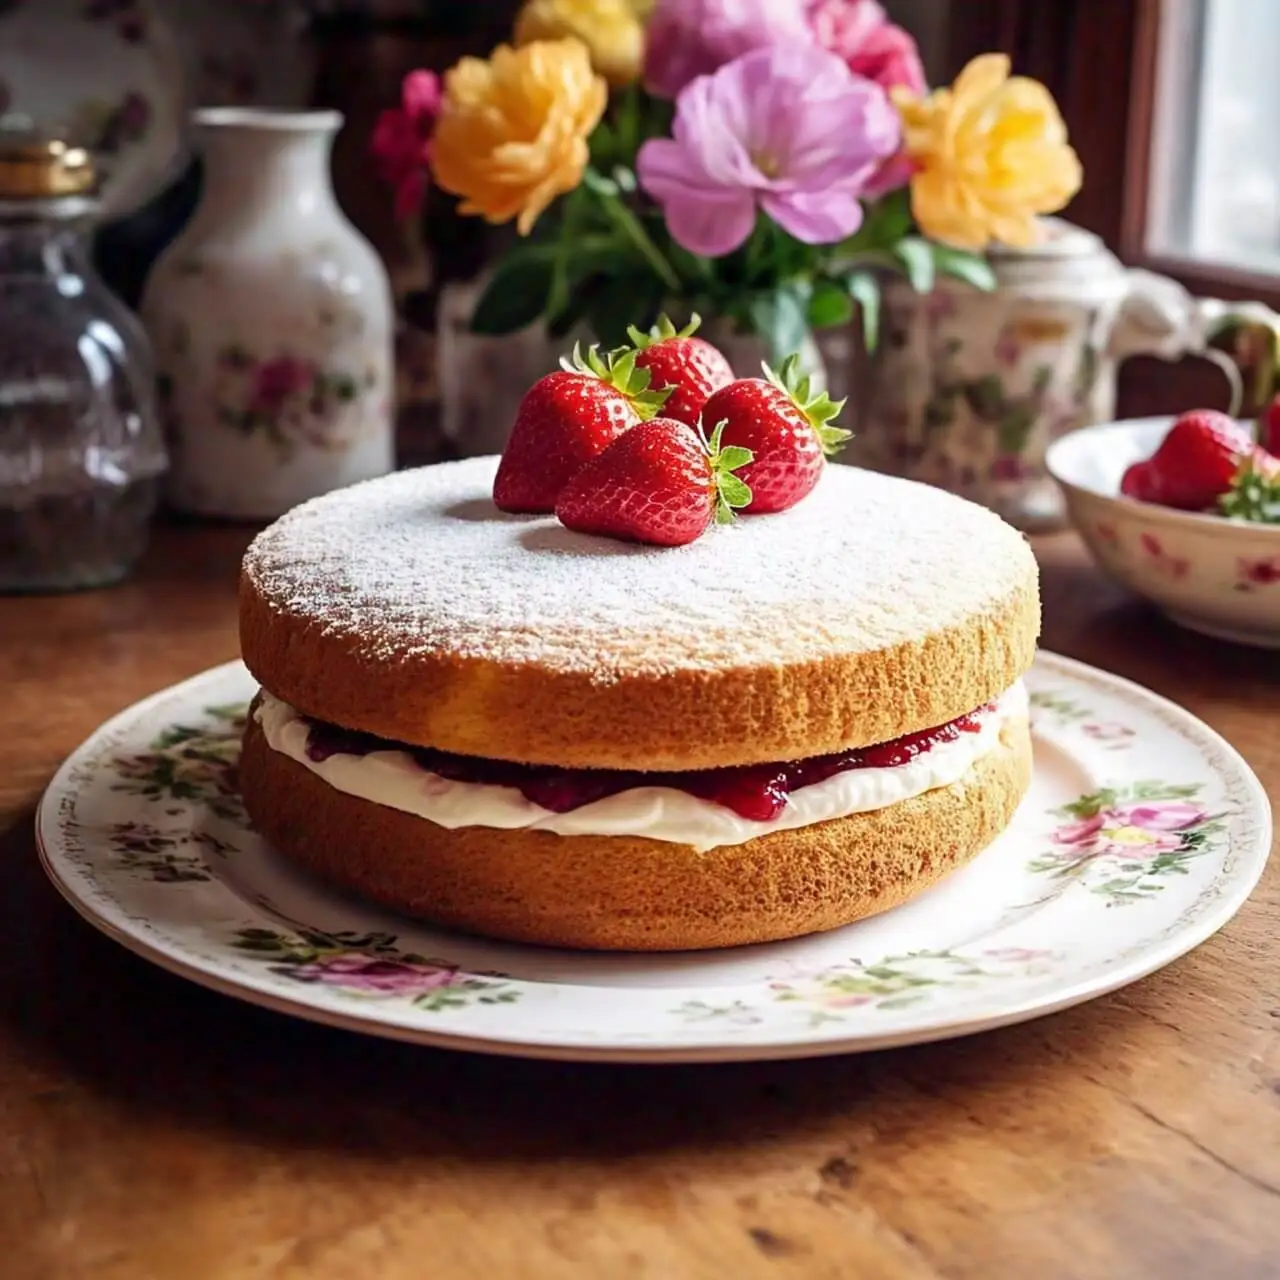
The Victoria Sponge Cake is a timeless classic, beloved for its simplicity and elegance. Named after Queen Victoria, who enjoyed a slice with her afternoon tea, this dessert has become a staple in British baking traditions. With its light, fluffy texture and delicious layers of jam and whipped cream, the Victoria Sponge Cake is the epitome of indulgence without being overly complicated.
Whether you’re a novice baker or a seasoned pro, mastering this recipe is a rewarding experience. In this guide, we’ll walk you through the ingredients, techniques, and tips to help you create the perfect Victoria Sponge Cake. Let’s bring a touch of royal charm to your kitchen!
The Victoria Sponge Cake is deeply rooted in British culinary history, named after Queen Victoria, who adored this delightful treat during her afternoon teas. For more details about its origins and significance, visit BBC FOOD
What Makes a Victoria Sponge Cake Special?
Origin Story
The Victoria Sponge Cake has a rich and fascinating history that ties it to British culture and royalty. This iconic dessert was named after Queen Victoria, who reigned during the 19th century. Known for her love of sweets, Queen Victoria popularized the concept of afternoon tea—a tradition that became a staple in British society. It is said that the Victoria Sponge Cake became her preferred treat to accompany her tea, making it a symbol of refinement and elegance.
Before the invention of baking powder in the mid-19th century, sponge cakes were dense and heavy. However, with the advent of this revolutionary ingredient, bakers could create light and airy cakes, giving rise to the classic Victoria Sponge we know today. The simplicity of its ingredients—eggs, sugar, butter, and flour—reflects the culinary style of the time, focusing on quality and balance.
Traditionally, the cake was filled with homemade strawberry or raspberry jam and sprinkled lightly with caster sugar. Over time, whipped cream became a popular addition, enhancing its indulgent flavor and texture. Today, the Victoria Sponge Cake remains a quintessential part of British tea culture and is celebrated worldwide for its delightful taste and historical charm.
Key Ingredients
The Victoria Sponge Cake’s charm lies in its simplicity, relying on a few staple ingredients to achieve its light, fluffy texture and rich flavor. Let’s explore these essential components and their roles in creating this classic dessert.
1. Self-Raising Flour
Self-raising flour is the foundation of the cake, providing the structure and lightness that makes the sponge so delightful. It contains a pre-mixed ratio of flour and leavening agents like baking powder, ensuring consistent results without the need for additional rising agents. Using self-raising flour ensures the cake has the perfect rise, creating that characteristic airy texture.
2. Caster Sugar
This finely granulated sugar is ideal for baking because it dissolves quickly, ensuring a smooth and velvety batter. Caster sugar not only adds sweetness but also helps to create a delicate crumb and enhances the cake’s golden brown color during baking.
3. Butter
Butter is a crucial ingredient for flavor and texture. Softened unsalted butter is creamed with sugar to create a light, fluffy base for the batter. The fat content in butter also contributes to the cake’s moist and tender crumb, making each bite rich and satisfying.
4. Eggs
Eggs play a dual role as a binder and leavening agent. Their proteins provide structure, while their air-trapping ability helps the batter rise during baking. Using fresh, room-temperature eggs ensures the batter emulsifies properly, resulting in a smooth and uniform sponge.
5. Strawberry or Raspberry Jam
The filling is what transforms the sponge cake into a Victoria Sponge Cake. Traditionally, strawberry or raspberry jam is used to add a sweet, fruity contrast to the buttery sponge. Homemade jam is often preferred for its freshness and rich flavor, but high-quality store-bought options work just as well.
6. Whipped Cream
Though not part of the original recipe, whipped cream has become a popular addition in modern versions of the cake. Lightly sweetened cream adds a layer of richness and complements the tanginess of the jam, creating a perfect balance of flavors.
7. Optional Enhancements
- Vanilla Extract: Adding a touch of vanilla enhances the overall flavor without overpowering the natural sweetness of the cake.
- Icing Sugar: A light dusting of icing sugar on top gives the cake a polished, elegant finish.
Each ingredient plays a specific role in achieving the perfect Victoria Sponge Cake, and their quality is key to success. By understanding their importance, you can recreate this timeless dessert with confidence and precision.
Texture and Taste
The Victoria Sponge Cake is celebrated for its exceptional texture and balanced flavor profile, which make it a timeless favorite among bakers and dessert lovers alike. Here’s what sets it apart:
1. Light and Airy Texture
The hallmark of a Victoria Sponge Cake is its incredibly light and airy texture. This is achieved through the careful creaming of butter and sugar to incorporate air into the batter, followed by the gradual addition of eggs and flour. The self-raising flour and eggs work together to create a sponge that is fluffy yet sturdy enough to hold its shape. The result is a cake that feels almost weightless when bitten into, melting in your mouth with every bite.
2. Tender Crumb
The tender crumb of a Victoria Sponge Cake comes from the balance of fat and moisture in the batter. The use of high-quality butter ensures a rich, soft texture, while the precise folding of the flour prevents overmixing, which can lead to a dense or rubbery cake. A well-made sponge should have a fine, even crumb that is soft yet holds together perfectly.
3. Sweet and Buttery Flavor
The flavor of the Victoria Sponge is a harmonious blend of sweetness and buttery richness. The cake itself is subtly sweet, allowing the natural flavors of the butter and eggs to shine through. This delicate balance makes it the perfect base for the vibrant, fruity notes of the jam and the creamy richness of the whipped cream filling.
4. Layers of Complementary Flavors
The simplicity of the sponge provides the ideal canvas for the contrasting flavors of the fillings:
- Jam: The tangy sweetness of strawberry or raspberry jam adds a burst of fruity flavor that cuts through the richness of the butter.
- Whipped Cream: Lightly sweetened cream contributes a smooth, velvety texture and a hint of indulgence, perfectly complementing the jam and sponge.
5. Subtle Vanilla Undertones (Optional)
In some modern versions, a splash of vanilla extract is added to the batter to enhance the cake’s flavor. The subtle vanilla undertones blend seamlessly with the natural sweetness, making the overall taste even more inviting.
6. Perfect Balance
What truly makes the Victoria Sponge Cake stand out is its balance. The lightness of the sponge, the sweetness of the jam, and the creaminess of the whipped filling come together to create a dessert that is indulgent without being overwhelming. Each bite offers a perfect harmony of flavors and textures, making it an ideal centerpiece for afternoon tea or any special occasion.
Ingredients You’ll Need for the Perfect Victoria Sponge Cake
Core Ingredients
The Victoria Sponge Cake is a masterpiece of simplicity, relying on just a few key ingredients to create its iconic texture and flavor. Each of these ingredients plays a vital role, and their quality and preparation are crucial for achieving the perfect sponge.
1. Self-Raising Flour
Self-raising flour is the backbone of the Victoria Sponge Cake. This flour is pre-mixed with a leavening agent, typically baking powder, which helps the cake rise evenly during baking. It contributes to the sponge’s light and airy texture, which is one of its defining characteristics.
- Why It’s Essential: The built-in leavening ensures consistency, saving bakers from the guesswork of adding baking powder separately.
- Substitutions: If self-raising flour is unavailable, you can use plain flour with 1 ½ teaspoons of baking powder per 150g of flour as a substitute.
2. Caster Sugar
This finely granulated sugar is perfect for baking because it dissolves quickly, ensuring a smooth batter. Its fine texture helps create a delicate crumb and enhances the overall lightness of the cake.
- Why It’s Essential: It blends seamlessly with butter during creaming, allowing air to incorporate into the batter.
- Pro Tip: If you don’t have caster sugar, you can pulse granulated sugar in a food processor to achieve a similar consistency.
3. Butter
Butter provides both flavor and structure to the Victoria Sponge. Softened unsalted butter is creamed with sugar to trap air, creating a fluffy base that contributes to the cake’s tender texture.
- Why It’s Essential: The fat in butter adds moisture and richness, ensuring the cake isn’t dry or crumbly.
- Substitutions: Margarine or baking spreads can be used, but they may alter the flavor slightly. For the best results, stick to high-quality unsalted butter.
4. Eggs
Eggs are a critical binding and leavening ingredient. They provide structure, moisture, and richness to the batter. Room-temperature eggs are ideal, as they combine more easily with other ingredients and help create a smooth batter.
- Why It’s Essential: Eggs also play a role in creating a stable emulsion, ensuring the batter doesn’t separate during mixing.
- Pro Tip: To bring eggs to room temperature quickly, place them in a bowl of warm water for a few minutes.
5. Filling Ingredients: Jam and Cream
- Jam: Traditionally, strawberry or raspberry jam is used as the filling. The fruity sweetness contrasts beautifully with the buttery sponge, adding a layer of flavor and texture.
- Homemade jam often has a more robust flavor, but high-quality store-bought options work just as well.
- Whipped Cream: Although not part of the original recipe, whipped cream has become a modern favorite. Lightly sweetened cream adds richness and a velvety texture, complementing the tangy jam.
6. Optional Enhancements
- Vanilla Extract: While not always included in traditional recipes, a splash of vanilla can elevate the flavor, adding a subtle warmth that enhances the sponge.
- Icing Sugar: A light dusting on the top of the assembled cake adds a touch of elegance and sweetness, making it perfect for presentation.
Ingredient Quality Matters
The success of a Victoria Sponge Cake hinges on the quality of its ingredients. Opt for fresh, high-grade butter, eggs, and jam to ensure the best possible flavor and texture. Precision in measurement and preparation is key to achieving the cake’s signature balance of lightness and richness.
Filling Options
The filling of a Victoria Sponge Cake is what transforms a simple sponge into a luxurious dessert. The traditional combination of fruity jam and light whipped cream strikes the perfect balance of sweetness and richness, but there are plenty of ways to customize the filling to suit different tastes and occasions. Let’s explore the classic options as well as some creative alternatives.
1. Traditional Filling: Jam and Cream
- Strawberry Jam: The most classic choice for a Victoria Sponge Cake, strawberry jam provides a sweet, fruity contrast to the buttery sponge. Its bright red color also enhances the visual appeal of the cake.
- Raspberry Jam: Slightly tarter than strawberry, raspberry jam offers a more tangy flavor profile that pairs beautifully with the sweetness of the sponge and cream.
- Whipped Cream: Lightly sweetened whipped cream adds a creamy, velvety texture to the filling. It balances the tanginess of the jam and enhances the cake’s richness without being overly heavy.
Tips for Traditional Fillings:
- Use high-quality or homemade jams for the best flavor.
- Chill the whipped cream slightly before spreading to ensure it holds its shape when layering the cake.
2. Fruit-Based Variations
For a fresh twist on the classic filling, consider incorporating real fruit or alternative fruit preserves:
- Mixed Berry Jam: A blend of blueberries, blackberries, and raspberries for a complex, fruity flavor.
- Fresh Fruit Slices: Add thinly sliced strawberries, raspberries, or even peaches for extra texture and freshness.
- Citrus Marmalade: For a zesty twist, use orange or lemon marmalade instead of jam.
Pro Tip: When using fresh fruits, ensure they’re not too watery to prevent the cake layers from becoming soggy.
3. Cream Variations
While whipped cream is a popular choice, there are other creamy options to explore:
- Buttercream: A rich, sweet alternative that can be flavored with vanilla, lemon, or even coffee for a unique twist.
- Mascarpone Cream: Mix mascarpone cheese with a little sugar and vanilla for a creamy, slightly tangy filling.
- Clotted Cream: A quintessentially British option that pairs wonderfully with fruity jams.
4. Decadent and Unique Alternatives
If you’re feeling adventurous, try these creative filling options:
- Chocolate Ganache: Replace the jam and cream with a layer of rich chocolate ganache for a more indulgent cake.
- Nut Spreads: Use almond butter or hazelnut spread (like Nutella) for a nutty, creamy filling.
- Lemon Curd: For a tangy, citrusy variation, layer the sponge with lemon curd and whipped cream.
5. Layering and Presentation Tips
- Even Distribution: Spread the jam and cream evenly across the sponge to ensure consistent flavor in every bite.
- No Overloading: Avoid overloading the filling to keep the cake layers stable and neat.
- Decoration: Consider adding a light dusting of icing sugar on top for a classic look or fresh berries for a touch of elegance.
The versatility of the filling options makes the Victoria Sponge Cake a dessert that can be tailored to suit any palate or occasion. Whether you stick with the traditional jam and cream or experiment with bold flavors, the filling is your chance to add a personal touch to this timeless recipe.
Step-by-Step Guide to Baking a Classic Victoria Sponge Cake
Preparation
Preparation is the foundation of baking a flawless Victoria Sponge Cake. Properly preparing your ingredients, tools, and workspace ensures a smooth process and a perfectly baked cake. Let’s break it down step by step:
1. Prepare Your Ingredients
a. Measure Accurately
- Baking is a science, and accurate measurements are key to achieving the ideal texture and rise. Use a digital kitchen scale for precision, especially when weighing ingredients like flour, sugar, and butter.
b. Bring Ingredients to Room Temperature
- Butter and Eggs: Softened butter and room-temperature eggs blend more easily into the batter, creating a smooth and consistent texture.
- Tip: To soften butter quickly, cut it into small cubes and let it sit for 15-20 minutes. For eggs, place them in a bowl of warm water for 5-10 minutes.
- Cream: If using whipped cream for the filling, keep it chilled until you’re ready to whip it to maintain its structure.
c. Sift Dry Ingredients
- Sift the self-raising flour before adding it to the batter. This helps aerate the flour, ensuring a lighter sponge and avoiding lumps.
2. Prepare Your Tools and Equipment
a. Select the Right Cake Tins
- Use two 8-inch (20 cm) round cake tins for a traditional Victoria Sponge. Ensure they are of equal size for even baking.
b. Grease and Line the Tins
- Grease the sides and base of each tin with butter or non-stick baking spray. Line the base with parchment paper to prevent sticking and ensure easy removal.
c. Preheat Your Oven
- Preheat the oven to 180°C (350°F) or 160°C (320°F) for a fan oven. A properly preheated oven ensures even cooking and helps the sponge rise beautifully.
- Tip: Use an oven thermometer to confirm the accuracy of your oven’s temperature.
3. Prepare Your Workspace
a. Clean and Organize
- A tidy workspace makes the baking process smoother and more enjoyable. Gather all your ingredients and tools before you begin to avoid interruptions.
b. Set Up a Mixing Station
- Position your mixing bowls, hand mixer or stand mixer, and spatulas in an easily accessible spot. Ensure all utensils are clean and dry.
4. Test Your Equipment
a. Electric Mixer or Whisk
- Ensure your hand mixer or stand mixer is working properly. If mixing by hand, use a sturdy whisk to cream butter and sugar effectively.
b. Weighing Scales and Measuring Cups
- Double-check that your weighing scale is set to zero before measuring. Have measuring spoons on hand for small quantities like vanilla extract or baking powder (if using a substitute).
5. Timing is Key
a. Plan Your Baking Schedule
- Allocate time for preparation, mixing, baking, cooling, and assembly. A well-planned schedule ensures you don’t rush any steps.
- Remember that the cake needs to cool completely before adding the filling, so factor in extra time for this.
b. Baking Time
- Victoria Sponge Cakes typically take 20-25 minutes to bake, but this can vary depending on your oven. Start checking for doneness at the 20-minute mark.
6. Mental Preparation
a. Be Patient
- Baking requires patience and precision. Avoid the temptation to overmix or open the oven door frequently, as these can affect the sponge’s texture and rise.
b. Confidence is Key
- With proper preparation and a clear plan, you’re set up for success. Trust the process, and enjoy the art of baking this classic dessert.
Taking the time to properly prepare your ingredients, tools, and workspace can make all the difference in creating a light, fluffy, and beautifully baked Victoria Sponge Cake.
Baking
Baking is the final and most crucial step in creating a Victoria Sponge Cake. It involves giving the batter the right conditions to rise, develop flavor, and achieve its signature light and fluffy texture. Proper baking ensures the sponge is evenly cooked, moist, and beautifully golden. Let’s explore the key aspects of baking a Victoria Sponge Cake.
1. Preheating the Oven
a. Importance
- A preheated oven ensures even heat distribution, which is essential for a consistent bake. A Victoria Sponge requires a moderate oven temperature to achieve a light and airy texture.
- If the oven isn’t hot enough or is too hot, the cake may collapse or fail to rise properly.
b. Temperature Guidelines
- Preheat the oven to 180°C (350°F) or 160°C (320°F) for a fan-assisted oven.
- Use an oven thermometer to confirm the correct temperature, as oven thermostats can vary.
2. Baking Time and Checking for Doneness
a. Bake Time
- Victoria Sponge Cakes typically bake for 20-25 minutes. The exact time can vary slightly based on oven performance, altitude, and pan size.
- Pro Tip: Don’t open the oven door too frequently during the first half of baking, as sudden temperature changes can cause the sponge to sink.
b. Checking for Doneness
- To check if the cake is done, gently press the top of the sponge with your fingertip. It should spring back quickly without sinking.
- Alternatively, insert a toothpick or cake tester into the center. If it comes out clean or with a few dry crumbs, the cake is ready.
3. Oven Placement and Air Circulation
a. Oven Rack Position
- Place the cake tins on the middle rack of the oven. This ensures even heat circulation and prevents uneven baking.
- Avoid placing the tins too close to the oven’s heating elements or too far from the middle rack.
b. Air Circulation
- Ensure there’s enough space between the cake tins for air to circulate, promoting even baking. If baking multiple tins, space them apart.
4. Monitoring the Bake
a. Avoid Opening the Oven Too Soon
- Opening the oven door too frequently can cause the cake to deflate due to sudden temperature changes.
- Wait until at least the 20-minute mark before checking for doneness.
b. Gentle Shaking Test
- After the 20-minute mark, gently shake the tins. The sponge should feel firm and spring back if lightly pressed.
5. Cooling the Sponge
a. Cooling Time
- Once baked, remove the cakes from the oven and let them cool in the tins for about 10 minutes.
- Pro Tip: Do not attempt to remove the cakes too early, as they are still delicate and prone to breaking.
b. Removing from Tins
- After cooling slightly, run a knife around the edge of the tin to loosen the sponge. Turn it out gently onto a cooling rack to cool completely.
c. Cooling Completely
- Allow the sponge to cool completely before assembling with jam and cream. Attempting to assemble the cake too soon can result in a soggy base.
6. Troubleshooting Common Baking Issues
a. Sunken Sponge
- If your sponge sinks in the middle, it may be due to opening the oven door too early or overmixing the batter.
- Ensure the oven is preheated properly and do not overmix the batter.
b. Dry Sponge
- A dry sponge could be due to overbaking or insufficient moisture in the batter.
- Check for doneness earlier and avoid overcooking. Ensure the eggs and butter are fully creamed for proper moisture retention.
Baking a Victoria Sponge Cake requires careful attention to temperature, time, and technique. By following these steps, you’ll ensure your sponge bakes evenly, retains its light texture, and achieves that perfect golden finish.
Cooling and Assembly
Proper cooling and assembly are essential steps in creating a Victoria Sponge Cake that’s light, airy, and perfectly layered. Taking the time to cool the sponge properly ensures the layers stay intact and the filling doesn’t slide out. Let’s dive into the key steps for cooling and assembling your cake.
1. Cooling the Sponge
a. Why Proper Cooling Matters
- Cooling the sponge allows it to set and prevents excess moisture, ensuring the cake maintains its structure and light texture.
- A warm sponge is more prone to falling apart or becoming soggy when filled.
b. How to Cool the Sponge
- After removing the cake from the oven, let it cool in the tin for about 10-15 minutes.
- Use a knife to gently loosen the edges of the sponge from the tin.
- Carefully transfer the sponge to a wire rack to cool completely.
c. Avoiding Condensation
- Ensure the sponge is fully cooled before attempting to assemble. Condensation from a warm sponge can lead to soggy layers.
2. Leveling the Sponge Layers
a. Leveling the Top
- If the sponge has a dome or uneven surface, gently slice off the top using a serrated knife.
- Leveling helps create a flat surface for easier stacking and a more even distribution of filling.
b. Ensuring Even Layers
- Once leveled, slice each sponge layer in half horizontally to create two even layers.
- This ensures a balanced filling-to-sponge ratio.
3. Preparing the Filling
a. Whipping Cream
- If using whipped cream, whip it to soft peaks and chill it before spreading. This helps the cream hold its shape when layering the cake.
- Tip: Whip until the cream is firm but not too stiff, as overly whipped cream can become grainy.
b. Applying Jam
- Spread a thin layer of your chosen jam (such as strawberry, raspberry, or lemon curd) evenly on one layer of the sponge.
- Avoid overfilling to prevent the jam from seeping out.
4. Assembling the Cake
a. Layering the Cake
- Place one of the leveled sponge layers on a cake stand or serving plate.
- Spread a generous layer of whipped cream on top of the jam.
- Add the second sponge layer carefully on top.
b. Adding Fillings Between Layers
- Optionally, add another layer of jam or fruit for added texture and flavor.
- Apply the remaining cream to cover the top layer and sides for a clean, polished finish.
5. Decorating the Cake
a. Final Touches
- Dust the top of the cake with powdered sugar for a classic, elegant look.
- Add fresh berries, edible flowers, or toasted nuts for decorative flair.
b. Chilling the Assembled Cake
- Once assembled, chill the cake in the refrigerator for at least 30 minutes to help the filling set and the flavors meld together.
6. Serving and Enjoying
a. Serving
- Allow the cake to come to room temperature for about 10-15 minutes before slicing to ensure neat and clean cuts.
- Use a serrated knife to cut through the cake layers gently.
b. Enjoying
- Serve the Victoria Sponge Cake with a cup of tea for the classic British experience or pair it with fresh fruit and a dollop of cream.
Proper cooling and assembly are key to creating a Victoria Sponge Cake that’s light, flavorful, and beautifully presented. By following these steps, you’ll ensure your cake holds together and delivers that signature texture and taste.
Tips for Getting the Perfect Sponge Cake Every Time
Measuring Accuracy
Accurate measurements are fundamental to baking a Victoria Sponge Cake that achieves the perfect balance of texture, flavor, and rise. Baking is a precise science, and even minor deviations in measurements can impact the outcome of your cake. Let’s explore the importance of measuring accuracy and how to ensure precision in your baking process.
1. Importance of Accurate Measurements
a. Consistency in Texture and Flavor
- Accurate measurements ensure the correct ratios of ingredients like flour, butter, sugar, and eggs. This consistency results in a sponge that is light, fluffy, and flavorful.
- Too much or too little of a key ingredient, like flour or butter, can lead to a dense, dry cake or one that fails to rise properly.
b. Ensures Proper Ratios
- Victoria Sponge Cake requires a precise balance of flour, sugar, fat, and liquid. Accurate measurements help achieve the ideal crumb, rise, and structure.
2. Weighing vs. Measuring by Volume
a. Weighing Ingredients
- Weighing ingredients like flour, sugar, and butter is more accurate than measuring by volume (cups or spoons).
- Why? Volume measurements can vary due to how ingredients are packed or scooped, leading to inconsistency.
b. Tools Needed
- Use a digital kitchen scale for weighing ingredients, as it provides precise measurements.
- Measuring cups are useful for liquid ingredients like milk, but dry ingredients like flour and sugar are best weighed.
c. Benefits of Weighing
- Weighing ensures you are getting the exact amount of ingredients every time, which is essential for baking consistency.
3. Measuring Dry Ingredients
a. Proper Sifting
- Sifting dry ingredients like flour before measuring is crucial to remove any lumps and ensure you get the right amount.
- Use a spoon to gently fill the measuring cup with flour, then level it off with a knife to ensure accuracy.
b. Avoiding Overpacking
- Do not scoop flour directly from the bag with the measuring cup, as this can lead to over-measuring.
- Tip: Stir the flour first, spoon it into the measuring cup, and level it off for precise measurements.
4. Measuring Wet Ingredients
a. Using Liquid Measuring Cups
- Use liquid measuring cups for ingredients like milk, cream, and extracts. Place them on a flat surface for accuracy.
- Fill the cups to the appropriate line, checking at eye level to avoid overfilling.
b. Using a Scale for Precision
- For liquid ingredients, weighing on a scale can be more accurate, especially when precise measurements are essential.
5. Understanding Conversion and Scaling
a. Conversion of Units
- When using different measurements, convert units properly. For example, 1 cup of flour is approximately 120 grams.
- Always use consistent measurements throughout the recipe to maintain accuracy.
b. Scaling Recipes
- If you’re scaling up or down the recipe, ensure you adjust all ingredient quantities proportionally.
- Tip: Use a recipe scaling tool or calculator to maintain the correct ratios.
6. Common Mistakes and Tips
a. Overusing Baking Powder or Soda
- Measuring dry leavening agents like baking powder or baking soda inaccurately can cause over-rising or sinking of the sponge.
- Always measure these precisely and follow the recipe’s guidelines.
b. Using Accurate Liquid Measurements
- Ensure you use the correct amount of liquid (like milk or cream) to achieve the right batter consistency. Too much liquid can make the cake heavy, while too little can dry it out.
Accurate measuring is key to achieving a light, fluffy Victoria Sponge Cake with the perfect crumb and structure. By weighing and measuring precisely, you ensure that all the ingredients work together harmoniously, creating a cake that’s both delicious and visually appealing.
Mixing Techniques
Mixing techniques play a vital role in achieving the perfect Victoria Sponge Cake. The right mixing methods ensure that the ingredients are well-incorporated and aerated, leading to a light, fluffy, and evenly baked cake. Let’s explore the key mixing techniques to help you achieve the ideal Victoria Sponge Cake.
Looking to elevate your baking skills? Check out our guide on Top Baking Tips for Perfect Cakes to ensure every bake is a masterpiece!
1. Creaming Method
a. Purpose
- The creaming method is one of the most important techniques in making a Victoria Sponge Cake. It involves beating together butter and sugar to incorporate air, which helps the cake rise and results in a light texture.
- The sugar particles break down the butter, trapping air bubbles, creating a batter that rises properly.
b. Technique
- Use softened butter and caster sugar. Beat them together with a hand mixer or stand mixer on medium speed until the mixture becomes pale and fluffy (about 5 minutes).
- Scrape down the sides of the bowl frequently to ensure even mixing.
c. Key Tip
- Avoid overbeating, as this can lead to a dense batter. The mixture should be smooth and creamy, not too airy or overly mixed.
2. Incorporating Eggs Gradually
a. Purpose
- Adding eggs gradually helps to avoid curdling and ensures the batter remains smooth. Eggs provide structure and moisture to the cake.
b. Technique
- Beat one egg into the creamed butter and sugar at a time, mixing well after each addition.
- If using more than 3-4 eggs, add a tablespoon of flour with each egg to prevent the batter from curdling.
c. Key Tip
- If the mixture begins to look slightly curdled, gently fold in a tablespoon of flour to restore the consistency.
3. Folding in Dry Ingredients (Flour and Baking Powder)
a. Purpose
- Folding the dry ingredients gently into the wet mixture helps maintain the air incorporated during creaming and prevents overmixing, which can lead to a dense sponge.
b. Technique
- Sift the self-raising flour and gently fold it into the wet mixture using a spatula or a folding motion with a whisk.
- Use slow, sweeping movements from the bottom of the bowl to the top to gently incorporate the flour.
- Avoid vigorous mixing, as this can deflate the batter and affect the sponge’s rise.
c. Key Tip
- A few streaks of flour may remain, which will fully blend during baking.
4. Adding Liquid Ingredients (Milk, Flavorings)
a. Purpose
- Liquid ingredients like milk or vanilla extract help to maintain the right batter consistency, ensuring the sponge remains moist and not too dry.
b. Technique
- Add the liquid ingredients gradually, mixing gently to combine.
- Avoid adding too much liquid at once, as this can make the batter too runny, leading to a dense cake.
c. Key Tip
- Ensure the milk is at room temperature for better incorporation and avoid overmixing to retain the air.
5. Whisking vs. Mixing by Hand or Electric Mixer
a. Hand Mixing
- Mixing by hand is suitable for small batches but may not incorporate as much air as using a stand mixer or electric hand mixer.
- Use a whisk for smooth, steady mixing if hand mixing.
b. Electric Mixer
- A stand mixer or electric hand mixer is ideal for creaming butter and sugar and incorporating air quickly.
- Use medium to low speeds to prevent overmixing, ensuring the sponge remains light and fluffy.
c. Key Tip
- Be cautious not to overwhisk with electric mixers, as this can lead to a dense or gummy texture.
6. Scraping Down the Bowl
a. Purpose
- Scraping down the sides of the bowl ensures all ingredients are thoroughly mixed and there are no pockets of unmixed ingredients.
b. Technique
- Use a spatula to scrape down the sides of the bowl frequently throughout the mixing process.
- This ensures the batter is smooth and uniform, avoiding lumps and uneven distribution of ingredients.
c. Key Tip
- Do this after creaming butter and sugar and after folding in the flour to ensure complete incorporation.
Mixing techniques are crucial to achieving the perfect Victoria Sponge Cake. By following these methods—creaming, folding, and ensuring the right balance of wet and dry ingredients—you’ll create a light, airy sponge with excellent flavor and structure.
Baking Secrets
Baking a Victoria Sponge Cake may seem simple, but there are several key “secrets” that can elevate your cake from good to exceptional. These tips ensure that your cake bakes evenly, rises beautifully, and has a light, fluffy texture. Let’s explore some baking secrets that guarantee a perfectly baked Victoria Sponge Cake.
1. Preheating Your Oven Properly
a. Why It’s Essential
- A properly preheated oven ensures even heat distribution, which is crucial for a Victoria Sponge Cake’s rise and texture.
- Baking the cake in an oven that isn’t at the right temperature can result in uneven cooking or sinking.
b. How to Preheat
- Preheat your oven to 180°C (350°F) or 160°C (320°F) for fan-assisted ovens at least 15-20 minutes before placing the cake inside.
- Use an oven thermometer to ensure the correct temperature, as oven thermostats can vary.
c. Pro Tip
- Don’t open the oven door too soon after placing the cake, as temperature fluctuations can affect the rise.
2. Use the Right Pan Size
a. Importance of Pan Size
- Using the correct pan size ensures the batter spreads evenly and the cake rises uniformly.
- A typical Victoria Sponge is baked in 2 round 8-inch cake tins.
b. Effects of Using the Wrong Pan Size
- A larger pan may cause the cake to be thin and overbaked on the edges, while a smaller pan can lead to over-rising or underbaking.
c. Pro Tip
- Lightly grease and line the cake tins with parchment paper to prevent sticking and ensure easy removal.
3. Avoid Overmixing the Batter
a. Why It Matters
- Overmixing incorporates too much air and leads to a dense, tough sponge.
- Gentle mixing ensures the cake stays light and fluffy.
b. Technique
- Mix the batter until just combined. Stop mixing as soon as no streaks of flour remain.
- Use folding motions rather than beating vigorously.
c. Pro Tip
- If you notice the batter becoming thick and stiff, stop immediately.
4. Use Room Temperature Ingredients
a. Importance of Room Temperature
- Using room temperature ingredients like eggs and butter ensures even mixing and helps maintain the proper consistency of the batter.
- Cold ingredients can lead to uneven mixing and curdling.
b. Technique
- Let your butter and eggs sit at room temperature for at least 30 minutes before mixing.
- This helps with the creaming process and ensures better incorporation of air.
c. Pro Tip
- If you forget to bring the ingredients to room temperature, you can quickly bring eggs to room temperature by placing them in warm water for a few minutes.
5. Use Self-Rising Flour
a. Why Self-Rising Flour Works Best
- Self-rising flour contains baking powder and salt, which help the cake rise and provide structure.
- Using regular all-purpose flour requires adding extra leavening agents, which can affect the texture.
b. How to Use It
- Measure the flour accurately and sift it to ensure the even distribution of leavening agents.
c. Pro Tip
- Sift the flour before mixing to remove any lumps and ensure a smooth batter.
6. Don’t Overfill the Cake Tins
a. Importance of Proper Tin Fill
- Filling the cake tins too full can lead to overflow and uneven baking.
- A typical Victoria Sponge recipe usually fills the tin about two-thirds full.
b. Effects of Overfilling
- Overfilled tins can result in domed or uneven layers, while underfilled tins may not rise properly.
c. Pro Tip
- Use a kitchen scale to measure the batter and ensure equal portions in both tins.
7. Cooling and Resting Time
a. Why Resting Is Important
- Allowing the cake to cool gradually helps prevent it from collapsing or becoming dense.
- Cooling too quickly can cause the structure to weaken.
b. Technique
- Let the cake rest in the tins for about 10-15 minutes before transferring to a wire rack.
- Once cooled, apply the filling and let the cake sit in the fridge for at least 30 minutes to firm up.
c. Pro Tip
- Resist the urge to slice too soon, as the filling may slide if the sponge hasn’t fully set.
8. Troubleshooting Common Issues
- Sunken Cake: Could be due to opening the oven door too early or overmixing. Ensure the oven is preheated properly and avoid frequent door opening.
- Dry Cake: May result from overbaking or too much flour. Check baking time and ensure correct ingredient ratios.
- Dense Sponge: Often caused by overmixing or using too much liquid. Ensure gentle mixing and use self-rising flour.
By applying these baking secrets, you’ll enhance the chances of achieving a light, moist, and beautifully risen Victoria Sponge Cake.
Cooling Tips
Cooling is a crucial step in the Victoria Sponge Cake baking process. Proper cooling ensures that your cake maintains its structure, texture, and flavor. Rushing through this stage or improper handling can result in a dense, soggy, or unevenly cooled cake. Let’s explore some essential cooling tips to help you achieve the perfect Victoria Sponge Cake.
1. Cooling the Cake in the Tin
a. Why It’s Important
- Cooling the cake in the tin for the first 10-15 minutes allows it to settle and prevents it from collapsing.
- Removing the cake too early can cause it to break or lose its shape.
b. How to Cool
- After baking, leave the cake in the tin for 10-15 minutes.
- Use a knife or spatula to gently loosen the sides from the tin.
- Place a wire rack or parchment-lined surface over the tin, then carefully invert to release the cake.
c. Pro Tip
- Be gentle when turning the cake out to avoid damaging the delicate layers.
2. Cooling on a Wire Rack
a. Why It’s Essential
- A wire rack helps circulate air around the cake, preventing moisture buildup, which can make the cake soggy.
- Allowing airflow helps the cake cool evenly and retains its light texture.
b. Technique
- Place the cake on a wire rack to cool completely.
- Ensure the rack is placed in a cool, dry area, away from direct sunlight or drafts.
- Leave space between the cake and the rack to allow air to circulate freely.
c. Pro Tip
- Avoid stacking or covering the cake too soon, as trapped heat can cause condensation.
3. Cooling Time for Different Cake Layers
a. First Layer
- Let the first layer cool fully before assembling. It usually takes around 30-45 minutes, depending on the size of the cake.
- Ensure the cake is completely cool before slicing or handling it further.
b. Second Layer
- If you’ve sliced the cake into layers, cool each layer separately before filling to prevent the layers from sticking or becoming uneven.
c. Pro Tip
- If you are making the cake in advance, allow it to cool completely, wrap it in parchment paper, and store it in an airtight container at room temperature.
4. Preventing Soggy Layers
a. Why Soggy Layers Happen
- Soggy layers are often caused by excess moisture from improper cooling or filling seeping into the sponge.
- Condensation can occur if the cake is still warm when filled.
b. How to Avoid Soggy Layers
- Ensure the cake is fully cooled before applying fillings such as jam or cream.
- Use chilled fillings (like whipped cream or jam) to reduce moisture absorption.
- If using fruit or liquid-based fillings, use minimal quantities to prevent sogginess.
c. Pro Tip
- Place the filled cake in the refrigerator for 30 minutes to firm up before serving to enhance the structure.
5. Resting Time Before Serving
a. Why Resting Matters
- Resting allows the flavors to meld and the cake to set properly, enhancing the texture and taste.
- A well-rested Victoria Sponge Cake ensures the filling stays intact and does not seep out.
b. How Long to Rest
- Let the assembled cake sit for at least 30 minutes to 1 hour before serving.
- This helps the cream and fillings firm up, creating a neater and more cohesive cake.
c. Pro Tip
- If serving later, cover the cake lightly with a cake dome or cling film to keep it fresh without affecting the texture.
6. Troubleshooting Common Cooling Issues
- Uneven Cooling: If the top layer cools too fast, the bottom layer might still be warm, leading to imbalance. Ensure consistent cooling on a wire rack.
- Trapped Moisture: Avoid stacking the cake or covering it too soon, as this traps moisture and leads to soggy layers.
- Over-Handling: Allow the cake to cool completely before slicing, as handling too soon can break fragile layers.
Proper cooling techniques ensure your Victoria Sponge Cake has a light texture, crisp edges, and a well-formed structure. By giving your cake the right amount of time to cool, you’ll achieve a delicious and beautifully presented cake.
Serving and Storing Your Victoria Sponge Cake
Presentation Tips
The presentation of your Victoria Sponge Cake plays a significant role in how it looks and tastes. A beautifully presented cake enhances its appeal and makes it more enjoyable for your guests. Whether you’re serving it at a special event or enjoying it as a treat, these presentation tips will help you elevate your Victoria Sponge Cake to a whole new level.
1. Choosing the Right Cake Stand
a. Importance of a Good Cake Stand
- A well-chosen cake stand elevates the cake, creating a visually pleasing display.
- It also provides stability, preventing the cake from shifting while being sliced or served.
b. Types of Cake Stands
- Opt for a sturdy, elegant stand that complements the style of the cake.
- Use a neutral-colored stand to keep the focus on the cake, or choose a decorative one to add a touch of personality.
c. Pro Tip
- A tiered cake stand works beautifully if you’re serving more than one layer or multiple cakes.
2. Layering and Filling
a. Even Layers and Neat Filling
- Ensure the cake layers are even in thickness for a balanced and visually appealing presentation.
- Apply the filling (jam, cream, etc.) evenly and generously, but not too much, to avoid messy overflows.
b. Creating a Smooth Top Layer
- Smooth the top of the cake with a spatula or cake scraper for a clean and polished finish.
- Use a piping bag for decorative designs like whipped cream or buttercream if desired.
c. Pro Tip
- Dust the top with a light sprinkle of powdered sugar for a simple yet elegant finishing touch.
3. Decorating with Fresh Fruit or Edible Flowers
a. Adding Fresh Fruit
- Fresh strawberries, raspberries, or other seasonal fruits add color, flavor, and a touch of elegance.
- Place them neatly around the cake, or layer them on top for a decorative effect.
b. Using Edible Flowers
- Edible flowers like violets or pansies add a beautiful, delicate touch to the cake.
- Ensure they are clean and free from pesticides before using them as decoration.
c. Pro Tip
- Keep decorations minimal to let the natural beauty of the cake shine through.
4. Sifting Powdered Sugar or Cocoa Powder
a. Purpose
- Sifting powdered sugar or cocoa powder over the cake adds a touch of sophistication and texture.
- A light dusting on top or over the sides gives the cake a refined and elegant look.
b. Technique
- Use a fine mesh sieve to gently sprinkle powdered sugar or cocoa powder in a thin layer.
- For a more decorative touch, create patterns like swirls or a crisscross design.
c. Pro Tip
- Avoid excessive dusting to maintain a clean, airy finish.
5. Creating a Minimalist Design
a. Simple and Elegant Presentation
- A minimalist design focuses on clean lines, symmetry, and understated beauty.
- Place the cake on a plain plate or stand and allow its natural layers to shine.
b. Avoid Over-Decorating
- Less is often more. Let the cake’s texture, color, and simplicity speak for themselves.
- Highlight the key elements like fruit or floral decorations rather than overcrowding the cake with embellishments.
c. Pro Tip
- Keep the decorations balanced, ensuring they complement the cake rather than overpowering it.
6. Creating a Rustic or Vintage Look
a. Rustic Charm
- Use natural, unpolished cake stands and add elements like burlap, lace, or wooden boards to enhance a rustic vibe.
- Top with fresh, seasonal fruits or a light drizzle of honey for added texture.
b. Vintage Elegance
- Use antique-style cake stands, lace tablecloths, and delicate floral arrangements to create a vintage feel.
- Place small, hand-crafted items like candles or teacups around the cake for a charming touch.
c. Pro Tip
- Choose decorations that match the overall theme or ambiance of your event.
7. Presentation Tips for Large Gatherings
a. Tiered Display
- For larger gatherings, a tiered cake stand showcasing multiple layers offers a grand, eye-catching presentation.
- Decorate each layer with different toppings for added visual interest.
b. Individual Portions
- Consider cutting the cake into individual slices or serving portions to enhance the presentation for guests.
- Garnish each slice with a small decoration like fresh fruit or a dollop of cream.
c. Pro Tip
- Label each tier or slice with creative tags or signs for a personalized touch.
Proper presentation enhances the visual appeal of your Victoria Sponge Cake and elevates its overall charm. By paying attention to details like decorations, toppings, and presentation methods, you can create a stunning display that will wow your guests.
Perfect Pairings
A Victoria Sponge Cake is not only delicious on its own but becomes even more delightful when paired with the right accompaniments. The right pairings enhance the flavors, textures, and overall experience, making it perfect for any occasion. Let’s explore some delightful pairings that complement the classic Victoria Sponge Cake.
1. Fresh Berries and Whipped Cream
a. Why It Works
- Fresh berries like strawberries, raspberries, or blueberries add a burst of natural sweetness and vibrant color.
- They pair beautifully with the light, airy sponge and the rich, creamy filling.
b. How to Serve
- Top the cake with a mix of fresh berries and a generous dollop of whipped cream.
- The sweetness of the berries balances the buttery sponge, enhancing the overall flavor profile.
c. Pro Tip
- Choose seasonal berries for the freshest flavor, and add a light drizzle of honey for extra sweetness.
2. Lemon Curd
a. Why It Works
- The tangy, zesty flavor of lemon curd complements the rich, buttery cake and provides a refreshing contrast.
- Lemon curd enhances the moistness and adds a layer of brightness to the cake.
b. How to Serve
- Spread lemon curd between the cake layers for a burst of citrus flavor.
- Top with powdered sugar for a classic, elegant finish.
c. Pro Tip
- Use homemade lemon curd for a fresher taste, or opt for a high-quality store-bought version.
3. Clotted Cream or Heavy Cream
a. Why It Works
- Clotted cream or heavy cream adds a rich, velvety texture that pairs beautifully with the light sponge.
- The cream enhances the overall indulgence and creates a luxurious mouthfeel.
b. How to Serve
- Whip the cream to soft peaks and layer it between the cake and fillings, or serve it on the side as a complement.
- The cream’s richness balances the airy sponge perfectly.
c. Pro Tip
- Add a hint of vanilla extract to the cream for extra flavor.
4. Jam or Marmalade
a. Why It Works
- Jam or marmalade provides a sweet, fruity layer that enhances the cake’s flavors.
- The richness of jam contrasts beautifully with the light sponge and cream.
b. How to Serve
- Spread a layer of your favorite jam between the cake layers for added sweetness and fruitiness.
- A classic choice is strawberry jam, but you can experiment with flavors like raspberry, apricot, or even citrus marmalade.
c. Pro Tip
- Opt for high-quality, thick jam to ensure it doesn’t run too much and stays well within the layers.
5. Nutty Flavors (Almonds or Hazelnuts)
a. Why It Works
- Nutty flavors add a delightful crunch and richness that complements the light sponge.
- Almond or hazelnut flavors enhance the depth of flavor and create a pleasant contrast.
b. How to Serve
- Add crushed almonds or hazelnuts to the sponge batter for a subtle nutty taste.
- Alternatively, sprinkle crushed nuts over the cake for a decorative touch.
c. Pro Tip
- Pair with a nut-flavored cream or a light almond extract in the whipped cream for added flavor complexity.
6. Honey or Caramel Drizzle
a. Why It Works
- Honey or caramel drizzle adds a touch of sweetness and richness that complements the light, airy cake.
- They provide a glossy finish and enhance the cake’s moistness.
b. How to Serve
- Drizzle honey or caramel over the top of the cake for a beautiful, golden finish.
- This pairing works well with any of the other fillings or as a standalone topping.
c. Pro Tip
- Use a high-quality honey or homemade caramel sauce for the best flavor.
7. Herbal Infusions (Lavender or Mint)
a. Why It Works
- Infused flavors like lavender or mint add a subtle, aromatic touch that elevates the cake.
- These flavors create a unique, sophisticated experience and pair beautifully with fruity or cream-based fillings.
b. How to Serve
- Use lavender or mint extract in the cake batter or infuse the cream with these flavors.
- Garnish the cake with edible lavender flowers or fresh mint leaves for added elegance.
c. Pro Tip
- Pair these herbal infusions with fruit or lemon curd to create a refined, layered flavor profile.
By experimenting with these perfect pairings, you can create a Victoria Sponge Cake that delights your taste buds in new and exciting ways. Whether you prefer classic combinations like fresh berries and cream or something more adventurous like lemon curd or caramel, these pairings enhance the cake’s texture, flavor, and presentation.
Conclusion
The Victoria Sponge Cake is a timeless classic that brings joy to any occasion, whether served at afternoon tea, birthdays, or special gatherings. From its rich history to its delicate ingredients and presentation, every element contributes to making this cake a beloved favorite. By following the step-by-step guide and incorporating expert tips, you’ve mastered the art of creating a light, flavorful, and perfectly balanced Victoria Sponge Cake.
Whether you’re enjoying it fresh or storing the leftovers, the key lies in maintaining the right balance of flavors, textures, and presentation. Experimenting with different pairings, enhancing flavors, and ensuring proper storage ensures that every slice delivers the same level of perfection.
Now, whether you’re indulging in a slice with fresh berries and cream or savoring it with lemon curd or clotted cream, your Victoria Sponge Cake is sure to impress. Happy baking, and enjoy every delightful bite of your beautifully crafted cake.
1 thought on “The Classic Victoria Cake Recipe: A Step-by-Step Guide to Perfection”