
Kheer, a beloved and timeless dessert, holds a special place in Indian cuisine and culture. Often served during festivals, celebrations, and family gatherings, this creamy rice pudding is cherished not only for its delightful taste but also for its rich history and tradition. Whether you’re new to Indian sweets or an experienced cook looking to perfect your technique, making authentic kheer at home is a rewarding experience that brings the warmth of Indian hospitality to your table. In this blog post, we’ll explore the secrets to crafting the perfect kheer, from selecting the finest ingredients to mastering the cooking process. Let’s embark on this culinary journey to create a dessert that’s as heartwarming as it is delicious.
What is Kheer? Understanding the Traditional Indian Dessert
The Origins of Kheer
Kheer, known as payasam in some parts of India, is a dessert steeped in history and tradition. Its roots can be traced back to ancient India, where it was often prepared as an offering in religious rituals and ceremonies. References to kheer can be found in sacred texts such as the Vedas, highlighting its significance in Indian culture for thousands of years.
# Historical Background
The word “kheer” is derived from the Sanskrit word “kshirika,” which refers to a dish made with milk. The dish evolved over time, incorporating ingredients like rice, sugar, and various spices to create the rich, creamy dessert we know today. Its preparation has been influenced by regional variations across the Indian subcontinent, each adding a unique twist to the traditional recipe.
# Cultural Significance
Kheer holds a prominent place in Indian festivities and is often associated with auspicious occasions. It is commonly prepared during festivals such as Diwali, Eid, and Raksha Bandhan, symbolizing prosperity and togetherness. In many households, kheer is considered a “prasad” or sacred offering, made and shared as a gesture of gratitude and devotion.
# Regional Variations
While the core ingredients of kheer remain consistent, regional adaptations have led to a diversity of flavors and textures. In the north of India, kheer is typically made with basmati rice and flavored with cardamom and saffron. In the south, the dish may be prepared with jaggery instead of sugar and include coconut or lentils. Each variation reflects the local ingredients and culinary traditions, enriching the cultural tapestry of Indian cuisine.
In summary, kheer is more than just a dessert; it is a testament to India’s rich culinary heritage and a symbol of its diverse cultural landscape. Whether enjoyed as a simple sweet treat or a festive indulgence, kheer continues to bring joy and unity to those who partake in its delicious legacy.
Key Ingredients in Kheer
Kheer is a simple yet elegant dessert that relies on a few key ingredients to create its signature creamy texture and rich flavor. Each ingredient plays a crucial role in achieving the perfect balance of taste and consistency.
1. Basmati Rice – The Heart of Kheer
Why Basmati Rice?
Basmati rice is preferred for its long grains, aromatic fragrance, and ability to absorb flavors while maintaining a delicate texture.
Other rice varieties, such as short-grain or parboiled rice, may not yield the same creamy consistency.
Preparing the Rice for Kheer
Wash the rice thoroughly to remove excess starch, which helps prevent the kheer from becoming too thick or sticky.
Soaking the rice for 20–30 minutes ensures even cooking and a soft, melt-in-the-mouth texture.
Alternatives to Basmati Rice
If Basmati rice is unavailable, you can use other fragrant rice varieties like Jasmine rice or Sona Masuri.
Flattened rice (poha) or vermicelli (seviyan) can also be used for unique variations of kheer.
2. Milk – The Base for Creamy Texture
Full-Fat Milk for Authentic Kheer
Whole milk (full-fat) is ideal as it naturally thickens during cooking, giving the kheer a rich, creamy consistency.
The higher fat content enhances the mouthfeel and prevents the dessert from becoming too watery.
Alternatives for Dietary Preferences
Low-fat or skim milk – Can be used but may require additional simmering time for thickening.
Plant-based alternatives – Almond milk, coconut milk, or cashew milk can be used for vegan kheer, though they will slightly alter the flavor.
Condensed milk – Some variations use condensed milk for added sweetness and richness, reducing the need for additional sugar.
3. Sweeteners – Balancing the Taste
Traditional Sweeteners
Granulated white sugar is the most common sweetener, offering a clean, straightforward sweetness.
Jaggery (gur) is sometimes used, adding a deeper caramel-like flavor and a touch of earthiness.
Healthier Sugar Alternatives
Honey, maple syrup, or coconut sugar can be used for a more natural sweetness.
Date paste or stevia are options for a sugar-free kheer.
Adjusting Sweetness Levels
Sugar should be added gradually and adjusted based on preference, as the sweetness intensifies when kheer cools.
4. Cardamom and Saffron – Flavor Enhancers
Cardamom – The Signature Spice
Green cardamom pods are commonly used for their warm, slightly citrusy aroma.
Lightly crushing the pods before adding them to the kheer helps release their essential oils.
Saffron – A Touch of Luxury
A few strands of saffron (soaked in warm milk) give the kheer a beautiful golden hue and a subtle floral fragrance.
High-quality saffron is potent, so a small amount goes a long way.
5. Nuts and Raisins – Texture and Depth
Almonds and Cashews
Sliced or slivered almonds and cashews add a pleasant crunch and enhance the richness of kheer.
Lightly toasting the nuts before adding them enhances their natural flavors.
Pistachios
Provide a vibrant green color contrast and a slightly sweet, nutty taste.
Raisins
Golden or black raisins add natural sweetness and a chewy texture.
Soaking them in warm milk before adding prevents them from hardening in the kheer.
Nutritional Value of Kheer
Kheer is a delicious and wholesome dessert that offers a balance of macronutrients and essential micronutrients. While it is considered an indulgence, its ingredients provide several health benefits when consumed in moderation.
1. Macronutrient Breakdown
Kheer primarily consists of carbohydrates, proteins, and fats, making it a balanced dish that provides energy and nourishment.
Carbohydrates
The primary source of energy in kheer comes from rice and sugar.
Basmati rice provides complex carbohydrates that release energy gradually.
Using jaggery or natural sweeteners can provide added minerals and a lower glycemic index.
Proteins
Milk is a rich source of high-quality protein, which supports muscle repair and overall body function.
Adding nuts like almonds, cashews, and pistachios enhances the protein content, making kheer more nutritious.
Fats
Full-fat milk provides essential fats that contribute to the dessert’s creamy texture and flavor.
Healthy fats from nuts (especially almonds and cashews) support heart health and brain function.
2. Essential Micronutrients in Kheer
Kheer is not just about taste—it also offers essential vitamins and minerals that promote overall health.
Calcium and Vitamin D (from milk)
Supports bone and teeth health and helps in proper nerve function.
Helps in preventing osteoporosis when consumed as part of a balanced diet.
Iron and Magnesium (from nuts and dried fruits)
Iron aids in red blood cell production and prevents anemia.
Magnesium supports nerve and muscle function, helping in relaxation and reducing stress.
B Vitamins (from rice and milk)
Essential for energy metabolism and brain function.
Helps in maintaining healthy skin, hair, and digestion.
Antioxidants (from saffron, cardamom, and nuts)
Saffron and cardamom contain antioxidants that help fight inflammation and oxidative stress.
Nuts like pistachios and almonds have vitamin E, which is good for skin health and immunity.
3. Dietary Considerations and Health Benefits
While kheer is a rich dessert, it can be adapted to suit various dietary needs and preferences.
For Weight Management
Choosing low-fat milk and reducing sugar content can make it a lighter dessert.
Using stevia, monk fruit, or jaggery instead of refined sugar reduces calorie intake.
For Heart Health
Swapping full-fat milk with plant-based milk (like almond or oat milk) can lower saturated fat content.
Using nuts in moderation adds heart-healthy unsaturated fats.
For Digestive Health
Cardamom and saffron aid digestion and reduce bloating.
Adding fiber-rich nuts and raisins helps with gut health.
For Lactose Intolerance or Vegan Diets
Replacing dairy milk with coconut milk, almond milk, or oat milk can make it suitable for vegans.
Using natural sweeteners like maple syrup or date paste can enhance nutrition.
4. How to Make Kheer Healthier
Use brown rice or quinoa instead of white rice for more fiber.
Replace sugar with honey, jaggery, or dates for a more natural sweetness.
Add chia seeds or flaxseeds for extra fiber and omega-3s.
Increase the amount of nuts and dried fruits for more protein and micronutrients.
Essential Ingredients for Authentic Kheer
Choosing the Right Rice
Rice is the foundation of kheer, and selecting the right variety is essential for achieving the perfect texture and flavor. The type of rice you use can significantly impact the creaminess, consistency, and overall taste of your kheer.
1. Why Basmati Rice is the Best Choice
Basmati rice is traditionally used for making kheer due to its unique qualities:
Aromatic fragrance – The natural floral aroma enhances the overall flavor of the dessert.
Long, slender grains – These grains hold their shape well while softening beautifully during cooking.
Light and fluffy texture – Helps maintain a delicate consistency in the kheer.
Ability to absorb flavors – The grains soak up the richness of milk, saffron, and cardamom, making each bite flavorful.
Best Practices for Using Basmati Rice in Kheer
Rinse thoroughly – Washing the rice 2–3 times removes excess starch, preventing the kheer from becoming too thick or sticky.
Soak for at least 20–30 minutes – This softens the grains, reducing cooking time and ensuring even texture.
Use the right ratio – Typically, ¼ to ⅓ cup of rice per liter of milk is ideal for a well-balanced consistency.
2. Alternative Rice Varieties for Kheer
If Basmati rice is unavailable, you can experiment with other types of rice to achieve different textures and flavors:
Short-Grain or Medium-Grain Rice
Arborio rice (used in risotto) – Creates an extra-creamy texture due to its high starch content.
Sona Masuri rice (popular in South Indian cuisine) – Has a slightly softer texture and absorbs flavors well.
Gobindobhog rice (used in Bengali desserts) – A fragrant short-grain rice that adds a rich taste to kheer.
Brown Rice or Red Rice (Healthier Alternatives)
Brown rice adds more fiber and nutrients, making kheer more filling and nutritious.
Red rice provides a nutty flavor and a chewier texture.
These varieties take longer to cook, so pre-soaking and extended simmering are necessary.
Flattened Rice (Poha) or Broken Rice (Tukda Basmati)
Poha (flattened rice) – Softens quickly and results in a lighter kheer, ideal for quick recipes.
Broken Basmati rice – Absorbs milk faster and creates a thicker consistency.
Vermicelli or Millet-Based Kheer
Seviyan (vermicelli kheer) – A common variation using thin wheat noodles instead of rice.
Millet (Bajra, Ragi, or Foxtail Millet) – Provides a healthier, gluten-free alternative with added fiber.
3. Common Mistakes When Choosing Rice for Kheer
Using unwashed rice – Leads to excessive starchiness and an overly thick texture.
Skipping the soaking step – Results in unevenly cooked rice that remains chewy.
Using parboiled or quick-cook rice – These varieties lack the ability to absorb milk properly, leading to a less creamy kheer.
Adding too much rice – Can make the kheer too thick, resembling pudding rather than a smooth dessert.
4. How to Store and Prepare Rice for Kheer
Store Basmati rice in an airtight container to retain its fragrance and freshness.
Always check for old or stale rice, as fresh rice gives better texture and taste.
Pre-soaked rice can be drained and refrigerated for a few hours to speed up cooking later.
Dairy and Sweeteners
The combination of dairy and sweeteners plays a crucial role in determining the taste, texture, and richness of kheer. Choosing the right type of milk and sweetener can significantly enhance the final dish, whether you prefer a classic, indulgent version or a lighter, healthier alternative.
—
1. Dairy: The Base for Creaminess and Flavor
The choice of milk is essential in achieving the smooth, creamy texture that makes kheer so delicious. Traditionally, full-fat milk is used, but there are several other options depending on dietary needs and preferences.
Full-Fat Milk (Traditional Choice)
Why It Works Best:
Higher fat content results in a richer, creamier texture.
Reduces faster when simmered, creating a naturally thick consistency.
Enhances the ability of rice to absorb flavors.
Tip: Stir occasionally while simmering to prevent scorching and to promote even thickening.
Low-Fat or Skim Milk (Lighter Alternative)
Benefits:
Lower in calories and fat, making it a healthier option.
Still provides a good texture, though slightly less creamy.
Best for: Those who want a lighter version without sacrificing too much creaminess.
Condensed Milk (For Extra Sweetness and Thickness)
Why Use It?:
Adds extra richness and makes the kheer naturally thicker.
Reduces the need for additional sugar, as it is already sweetened.
How to Use It?: Replace a portion of regular milk with condensed milk and adjust sugar accordingly.
Evaporated Milk (For a Caramelized Flavor)
Benefits:
Provides a slightly caramelized taste, enhancing the depth of flavor.
Works well when combined with full-fat milk for added creaminess.
Plant-Based Milk (Vegan and Lactose-Free Alternatives)
If you prefer a dairy-free version, these milk alternatives can be used:
Tip for Vegan Kheer: Use a combination of coconut milk + almond milk for a balance of richness and lightness.
—
2. Sweeteners: Balancing the Taste
Sweetness is an integral part of kheer, and the choice of sweetener can influence both flavor and nutritional value. While white sugar is traditionally used, there are many alternatives to customize the sweetness level and health benefits.
Traditional Sweeteners
Granulated White Sugar (Most Common Choice)
Why It Works:
Dissolves easily in warm milk, providing an even sweetness.
Does not alter the traditional taste of kheer.
Tip: Add sugar toward the end of cooking to avoid interfering with the thickening process.
Jaggery (Gur) – A Natural Sweetener with a Rich Flavor
Why Use It?:
Adds a deep caramel-like flavor and an earthy sweetness.
Contains more minerals (iron, magnesium) than refined sugar.
How to Use It?:
Always melt jaggery separately in warm milk or water before adding it to kheer.
Adding jaggery directly to boiling milk may cause curdling.
Brown Sugar – A Slightly Milder Alternative
Benefits:
Adds a hint of molasses flavor.
Slightly more natural than white sugar, with a richer depth.
—
Healthier Sugar Alternatives
Tip for a Healthier Kheer: Combine a small amount of jaggery with dates or coconut sugar for a naturally sweetened version with more nutrients.
—
3. Adjusting Sweetness and Consistency
Since kheer thickens as it cools, it’s important to balance the sweetness and texture accordingly:
✔ Start with less sugar and adjust gradually.
✔ If the kheer becomes too thick, add a splash of warm milk before serving.
✔ If the kheer is too thin, simmer for a few extra minutes until desired consistency is reached.
Flavor Enhancers
The rich, creamy base of kheer is complemented by a variety of flavoring ingredients that elevate its taste and aroma. These ingredients not only add depth and complexity to the dish but also enhance its visual appeal and overall sensory experience. Traditional Indian spices, nuts, and dried fruits play a key role in making kheer truly special.
—
1. Aromatic Spices: The Heart of Kheer’s Flavor
Spices are essential in kheer, transforming it from a simple rice pudding into a fragrant and indulgent dessert.
Cardamom (Elaichi) – The Classic Fragrant Spice
Why It’s Important:
Adds a warm, slightly citrusy, and floral aroma.
Enhances the sweetness and complements the richness of the milk.
How to Use It:
Lightly crush 2–3 green cardamom pods and add them to the milk while simmering.
Alternatively, use ¼ teaspoon of ground cardamom for a milder flavor.
Tip: Strain out whole cardamom pods before serving for a smoother texture.
Saffron (Kesar) – The Luxurious Golden Touch
Why It’s Used:
Adds a vibrant golden color and a distinctive floral aroma.
Enhances the richness of the milk with its subtle, honey-like flavor.
How to Use It:
Soak a few saffron strands in 2 tablespoons of warm milk for 5–10 minutes, then stir into the kheer.
Avoid adding too much, as saffron has an intense flavor.
Tip: Use pure saffron (not artificial saffron powder) for authentic taste and color.
Nutmeg (Jaiphal) – A Warm and Earthy Spice
Why It’s Used:
Has a mild sweetness with hints of clove and cinnamon.
Enhances the overall warmth of the dish.
How to Use It:
Grate a small pinch of nutmeg into the kheer towards the end of cooking.
Tip: Nutmeg has a strong flavor, so use it sparingly.
Cinnamon (Dalchini) – A Subtle Woody Sweetness
Why It’s Used:
Adds a mild warmth and gentle sweetness.
Complements the creaminess of the milk.
How to Use It:
Add a small cinnamon stick while simmering the milk and remove before serving.
Alternatively, use a pinch of ground cinnamon for a lighter touch.
—
2. Nuts and Seeds: Adding Crunch and Creaminess
Nuts not only enhance the flavor of kheer but also add texture, richness, and nutritional value.
Tip for Best Texture: Lightly toast almonds, cashews, or pistachios before adding to enhance their natural nuttiness.
—
3. Dried Fruits: Natural Sweetness and Chewiness
Dried fruits add a natural depth of sweetness and enhance the overall mouthfeel of kheer.
Dates (Khajoor) – A Natural Sweetener
Rich in natural sugars, fiber, and iron.
Best used blended into a paste for sweetness without refined sugar.
Figs (Anjeer) – A Chewy, Caramel-Like Addition
Provides a mildly caramel flavor with tiny crunchy seeds.
Best soaked and finely chopped before adding.
Coconut (Nariyal) – A Subtle Tropical Twist
Grated coconut adds a light, chewy texture.
Coconut milk can also be used for a distinct flavor.
Tip: Always chop or soak dried fruits before adding them to ensure even distribution in the kheer.
—
4. Rose Water & Kewra Water: Exotic Floral Essences
Floral waters are often used in Indian desserts to add a refreshing and aromatic touch.
Tip: Use only pure rose or kewra water, not synthetic ones, for an authentic taste.
—
5. Fusion and Modern Twists: Experimenting with Flavors
While traditional kheer uses classic flavor enhancers, you can experiment with modern variations:
✔ Chocolate or Cocoa Powder – A unique fusion for a chocolate-kheer twist.
✔ Vanilla Extract – Adds a mild sweetness and enhances overall flavors.
✔ Coffee or Espresso Powder – For a mocha-flavored kheer.
✔ Orange Zest – Provides a fresh, citrusy contrast to the rich milk.
✔ Slightly Salted Caramel – Balances sweetness with a hint of salty richness.
—
Final Tips for Perfectly Balanced Flavor
✔ Add spices at the beginning to let them infuse the milk properly.
✔ Introduce nuts and dried fruits toward the middle or end to retain texture.
✔ Use essences and floral waters in the last few minutes to prevent flavor loss.
✔ Garnish with chopped pistachios and saffron strands before serving for an elegant touch.
Step-by-Step Guide to Making Perfect Kheer
Preparation Before Cooking
Before you start making kheer, proper preparation ensures a smooth cooking process and helps achieve the perfect creamy texture and balanced flavors. Taking a few extra steps—such as soaking the rice, prepping the ingredients, and setting up your cooking station—can make all the difference in the final dish.
—
1. Choosing the Right Utensils for Cooking Kheer
Since kheer requires slow cooking and continuous stirring, selecting the right cookware and tools is essential.
Best Cookware for Kheer
✔ Heavy-Bottomed Pan or Kadai – Prevents milk from scorching or sticking to the bottom.
✔ Deep Pot or Saucepan – Provides ample space for milk to boil and reduce without overflowing.
✔ Non-Stick Pan (Optional) – Reduces the risk of rice sticking but may not develop the best consistency.
Tip: Avoid using thin-bottomed pans, as they can cause the milk to burn quickly.
Essential Cooking Tools
✔ Wooden or Silicone Spoon – Ideal for stirring without scratching the pan.
✔ Whisk – Helps prevent lumps and ensures an even texture.
✔ Ladle or Small Cup – Useful for skimming and tasting while cooking.
—
2. Preparing the Rice: Soaking for the Perfect Texture
Soaking rice before cooking is a crucial step that helps achieve the signature creamy consistency of kheer.
Why Soak the Rice?
✔ Softens the grains, reducing cooking time.
✔ Helps the rice absorb milk faster, ensuring a creamy texture.
✔ Prevents rice from breaking during cooking.
How to Soak Rice for Kheer
1. Measure ¼ to ½ cup of basmati rice (or your preferred variety).
2. Rinse thoroughly under cold water 2–3 times to remove excess starch.
3. Soak in water for 30 minutes to 1 hour.
4. Drain the water before adding the rice to the milk.
Tip: If you forget to soak the rice, rinse it well and simmer slightly longer while cooking.
Alternative: Grinding Rice for a Different Texture
For a smoother kheer, lightly grind the soaked rice before cooking.
This technique is commonly used in South Indian and Bengali-style payasam.
—
3. Prepping the Milk for a Creamy Consistency
Milk is the foundation of kheer, and preparing it properly enhances its richness and texture.
Steps to Prep Milk
✔ Use full-fat milk for the best creaminess.
✔ Warm the milk separately before adding it to the pan to speed up the cooking process.
✔ If using saffron, soak a few strands in 2 tbsp of warm milk to enhance its color and aroma.
Tip: Stir occasionally while heating milk to prevent scorching.
—
4. Measuring and Prepping Other Ingredients
Since kheer requires constant attention while cooking, measuring and prepping ingredients beforehand helps avoid last-minute scrambling.
Prepping Sweeteners
✔ Granulated Sugar – Measure in advance but add later in the cooking process.
✔ Jaggery or Brown Sugar – Melt separately in warm water or milk before adding.
Prepping Flavor Enhancers
✔ Cardamom Pods – Lightly crush to release aroma.
✔ Nutmeg or Cinnamon – Grate fresh for maximum flavor.
✔ Rose Water/Kewra Essence – Keep ready to add at the end.
Prepping Nuts and Dried Fruits
✔ Almonds, Cashews, Pistachios – Chop or slice for garnish and texture.
✔ Raisins – Soak in warm water to plump them up.
Tip: Toast nuts lightly for a richer taste and crunch.
—
5. Organizing the Cooking Station for Efficiency
Since kheer requires slow cooking and patience, setting up everything before starting ensures a smooth process.
✔ Place all measured ingredients within easy reach.
✔ Keep a ladle for stirring and tasting.
✔ Set aside a small bowl of warm water or milk in case you need to adjust the consistency.
Tip: If using jaggery or condensed milk, keep a separate pan ready for melting them before adding.
—
Final Pre-Cooking Checklist
✅ Rice soaked and drained.
✅ Milk warmed and saffron (if used) infused.
✅ Sweeteners measured and ready.
✅ Nuts and dried fruits prepped.
✅ Cooking tools and utensils arranged.
Once everything is prepared, you’re ready to start cooking and create a perfectly creamy, flavorful kheer!
Cooking Process
The cooking process is where all the carefully prepared ingredients come together to create the perfect kheer. Achieving the right texture and consistency requires slow cooking, patience, and frequent stirring. In this section, we’ll break down the step-by-step cooking method to ensure your kheer turns out creamy, flavorful, and authentic.
—
1. Heating the Milk: The Foundation of Kheer
Milk is the primary base of kheer, and how you heat it plays a crucial role in the final texture.
Steps for Heating the Milk
1. Pour the milk into a heavy-bottomed pan or kadai – This prevents scorching and allows even heat distribution.
2. Heat on medium flame until the milk starts to simmer gently. Avoid rapid boiling, as it can cause the milk to burn.
3. Stir occasionally to prevent the milk from sticking to the bottom.
4. Once the milk is warm, you can add saffron strands (if using) to infuse color and aroma.
Tip: If a layer of cream (malai) forms on the surface, mix it back into the milk for a richer consistency.
—
2. Adding the Rice: Cooking Until Tender
The rice must be cooked slowly so that it absorbs the milk and becomes soft while maintaining a slight texture.
Steps for Cooking the Rice in Milk
1. Drain the soaked rice and add it to the simmering milk.
2. Cook on low-medium heat, stirring frequently to prevent sticking.
3. After 10–15 minutes, check the rice:
The grains should be soft but not mushy.
The milk will start thickening as starch is released from the rice.
Tip: Do not stir too vigorously, as it can break the rice grains and affect the texture.
—
3. Allowing the Kheer to Thicken: Achieving the Right Consistency
The hallmark of a perfect kheer is its rich and creamy consistency.
How to Thicken Kheer Properly
✔ Simmer on low heat for at least 30–40 minutes, allowing the flavors to develop.
✔ Stir every few minutes to prevent the rice from settling at the bottom.
✔ If kheer thickens too much, add a little warm milk and stir to adjust.
Tip: Kheer thickens further as it cools, so remove it from heat when it’s slightly thinner than your desired final consistency.
—
4. Sweetening the Kheer: When and How to Add Sugar
Adding sugar at the right stage ensures proper consistency and prevents the kheer from becoming too thin.
Best Time to Add Sweetener
✔ After the rice is fully cooked (around 30 minutes into cooking).
✔ Stir well after adding sugar to help it dissolve evenly.
Alternative Sweeteners
✔ Jaggery or Brown Sugar – Melt separately and add at the end to prevent curdling.
✔ Condensed Milk – Can be added for extra richness (reduce regular sugar accordingly).
✔ Honey or Maple Syrup – Add after removing from heat to preserve their natural flavor.
Tip: Taste and adjust sweetness before finishing the cooking process.
—
5. Infusing Flavor: Spices and Nuts
Adding spices and nuts at the right time ensures maximum aroma and texture.
✔ Cardamom – Add lightly crushed pods while simmering or ground cardamom toward the end.
✔ Nutmeg – A small pinch grated in the final minutes enhances the warmth of the kheer.
✔ Cinnamon (Optional) – Add a small stick while simmering and remove before serving.
✔ Saffron-Soaked Milk – Stir in towards the end for a rich golden hue.
✔ Nuts & Dried Fruits – Add cashews, almonds, and raisins in the last 5–10 minutes for the best texture.
Tip: Lightly toast the nuts in ghee before adding for a richer flavor.
—
6. Final Cooking Touches: Adjusting and Balancing the Texture
Once all ingredients are combined, the final few minutes are essential to get the perfect kheer.
✔ Check the consistency – If too thick, add a little warm milk and stir.
✔ Stir well to blend all flavors before turning off the heat.
✔ Add rose water or kewra essence in the last minute for an exotic floral note.
Tip: Never boil after adding floral essences, as heat can destroy their delicate aroma.
—
7. Resting the Kheer: Letting Flavors Settle
Kheer tastes best when it has had time to rest and thicken naturally.
✔ Let it cool for 10–15 minutes before serving warm.
✔ For chilled kheer, refrigerate for at least 2 hours before serving.
✔ Garnish with sliced pistachios, saffron strands, or edible silver leaves for an elegant presentation.
Tip: Kheer thickens in the fridge, so add a splash of milk while reheating if needed.
—
Final Cooking Tips for Perfect Kheer
✔ Use a heavy-bottomed pan to prevent burning.
✔ Cook on low heat for better texture and depth of flavor.
✔ Stir regularly to avoid rice sticking or clumping.
✔ Taste and adjust sugar before finishing the cooking process.
✔ Let it rest before serving for the best flavor.
Final Touches: Bringing Your Kheer to Perfection
The final touches are what transform a simple rice pudding into an extraordinary dessert. This stage involves enhancing the texture, balancing flavors, and adding garnishes that make the kheer visually appealing and delicious. Let’s break down the key steps to ensure your kheer turns out rich, aromatic, and restaurant-quality.
—
1. Adjusting the Consistency: Finding the Right Texture
Kheer thickens naturally as it cools, so it’s important to check its consistency before serving.
✔ For a thicker kheer – Continue simmering for a few extra minutes, stirring frequently.
✔ For a thinner kheer – Add a small amount of warm milk and stir well before turning off the heat.
✔ For ultra-creamy kheer – Blend a small portion of cooked rice and milk, then mix it back into the kheer.
Tip: If refrigerating, remember that kheer will continue to thicken. Add a little warm milk before serving if needed.
—
2. Enhancing the Flavor: Subtle Additions for a Rich Taste
Even after cooking, a few small tweaks can elevate the taste of your kheer.
Best Ingredients to Add at the End
✔ Rose Water or Kewra Essence – Just ½ to 1 teaspoon adds a delicate floral note.
✔ A Few Drops of Vanilla Extract – Complements the sweetness and enhances depth.
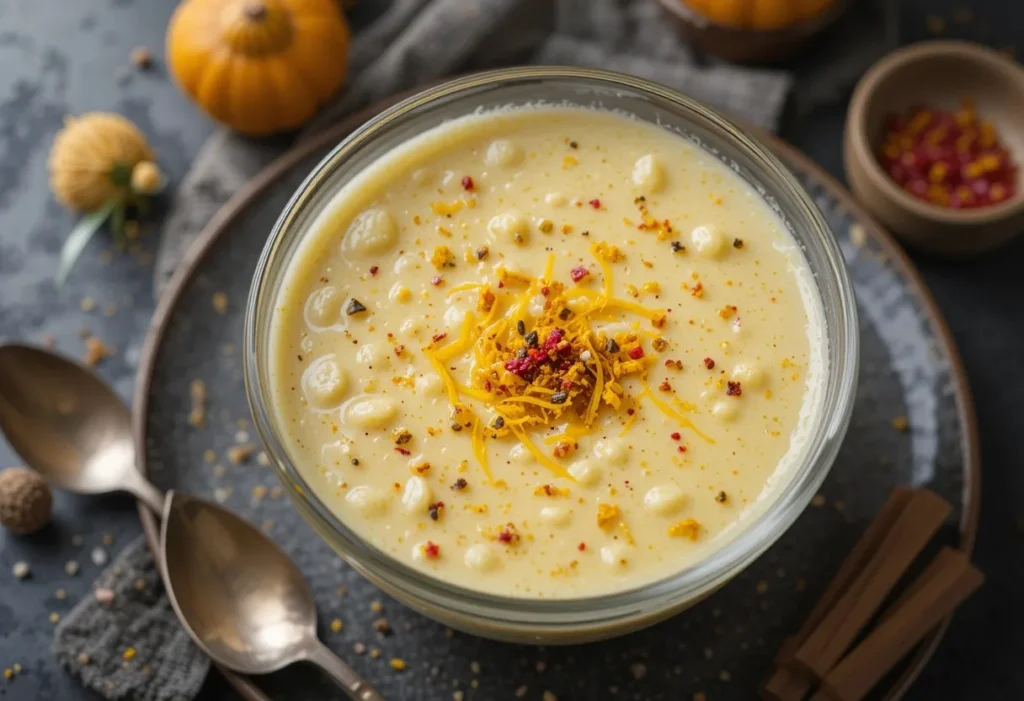
✔ Saffron-Soaked Milk – Stir in just before serving for a rich golden hue and luxurious aroma.
Tip: Avoid adding floral essences while the kheer is still boiling, as high heat can diminish their delicate fragrance.
—
3. Garnishing: Making Kheer Visually Appealing
A well-garnished kheer is not just beautiful but also adds layers of texture and flavor.
Best Garnishes for Kheer
✔ Slivered Almonds & Pistachios – Add crunch and a pop of color.
✔ Toasted Cashews – Provide a buttery, nutty contrast.
✔ Golden Raisins – Soaked or lightly fried in ghee for extra sweetness.
✔ Saffron Strands – Infuse flavor and an elegant touch.
✔ Silver Leaf (Varak) – A traditional Indian touch for festive occasions.
Tip: Lightly toast the nuts in ghee before adding to enhance their flavor.
—
4. Serving Temperature: Warm vs. Chilled Kheer
Serving Kheer Warm
✔ Best enjoyed fresh, straight from the pot.
✔ Has a rich, creamy texture.
✔ Ideal for winter or festive occasions.
Serving Kheer Chilled
✔ Refrigerate for 2–4 hours before serving.
✔ The flavors deepen, and the texture becomes thicker.
✔ Perfect for summer or as a cold dessert option.
Tip: If the kheer thickens too much in the fridge, stir in a little cold milk before serving.
—
5. Presentation: How to Serve Kheer in Style
✔ In Traditional Clay Pots (Matka Kheer) – Absorbs excess moisture and enhances flavor.
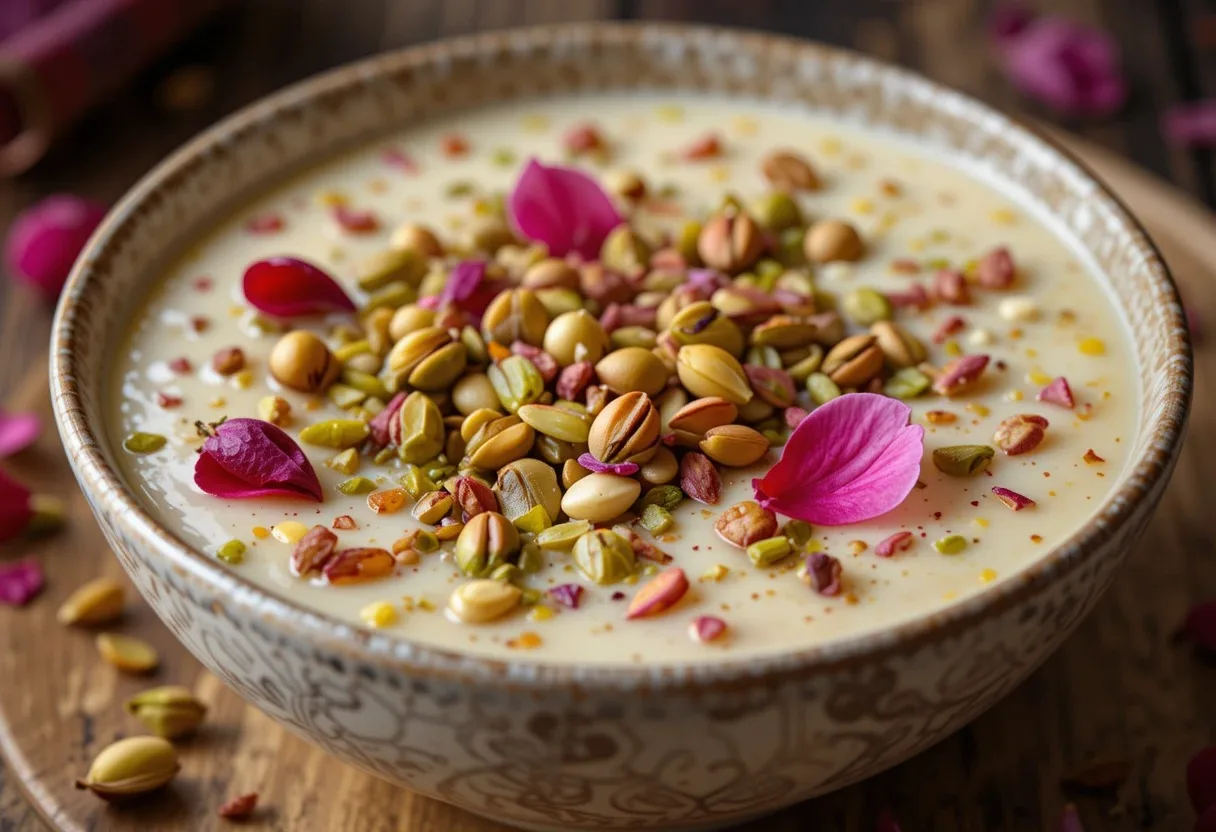
✔ In Glass Bowls or Dessert Cups – Elegant presentation for special occasions.
✔ With Edible Flowers (Like Rose Petals) – Adds beauty and a subtle floral aroma.
✔ With a Side of Fried Pooris – A delicious North Indian-style combination.
Tip: For special occasions, serve kheer with a sprinkle of chopped dried fruits and a dusting of cardamom powder on top.
—
Final Touches Checklist for Perfect Kheer
✅ Consistency adjusted (not too thick or too runny).
✅ Flavor balanced (sweetness and aroma fine-tuned).
✅ Garnished beautifully with nuts, saffron, or rose petals.
✅ Served at the right temperature (warm or chilled based on preference).
Tips and Tricks for the Best Homemade Kheer
Avoiding Common Mistakes: Troubleshooting Kheer for Perfect Results
Making kheer seems simple, but small mistakes can lead to issues like an overly thick texture, burnt milk, or undercooked rice. To ensure your kheer turns out creamy, flavorful, and perfectly balanced every time, here’s a breakdown of common mistakes and how to avoid them.
—
1. Using the Wrong Type of Rice
Mistake: Using short-grain or sticky rice can alter the texture of kheer, making it too thick or mushy.
✔ Solution: Always use basmati rice for its fragrance, long grains, and non-sticky texture. If using another variety, adjust cooking time accordingly.
Tip: Rinse the rice thoroughly to remove excess starch, which helps achieve a smooth consistency.
—
2. Not Soaking the Rice Before Cooking
Mistake: Cooking rice directly without soaking leads to unevenly cooked grains and longer cooking time.
✔ Solution: Soak the rice for 30 minutes before cooking. This softens the grains, allowing them to absorb milk faster and cook evenly.
Tip: Drain the rice well before adding it to the milk to prevent excess water from thinning out the kheer.
—
3. Cooking on High Heat
Mistake: Boiling kheer on high heat causes the milk to burn at the bottom, ruining the flavor.
✔ Solution: Always cook kheer on low to medium heat, stirring frequently to prevent scorching.
Tip: Use a heavy-bottomed pan or kadai to ensure even heat distribution and avoid burning.
—
4. Not Stirring Enough
Mistake: Leaving kheer unattended allows the rice to stick to the bottom and burn.
✔ Solution: Stir gently every few minutes to keep the milk and rice moving, preventing lumps and scorching.
Tip: Use a wooden spoon or silicone spatula to stir—these prevent scratching and help scrape the bottom of the pan.
—
5. Adding Sugar Too Early
Mistake: Adding sugar before the rice is fully cooked hardens the grains, making them chewy instead of soft.
✔ Solution: Wait until the rice is fully cooked (about 30 minutes into cooking) before adding sugar.
Tip: Stir well after adding sugar to ensure it dissolves evenly and doesn’t settle at the bottom.
—
6. Over-Thickening the Kheer
Mistake: Cooking the kheer too long can make it excessively thick, especially after cooling.
✔ Solution: Remove from heat when slightly thinner than desired—kheer thickens as it cools. If it becomes too thick, stir in warm milk to adjust the consistency.
Tip: If reheating leftover kheer, add a little milk and stir over low heat to restore creaminess.
—
7. Skipping Flavoring Enhancements
Mistake: Not adding cardamom, saffron, or other spices results in a bland-tasting kheer.
✔ Solution: Always add cardamom powder, saffron strands, or rose water for an authentic taste.
Tip: Infuse saffron in warm milk before adding to enhance color and aroma.
—
8. Adding Jaggery or Honey Incorrectly
Mistake: Adding jaggery, brown sugar, or honey directly into hot kheer can cause the milk to curdle.
✔ Solution: Melt jaggery separately in a little water and let it cool before mixing it into the kheer after removing it from heat.
Tip: Always add honey or maple syrup after cooking to preserve their natural flavors.
—
9. Not Letting Kheer Rest Before Serving
Mistake: Serving kheer immediately without letting the flavors settle can result in an uneven taste and texture.
✔ Solution: Let the kheer rest for at least 10–15 minutes before serving warm or refrigerate for 2–4 hours if serving chilled.
Tip: Garnish only after cooling slightly to prevent nuts and saffron from sinking.
—
Final Checklist to Avoid Common Kheer Mistakes
✅ Use basmati rice and soak it for 30 minutes.
✅ Cook on low to medium heat to prevent burning.
✅ Stir frequently to keep milk and rice from sticking.
✅ Add sugar only after the rice is fully cooked.
✅ Adjust consistency with warm milk if needed.
✅ Enhance flavor with cardamom, saffron, and nuts.
✅ Let the kheer rest before serving for the best taste.
Enhancing the Flavor: How to Make Kheer Extra Delicious
Kheer is all about achieving a balance of creaminess, sweetness, and aromatic depth. While the basic ingredients—rice, milk, and sugar—form the foundation, it’s the subtle additions that truly elevate the flavor. In this section, we’ll explore the best ways to enhance the taste of kheer, from traditional spices to creative add-ins that bring complexity and richness to the dish.
—
1. The Magic of Spices: Elevating Aroma and Depth
Indian desserts often rely on fragrant spices to add warmth and complexity, and kheer is no exception. The right combination of spices transforms a simple rice pudding into a luxurious treat.
Key Spices to Use in Kheer
✔ Cardamom (Elaichi) – The most traditional spice for kheer, cardamom has a sweet, floral aroma that enhances the richness of milk. Use ½ teaspoon of ground cardamom or 2–3 whole crushed pods.
✔ Saffron (Kesar) – This premium spice imparts a golden hue and a subtle, honey-like aroma. Soak a few strands of saffron in warm milk for 5–10 minutes before adding.
✔ Nutmeg (Jaiphal) – A pinch of grated nutmeg adds warmth and depth, pairing well with cardamom.
✔ Cinnamon (Dalchini) – Though not traditionally used in kheer, a small piece of cinnamon stick can add a gentle spiced note, perfect for fusion versions.
Tip: Always add spices toward the end of cooking to preserve their fragrance and prevent bitterness.
—
2. Floral and Aromatic Enhancements
Adding floral flavors brings a delicate, exotic touch to kheer, making it taste even more indulgent.
✔ Rose Water – Just ½ to 1 teaspoon of rose water adds a subtle floral note without overpowering the dish.
✔ Kewra Essence – Used in North Indian desserts, kewra essence (screwpine extract) has a deep, floral aroma. Just a few drops are enough to elevate the flavor.
✔ Vanilla Extract – Though not traditional, a few drops of vanilla can complement the milk’s natural sweetness.
Tip: Floral essences should be added at the very end of cooking to retain their delicate fragrance.
—
3. Nutty Goodness: Adding Crunch and Depth
Nuts not only enhance texture but also enrich the flavor of kheer. Lightly toasting them before adding brings out their natural oils and intensifies their taste.
✔ Almonds (Badam) – Thinly sliced or slivered almonds add a subtle crunch and mild sweetness.
✔ Pistachios (Pista) – Their vibrant green color makes kheer visually appealing, and they add a nutty richness.
✔ Cashews (Kaju) – Give kheer a buttery crunch, especially when lightly fried in ghee.
✔ Coconut (Nariyal) – Fresh or desiccated coconut adds a tropical twist to traditional kheer.
Tip: Always add nuts at the end or as a garnish to maintain their crunch.
—
4. Dried Fruits for Natural Sweetness and Texture
Dried fruits provide bursts of sweetness and chewiness, making each spoonful of kheer more exciting.
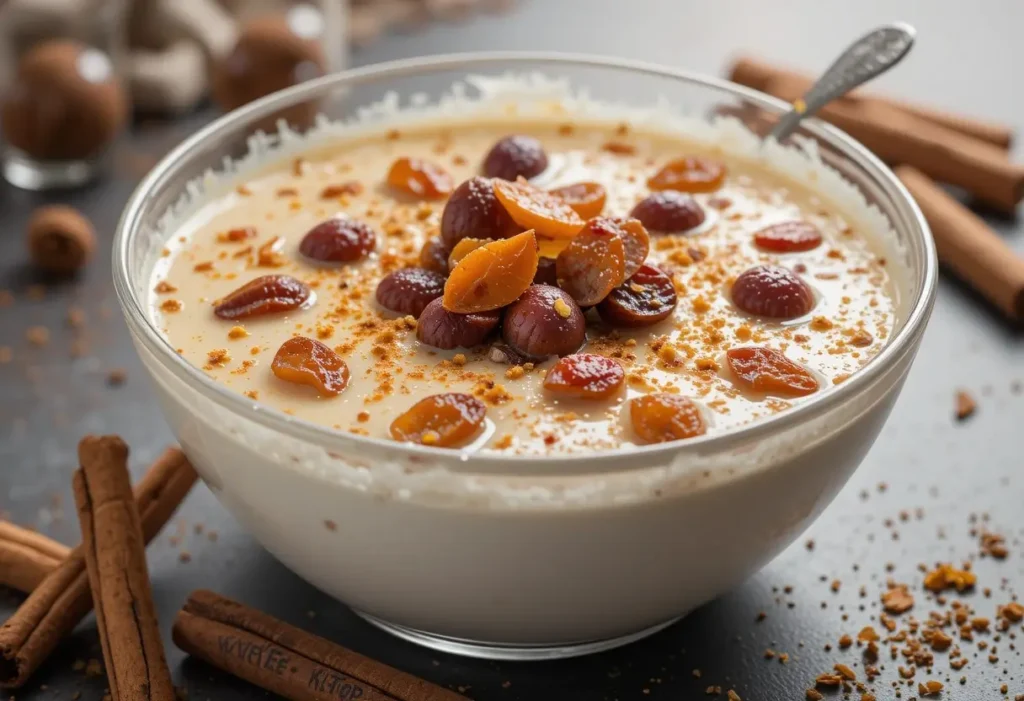
✔ Golden Raisins (Kishmish) – The most common dried fruit in kheer, raisins absorb the milk’s richness and become soft and juicy.
✔ Dates (Khajoor) – Finely chopped dates add caramel-like sweetness and extra fiber.
✔ Figs (Anjeer) – A slightly chewy and sweet addition, figs pair well with warm spices.
✔ Apricots (Khubani) – For a unique twist, try adding chopped dried apricots for a hint of tartness.
Tip: Soak dried fruits in warm milk before adding to make them softer and more flavorful.
—
5. Sweeteners: Finding the Perfect Balance
The right sweetener enhances the natural creaminess of kheer without overpowering its delicate flavors.
✔ White Sugar – The most commonly used sweetener, offering a clean sweetness.
✔ Jaggery (Gur) – A traditional, unrefined sweetener with caramel and molasses notes. Always add jaggery after turning off the heat to prevent curdling.
✔ Condensed Milk – A shortcut for richness and sweetness; reduces cooking time and adds extra creaminess.
✔ Honey or Maple Syrup – Ideal for those seeking natural sweeteners, but should be added after cooking.
Tip: If using jaggery, dissolve it in warm milk separately before mixing into the kheer.
—
6. Unique Flavor Twists: Modern Variations
While traditional kheer is delicious on its own, experimenting with modern flavors can give it a unique twist.
✔ Chocolate Kheer – Add 2 tablespoons of cocoa powder or melted dark chocolate for a decadent version.
✔ Coffee-Infused Kheer – Mix 1 teaspoon of instant coffee into warm milk before adding it to the kheer for a rich, aromatic twist.
✔ Fruity Kheer – Stir in mashed ripe bananas, mango pulp, or berries for a fresh take on classic kheer.
✔ Caramel Kheer – Drizzle homemade caramel sauce on top for extra depth and a gourmet touch.
Tip: When adding fruits, always let the kheer cool slightly first to prevent curdling.
—
Final Flavor Enhancement Checklist
✅ Use traditional spices (cardamom, saffron, nutmeg) for authentic taste.
✅ Add floral notes (rose water, kewra, vanilla) for an aromatic boost.
✅ Incorporate nuts and dried fruits for texture and natural sweetness.
✅ Choose the right sweetener (sugar, jaggery, honey) based on preference.
✅ Experiment with modern flavors like chocolate, coffee, or fruit.
Serving Suggestions: How to Enjoy Kheer at Its Best
Kheer is a versatile dessert that can be served in multiple ways, depending on the occasion, personal preference, and season. Whether you enjoy it warm on a cozy evening or chilled on a hot summer day, the right presentation and accompaniments can elevate your kheer experience. In this section, we’ll explore the best ways to serve kheer, from traditional garnishes to creative pairings.
—
1. Warm vs. Chilled: The Best Way to Serve Kheer
Kheer can be enjoyed either warm or cold, and each version offers a unique experience.
✔ Warm Kheer – Best served fresh, right after cooking or slightly cooled. Warm kheer has a thinner consistency and releases a more pronounced aroma of spices like cardamom and saffron.
✔ Chilled Kheer – When refrigerated for a few hours, kheer thickens and develops a richer, creamier texture. The flavors also deepen, making it a refreshing dessert, especially in summer.
Tip: If serving chilled, stir in a little warm milk before serving to adjust the consistency if it has thickened too much.
—
2. Traditional Garnishes for a Classic Touch
A well-garnished kheer not only looks appealing but also enhances its taste and texture.
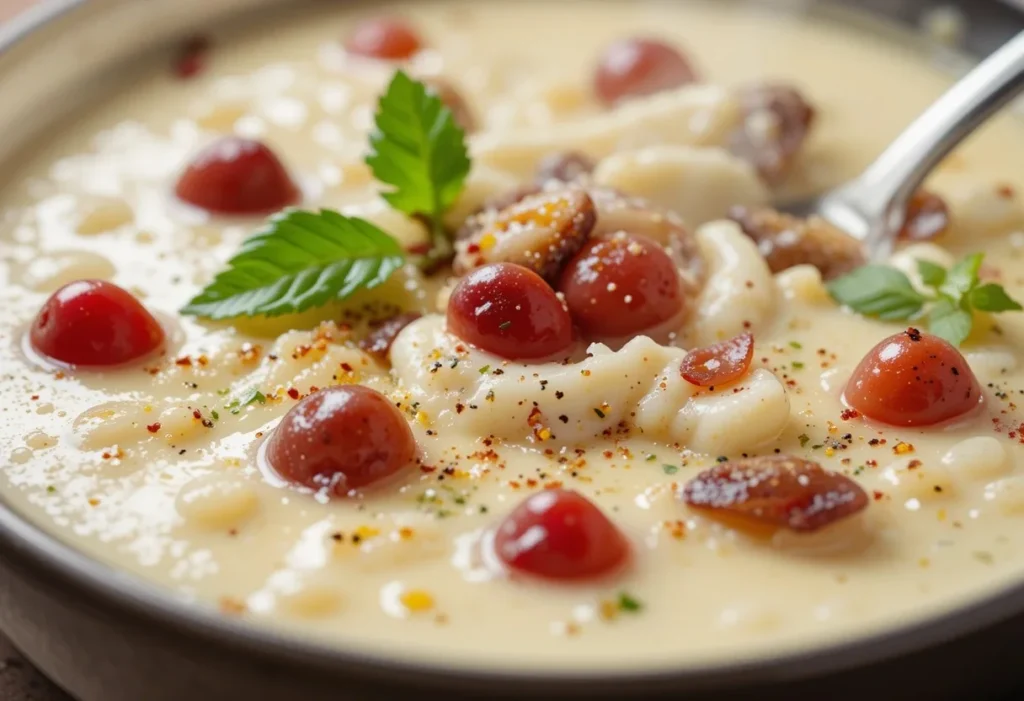
✔ Slivered Almonds and Pistachios – Adds a crunchy texture and a nutty depth to balance the creaminess.
✔ Golden Raisins – Soft, juicy raisins provide bursts of natural sweetness.
✔ Saffron Strands – A few strands of saffron sprinkled on top enhance both the visual appeal and the aroma.
✔ Edible Rose Petals – Common in royal Mughlai versions of kheer, these add a delicate floral note.
✔ Chopped Dates or Figs – Adds a chewy texture and a caramel-like sweetness.
Tip: For a richer flavor, lightly toast nuts in ghee before using them as garnish.
—
3. Pairing Kheer with Other Indian Desserts
For festive occasions or special gatherings, kheer pairs well with other Indian sweets to create a balanced dessert platter.
✔ Jalebi & Kheer – The crispy, syrupy sweetness of jalebi complements the creamy, mildly sweet kheer perfectly.
✔ Gulab Jamun & Kheer – Serve warm gulab jamun alongside chilled kheer for an indulgent contrast.
✔ Malpua & Kheer – This deep-fried, syrup-soaked pancake pairs beautifully with chilled kheer.
✔ Barfi or Ladoo – Small pieces of kaju katli, besan ladoo, or coconut barfi add variety to a dessert spread.
Tip: If serving multiple sweets, opt for a mildly sweet kheer to balance the flavors.
—
4. Creative Fusion Serving Ideas
For a modern or gourmet touch, try these unique ways to serve kheer:
✔ Kheer Parfait – Layer chilled kheer with crushed biscuits or granola and fresh fruits like mangoes or berries.
✔ Chocolate Kheer – Stir in melted dark chocolate and serve with chocolate shavings on top.
✔ Kheer Tartlets – Use mini pastry shells filled with thickened kheer, topped with nuts and saffron.
✔ Kheer with Ice Cream – A scoop of vanilla, saffron, or pistachio ice cream adds a delightful contrast.
✔ Caramelized Banana Kheer – Top kheer with pan-fried banana slices in brown sugar for a gourmet twist.
Tip: For a healthier version, replace sugar with honey or maple syrup and add more fresh fruits.
—
5. Ideal Occasions to Serve It
Kheer is a celebratory dish often made for special occasions and religious festivals.
✔ Festivals: It is commonly prepared during Diwali, Eid, Raksha Bandhan, and Navratri.
✔ Weddings and Celebrations: Often served as a dessert at Indian weddings or family gatherings.
✔ Poojas and Offerings: A traditional dish offered to deities and served as prasad in temples.
✔ Casual Family Dessert: Perfect as a comforting treat on a regular day, either warm or chilled.
✔ Winter Comfort Food: Serve warm kheer on cold days for a cozy, satisfying dessert.
Tip: If serving kheer at a party, present it in small clay bowls (kulhads) for a rustic, traditional feel.
—
Final Serving Checklist for the Best Kheer Experience
✅ Choose between warm or chilled kheer based on the occasion.
✅ Garnish with nuts, saffron, and raisins for texture and flavor.
✅ Pair kheer with other Indian sweets like jalebi, gulab jamun, or malpua.
✅ Try modern serving ideas like kheer parfaits or tartlets for a gourmet touch.
✅ Serve in traditional clay bowls for an authentic presentation.
Conclusion and Final Thoughts on Making Perfect Kheer
Kheer, with its creamy texture, aromatic spices, and rich flavors, is more than just a dessert—it’s a symbol of tradition, culture, and warmth. Whether you’re making it for a festive occasion or simply craving a comforting treat, this classic Indian rice pudding is sure to satisfy every palate.
By choosing the right ingredients—like basmati rice, full-fat milk, and aromatic spices—you’ll create a dish that’s both delicious and authentic. The key to making perfect kheer lies in mastering the cooking technique, ensuring the rice absorbs the flavors, and adjusting the sweetness to your liking. Don’t forget the finishing touches, whether it’s a sprinkle of toasted nuts or a dash of saffron, which will take your kheer to the next level.
As you experiment with different variations—be it adding chocolate, fruits, or different sweeteners—you’ll find endless ways to enjoy this beloved dessert. Kheer can be served warm for a comforting dessert or chilled for a refreshing treat in warmer months, making it a versatile option year-round.
We hope this step-by-step guide has helped you understand how to make perfect kheer and inspired you to try your hand at this delightful dish. Remember, the beauty of kheer lies in its simplicity, so take the time to perfect the balance of ingredients and savor every spoonful.
We’d love to hear about your kheer-making experience! Feel free to share your thoughts, tips, or any variations you’ve tried in the comments below. If you found this recipe helpful, don’t forget to share it with your friends and family. Happy cooking!
1 thought on “How to Make Perfect Kheer at Home (Authentic Indian Rice Pudding Recipe)”