

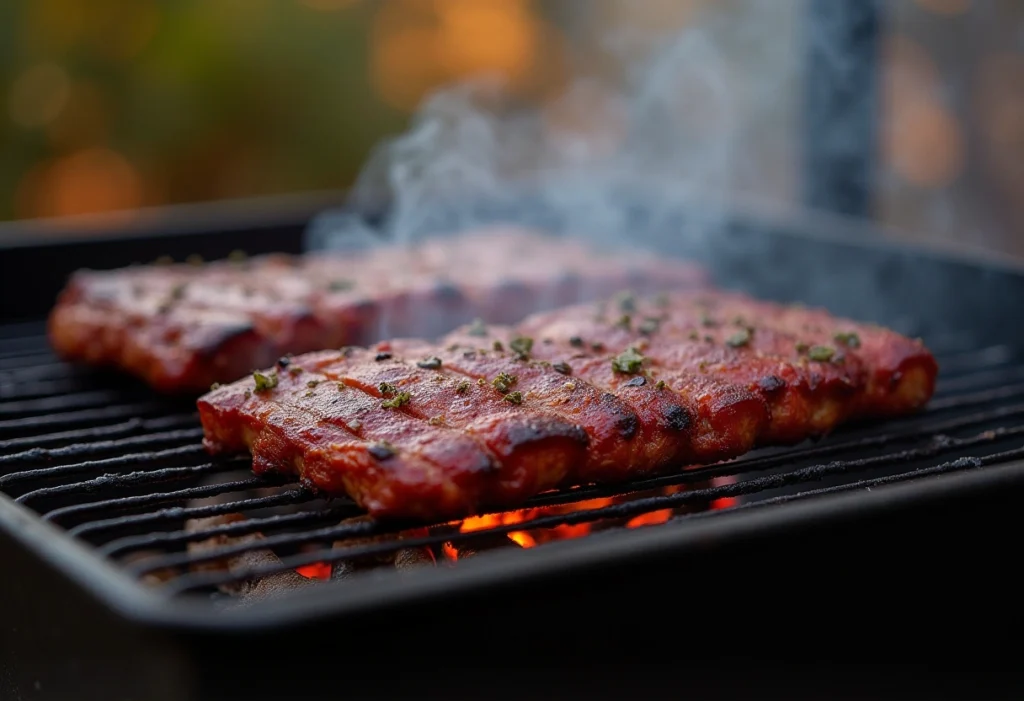
Smoking ribs at 225°F is the secret to achieving that perfect fall-off-the-bone tenderness with deep, smoky flavor. This low and slow method allows the meat to absorb the smoke gradually while breaking down collagen, resulting in juicy and flavorful ribs.
But how long should you smoke ribs at 225°F? The answer depends on the type of ribs, the smoking method, and whether you choose to wrap them during the cooking process. Generally, baby back ribs take 5-6 hours, while spare ribs or St. Louis-style ribs need 6-7 hours for optimal tenderness.
In this guide, we’ll break down the ideal smoking times for different types of ribs, explore the best techniques for achieving perfect texture, and share pro tips on wood selection, wrapping methods, and serving suggestions. Whether you’re a beginner or a seasoned pitmaster, this guide will help you smoke restaurant-quality ribs at home!
Why 225°F is the Best Temperature for Smoking Ribs
The Low and Slow Cooking Method
One of the golden rules of smoking ribs is the low and slow approach. Cooking ribs at 225°F ensures that the meat gradually breaks down, absorbing rich smoky flavors while staying tender and juicy.
Why Low and Slow Works for Ribs
Ribs contain a good amount of connective tissue and collagen, which can make them tough if cooked too quickly at high temperatures. When you smoke ribs slowly at a low temperature, the collagen gradually melts into gelatin, creating a soft, moist texture. This slow breakdown is what gives ribs that irresistible fall-off-the-bone tenderness.
If you crank up the heat and try to rush the process, the muscle fibers contract too quickly, pushing out moisture and resulting in tough, dry ribs. That’s why professional pitmasters swear by 225°F—it provides the perfect balance of heat and time to achieve succulent ribs.
How Long Does Low and Slow Take?
At 225°F, smoking times vary based on the type of ribs:
Baby Back Ribs → 5 to 6 hours
St. Louis & Spare Ribs → 6 to 7 hours
While these times are a great guideline, it’s important to check for doneness rather than relying solely on the clock.
The Role of Smoke Absorption
A slower cooking process at 225°F also allows ribs to absorb more smoke, enhancing their flavor. Different woods, such as hickory, applewood, or mesquite, contribute unique smoky notes to the meat. The longer ribs stay in the smoker, the deeper the smoke ring and the more complex the flavor profile.
By following the low and slow method, you ensure that your ribs turn out juicy, flavorful, and perfectly cooked—just like they should be.
Smoke Absorption and Flavor Development
One of the biggest advantages of smoking ribs at 225°F is the optimal smoke absorption, which enhances the depth of flavor. When cooked low and slow, ribs spend more time in the smoker, allowing them to take on the rich, smoky notes from the wood. The result? A beautifully flavored rack of ribs with a deep smoke ring and an irresistible aroma.
How Smoke Absorption Works
Smoke absorption happens primarily during the early stages of cooking, before the meat’s surface reaches 140°F. During this time:
The meat’s pores remain open, allowing the smoke to penetrate deeper.
Moisture on the surface of the ribs helps trap smoke particles, contributing to that signature BBQ flavor.
The formation of the smoke ring—a pinkish layer just beneath the surface—is a sign that the ribs have absorbed a good amount of smoke.
After the ribs reach 140°F internally, they still take on some smoke, but at a slower rate. That’s why it’s important to maintain a steady temperature and consistent smoke output during the first few hours of smoking.
Choosing the Best Wood for Smoking Ribs
Different types of wood impart different flavors to the ribs. Here are some of the best options:
Hickory – Bold, slightly sweet, and strong smoky flavor. A classic choice for ribs.
Applewood – Mellow and slightly fruity, perfect for a more subtle smoke profile.
Mesquite – Intense and earthy, best used in moderation to avoid overpowering the ribs.
Cherry – Adds a mild, sweet, and slightly tart flavor with a beautiful color.
Pecan – A nutty, rich smoke that pairs well with pork ribs.
For a balanced flavor, many pitmasters prefer mixing hickory and fruitwoods (apple or cherry) to get both depth and a hint of sweetness.
How to Enhance Smoke Flavor Without Overpowering the Ribs
Use seasoned or kiln-dried wood – Too much moisture in the wood can create a bitter, creosote-like taste.
Maintain thin, clean smoke – A blue-tinted, wispy smoke is ideal. Thick, white smoke can leave ribs with a harsh flavor.
Avoid excessive wood chunks – Adding too much wood at once can cause an overpowering smoky taste. It’s better to add smaller amounts gradually.
By controlling smoke absorption and choosing the right wood, you can achieve perfectly smoked ribs with a rich, complex flavor that isn’t too overpowering.
Preventing Dryness and Overcooking
One of the biggest challenges when smoking ribs is keeping them juicy and tender without drying them out. Since ribs are relatively lean, overcooking or improper smoking techniques can lead to tough, dry meat. The key to perfectly smoked ribs is maintaining the right balance of temperature, moisture, and cooking time.
Why Do Ribs Become Dry or Overcooked?
There are a few common reasons ribs can dry out during the smoking process:
1. Cooking at Too High a Temperature – If the smoker temperature exceeds 250°F, the ribs cook too quickly, causing them to lose moisture before the connective tissues break down properly.
2. Smoking for Too Long – While low and slow cooking is ideal, leaving ribs in the smoker for too many hours without proper monitoring can result in overcooked meat.
3. Not Using a Wrapping Method – Wrapping ribs at the right stage helps lock in moisture and prevents excessive evaporation.
4. Skipping the Resting Step – If you cut into the ribs immediately after smoking, the juices will escape, leaving the meat dry.
How to Prevent Dryness While Smoking Ribs
✅ Maintain a Consistent Temperature (225°F)
Always monitor your smoker’s temperature using a reliable thermometer.
Fluctuations in heat can cause uneven cooking, leading to dry spots.
If using a charcoal or wood smoker, ensure proper airflow and fuel management to keep the heat steady.
✅ Use a Water Pan in Your Smoker
A water pan placed inside the smoker adds humidity, preventing the ribs from drying out.
This is especially useful for charcoal or offset smokers, which can run dry over long cooking times.
Some pitmasters add apple juice, beer, or cider vinegar to the water pan to enhance flavor.
✅ Spritz the Ribs Regularly
Lightly spraying the ribs with a misting bottle every 45-60 minutes helps retain moisture.
Common spritzing liquids include:
Apple cider vinegar (adds tang and helps tenderize).
Apple juice (enhances sweetness).
A mix of water and Worcestershire sauce (adds umami depth).
Be careful not to overdo it, as too much spritzing can cool down the ribs and increase cooking time.
How to Avoid Overcooking Your Ribs
✅ Use the 3-2-1 Method (for Spare & St. Louis Ribs)
3 hours unwrapped in the smoker → Smoke penetrates and forms a bark.
2 hours wrapped in foil or butcher paper → Keeps ribs moist and tender.
1 final hour unwrapped → Allows the bark to firm up before serving.
✅ Check for Doneness Instead of Relying on Time
Rather than smoking for a set number of hours, check for doneness using these methods:
Internal Temperature: Ribs are done when they reach 190-205°F (use a meat thermometer).
Bend Test: Pick up the rack with tongs and gently bounce it. If the meat starts to crack, they’re ready.
Toothpick Test: Insert a toothpick between the bones. If it slides in easily with no resistance, the ribs are tender.
✅ Let the Ribs Rest Before Slicing
After removing from the smoker, let the ribs rest for 10-15 minutes before cutting.
Resting allows the juices to redistribute, preventing them from drying out when sliced.
By following these pro tips, you’ll ensure your ribs remain moist, flavorful, and never overcooked—giving you that perfect BBQ experience every time!
How Long to Smoke Different Types of Ribs at 225°F
Baby Back Ribs Cooking Time
Baby back ribs are one of the most popular types of ribs due to their tender texture, lean meat, and shorter cooking time compared to spare ribs or St. Louis-style ribs. When smoked at 225°F, they require a precise balance of time and technique to achieve fall-off-the-bone tenderness while retaining their juiciness.
How Long to Smoke Baby Back Ribs at 225°F
At 225°F, baby back ribs typically take 5 to 6 hours to cook properly. The exact time depends on factors such as rib size, meat thickness, smoker consistency, and whether you wrap them.
A general guideline for baby back ribs follows this timeline:
Unwrapped smoking phase: 3 hours
Wrapped phase (optional): 1.5 to 2 hours
Final unwrapped phase: 30 minutes to 1 hour
Using the 2-2-1 Method for Baby Back Ribs
Many pitmasters follow the 2-2-1 method to ensure baby back ribs stay moist and tender:
1. 2 hours of smoking unwrapped – Allows the ribs to absorb maximum smoke flavor and develop a nice crust (bark).
2. 2 hours wrapped in foil or butcher paper – Helps tenderize the meat by steaming in its own juices.
3. 1 final hour unwrapped – Firms up the bark and enhances caramelization of the sauce or glaze (if used).
How to Know When Baby Back Ribs Are Done
Instead of relying solely on cooking time, check for doneness using these methods:
✅ Internal Temperature Check
Baby back ribs are fully cooked when they reach an internal temperature of 190-205°F.
Use a digital meat thermometer by inserting it between the bones without touching them.
✅ Bend Test
Pick up the ribs with tongs from one end and gently bounce them.
If the ribs crack but don’t break apart completely, they are done.
✅ Toothpick Test
Insert a toothpick into the thickest part of the meat between the bones.
If it slides in easily without resistance, the ribs are ready.
✅ Bone Pull Test
If the bones slightly protrude and can be pulled with minimal effort, the ribs have reached perfect tenderness.
Should You Wrap Baby Back Ribs?
Wrapping baby back ribs in foil or butcher paper during the cooking process is optional but highly recommended if you want extra tender ribs. Wrapping helps:
✔ Lock in moisture and prevent drying out.
✔ Speed up cooking time by trapping heat.
✔ Enhance tenderness by steaming the meat in its own juices.
However, if you prefer a firmer bark, you can skip wrapping and smoke them unwrapped for the full duration, spritzing occasionally to keep them from drying out.
Final Tips for Perfect Baby Back Ribs
✔ Trim excess fat before smoking to ensure even cooking.
✔ Use a good dry rub to enhance flavor—let it sit for at least 30 minutes (or overnight).
✔ Choose the right wood—hickory, applewood, or cherry provide excellent flavor.
✔ Let ribs rest for 10-15 minutes before slicing to retain juices.
By following these steps, you’ll get juicy, smoky, and flavorful baby back ribs that are perfectly cooked every time!

St. Louis & Spare Ribs Cooking Time
St. Louis-style ribs and spare ribs are larger, meatier, and contain more fat compared to baby back ribs. This extra fat and connective tissue require a longer cooking time to fully break down, resulting in tender, flavorful ribs. When smoked at 225°F, these ribs take around 5.5 to 7 hours, depending on their size and thickness.
How Long to Smoke St. Louis-Style & Spare Ribs at 225°F?
Both St. Louis-style and spare ribs require slow, indirect heat to properly tenderize. Here’s a general time breakdown:
Unwrapped smoking phase: 3 hours
Wrapped phase (optional): 2 to 2.5 hours
Final unwrapped phase: 30 minutes to 1 hour
Since spare ribs contain more connective tissue than baby back ribs, they benefit from a longer cooking time to achieve that classic fall-off-the-bone texture.
Using the 3-2-1 Method for St. Louis & Spare Ribs
The 3-2-1 method is the most popular technique for smoking spare ribs:
1. 3 hours unwrapped in the smoker – Allows the ribs to absorb a deep smoky flavor and develop a crust (bark).
2. 2 hours wrapped in foil or butcher paper – Steams the ribs in their own juices, breaking down connective tissue for a more tender bite.
3. 1 final hour unwrapped – Helps firm up the bark and caramelize any sauce or glaze applied.
This method ensures tender and juicy ribs, but if you prefer a firmer bite, you can adjust the wrapped phase to 1.5 hours instead of 2.
How to Tell When St. Louis & Spare Ribs Are Done
Rather than relying strictly on time, it’s important to check for doneness using multiple methods:
✅ Internal Temperature Test
Ribs are fully cooked when they reach an internal temperature of 190-205°F.
Use a meat thermometer by inserting it into the thickest part without touching the bone.
✅ Bend Test
Pick up the ribs with tongs from one end and gently bounce them.
If the rack starts to crack but doesn’t fall apart, they are done.
✅ Toothpick Test
Insert a toothpick between the bones; if it slides in effortlessly, the ribs are ready.
✅ Bone Pull Test
If the meat has pulled back from the bones by about ½ inch, it’s a sign they are fully cooked.
Should You Wrap St. Louis & Spare Ribs?
Wrapping is optional but highly recommended for achieving extra tenderness. Wrapping helps:
✔ Retain moisture and prevent drying out.
✔ Speed up cooking by trapping heat.
✔ Break down collagen and fat, resulting in softer ribs.
If you prefer firmer bark, you can skip the wrap and let them cook unwrapped for the full duration, spritzing every hour with apple cider vinegar, apple juice, or water to prevent drying.
Final Tips for Perfect St. Louis & Spare Ribs
✔ Trim excess fat and remove the membrane before smoking for better texture.
✔ Use a flavorful dry rub and let the ribs marinate for at least 1 hour (or overnight).
✔ Choose the right wood—hickory, mesquite, oak, or cherry provide excellent smoke flavor.
✔ Let ribs rest for 15-20 minutes before slicing to retain juices.
By following these techniques, your St. Louis-style and spare ribs will turn out perfectly juicy, smoky, and flavorful every time!
How to Know When Ribs Are Done
Achieving perfectly cooked ribs requires more than just following a set cooking time. Because every rack of ribs is different in size, thickness, and fat content, it’s important to use visual, textural, and temperature-based methods to determine doneness. Here are the best ways to check if your ribs are fully cooked and ready to enjoy.
1. Internal Temperature Test
Using a digital meat thermometer is one of the most reliable ways to check if ribs are done. The ideal internal temperature depends on the desired texture:
190-200°F: Tender ribs with a bit of chew (competition-style texture).
200-205°F: Fall-off-the-bone tender, where the connective tissues have fully broken down.
To measure accurately, insert the thermometer probe between the bones in the thickest part of the meat without touching the bone.
2. Bend Test (Flex Test)
The bend test is a classic technique used by pitmasters. Here’s how it works:
Grab the rack of ribs with tongs in the middle.
Gently lift and bounce the ribs.
If the rack cracks but doesn’t completely break, it’s done.
If the ribs feel too stiff and don’t bend, they need more time. If they completely fall apart, they may have been overcooked.
3. Toothpick Test
This is one of the easiest ways to test rib tenderness:
Insert a toothpick into the thickest part of the meat between the bones.
If it slides in with little to no resistance, the ribs are fully cooked.
This method is similar to checking cake doneness—if the toothpick meets a lot of resistance, the ribs need more time.
4. Bone Pull Test
Look at the edges of the bones—if they have pulled back about ¼ to ½ inch from the meat, the ribs are getting close to being done.
Try gently twisting a bone—if it twists easily without much effort, the ribs are fully cooked.
If the meat is still gripping the bone tightly, the collagen and fat haven’t fully broken down yet, and the ribs need more time to cook.
5. The Clean Bite Test (Competition-Style Ribs)
If you want competition-style ribs that have a slight chew rather than fall-off-the-bone tenderness, use the bite test:
Take a bite from the middle of the rib.
If the meat comes off the bone cleanly but doesn’t fall apart, it’s perfectly cooked.
If the meat is mushy and falls off immediately, it’s overcooked. If it’s tough and doesn’t pull away cleanly, it needs more time.
Final Tips for Perfectly Cooked Ribs
✔ Don’t rush the process—low and slow cooking is key to achieving tender ribs.
✔ Rest the ribs for 10-15 minutes before slicing to allow juices to redistribute.
✔ If ribs finish early, wrap them in foil and place them in a cooler to keep warm without drying out.
By using a combination of these tests, you’ll ensure that your ribs turn out juicy, tender, and packed with smoky flavor every time!
Best Techniques for Smoking Ribs to Perfection
The 3-2-1 Method for Smoking Ribs
The 3-2-1 method is one of the most popular techniques for smoking ribs, especially spare ribs and St. Louis-style ribs. This method ensures ribs are tender, juicy, and packed with smoky flavor by following a structured timeline of smoking, wrapping, and finishing. The numbers refer to the time breakdown:
3 hours of smoking unwrapped
2 hours wrapped in foil or butcher paper
1 final hour unwrapped to finish
This approach allows the ribs to absorb smoke, retain moisture, and develop a beautiful bark without becoming too dry or tough.
—
Step 1: The First 3 Hours – Smoking Unwrapped
The first phase of the 3-2-1 method is all about smoke absorption and bark formation.
What Happens in This Stage?
The ribs are left unwrapped in the smoker at 225°F for 3 hours.
The surface of the meat absorbs smoky flavors from wood like hickory, applewood, or mesquite.
A crust (bark) begins to form on the outside, which contributes to texture and taste.
The meat starts to slowly break down as collagen and fat render.
Tips for This Phase:
✔ Use a flavorful dry rub – Season the ribs generously with your favorite rub at least 30 minutes before smoking. Some pitmasters let the rub sit overnight for deeper flavor penetration.
✔ Spritz every 45-60 minutes – Lightly misting the ribs with apple cider vinegar, apple juice, or a mix of water and bourbon keeps the meat moist and prevents drying.
✔ Maintain a steady temperature – Keeping the smoker at 225°F is crucial for proper smoke absorption.
—
Step 2: The Next 2 Hours – Wrapping for Tenderness
The second phase focuses on tenderizing the ribs by wrapping them in foil or butcher paper.
Why Wrap the Ribs?
Wrapping traps heat and moisture, essentially steaming the ribs in their own juices.
It speeds up the cooking process and helps break down connective tissue, making the ribs more tender.
It prevents the bark from becoming too dark or overly smoky.
How to Wrap the Ribs:
1. Lay out a large piece of aluminum foil or butcher paper.
2. Place the ribs meat-side down.
3. Add a liquid for extra moisture—popular choices include:
Apple juice or cider vinegar (for a tangy flavor)
Honey and butter (for sweetness and richness)
Beer or bourbon (for depth of flavor)
4. Wrap the ribs tightly, ensuring there are no leaks, and place them back in the smoker for 2 hours at 225°F.
Tips for This Phase:
✔ Don’t skip the liquid – It helps create a steam effect inside the wrap, ensuring ultra-tender ribs.
✔ Use foil for juicier ribs, butcher paper for a firmer bark – Butcher paper allows some moisture to escape, while foil locks everything in.
✔ Be careful when unwrapping – Hot steam and juices can spill out, so open the foil away from your face.
—
Step 3: The Final 1 Hour – Unwrapped for a Perfect Finish
The last phase is where the ribs develop their final texture and flavor.
What Happens in This Stage?
The ribs are removed from the wrap and placed back in the smoker.
This phase re-firms the bark and allows the exterior to develop a slight crispness.
If using a sauce, this is when you apply a glaze for a sticky, caramelized finish.
How to Finish the Ribs:
1. Brush with BBQ sauce (if desired) and place the ribs back on the smoker meat-side up.
2. Let them cook for 30-60 minutes until the sauce thickens and becomes tacky.
3. If you prefer a firmer crust, leave them unsauced and let the dry rub create a flavorful bark.
4. Once done, remove the ribs and let them rest for 10-15 minutes before slicing.
Tips for This Phase:
✔ Don’t overdo the sauce – Too much sauce can mask the smoky flavor. Apply a thin, even layer and let it caramelize naturally.
✔ Keep the temperature steady – Some pitmasters slightly increase the heat (to 250°F) in the last hour to speed up caramelization.
✔ Rest before slicing – This allows juices to redistribute, ensuring moist ribs.
—
Does the 3-2-1 Method Work for All Ribs?
The 3-2-1 method is best for spare ribs and St. Louis-style ribs, as they contain more fat and collagen that need extra cooking time. However, for baby back ribs, this method may be too long, leading to overcooked ribs.
For baby back ribs, consider a shorter 2-2-1 version:
2 hours unwrapped
2 hours wrapped
1 hour unwrapped for finishing
This adjustment helps maintain the tenderness and juiciness of baby back ribs without making them fall apart.
—
Final Thoughts on the 3-2-1 Method
The 3-2-1 method is a foolproof way to get juicy, flavorful ribs with minimal effort. By following this structured approach, you ensure:
✔ Deep smoke flavor from the first 3 hours.
✔ Tender, juicy meat from the wrapped steaming phase.
✔ Beautiful caramelization and bark in the final hour.
If you’re new to smoking ribs, this is a great technique to master before experimenting with different smoking times and styles. Try it out, and enjoy perfectly smoked ribs every time!
Dry Rub vs. Marinade – Which One to Use?
When preparing smoked ribs, one of the biggest decisions you’ll make is whether to use a dry rub or a marinade. Both methods infuse the meat with flavor, but they work in different ways and produce distinct textures. The choice depends on your preferred taste, the level of tenderness you want, and the type of ribs you’re smoking.
—
What is a Dry Rub?
A dry rub is a blend of spices, salt, sugar, and herbs that is rubbed directly onto the surface of the ribs before smoking. It forms a flavorful crust (bark) as the ribs cook, enhancing both texture and taste.
Benefits of Using a Dry Rub:
✔ Enhances the bark – As the ribs cook, the rub creates a slightly crispy, caramelized crust.
✔ Concentrated flavor – The combination of spices penetrates the meat, adding layers of taste.
✔ Less moisture loss – Dry rubs don’t add extra liquid, helping to maintain the integrity of the meat’s texture.
✔ No waiting time – You can apply a dry rub and start smoking immediately, making it a convenient option.
Common Ingredients in a Dry Rub:
Salt & Pepper – A must-have base for seasoning and bringing out natural meat flavors.
Brown Sugar – Helps with caramelization and balances the spice with a touch of sweetness.
Paprika – Adds a mild smokiness and enhances color.
Garlic Powder & Onion Powder – Provide depth and savory umami flavor.
Chili Powder & Cayenne Pepper – Add heat and a little kick.
Cumin & Mustard Powder – Enhance complexity and richness.
How to Apply a Dry Rub for Maximum Flavor:
1. Pat the ribs dry with a paper towel to remove excess moisture.
2. Apply a thin layer of binder (like mustard or olive oil) to help the rub stick.
3. Coat the ribs generously with the dry rub, pressing it into the meat.
4. Let the ribs sit for at least 30 minutes before smoking, or refrigerate overnight for deeper flavor penetration.
—
What is a Marinade?
A marinade is a liquid-based mixture that soaks into the ribs for several hours or overnight. It typically contains a combination of acid, oil, seasonings, and sometimes sweeteners to help tenderize the meat while adding flavor.
Benefits of Using a Marinade:
✔ Tenderizes the meat – The acids (vinegar, citrus, or buttermilk) help break down muscle fibers.
✔ Adds deep moisture – Marinades lock in juiciness, keeping ribs from drying out.
✔ Infuses flavor inside the meat – The liquid seeps into the fibers, ensuring even seasoning throughout.
✔ Perfect for leaner cuts – Works well on baby back ribs, which have less fat compared to spare ribs.
Common Ingredients in a Marinade:
Acids (Vinegar, Lemon Juice, Apple Cider, Buttermilk) – Help break down proteins for tenderness.
Oils (Olive Oil, Sesame Oil, Canola Oil) – Help carry fat-soluble flavors into the meat.
Soy Sauce or Worcestershire Sauce – Add savory umami notes.
Honey, Brown Sugar, or Molasses – Balance the acidity and add a touch of sweetness.
Herbs & Spices (Garlic, Ginger, Chili Flakes, Mustard, Black Pepper) – Boost flavor depth.
How to Marinate Ribs for Maximum Flavor:
1. Whisk together the marinade ingredients in a bowl.
2. Place the ribs in a large ziplock bag or dish and pour the marinade over them.
3. Refrigerate for at least 4 hours (overnight is ideal for deeper penetration).
4. Remove the ribs and pat them dry before placing them in the smoker to prevent steaming.
—
Which One Should You Use?
Both dry rubs and marinades have their advantages, and the best choice depends on your flavor preferences and cooking style.
Pro Tip: Use Both!
For maximum flavor, some pitmasters combine both methods:
1. Marinate the ribs first for deep internal flavor (4-12 hours).
2. Pat the ribs dry and apply a dry rub before smoking.
3. Let the rub sit for 30-60 minutes before putting the ribs in the smoker.
This approach gives you the tenderizing benefits of a marinade along with the crusty, flavorful bark of a dry rub.
—
Final Thoughts on Dry Rub vs. Marinade
Whether you choose a dry rub or a marinade, both methods can yield delicious, tender, and smoky ribs. If you love bold, crispy bark, go for a dry rub. If you prefer juicy, tender ribs with deep seasoning, a marinade is the way to go. Or, for the best of both worlds, combine both techniques to create ribs that are flavorful inside and out!
Best Wood for Smoking Ribs
The type of wood you choose for smoking ribs plays a crucial role in developing the flavor, aroma, and overall experience of your barbecue. Different woods impart unique flavors, and selecting the right one can enhance the natural taste of the meat while complementing your chosen dry rub or marinade.
How Wood Affects Smoke Flavor
Wood used in smoking breaks down into smoke, releasing natural compounds that penetrate the meat, adding depth to the flavor. Hardwoods with low resin content are preferred because they burn cleanly and produce a steady, aromatic smoke.
The best woods for smoking ribs fall into three main categories: mild, medium, and strong-flavored woods.
—
1. Mild Woods – Subtle & Sweet Smoke
If you prefer a mild, slightly sweet smoky flavor that doesn’t overpower the natural taste of pork, these woods are ideal.
Fruitwoods
✔ Apple – Delivers a sweet, fruity smoke that enhances pork’s natural sweetness. Great for baby back ribs.
✔ Cherry – Adds a mildly sweet, slightly tart flavor and gives the ribs a rich, dark mahogany color.
✔ Peach – A delicate, sweet smoke that works well in the summer months.
Other Mild Woods
✔ Alder – Has a light, slightly nutty flavor that pairs well with dry rubs and subtle seasoning.
✔ Pecan – A mild, nutty, and slightly sweet wood that adds a delicate smoke layer.
Best For: Those who enjoy a light, natural smoke flavor with a touch of sweetness.
—
2. Medium Woods – Balanced & Versatile Smoke
For those who want a stronger smoke presence without overwhelming the ribs, medium-strength woods provide a nice balance.
✔ Hickory – One of the most popular woods for smoking ribs, hickory provides a bold, smoky, slightly sweet and nutty flavor. However, it should be used in moderation, as too much can turn bitter.
✔ Maple – Offers a sweet, mild smokiness with a touch of caramel flavor, making it an excellent complement to pork ribs.
✔ Oak – A classic choice for barbecue, oak has a stronger smoke flavor than fruitwoods but is not overpowering, making it a great all-around option.
Best For: Those looking for a well-balanced smoky flavor that enhances the taste of the ribs without being too intense.
—
3. Strong Woods – Bold & Smoky Flavor
If you love a deep, rich, and bold smoky taste, stronger woods provide an intense flavor experience.
✔ Mesquite – One of the strongest smoking woods, mesquite delivers an earthy, intense, slightly bitter smoke. It should be used sparingly or blended with milder woods to avoid overpowering the ribs.
✔ Walnut – A very strong and slightly bitter wood that pairs best when mixed with milder options like apple or cherry.
Best For: Those who prefer a bold, Texas-style barbecue smoke flavor with deep, earthy notes.
—
Mixing Wood for a Unique Flavor Profile
Many pitmasters combine different woods to create a customized smoke flavor. Here are some great pairings:
✔ Apple + Hickory – A perfect balance of sweet and smoky flavors.
✔ Cherry + Oak – A mild fruitiness with a classic wood-smoked taste.
✔ Maple + Pecan – A nutty, sweet smoke that pairs well with caramelized rubs.
✔ Mesquite + Fruitwood – Adds a punch of smoke with a touch of mild sweetness to balance it out.
—
Best Wood Choice Based on Rib Type
—
Tips for Smoking Ribs with Wood
✔ Use wood chunks or chips – Chunks last longer and provide steady smoke, while chips burn faster.
✔ Soak wood chips (optional) – Soaking chips in water for 30 minutes can slow burning, but it’s not necessary if using chunks.
✔ Avoid too much smoke – Over-smoking can make ribs bitter. Use wood in moderation and maintain proper ventilation.
✔ Experiment! – Try different combinations to find your ideal smoky flavor.
—
Final Thoughts on Choosing the Best Wood for Smoking Ribs
Selecting the right wood is just as important as the smoking process itself. Whether you prefer a sweet fruitwood, a balanced oak-hickory mix, or a bold mesquite punch, the right wood choice will elevate your ribs to the next level. Experiment with different combinations to find your signature smoky flavor!
Should You Wrap Ribs While Smoking?
Benefits of Wrapping Ribs in Foil
Wrapping ribs in foil, often referred to as the Texas Crutch, is a popular technique used by pitmasters to enhance tenderness, retain moisture, and speed up the cooking process. This method is commonly used in the 3-2-1 smoking technique, where ribs are smoked unwrapped for a few hours, then wrapped in foil, and finally unwrapped again for the finishing stage.
Let’s explore the key benefits of wrapping ribs in foil and how it can improve the texture and flavor of your smoked ribs.
—
1. Retains Moisture and Prevents Drying Out
One of the biggest challenges in smoking ribs is keeping them moist. When ribs are cooked uncovered for long periods, the heat and smoke can draw out moisture, leading to drier meat.
✔ Foil acts as a barrier – It traps the natural juices and steam, allowing the ribs to braise in their own moisture.
✔ Prevents excessive evaporation – This is particularly useful in long smoking sessions where meat can lose too much water.
✔ Keeps the ribs tender – The retained moisture helps break down the collagen in the meat, making the ribs softer and juicier.
—
2. Speeds Up the Cooking Process
Smoking ribs at 225°F (107°C) is a slow process, and wrapping helps reduce cooking time by increasing heat retention.
✔ Encourages faster breakdown of connective tissue – The trapped steam creates a slightly higher temperature inside the foil, helping collagen and fat render more quickly.
✔ Shortens the stall phase – The stall happens when moisture evaporates from the meat’s surface, causing the temperature to plateau. Wrapping minimizes evaporation and pushes the ribs past this stage faster.
This method can save you up to an hour or more of cooking time while still achieving that fall-off-the-bone tenderness.
—
3. Enhances Flavor and Sauce Penetration
Wrapping in foil creates an enclosed environment where flavors can infuse deeper into the meat. This is especially useful if you apply:
✔ Butter, honey, or brown sugar – These add a rich, caramelized sweetness to the ribs.
✔ Apple juice, cider vinegar, or beer – These enhance moisture while adding subtle fruity or tangy flavors.
✔ BBQ sauce or glaze – Wrapping allows the sauce to meld with the ribs and form a delicious sticky coating.
If you enjoy ribs with a sweet, tangy, or saucy finish, wrapping is a great way to intensify the flavor.
—
4. Helps Achieve a More Tender Texture
Tenderness is a major goal when smoking ribs, and foil wrapping makes it easier to achieve a soft, pull-apart texture.
✔ Gentle steaming effect – The trapped heat and moisture soften the meat’s fibers.
✔ Prevents excessive bark hardening – While a crusty bark is desirable, leaving ribs unwrapped too long can cause them to become too dry or chewy.
✔ Perfect balance of texture – Wrapping ensures the inside remains juicy while the outer layer still has a nice bite.
This technique is particularly helpful for St. Louis-style and spare ribs, which have more connective tissue and benefit from a bit of steaming.
—
5. Prevents Over-Smoking
Too much smoke can overpower the meat, making it bitter or overly intense. Wrapping in foil helps control smoke exposure during the middle stage of cooking.
✔ Allows ribs to absorb just the right amount of smoky flavor – Wrapping after the first few hours ensures the ribs develop a great smoke ring and flavor without becoming too intense.
✔ Reduces the risk of creosote buildup – Excess smoke can leave an unpleasant, bitter taste. Foil helps moderate this effect.
This method is great if you prefer a milder, well-balanced smoky taste rather than an overly strong or acrid smoke flavor.
—
When Should You Wrap the Ribs?
The best time to wrap ribs in foil is when they hit an internal temperature of about 160-170°F (71-77°C). At this stage:
✔ The bark has formed, and the meat has absorbed a good amount of smoke.
✔ The ribs are entering the stall phase, and wrapping will push them past it.
✔ The meat is beginning to pull away from the bones, signaling that it’s time for the braising stage.
Typically, in a 3-2-1 method, wrapping happens during the second phase (the “2” in 3-2-1) for about 2 hours before finishing the ribs unwrapped.
—
Foil vs. Butcher Paper: What’s the Difference?
Some pitmasters prefer butcher paper over foil for wrapping ribs. Here’s a quick comparison:
If you prefer juicier ribs, go with foil. If you want a firmer bark with some smoke retention, use butcher paper.
—
Final Thoughts: Should You Wrap Your Ribs?
Wrapping ribs in foil offers many benefits, from moisture retention and faster cooking to enhanced flavor infusion and better tenderness. While some BBQ purists prefer to smoke ribs unwrapped for the entire cook, many pitmasters swear by wrapping to achieve the perfect balance of smoke, tenderness, and juiciness.
If you enjoy fall-off-the-bone, melt-in-your-mouth ribs, using foil wrapping in your smoking process is highly recommended!
When to Wrap and When to Skip It
Wrapping ribs is a widely debated technique in the BBQ world, with some pitmasters swearing by it and others preferring a fully unwrapped smoke. Understanding when to wrap your ribs and when to skip the foil can make a big difference in texture, moisture, and flavor.
Let’s break down the factors that influence this decision and how it affects the final results.
—
When to Wrap Ribs
Wrapping ribs in foil or butcher paper creates a steaming effect that speeds up cooking and helps keep the meat tender and juicy. Here are the key scenarios where wrapping is recommended:
1. If You Want Extra Tender Ribs
✔ Wrapping helps soften tough connective tissue by trapping moisture and heat.
✔ Ideal for those who prefer fall-off-the-bone ribs rather than a chewier texture.
2. If You Want to Shorten Cooking Time
✔ Wrapping helps push ribs through the stall phase, reducing total cooking time.
✔ Best when you need to serve ribs on a schedule without drying them out.
3. If You Want to Prevent Drying Out
✔ Useful for leaner cuts like baby back ribs, which can dry out quickly.
✔ Helps ribs retain their natural juices while allowing added flavors to penetrate.
4. If You’re Using the 3-2-1 Method
✔ The second stage (the “2” in 3-2-1) involves wrapping for about 2 hours to steam the meat.
✔ Ensures the ribs become tender before unwrapping for the final stage.
5. If You Want a Milder Smoke Flavor
✔ Wrapping stops excessive smoke exposure, preventing the ribs from tasting too strong or bitter.
✔ Ideal when using strong wood varieties like hickory or mesquite.
—
When to Skip Wrapping
While wrapping has benefits, some pitmasters prefer to leave ribs unwrapped to preserve a firmer texture and deeper smoke flavor. Here are the situations where skipping foil might be the better choice:
1. If You Prefer a Firmer Bark
✔ Wrapping softens the exterior, while leaving ribs unwrapped allows the bark to develop fully.
✔ Best for those who enjoy a chewier, meatier bite with a crispy crust.
2. If You Want Maximum Smoke Absorption
✔ Once wrapped, ribs stop absorbing smoke, so skipping foil gives them a deeper, more complex smoky flavor.
✔ Recommended if you enjoy a strong wood-fired taste.
3. If You’re Cooking at a Lower Temperature for Longer
✔ If you’re smoking at 225°F for 6+ hours, ribs naturally retain moisture, making wrapping unnecessary.
✔ Slow smoking keeps collagen and fat rendering at a steady pace, reducing the risk of dryness.
4. If You’re Using Butcher Paper Instead
✔ Butcher paper offers a middle-ground option, allowing some steam release while still keeping moisture in.
✔ Great for those who want a bit of a bark while preventing excessive dryness.
5. If You Enjoy the Texas-Style Approach
✔ Many Texas pitmasters prefer naked ribs (unwrapped) to highlight the meat’s natural flavor and texture.
✔ If you want a traditional, pure BBQ experience, skipping the foil is a great choice.
—
Final Thoughts: Should You Wrap or Not?
Ultimately, whether to wrap or skip it depends on your personal preference and the type of ribs you want:
✔ Wrap for ultra-tender, juicy ribs with a mild smoky flavor and shorter cooking time.
✔ Skip wrapping for firmer, bark-heavy ribs with a deep, smoky taste and longer cook time.
If you’re unsure, experiment with both methods to see which style suits your taste buds best!
Alternative Wrapping Materials
When smoking ribs, wrapping helps retain moisture, speed up cooking, and enhance tenderness. While aluminum foil is the most common choice, several alternative wrapping materials offer unique benefits, allowing pitmasters to experiment with different textures and flavors. Let’s explore some of the best alternatives to foil and how they impact the cooking process.
—
1. Butcher Paper – A Balanced Approach
Butcher paper, particularly pink (unwaxed) butcher paper, is a favorite among BBQ purists. Unlike foil, it allows some airflow and smoke penetration while still retaining moisture, creating a less steamed, more authentic BBQ texture.
Pros of Butcher Paper:
✔ Maintains bark formation better than foil
✔ Allows some smoke absorption even after wrapping
✔ Prevents ribs from getting too mushy or steamed
✔ Ideal for longer smokes at 225°F
Cons of Butcher Paper:
✘ Doesn’t retain as much moisture as foil, so ribs may not be as fall-off-the-bone tender
✘ Requires high-quality paper to prevent tearing from moisture and grease
Best Use Case:
✔ When you want tender ribs with a crispy bark
✔ When using a low-and-slow method and still want some smoke absorption
—
2. Parchment Paper – A Convenient Option
Parchment paper is a good alternative if you don’t have butcher paper on hand. While it’s not as breathable as butcher paper, it allows some moisture to escape, preventing ribs from becoming overly soft.
Pros of Parchment Paper:
✔ Readily available in most kitchens
✔ Can withstand high heat without burning
✔ Less risk of ribs sticking compared to foil
Cons of Parchment Paper:
✘ More delicate and prone to tearing when exposed to grease
✘ Doesn’t trap as much moisture as foil
✘ Not as breathable as butcher paper
Best Use Case:
✔ When you want to avoid aluminum foil but need a moisture barrier
✔ When cooking at moderate heat (below 350°F) to avoid burning
—
3. Banana Leaves – A Natural Choice
Banana leaves are commonly used in tropical and Latin American cooking for wrapping meats. They provide a mild, earthy aroma and lock in moisture without trapping steam as aggressively as foil.
Pros of Banana Leaves:
✔ Adds a subtle herbal flavor to ribs
✔ Retains moisture without making ribs soggy
✔ 100% natural and biodegradable
Cons of Banana Leaves:
✘ Not always easy to find in regular grocery stores
✘ Can burn if exposed to direct flames
✘ Requires soaking or steaming before use to make them pliable
Best Use Case:
✔ When you want a natural, slightly aromatic wrap
✔ When experimenting with unique flavors for smoked ribs
—
4. Corn Husks – A Rustic Alternative
Corn husks are another natural wrapping option, commonly used in tamales but also effective for wrapping smoked meats. They allow moderate airflow and impart a mildly sweet, smoky aroma to the ribs.
Pros of Corn Husks:
✔ Naturally enhances the smoky aroma of ribs
✔ Creates a slightly firmer texture compared to foil-wrapped ribs
✔ Readily available in many grocery stores
Cons of Corn Husks:
✘ Must be soaked in water before use to prevent burning
✘ Not as durable as foil or butcher paper
✘ Can dry out if not wrapped tightly
Best Use Case:
✔ When you want a natural, slightly sweet wrap for a subtle flavor twist
✔ Best for grilled or smoked ribs with a rustic, earthy taste
—
5. Cabbage or Collard Leaves – A Moisture-Rich Alternative
For a creative, vegetable-based wrapping option, large cabbage or collard leaves can work surprisingly well. They naturally retain moisture while allowing some air circulation, preventing over-steaming.
Pros of Cabbage/Collard Leaves:
✔ Infuses a mild, vegetal sweetness into the meat
✔ Helps keep ribs juicy without making them mushy
✔ Eco-friendly and completely natural
Cons of Cabbage/Collard Leaves:
✘ Not as durable as foil or paper
✘ Requires multiple layers to fully protect the ribs
✘ Can become too soft and fragile if overcooked
Best Use Case:
✔ When you want a plant-based alternative to foil
✔ Ideal for smoked ribs with a unique, mild herbal note
—
Which Wrapping Material is Best for You?
—
Final Thoughts: Choosing the Right Wrap
While aluminum foil remains the most widely used wrapping material, exploring alternatives like butcher paper, banana leaves, and corn husks can add unique flavors and textures to your ribs.
Use foil if you want extra juicy ribs with a softer texture.
Use butcher paper for a balance of tenderness, bark, and smoke absorption.
Use banana leaves or corn husks if you want a natural, slightly aromatic twist to your ribs.
Experiment with cabbage or collard leaves if you’re looking for a moisture-locking, plant-based option.
Ultimately, the best way to find your perfect wrap is through experimentation—so don’t be afraid to try different methods and discover which one suits your BBQ style best!
Final Steps – Resting, Slicing, and Serving Smoked Ribs
Why Resting Ribs is Important
Resting your ribs after smoking is just as important as the cooking process itself. Many BBQ enthusiasts make the mistake of slicing into ribs right off the smoker, only to find that all the flavorful juices run out onto the cutting board, leaving the meat drier than expected. Allowing ribs to rest properly enhances tenderness, preserves juiciness, and deepens the flavor. Let’s break down why resting is crucial and how to do it correctly.
—
1. Juice Redistribution for Maximum Tenderness
During the smoking process, heat causes the meat’s muscle fibers to tighten, pushing moisture toward the surface. If you cut into the ribs immediately after taking them off the smoker, those juices spill out instead of being reabsorbed. Resting gives the ribs time to relax, allowing the juices to redistribute throughout the meat, leading to juicier, more flavorful bites.
What Happens If You Don’t Rest Your Ribs?
✘ Juices escape, leading to dry ribs
✘ The texture may feel slightly tougher
✘ The ribs won’t have time to develop their full depth of flavor
—
2. Carryover Cooking – Finishing the Process Off-Heat
Even after removing ribs from the smoker, the internal temperature continues to rise due to residual heat. This process, known as carryover cooking, can increase the temperature by 5-10°F depending on the thickness of the ribs.
If you slice into the ribs too soon, they lose heat and moisture too quickly, preventing them from reaching the ideal final texture. Resting allows this process to happen gradually, ensuring perfect doneness without overcooking.
Ideal Resting Time for Ribs
✔ 15-30 minutes – The sweet spot for perfect moisture retention
✔ 5-10 minutes – If you’re short on time, this is the absolute minimum
✔ Over 30 minutes – Only necessary if you’re holding them for serving later (use a warm cooler or oven)
—
3. Improved Bark and Smoke Flavor Development
Resting ribs doesn’t just preserve moisture—it also enhances the texture and taste. The bark (outer crust), which forms from the dry rub and smoke, firms up slightly during resting, giving you that satisfying bite without being too chewy or soft.
Additionally, resting gives the smoke, rub, and rendered fat more time to meld together, creating a deeper and more balanced BBQ flavor profile.
—
4. The Best Way to Rest Ribs
To rest ribs properly, follow these steps:
1. Remove ribs from the smoker and place them on a cutting board or tray.
2. Loosely tent them with foil to keep them warm while allowing excess steam to escape (this prevents the bark from getting soggy).
3. Let them sit for 15-30 minutes to allow juices to redistribute and flavors to settle.
4. Slice and serve for the perfect texture and flavor.
Pro Tip: Want to keep ribs warm for longer?
✔ Wrap them in butcher paper and place them in a cooler lined with towels—this will keep them hot for 1-2 hours without overcooking.
—
Final Thoughts: Resting is the Key to Perfect Ribs
Resting ribs isn’t just a small step—it’s the final touch that brings everything together. Skipping this process can lead to dry, tough meat, while a proper rest ensures juicy, tender, and flavorful ribs every time. Whether you’re smoking baby back ribs or St. Louis-style spare ribs, always allow enough time for a proper rest before serving.
Your patience will be rewarded with BBQ perfection!
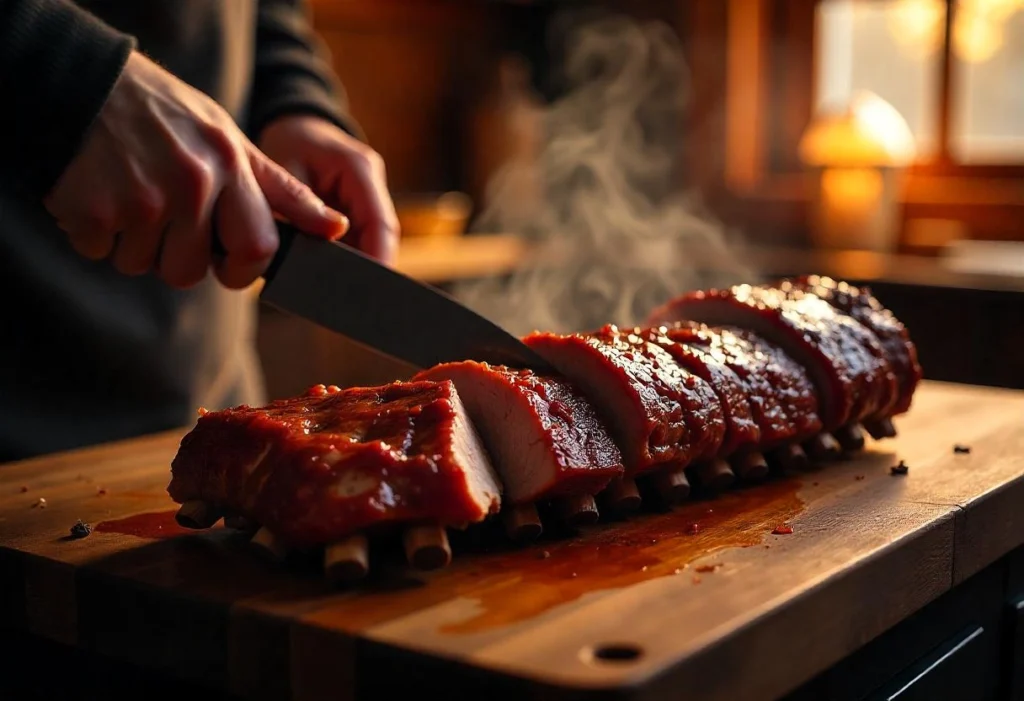
Best Way to Slice Ribs for Perfect Presentation
Slicing your ribs correctly is just as important as smoking them to perfection. A well-cut rack of ribs not only enhances the presentation but also ensures that each serving is tender, juicy, and easy to eat. Whether you’re preparing baby back ribs, St. Louis-style ribs, or spare ribs, using the right technique will make all the difference.
Here’s a step-by-step guide to slicing ribs like a pro:
—
1. Let the Ribs Rest Before Slicing
Before you start cutting, make sure to let your ribs rest for 15-30 minutes. This allows the juices to redistribute, ensuring each rib stays moist and tender instead of drying out immediately after slicing. If you cut into hot ribs too soon, the juices will run out, leaving the meat less flavorful.
Pro Tip:
✔ Loosely tent the ribs with foil while resting to keep them warm without trapping too much moisture.
—
2. Use a Sharp Knife for Clean Cuts
A sharp knife is essential for slicing ribs cleanly without tearing the meat. A chef’s knife, carving knife, or slicing knife with a long, sharp blade will work best. Avoid serrated knives, as they can shred the meat instead of making smooth, even cuts.
Recommended Knife Types:
✔ Carving knife – Ideal for precision slicing
✔ Boning knife – Useful for cutting around the bones
✔ Chef’s knife – A versatile option for most cuts
—
3. Identify the Rib Bones for Proper Slicing
One of the biggest mistakes people make when slicing ribs is cutting blindly without considering the bone structure. Ribs aren’t perfectly straight, so it’s important to find where the bones are positioned before slicing.
How to Find the Bones:
✔ Turn the ribs meat-side down – The bones are easier to see from the back.
✔ Feel along the rack with your knife to locate the gaps between the bones.
✔ Angle your cuts slightly to follow the natural shape of the bones for even portions.
—
4. Cut Between the Bones for Perfect Rib Portions
Once you’ve identified the bones, slice between them to create evenly sized rib portions. Use smooth, confident strokes to avoid jagged edges or uneven pieces.
Tips for the Best Cut:
✔ Single-bone slices – Best for serving ribs individually.
✔ Double-bone slices – Great for a heartier serving size.
✔ Avoid cutting too close to one side – This ensures each rib has a good balance of meat and bone.
Pro Tip for St. Louis & Spare Ribs:
Since these ribs are wider and meatier, cutting them into half-rack portions first can make slicing easier.
—
5. Arrange the Ribs for an Eye-Catching Presentation
After slicing, how you arrange your ribs on the plate or platter can make a huge difference in presentation. Here are a few ways to make your ribs look restaurant-quality:
Plating Ideas:
✔ Fanned Out: Overlap the ribs slightly in a fanned-out arrangement for a professional BBQ look.
✔ Stacked: Stack ribs in small piles for a more rustic, hearty feel.
✔ Standing Up: Arrange the ribs vertically with the bone side down for a unique visual effect.
For extra appeal, brush the ribs lightly with BBQ sauce before serving and garnish with fresh herbs, pickled onions, or a side of coleslaw.
—
Final Thoughts: Perfect Slicing for Perfect Ribs
Slicing ribs properly isn’t just about looks—it ensures that every bite is juicy, tender, and easy to eat. By following these steps, you’ll impress your guests with perfectly cut ribs that showcase all your hard work on the smoker.
So, grab your sharpest knife, follow the bone structure, and serve your ribs like a true pitmaster!
The Best BBQ Sauces & Sides for Smoked Ribs
Smoked ribs are a BBQ masterpiece on their own, but the right sauce and side dishes can elevate them to the next level. A well-chosen BBQ sauce enhances the smoky, savory flavors, while the perfect sides provide balance, texture, and contrast, making for a complete and satisfying meal.
—
1. Choosing the Right BBQ Sauce for Smoked Ribs
BBQ sauce plays a crucial role in complementing the deep, smoky flavor of ribs. Depending on regional styles and personal preferences, you can go for a sauce that’s sweet, tangy, spicy, or bold. Here are some of the most popular BBQ sauces to pair with smoked ribs:
Classic BBQ Sauce Styles
✔ Kansas City-Style Sauce – Thick, sweet, and tangy with a tomato base, molasses, and a touch of spice. This is one of the most popular sauces for ribs.
✔ Memphis-Style Sauce – Vinegar-based with a thinner consistency, offering a tangy, slightly sweet taste. Often used for dipping rather than coating.
✔ Texas-Style Sauce – Bold and smoky with a tomato base, Worcestershire sauce, and black pepper. Works great for beef ribs but also adds depth to pork ribs.
✔ Carolina Mustard Sauce – Mustard-based and slightly tangy with vinegar, honey, and spices. This sauce brings a unique twist to ribs, especially for those who enjoy a bit of acidity.
✔ Alabama White Sauce – A creamy, tangy mayo-based sauce with vinegar and black pepper. Not as common for ribs, but a fantastic choice if you want something different.
✔ Spicy Chipotle Sauce – A smoky, spicy sauce made with chipotle peppers and a touch of honey. Ideal for those who love heat.
✔ Homemade BBQ Sauce – If you love to experiment, making your own sauce lets you control the flavors, from sweet and smoky to bold and spicy.
When to Apply BBQ Sauce on Ribs
To get the best results:
✔ Brush sauce on in the last 30 minutes of smoking to avoid burning the sugars.
✔ Apply in thin layers, building up a nice glaze instead of drenching the ribs.
✔ Serve extra sauce on the side for dipping—some people love their ribs extra saucy!
—
2. Best Side Dishes to Serve with Smoked Ribs
Ribs are rich and flavorful, so the best sides should complement their smokiness while adding freshness, crunch, or creaminess. Here are some classic and unique sides that pair perfectly with smoked ribs:
Classic BBQ Side Dishes
✔ Coleslaw – A crisp, tangy slaw balances the richness of ribs, especially if made with vinegar instead of mayo.
✔ Baked Beans – Smoky, sweet, and slightly spicy beans cooked with bacon or brisket pieces make for a hearty side.
✔ Mac and Cheese – Creamy, cheesy, and comforting—this is a must-have for any BBQ plate.
✔ Cornbread – Slightly sweet and crumbly, cornbread is a Southern staple that pairs beautifully with smoky ribs.
✔ Potato Salad – A creamy or vinegar-based potato salad adds a cooling, rich contrast to BBQ ribs.
✔ Collard Greens – Slow-cooked greens with smoked ham hock or bacon bring a deep, earthy flavor.
✔ Grilled Corn on the Cob – Brushed with butter and seasoned with salt, pepper, or chili lime, grilled corn is a perfect smoky-sweet side.
Fresh and Light Side Options
✔ Cucumber Tomato Salad – A fresh, crisp salad with a tangy vinaigrette helps cut through the richness of the ribs.
✔ Grilled Vegetables – Zucchini, bell peppers, and asparagus grilled alongside the ribs provide a healthy, flavorful contrast.
✔ Pickled Vegetables – The acidity of pickled onions, cucumbers, or jalapeños adds a refreshing bite that enhances the smoky ribs.
✔ Fruit Salad – A light fruit salad with watermelon, pineapple, or citrus brings a natural sweetness that balances smoky BBQ flavors.
Unique and Creative Side Ideas
✔ Jalapeño Cheddar Cornbread – A spicy, cheesy twist on classic cornbread for those who love heat.
✔ Sweet Potato Fries – The natural sweetness of roasted or fried sweet potatoes pairs well with smoky BBQ sauce.
✔ Elote (Mexican Street Corn) – Grilled corn slathered with mayo, cotija cheese, lime, and chili powder for a bold, zesty side.
✔ Hush Puppies – Crispy, deep-fried cornmeal balls that add a satisfying crunch.
✔ BBQ Deviled Eggs – Classic deviled eggs with a smoky, BBQ-infused twist.
—
3. Best Drinks to Pair with Smoked Ribs
To complete your BBQ feast, pair your ribs with a refreshing drink. Here are some great options:
✔ Sweet Tea – A Southern classic that balances smoky and spicy flavors.
✔ Lemonade – The acidity of lemonade cuts through the richness of BBQ ribs.
✔ Cold Beer – A crisp lager, pale ale, or a smoky porter pairs well with BBQ flavors.
✔ Whiskey or Bourbon – The caramel and smoky notes of bourbon complement smoked ribs beautifully.
✔ Iced Coffee or Cold Brew – A slightly sweet cold brew coffee can enhance BBQ’s deep flavors.
✔ Fruit-Infused Sparkling Water – A light, bubbly option that keeps your palate refreshed.
—
Final Thoughts: The Perfect BBQ Pairings
The best BBQ experience goes beyond just smoking ribs—it’s about the full meal experience. Whether you prefer sweet and tangy BBQ sauce, classic comfort sides, or fresh and light accompaniments, the right pairings enhance the smoky, tender goodness of your ribs.
So fire up the smoker, choose your favorite sauces, sides, and drinks, and get ready to enjoy a BBQ feast to remember!
Conclusion
Smoking ribs at 225°F is the key to achieving that perfect tenderness, rich smoky flavor, and juicy bite. By mastering the low and slow cooking method, choosing the right wood for smoking, and using techniques like the 3-2-1 method or wrapping in foil, you can elevate your BBQ game to professional levels.
Remember to monitor your ribs’ doneness using the bend test, toothpick test, or meat thermometer to ensure they’re cooked to perfection. Resting your ribs before slicing allows the juices to redistribute, keeping them moist and flavorful.
Finally, the right BBQ sauce and side dishes will enhance your smoked ribs, making for a complete and satisfying meal. Whether you prefer classic baked beans and cornbread or fresh salads and grilled veggies, pairing your ribs with the perfect accompaniments ensures a well-balanced and memorable BBQ experience.
Now that you have all the knowledge and techniques at your fingertips, it’s time to fire up the smoker and make the best ribs of your life! Happy smoking!