
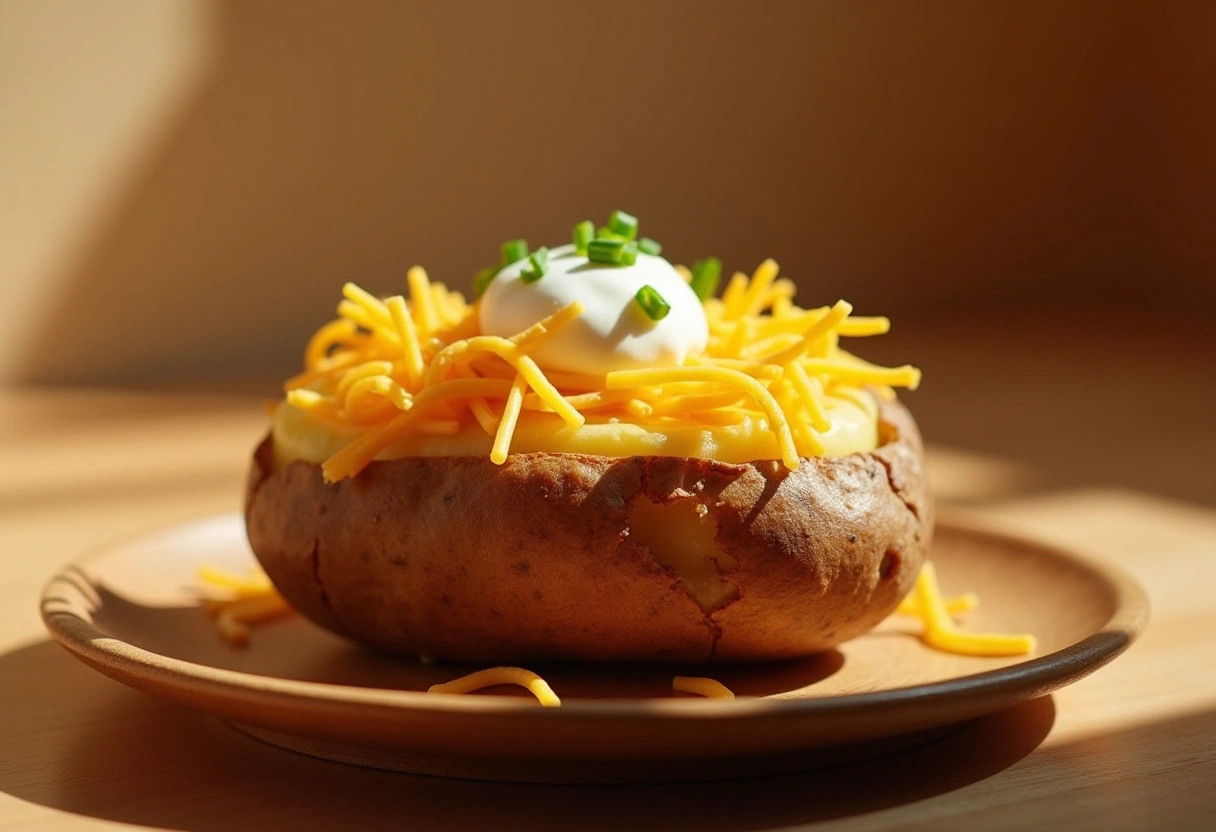
There’s nothing quite like a perfectly baked potato—crispy on the outside, soft and fluffy on the inside. Whether you’re serving it as a side dish or loading it up with delicious toppings, knowing how to bake a potato the right way makes all the difference.
Many people struggle with achieving crispy skin while keeping the inside light and tender. The key lies in selecting the right potato, using proper seasoning, and baking at the perfect temperature. Should you wrap your potato in foil? What’s the best baking time? In this guide, we’ll answer all these questions and walk you through the foolproof method for baking the perfect potato in the oven.
By the end of this post, you’ll have restaurant-quality baked potatoes that are simple to make and packed with flavor. Let’s get started!
Choosing the Best Potato for Baking
Why Russet Potatoes Are the Best Choice
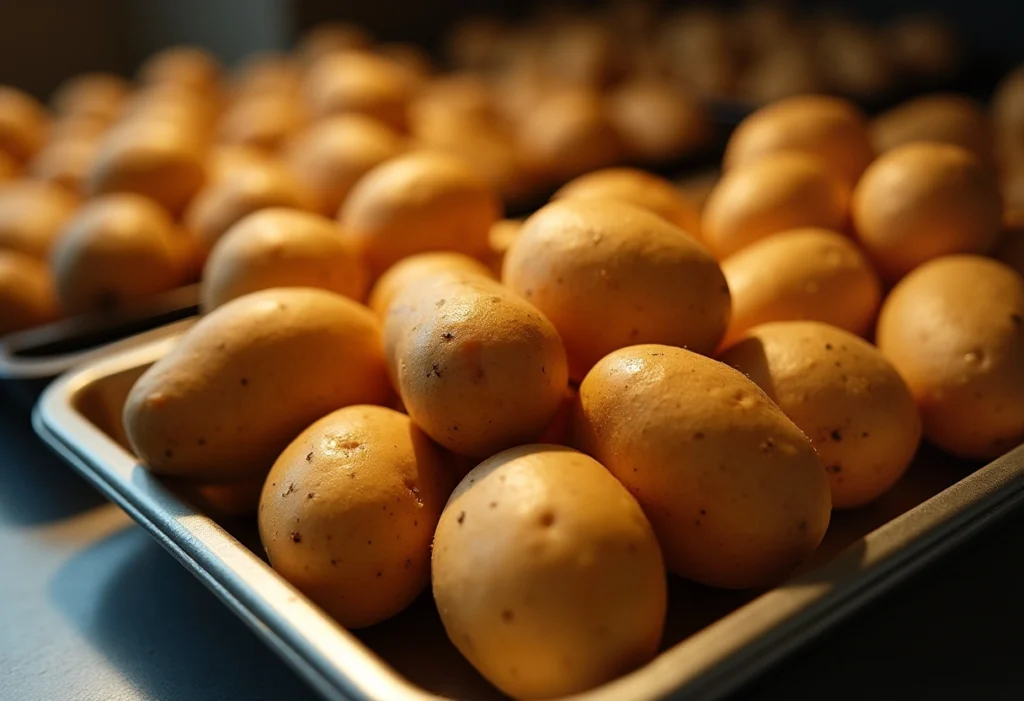
When it comes to baking potatoes, not all varieties are created equal. The type of potato you choose can greatly impact the final texture and flavor of your baked potato. While you might come across different options at the grocery store, Russet potatoes stand out as the best choice for achieving that perfect balance of crispy skin and fluffy interior. Here’s why:
1. High Starch Content = Fluffy Texture
Russet potatoes are considered high-starch potatoes, meaning they contain more dry starch granules and less moisture than waxy varieties like Yukon Gold or Red potatoes. When baked, the starch granules absorb moisture and expand, creating that light, airy, and fluffy interior we all love. This makes them ideal for absorbing butter, sour cream, or any other toppings you add after baking.
2. Thick Skin for Extra Crispiness
One of the defining features of a great baked potato is a crispy, golden-brown skin. Russet potatoes naturally have thicker skin, which crisps up beautifully when coated with olive oil and salt before baking. This gives the potato a delicious contrast between the crunchy exterior and the soft, steamy inside.
3. Neutral Flavor for Versatile Toppings
Russet potatoes have a mild, earthy flavor that pairs well with a variety of seasonings and toppings. Whether you prefer a classic combination of butter and chives, a hearty loaded baked potato with cheese and bacon, or a healthier option like Greek yogurt and avocado, Russet potatoes provide the perfect base to customize your dish.
4. Ideal Size for Even Baking
Most Russet potatoes are medium to large in size, making them perfect for baking. Their even shape ensures they cook consistently, so you don’t end up with an undercooked center or an overcooked exterior. For best results, choose potatoes that are similar in size so they bake evenly at the same time.
Final Verdict: Stick with Russets for the Best Baked Potatoes
While you can bake other potato varieties, Russet potatoes remain the top choice if you want a perfect balance of crisp skin and a soft, fluffy center. Their high starch content, thick skin, and neutral flavor make them ideal for baking, whether you’re making a simple side dish or a fully loaded baked potato meal.
So next time you’re at the store, reach for Russet potatoes and follow the right baking method for perfect results every time!
Yukon Gold vs. Russet: Which One to Use?
When it comes to baking potatoes, Russet and Yukon Gold are two of the most common choices. While both are delicious, they have distinct differences in texture, moisture content, and best uses. If you’re wondering whether you can substitute Yukon Gold for Russet in a baked potato recipe, let’s break down the key differences and determine which one is the better choice for baking.
—
1. Texture & Starch Content: Fluffy vs. Creamy
The biggest difference between Yukon Gold and Russet potatoes comes down to starch content and texture.
Russet Potatoes: These are high-starch, low-moisture potatoes, meaning they become light, airy, and fluffy when baked. The starch granules absorb moisture and expand, creating that classic tender, flaky interior that pairs perfectly with butter and toppings.
Yukon Gold Potatoes: These are medium-starch, waxy potatoes with a naturally creamy, dense texture. Unlike Russets, they don’t become as fluffy when baked. Instead, they hold their shape well and offer a smooth, buttery bite.
➡️ Winner for Baking: Russet potatoes because their high starch content ensures a soft, fluffy interior, ideal for a classic baked potato.
—
2. Skin Thickness & Crispiness
The outer skin plays a crucial role in achieving a crispy baked potato.
Russet Potatoes: Have thicker, rough-textured skin, which crisps up beautifully in the oven when brushed with oil and salt.
Yukon Gold Potatoes: Have thin, smooth skin, which doesn’t crisp up as well as Russet potatoes. While it remains edible and tender, it won’t give you that crunchy, golden-brown exterior.
➡️ Winner for Crispy Skin: Russet potatoes because their thicker skin allows for a perfectly crisp, golden-brown crust.
—
3. Moisture Content: Dry vs. Buttery
Moisture content affects how a potato bakes and absorbs seasonings.
Russet Potatoes: Have a drier texture, which helps them absorb butter, sour cream, and other toppings easily without becoming soggy.
Yukon Gold Potatoes: Contain more natural moisture, resulting in a creamier bite but making it harder to achieve a fluffy, airy texture when baked.
➡️ Winner for Absorbing Toppings: Russet potatoes, because their dry interior soaks up butter, cheese, and seasonings effortlessly.
—
4. Best Uses: Baking vs. Roasting & Mashing
Each potato variety shines in different types of dishes.
Russet Potatoes: Best for baking, mashing, and frying because of their light, fluffy texture.
Yukon Gold Potatoes: Best for roasting, mashing, and soups because of their creamy consistency and ability to hold their shape.
➡️ Winner for Baking: Russet potatoes, because their structure and texture are ideal for a classic, restaurant-style baked potato.
—
Final Verdict: Which One Should You Use?
If you want the perfect baked potato with crispy skin and a fluffy inside, Russet potatoes are the clear winner. However, if you prefer a creamy, dense bite with thinner skin, you can try baking Yukon Gold, though it won’t have the same light and airy texture.
Summary:
| Feature | Russet Potatoes | Yukon Gold Potatoes |
|———|—————-|———————-|
| Starch Content | High (Fluffy) | Medium (Creamy) |
| Skin Thickness | Thick (Crispy) | Thin (Tender) |
| Moisture Level | Low (Dry) | High (Moist) |
| Best For | Baking, Mashing, Frying | Roasting, Mashing, Soups |
For classic oven-baked potatoes, always go with Russet potatoes for the best results!
Organic vs. Regular Potatoes: Does It Matter?
When shopping for potatoes, you might wonder whether organic potatoes are worth the extra cost or if regular (conventional) potatoes will work just as well. While both types will bake up deliciously, there are key differences in how they’re grown, their pesticide exposure, flavor, and overall health benefits. Let’s break it down so you can make the best choice for your baked potatoes.
—
1. Pesticide Exposure: The “Dirty Dozen” Factor
One of the biggest reasons people choose organic potatoes is to avoid pesticides and chemical residues.
Regular (Conventional) Potatoes: Potatoes are on the Environmental Working Group’s (EWG) “Dirty Dozen” list, meaning they are one of the most pesticide-contaminated crops. Since potatoes grow underground, they absorb pesticides and chemicals from the soil, and their thin skin doesn’t provide much protection. Even washing and peeling them may not completely remove all residues.
Organic Potatoes: These are grown without synthetic pesticides, herbicides, or chemical fertilizers, making them a cleaner, more natural option. Because they aren’t exposed to as many chemicals, organic potatoes may be a better choice if you’re concerned about pesticide consumption.
➡️ Winner for Health & Fewer Chemicals: Organic potatoes, since they contain little to no pesticide residue.
—
2. Nutritional Differences: Are Organic Potatoes Healthier?
Nutritionally, both organic and conventional potatoes provide essential vitamins, minerals, and fiber. However, some studies suggest that organic potatoes may have slightly higher levels of antioxidants and nutrients due to the way they are grown.
Higher Antioxidants: Organic potatoes often contain more polyphenols and antioxidants, which help reduce inflammation and fight free radicals in the body.
More Natural Growth: Since organic potatoes aren’t treated with growth chemicals, they may develop a more natural nutrient profile, making them a slightly healthier choice.
➡️ Winner for Slightly Better Nutrition: Organic potatoes, though the difference isn’t drastic.
—
3. Taste & Texture: Do Organic Potatoes Taste Better?
Some chefs and home cooks claim that organic potatoes have a richer, earthier flavor compared to conventionally grown potatoes. The difference in taste could be due to:
Healthier Soil: Organic farming practices improve soil quality, which may enhance the natural flavors of the potatoes.
Slower Growth: Without synthetic fertilizers, organic potatoes often grow at a more natural pace, leading to a denser, richer texture.
However, the taste difference is subtle, and most people won’t notice it unless they compare organic and regular potatoes side by side.
➡️ Winner for Slightly Better Taste: Organic potatoes, though it depends on personal preference.
—
4. Cost & Availability: Are Organic Potatoes Worth It?
Regular Potatoes: More affordable and widely available at grocery stores and markets.
Organic Potatoes: Typically cost 20-50% more than conventional potatoes due to higher farming and certification costs. They may not always be available in smaller grocery stores.
If you’re on a budget, conventional potatoes are still a great option—just wash them thoroughly and peel them if needed to reduce pesticide exposure.
➡️ Winner for Affordability & Availability: Regular potatoes.
—
5. Sustainability & Environmental Impact
Organic farming is generally better for the environment since it avoids harmful pesticides, promotes soil health, and reduces water contamination.
Conventional farming often uses synthetic fertilizers and pesticides that can contribute to soil degradation, water pollution, and biodiversity loss.
If sustainability is important to you, organic potatoes are the more eco-friendly choice.
➡️ Winner for Environmental Impact: Organic potatoes.
—
Final Verdict: Which One Should You Choose?
Both organic and regular potatoes will bake beautifully, but your choice depends on your budget, health concerns, and environmental priorities.
Choose organic potatoes if you want to reduce pesticide exposure, support sustainable farming, and possibly enjoy a slightly richer flavor.
Choose regular potatoes if you’re looking for a budget-friendly option and are okay with thoroughly washing or peeling them to minimize chemical residues.
Summary:
| Feature | Organic Potatoes | Regular Potatoes |
|———|—————-|—————-|
| Pesticide Exposure | No synthetic pesticides | May contain pesticide residues |
| Nutrient Content | Slightly higher antioxidants | Standard nutrition |
| Taste | Slightly richer, earthier flavor | Mild, classic potato taste |
| Cost | More expensive | More affordable |
| Availability | Less common | Widely available |
| Environmental Impact | Sustainable farming | Higher chemical use |
Final Tip: If you can afford it, organic potatoes are the better choice for health and sustainability. But if you’re on a budget, conventional potatoes work just as well—just be sure to wash them thoroughly before baking!
Preparing Your Potatoes for the Oven
Should You Wash and Dry Potatoes Before Baking?
Absolutely! Washing and drying potatoes before baking is a crucial step that ensures food safety, enhances texture, and helps achieve that perfectly crispy skin. Even if your potatoes look clean, they can still have dirt, bacteria, and pesticide residues on the surface. Let’s break down why this step is important and how to do it properly.
—
1. Why Washing Potatoes Is Essential
Potatoes grow underground, meaning they often come covered in dirt, debris, and sometimes even bacteria. Even pre-washed potatoes from the store may still have some residual soil or chemical coatings. Here’s why you should always wash them:
Removes Dirt & Bacteria: Potatoes are often stored in large bins where they can collect dust, germs, and even mold spores. Washing ensures you’re not baking those into your food.
Eliminates Pesticides & Chemicals: Non-organic potatoes may have pesticide residues, fungicides, or preservatives on their skin. Rinsing and scrubbing helps reduce these unwanted substances.
Prevents a Gritty Texture: Baking an unwashed potato can lead to an unpleasant, gritty bite if any dirt remains on the skin.
➡️ Bottom Line: Always wash your potatoes thoroughly, even if they look clean!
—
2. How to Properly Wash Potatoes
Washing potatoes is simple, but doing it the right way ensures you remove all unwanted residues. Follow these steps:
Step 1: Rinse Under Cold Running Water
Hold the potatoes under cool, running water and gently rub the surface with your hands to remove loose dirt.
Step 2: Use a Vegetable Brush or Scrubber
A stiff-bristled vegetable brush works best to scrub off stubborn dirt and residues.
Focus on any rough patches or indentations where dirt tends to stick.
If you don’t have a vegetable brush, use a clean dish sponge (the rough side) to scrub.
Step 3: Inspect for Any Bad Spots
Look for sprouts, blemishes, or soft spots and remove them with a paring knife.
Small green spots indicate exposure to light and a possible buildup of solanine, a natural toxin. Cut these areas off before baking.
Step 4: Give One Final Rinse
After scrubbing, rinse the potatoes one last time to ensure no dirt or soap-like residue remains.
—
3. Why Drying Potatoes is Just as Important
Once washed, you must dry the potatoes completely before baking. Here’s why:
Helps Achieve Crispy Skin: Excess water creates steam, which prevents the potato skin from getting that golden, crispy texture in the oven.
Ensures Even Baking: Drying removes moisture that can affect how the potato roasts and crisps up.
Prevents Soggy Potatoes: A wet potato will steam rather than bake properly, leading to chewy or rubbery skin instead of crispiness.
How to Dry Potatoes Properly
After washing, place potatoes on a clean kitchen towel or paper towel.
Pat them thoroughly dry, ensuring no moisture remains on the skin.
If you have time, let them air-dry for 10-15 minutes before baking for even better crisping.
—
4. Should You Peel Potatoes Before Baking?
No! The skin is one of the best parts of a baked potato. Here’s why you should keep it on:
✔️ Adds Texture & Crunch: A baked potato with its skin intact has a delicious, crispy bite.
✔️ More Nutrients: Potato skins contain fiber, vitamins, and antioxidants that are lost when peeled.
✔️ Better Flavor: The skin helps seal in moisture while creating that signature crispy exterior.
Only peel potatoes before baking if you prefer a softer texture or are making mashed potatoes. Otherwise, keeping the skin on is the best choice!
—
Final Verdict: Washing & Drying is a Must!
To get the perfect crispy-on-the-outside, fluffy-on-the-inside baked potato, always:
✅ Wash thoroughly to remove dirt, pesticides, and bacteria.
✅ Scrub well to ensure clean, grit-free skin.
✅ Dry completely to allow for proper crisping in the oven.
Skipping these steps can lead to soggy, chewy, or unappetizing potatoes—so don’t rush the process!
To Prick or Not to Prick? Preventing Steam Buildup
One of the most debated steps in baking a potato is whether or not to prick the skin before baking. Some cooks insist that poking holes is essential to prevent the potato from exploding in the oven, while others argue that it leads to moisture loss and results in a drier texture. So, what’s the truth? Let’s dive into the science behind steam buildup and whether you should prick or leave your potatoes untouched.
—
1. Why Do Some People Prick Potatoes Before Baking?
The idea behind pricking potatoes is to release steam as they bake. Here’s why some believe it’s necessary:
Potatoes Contain Water: Potatoes are about 80% water, and as they bake, the water inside turns into steam.
Pressure Can Build Up: In rare cases, if steam has no escape route, it could create enough internal pressure to burst the potato’s skin.
Avoiding a Mess: A burst potato can be messy, leaving bits of potato all over your oven.
For these reasons, many traditional recipes recommend poking potatoes with a fork or knife a few times to allow steam to escape safely.
➡️ Bottom Line: Pricking is a precautionary step to prevent rare but possible potato explosions.
—
2. Why Some People Don’t Prick Their Potatoes
Many chefs and home cooks skip pricking because they believe it affects the final texture of the potato. Here’s why:
Pricking Allows Moisture to Escape: When you poke holes, steam escapes too early, which can lead to a drier potato rather than keeping the interior moist and fluffy.
Crispy Skin is Better Without Holes: If your goal is ultra-crispy skin, avoiding pricking can help trap steam inside, ensuring the skin roasts beautifully while the inside remains tender.
Explosions Are Rare: Modern ovens provide even heating, and unless you’re baking at an extremely high temperature (above 450°F/230°C), the likelihood of a potato exploding is very low.
➡️ Bottom Line: Skipping the pricking step may result in a creamier, fluffier interior and crispier skin.
—
3. What Do Experts Recommend?
If baking at normal temperatures (375-450°F / 190-230°C):
If you like crispy skin and a moist inside, don’t prick the potatoes.
If you’re worried about an explosion or using extra-large potatoes, poke them once or twice to be safe.
If baking at high temperatures (above 450°F / 230°C):
It’s safer to prick the potato a few times to release excess steam.
You can also rub a little oil on the skin to help trap moisture inside while still allowing steam to escape.
➡️ Best Compromise: Poke 1-2 small holes near the bottom of the potato instead of multiple holes all over. This allows steam to escape but keeps most of the moisture inside for a perfect fluffy texture.
—
4. Alternative Methods to Prevent Explosions Without Pricking
If you prefer to avoid poking holes but still want to prevent a potato explosion, here are some tricks:
✔️ Bake at a lower temperature (375°F / 190°C) for a longer time to let steam escape naturally.
✔️ Coat the potato in oil to create a protective barrier while allowing moisture to circulate.
✔️ Use a baking rack or sheet tray to ensure even heat distribution, which prevents hot spots that might cause an explosion.
—
Final Verdict: Should You Prick or Not?
✔️ If you want crispier skin and a fluffy interior: Skip pricking.
✔️ If you’re baking at a very high temperature or using giant potatoes: Poke 1-2 small holes.
✔️ If you’re unsure, do a test: Bake one pricked and one unpricked potato and see which texture you prefer!
Either way, the chance of an actual explosion is very low, so the choice ultimately depends on personal preference and how crispy or moist you want your potato to be.
The Role of Olive Oil and Sea Salt for Crispy Skin
One of the secrets to achieving perfectly crispy, golden-brown potato skin is using olive oil and sea salt. These two simple ingredients work together to enhance both texture and flavor, transforming a basic baked potato into a restaurant-quality side dish. Let’s explore why olive oil and sea salt are essential and how to use them effectively.
—
1. Why Olive Oil is a Game-Changer
Brushing your potatoes with olive oil before baking is one of the best ways to achieve crispy, well-seasoned skin. Here’s why:
✔️ Enhances Crispiness:
Olive oil coats the potato skin, locking in moisture while allowing the exterior to crisp up beautifully.
It prevents the skin from drying out unevenly, leading to that perfect crunch.
✔️ Boosts Flavor:
Olive oil has a rich, slightly fruity taste that adds depth to the baked potato.
It also helps seasonings adhere better to the skin, ensuring even distribution.
✔️ Promotes Even Browning:
The oil conducts heat more effectively, helping the skin brown uniformly.
Without oil, the potato skin may cook unevenly, with some spots crispier than others.
➡️ Best Practice: Use extra virgin olive oil for the best flavor, but light olive oil works well if you prefer a more neutral taste.
—
2. Why Sea Salt is Essential for Perfectly Baked Potatoes
Adding sea salt before baking does more than just improve taste—it also enhances texture.
✔️ Draws Out Moisture for Crispier Skin:
Salt helps pull excess moisture from the potato skin, allowing it to bake up extra crispy.
This effect is similar to dry-brining meats—by removing surface moisture, the skin roasts instead of steams.
✔️ Creates a Satisfying Crunch:
Coarse sea salt forms a light crust on the skin, adding texture and a pleasant bite.
This makes the potato more enjoyable to eat, even before adding toppings.
✔️ Enhances Natural Potato Flavor:
Salt brings out the potato’s earthy, buttery notes, making it taste richer and more savory.
Using high-quality flaky sea salt or kosher salt provides a more even, delicate seasoning compared to table salt.
➡️ Best Practice: Use coarse sea salt or kosher salt rather than fine table salt for better texture and flavor.
—
3. How to Apply Olive Oil and Sea Salt for the Best Results
To get crispy, flavorful skin, follow these steps:
Step 1: Wash and Dry the Potatoes
Scrub the potatoes under cold water to remove dirt.
Pat them completely dry with a kitchen towel—moisture prevents crisping!
Step 2: Rub with Olive Oil
Pour 1-2 teaspoons of olive oil into your hands and rub it all over the potato skin.
Ensure a thin, even coating—too much oil can make the skin greasy instead of crisp.
Step 3: Sprinkle with Sea Salt
Generously sprinkle coarse sea salt or kosher salt over the oiled skin.
Use your hands to gently press the salt into the potato for even coverage.
Step 4: Bake at the Right Temperature
Place potatoes directly on the oven rack (or on a wire rack over a baking sheet) at 400-425°F (200-220°C).
Bake for 50-60 minutes, turning once for even crisping.
—
4. Optional Enhancements for Extra Crispy Skin
Want to take your baked potatoes to the next level? Try these extra steps:
✔️ Add Black Pepper or Garlic Powder: A light sprinkle enhances the overall flavor.
✔️ Use a High-Heat Oil: If you want an even crispier texture, try avocado oil instead of olive oil—it has a higher smoke point.
✔️ Finish with Butter After Baking: For a restaurant-style touch, rub a bit of melted butter on the hot potato just before serving.
—
Final Verdict: Olive Oil & Sea Salt = The Ultimate Crispy Skin Hack
By coating potatoes with olive oil and sea salt, you:
✅ Enhance crispiness by locking in moisture while allowing the skin to crisp up.
✅ Boost flavor by creating a well-seasoned, golden crust.
✅ Ensure even cooking with an oil layer that helps distribute heat.
So, if you want a baked potato with shatteringly crisp skin and a fluffy interior, never skip this step!
The Best Temperature and Time for Baking Potatoes
What’s the Ideal Temperature for Baking Potatoes?
Baking a potato might seem simple, but the oven temperature you choose plays a huge role in achieving the perfect crispy skin and fluffy interior. Too low, and you’ll end up with a dense, underwhelming texture. Too high, and you risk burning the skin before the inside is fully cooked. So, what’s the ideal temperature for baking a potato? Let’s break it down.
—
1. The Best Temperature for Perfectly Baked Potatoes
For the best results, bake your potatoes at 400°F to 425°F (200°C to 220°C).
✔️ 400°F (200°C) – The Classic Temperature
This temperature allows for even cooking while keeping the interior moist and fluffy.
The skin crisps up beautifully without burning.
Cooking time: 50-60 minutes (depending on potato size).
✔️ 425°F (220°C) – Extra Crispy Skin
If you want an ultra-crispy crust, baking at a slightly higher temperature is a great option.
This temperature shortens cooking time slightly while enhancing the roasted flavor of the skin.
Cooking time: 45-55 minutes.
➡️ Best Practice: For a balance of crispy skin and a fluffy interior, most chefs recommend 425°F (220°C) for one hour.
—
2. What Happens at Other Oven Temperatures?
Different temperatures can yield different results when baking potatoes. Let’s see how they compare:
✔️ 350°F (175°C) – Slow and Steady
Works well if baking alongside other dishes that require lower temperatures.
Takes longer—around 75-90 minutes—but still produces a decently fluffy texture.
The skin won’t be as crispy as higher temperatures.
✔️ 375°F (190°C) – A Balanced Approach
A good option if you prefer a slightly longer bake time for deeper flavor development.
Takes 60-75 minutes, with a slightly softer skin than at 400°F.
✔️ 450°F (230°C) – Super Fast, but Risky
Cuts baking time down to 35-45 minutes, but can burn the skin if left too long.
The interior may cook unevenly, with some areas overcooked while others remain dense.
Works well if you wrap the potato in foil or turn them frequently.
➡️ Verdict: 400-425°F (200-220°C) offers the best balance of crispy skin, fluffy interior, and even cooking.
—
3. Does Altitude Affect Baking Temperature?
If you live in a high-altitude area, you may need to make minor adjustments when baking potatoes.
At high altitudes, the boiling point of water is lower, meaning moisture inside the potato evaporates faster.
You may need to bake at a higher temperature (425°F to 450°F) or increase the cooking time.
Wrapping potatoes in foil can help retain some moisture, but it will soften the skin.
➡️ Best Practice for High Altitudes: Bake at 425°F for about 60-70 minutes and test for doneness by piercing with a fork.
—
4. How to Check for Doneness Without Cutting the Potato
To make sure your potato is perfectly cooked inside, use these simple tests:
✔️ Fork Test: Insert a fork or knife into the thickest part of the potato—it should slide in effortlessly.
✔️ Internal Temperature Check: A perfectly baked potato should reach 205°F to 212°F (96°C to 100°C) inside.
✔️ Gentle Squeeze: Using oven mitts, squeeze the sides of the potato—it should feel soft and slightly deflate.
➡️ Tip: If your potatoes are done but not crispy enough, place them directly on the oven rack for 5-10 extra minutes.
—
Final Verdict: What’s the Best Temperature?
✅ 400°F (200°C): A great balance for a tender inside and crisp skin.
✅ 425°F (220°C): The ideal choice for extra crispy skin with a perfectly cooked center.
✅ 450°F (230°C): A fast bake but requires close monitoring to avoid burning.
So, if you want perfectly crispy, fluffy baked potatoes, set your oven to 425°F and bake for about 1 hour—it’s the sweet spot!
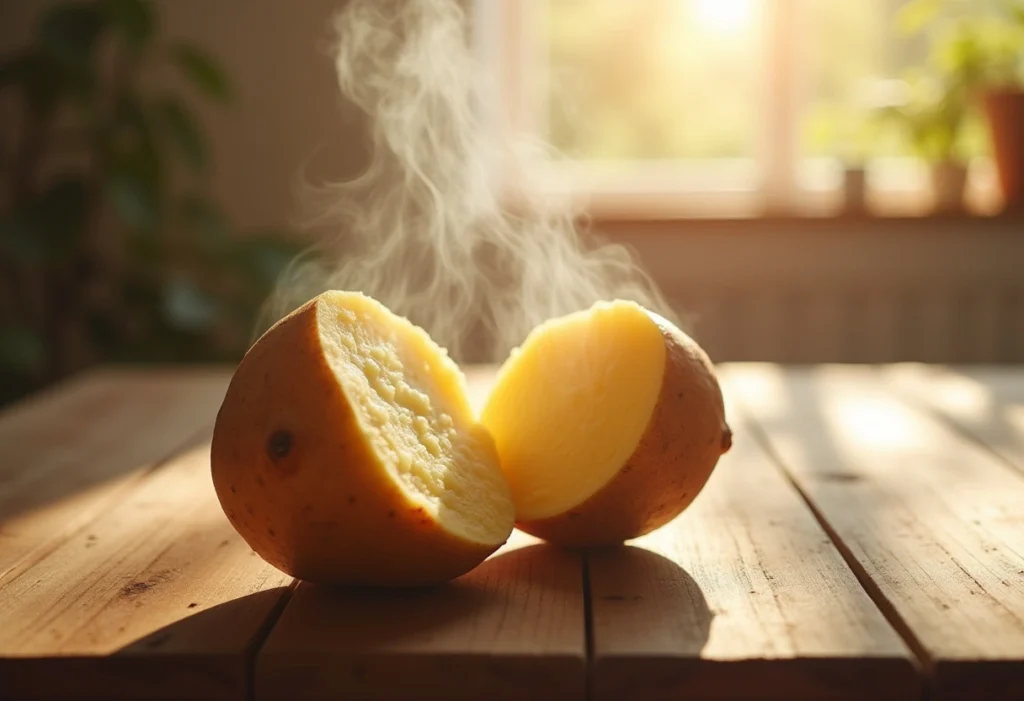
How Long to Bake a Potato?
The perfect baked potato has a crispy, golden-brown skin and a soft, fluffy interior—but how long does it take to achieve that texture? The baking time depends on factors such as oven temperature, potato size, and cooking method. Let’s break it down so you can bake your potatoes to perfection every time.
—
1. General Baking Times Based on Temperature
The baking time for a potato varies based on the oven temperature you choose:
✔️ Best Temperature: 425°F (220°C) for 50-60 minutes provides the best combination of crispy skin and fluffy interior.
—
2. Baking Time Based on Potato Size
The size of the potato affects the baking duration. Here’s a rough guide for different sizes when baking at 400-425°F (200-220°C):
✔️ Tip: If baking multiple potatoes, ensure they are similar in size so they cook evenly.
—
3. How to Tell If a Potato Is Done
Rather than relying solely on time, check for doneness using these methods:
✔️ Fork or Knife Test: Insert a fork into the thickest part of the potato—it should slide in easily without resistance.
✔️ Internal Temperature: A perfectly baked potato should reach 205-212°F (96-100°C) inside when measured with a food thermometer.
✔️ Squeeze Test: Wearing oven mitts, gently squeeze the potato—if it gives slightly and feels soft inside, it’s done.
✔️ Crack Test: When fully baked, the skin will slightly crack open when squeezed, revealing the fluffy inside.
—
4. What If the Potato Isn’t Done Yet?
If you cut into the potato and find it undercooked or firm, don’t worry! You can fix it by:
Returning it to the oven: Bake for an additional 10-15 minutes at the same temperature.
Microwaving for a quick finish: Wrap the potato in a damp paper towel and microwave for 1-2 minutes to soften the inside.
Slicing and pan-frying: If time is short, slice the potato in half and pan-fry the inside with a little butter for a crispy, delicious alternative.
—
5. Speeding Up the Baking Process
If you’re short on time, here are some ways to reduce baking time while still getting crispy skin:
✔️ Preheat the oven properly: Always preheat your oven to 425°F (220°C) before adding the potatoes.
✔️ Use a wire rack: Placing potatoes on a wire rack over a baking sheet allows for better air circulation and even cooking.
✔️ Microwave first: Poke holes in the potato and microwave it for 5-7 minutes before transferring it to the oven.
✔️ Cut potatoes in half: If you’re in a rush, slice the potatoes in half before baking to reduce cook time by 15-20 minutes.
—
Final Verdict: How Long to Bake the Perfect Potato?
✅ 400°F (200°C): 50-60 minutes for a fluffy interior and crispy skin.
✅ 425°F (220°C): 45-55 minutes for the perfect balance of crispiness and tenderness.
✅ 450°F (230°C): 35-45 minutes for a quick bake (but monitor to prevent burning).
So, if you want the best baked potato, aim for 425°F and bake for about an hour—you’ll get that perfect mix of crisp, golden skin and a soft, pillowy inside!
Convection Oven vs. Regular Oven: Which One is Better for Baking Potatoes?
When it comes to baking the perfect potato, the type of oven you use makes a difference. Both convection ovens and regular (conventional) ovens can produce delicious baked potatoes, but they work differently and require slight adjustments in temperature and cooking time. Let’s break down the differences and determine which method is best for achieving crispy skin and a fluffy interior.
—
1. How Do Convection and Regular Ovens Work?
To understand the impact on baking potatoes, let’s first look at how each oven type functions:
✔️ Regular Oven (Conventional Oven)
Uses heating elements (usually at the top and bottom) to generate heat.
The air inside remains relatively still, relying on natural heat circulation.
May have hot spots, leading to uneven cooking.
✔️ Convection Oven
Has a fan and exhaust system that actively circulates hot air around the food.
Promotes faster, more even cooking.
Enhances browning and crispiness due to reduced moisture.
➡️ Key Difference: A convection oven speeds up cooking and creates crispier skin due to its air circulation, whereas a regular oven relies on slower, static heat.
—
2. Baking Potatoes in a Regular Oven
If you’re using a standard oven, here’s how to get the best results:
Temperature: 425°F (220°C) is ideal for crispy skin.
Time: Bake for 50-60 minutes for medium-sized potatoes.
Placement: Place potatoes directly on the oven rack or a wire rack on a baking sheet for even heat exposure.
Extra Tip: For an extra crispy skin, turn the potatoes halfway through baking.
✔️ Best for: Traditional baking, if you have time to wait for slow, even cooking.
—
3. Baking Potatoes in a Convection Oven
A convection oven can produce better results in less time, but requires slight adjustments:
Lower the Temperature: Reduce the heat by 25°F (15°C) compared to regular ovens. If a recipe calls for 425°F, set your convection oven to 400°F (205°C).
Faster Cooking Time: Expect the potatoes to bake 15-20% faster—typically 40-50 minutes instead of 50-60 minutes.
Crispier Skin: The constant air circulation removes moisture quickly, resulting in extra crispy skin.
Even Cooking: Hot air movement prevents hot spots, leading to consistent doneness throughout the potato.
✔️ Best for: Faster baking, crispier skin, and even cooking.
—
4. Pros and Cons of Each Method
➡️ Verdict: If you love a crispy, evenly baked potato in less time, a convection oven is the winner. However, if you prefer a more traditional slow-roasted flavor, a regular oven works well.
—
5. Should You Adjust Your Cooking Method?
If switching between convection and regular ovens, keep these adjustments in mind:
✔️ For Convection Ovens:
Reduce temperature by 25°F (15°C).
Check for doneness 10-15 minutes earlier than in a regular oven.
✔️ For Regular Ovens:
Stick to the 425°F (220°C) temperature for the best results.
If you want extra crispy skin, turn the potatoes or use a higher rack position.
—
Final Verdict: Which One is Best?
✅ Use a convection oven if you want a faster bake time and crispier skin.
✅ Use a regular oven if you prefer traditional slow-roasting with deep flavor.
So, if time is short and you love crispy potatoes, go with a convection oven at 400°F (205°C) for about 45-50 minutes. But if you enjoy the classic slow-baked potato, stick with a regular oven at 425°F (220°C) for 50-60 minutes!
Should You Wrap Potatoes in Foil or Not?
Pros and Cons of Using Aluminum Foil When Baking Potatoes
Wrapping potatoes in aluminum foil before baking is a common practice, but is it really the best method? While foil can help retain moisture, it also affects the texture of the skin and overall cooking process. Below, we’ll explore the advantages and disadvantages of using aluminum foil when baking potatoes and whether it’s necessary for achieving the perfect crispy-skinned, fluffy-centered result.
—
1. Pros of Using Aluminum Foil
✔️ Helps Retain Moisture
Wrapping potatoes in foil traps steam, keeping the inside soft and moist.
This can be beneficial if you prefer a tender skin rather than a crispy one.
✔️ Speeds Up Cooking Slightly
The foil helps conduct heat, slightly reducing baking time.
It distributes heat more evenly, which may help if baking at lower temperatures.
✔️ Keeps Potatoes Warm for Longer
If you’re preparing potatoes ahead of time, foil acts as an insulator, keeping them warm for an extended period.
This is useful when serving multiple guests or during meal prep.
✔️ Prevents Mess in the Oven
Some potatoes may leak moisture or starch during baking.
Foil catches any drippings, making cleanup easier.
—
2. Cons of Using Aluminum Foil
❌ Prevents Crispy Skin
The biggest downside of using foil is that it traps steam, making the potato skin soft and soggy rather than crispy.
If you want a golden, crunchy exterior, avoid wrapping in foil.
❌ Can Result in Overcooked or Gummy Texture
Since foil holds moisture, it can lead to a slightly gummy texture inside instead of a light and fluffy potato.
This is especially true if baked at lower temperatures.
❌ May Require Longer Baking Time
While foil conducts heat well, it also insulates the potato, which can actually slow down the cooking process.
Potatoes wrapped in foil often take an extra 10-15 minutes to bake compared to unwrapped ones.
❌ Not Necessary for Food Safety
Some people believe wrapping potatoes in foil is necessary to prevent bacteria growth (like botulism).
However, baking without foil at the right temperature (above 200°F or 93°C) is perfectly safe.
If you do use foil, do not leave the potatoes wrapped for long periods at room temperature after baking, as this can create an environment for bacteria to grow.
—
3. Best Practices for Baking Without Foil
If you want crispy skin and a fluffy interior, skip the foil and follow these tips instead:
✅ Bake directly on the oven rack or a wire rack placed over a baking sheet. This allows air circulation for even cooking.
✅ Rub potatoes with olive oil and sea salt before baking to enhance crispiness.
✅ Bake at a high temperature (425°F/220°C) for 50-60 minutes for the best results.
✅ Let the potatoes rest for 5 minutes after baking to help set the skin before cutting them open.
—
4. When Should You Use Foil?
While baking without foil is generally the best method, there are some situations where using foil can be helpful:
✔️ For Meal Prep: If you need to keep baked potatoes warm for a long time before serving, foil helps retain heat.
✔️ For Steamed Potatoes: If you prefer a softer skin and a more steamed texture, foil can help trap moisture.
✔️ For Grilling or Campfire Cooking: Wrapping potatoes in foil protects them from direct flames and helps them cook evenly over a grill or in hot coals.
—
Final Verdict: To Foil or Not to Foil?
Best for crispy skin: ❌ Do NOT use foil
Best for soft skin and moist interior: ✅ Use foil
Best for grilling/campfire cooking: ✅ Use foil
Best for faster, even baking: ❌ Do NOT use foil
If you love the perfect crispy-skinned baked potato, it’s best to bake without foil. However, if you’re keeping potatoes warm for a long time or cooking over an open flame, foil can be useful.
Why Leaving Potatoes Unwrapped Creates a Crispier Skin
One of the key secrets to achieving the perfect baked potato—crispy on the outside and fluffy on the inside—is to bake them unwrapped. Many people assume wrapping potatoes in aluminum foil helps them cook better, but this actually traps moisture and prevents the skin from crisping up. Let’s explore the reasons why leaving potatoes unwrapped leads to a deliciously golden, crispy texture.
—
1. Moisture Evaporation is the Key to Crispiness
✔️ Trapping Steam vs. Allowing It to Escape
When a potato is wrapped in foil, it traps steam inside, creating a moist cooking environment.
This leads to a soft and slightly soggy skin instead of a crispy one.
Unwrapped potatoes allow moisture to escape, letting the skin dry out and crisp up as it bakes.
✔️ Think of Roasting Instead of Steaming
Baking an unwrapped potato is more like roasting: the dry heat of the oven draws out excess moisture from the skin, allowing it to crisp up naturally.
Wrapping in foil, on the other hand, steams the potato rather than roasting it.
—
2. Direct Exposure to Dry Heat Enhances Texture
✔️ Airflow Plays a Big Role
Leaving the potato unwrapped allows hot air to circulate around the entire surface.
This creates even browning and prevents moisture buildup that would make the skin soft.
A wire rack can help by ensuring even airflow underneath the potato as well.
✔️ High Heat and Direct Contact with the Oven Rack
Placing the potato directly on the oven rack instead of a baking sheet can further enhance crispiness by allowing the heat to reach all sides.
The skin crisps up without any trapped moisture interfering.
—
3. Oil and Salt Help the Process
✔️ Why Rubbing Potatoes with Oil Matters
To get extra crispy skin, rub the potatoes with a thin layer of olive oil before baking.
The oil helps conduct heat and intensifies the browning process, making the skin deliciously crispy.
✔️ Adding Salt for Texture and Flavor
Sprinkling sea salt or kosher salt over the oiled skin draws out more moisture, leading to a crisper texture.
It also enhances flavor, making the skin just as enjoyable as the fluffy inside.
—
4. How to Bake an Unwrapped Potato for Maximum Crispiness
To achieve perfectly crispy skin, follow these steps:
✅ Choose the right potato – Russet potatoes work best because of their thick skin and starchy interior.
✅ Wash and dry thoroughly – Removing excess moisture before baking prevents steaming.
✅ Rub with olive oil and salt – Enhances crispiness and flavor.
✅ Bake directly on the oven rack at 425°F (220°C) for 50-60 minutes.
✅ Don’t wrap in foil – This allows moisture to escape for a crispy texture.
✅ Let the potato rest for 5 minutes after baking – This helps the skin firm up even more before slicing.
—
5. Why Restaurants Bake Potatoes Unwrapped
✔️ The Secret to Steakhouse-Style Baked Potatoes
If you’ve ever had a restaurant-quality baked potato, you’ll notice the skin is perfectly crispy and the inside is light and fluffy.
This is because restaurants never wrap potatoes in foil—they bake them directly on oven racks at high temperatures to achieve that signature crispiness.
Many steakhouses even double-bake the potatoes for extra crunch by reheating them at a high temperature just before serving.
✔️ Consistent Cooking Results
Restaurants need to ensure every baked potato is cooked evenly and has a uniform texture.
By leaving them unwrapped, they avoid inconsistent steaming and get reliable, crispy results every time.
—
Final Verdict: To Wrap or Not to Wrap?
Best for crispy skin: ❌ Do NOT use foil
Best for soft, steamed skin: ✅ Wrap in foil
Best for steakhouse-style baked potatoes: ❌ Bake unwrapped at high heat
If your goal is to make the crispiest, most delicious baked potato, leaving them unwrapped is the way to go. By allowing moisture to escape, exposing the skin to direct dry heat, and using a little oil and salt, you’ll get a perfectly crispy potato every time.
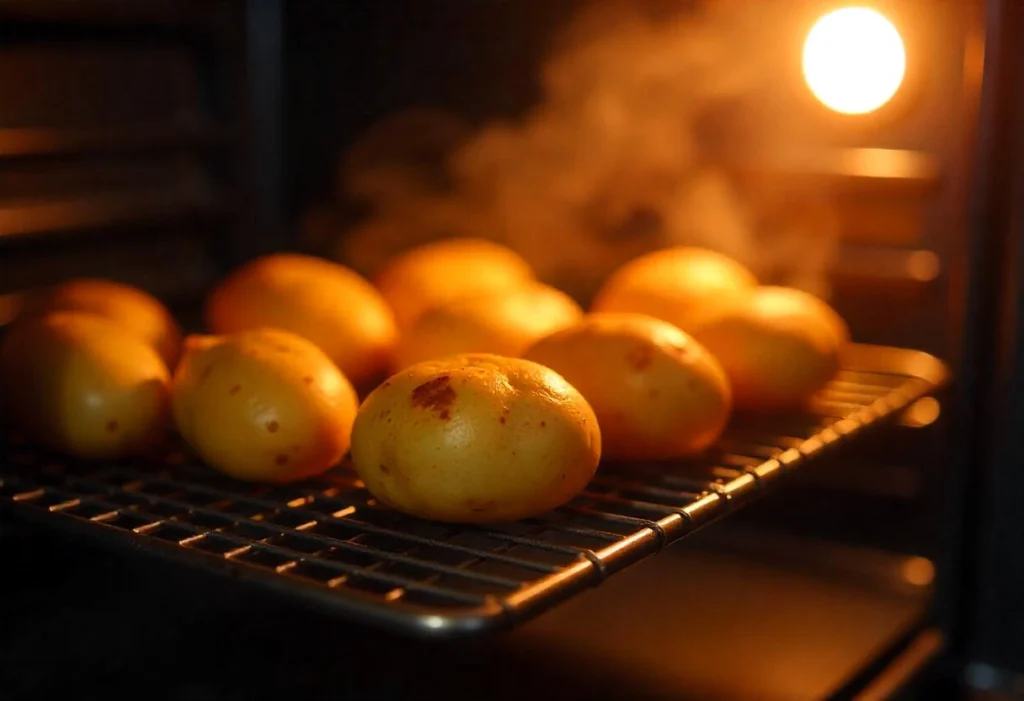
How to Bake Directly on the Oven Rack for Even Cooking
Baking a potato directly on the oven rack is one of the best ways to achieve even cooking, a fluffy interior, and crispy skin. Many people use a baking sheet or even wrap potatoes in foil, but allowing the potato to sit directly on the rack maximizes airflow and heat distribution, leading to a perfectly cooked result. Below, we’ll go over the benefits, step-by-step instructions, and tips for ensuring the best baked potato every time.
—
1. Why Baking Directly on the Oven Rack Works Best
✔️ Promotes Even Heat Circulation
When potatoes sit on a baking sheet, the bottom may cook unevenly due to restricted airflow.
Placing them directly on the oven rack allows 360-degree air circulation, ensuring all sides cook evenly.
✔️ Prevents Soggy or Overly Soft Skin
Using a baking sheet can sometimes trap moisture underneath the potato, making the skin soft instead of crispy.
On the oven rack, excess moisture evaporates, leading to golden, crunchy skin.
✔️ Mimics Restaurant-Style Baking
Many steakhouses bake potatoes directly on oven racks because this method creates the crispiest exterior while keeping the inside light and fluffy.
If you’ve ever had a perfectly textured baked potato at a restaurant, it was likely cooked this way!
—
2. Step-by-Step Guide to Baking a Potato Directly on the Oven Rack
Follow these simple steps to ensure your baked potato turns out evenly cooked and delicious:
Step 1: Choose the Right Potatoes
Russet potatoes are the best choice because of their thick skin and starchy interior, which makes them ideal for baking.
Medium to large-sized potatoes work best for this method, as they bake evenly.
Step 2: Preheat Your Oven
Set your oven to 425°F (220°C) for the best results.
A high temperature helps crisp the skin while ensuring a fluffy interior.
Step 3: Wash and Dry Thoroughly
Scrub the potatoes under running water to remove any dirt or residue.
Pat them completely dry with a towel—moisture on the skin can lead to steaming instead of crisping.
Step 4: Poke Holes to Prevent Bursting
Use a fork to prick the potatoes a few times (4-5 times is enough).
This allows steam to escape during baking, preventing any unexpected bursts in the oven.
Step 5: Coat with Oil and Seasoning
Rubbing the potatoes with olive oil enhances browning and crispiness.
Sprinkle coarse sea salt or kosher salt over the skin for extra texture and flavor.
For an added boost, you can also rub in garlic powder, black pepper, or smoked paprika for extra seasoning.
Step 6: Place Directly on the Oven Rack
Position the potatoes in the center of the oven rack for the most even cooking.
If baking multiple potatoes, leave space between them so air can circulate properly.
If you’re worried about drips, place a baking sheet on the lower rack (not directly under the potatoes) to catch any potential starch or oil drippings.
Step 7: Bake Until Perfectly Cooked
Bake for 50-60 minutes, depending on the size of your potatoes.
Test doneness by inserting a fork or skewer—if it slides in easily, the potato is ready.
For extra crispy skin, leave the potatoes in for an additional 5-10 minutes after turning off the oven.
Step 8: Let Them Rest Before Cutting
Remove the potatoes from the oven and let them rest for 5 minutes before slicing open.
This allows the interior to finish setting while keeping the skin crispy.
—
3. Tips for the Best Results
✔️ Bake at High Heat (425°F/220°C) – This ensures a crispy skin while keeping the inside fluffy.
✔️ Don’t Wrap in Foil – This traps moisture, making the skin soggy.
✔️ Use a Wire Rack for More Control – If you’re baking many potatoes at once, placing them on a wire rack over a baking sheet can also work for even crispiness.
✔️ Turn Once for Extra Even Cooking – If you want to ensure every side is crisp, rotate the potatoes halfway through baking.
—
4. Alternative: Using an Air Fryer for Similar Results
If you love the idea of crispy-skinned baked potatoes but don’t want to heat up your whole oven, an air fryer can achieve similar results. Simply:
1. Preheat your air fryer to 400°F (200°C).
2. Prepare the potatoes the same way (wash, dry, oil, and salt).
3. Place them in the air fryer without overcrowding.
4. Cook for 40-50 minutes, flipping halfway through for even crispiness.
—
Final Verdict: Why This Method Works Best
✔️ Best for crispy skin – Baking directly on the rack ensures a golden, crunchy texture.
✔️ Best for even cooking – No uneven soft spots or undercooked sections.
✔️ Best for restaurant-quality baked potatoes – Mimics steakhouse baking techniques.
By following these steps, you’ll achieve the perfect balance of crispy skin and fluffy interior, making your baked potato the star of any meal.
Best Toppings for the Ultimate Baked Potato
Classic Toppings: Elevate Your Baked Potato with Timeless Flavors
A perfectly baked potato is delicious on its own, but the right toppings can take it to the next level. Classic toppings add richness, texture, and bold flavors, transforming a simple potato into a satisfying meal or side dish. Whether you prefer a fully loaded baked potato or just a touch of butter, these traditional toppings never go out of style.
—
1. Butter: The Essential Classic
✔️ Why It Works:
Butter melts into the hot, fluffy potato, creating a rich, creamy texture and enhancing its natural flavor.
It adds a touch of indulgence with a mild, buttery taste that pairs well with almost any topping.
✔️ How to Use It:
Add a pat of unsalted butter for a simple, pure flavor.
For extra depth, try garlic butter or herb-infused butter (such as butter mixed with parsley, thyme, or chives).
—
2. Sour Cream: Cool and Tangy Contrast
✔️ Why It Works:
The cool, tangy flavor of sour cream balances out the warm, starchy potato.
Its smooth texture adds a creamy element without overwhelming the dish.
✔️ How to Use It:
Spoon plain sour cream directly onto the potato for a classic approach.
Mix in chopped chives, garlic, or lemon zest for an upgraded flavor.
Opt for Greek yogurt as a healthier alternative with extra protein and probiotics.
—
3. Cheese: The Ultimate Comforting Addition
✔️ Why It Works:
Cheese adds a savory, melty richness that makes any baked potato irresistible.
It provides umami depth and pairs perfectly with other toppings like butter and sour cream.
✔️ Best Cheese Options:
Cheddar: The most popular choice, offering a sharp, bold flavor.
Mozzarella: Mild and stretchy, perfect for a gooey texture.
Parmesan: A nutty, salty kick that enhances the potato’s natural taste.
Pepper Jack: Adds a spicy twist for those who like a bit of heat.
✔️ How to Use It:
Shred cheese over the hot potato so it melts perfectly.
Mix cheese into the potato’s flesh for a creamier consistency.
—
4. Bacon Bits: A Crunchy, Smoky Boost
✔️ Why It Works:
Bacon adds a salty, crispy texture that contrasts beautifully with the softness of the potato.
The smoky, savory flavor complements butter, sour cream, and cheese.
✔️ How to Use It:
Use freshly cooked, crumbled bacon for the best flavor.
Opt for turkey bacon or plant-based bacon bits as a healthier alternative.
Sprinkle bacon on top of melted cheese for an extra indulgent bite.
—
5. Chives or Green Onions: A Fresh, Herbaceous Touch
✔️ Why It Works:
Adds a mild onion flavor that balances the richness of butter, cheese, and sour cream.
The bright green color makes the potato more visually appealing.
✔️ How to Use It:
Chop finely and sprinkle on top of sour cream or melted cheese.
Mix into the potato flesh for an even distribution of flavor.
Substitute with parsley, dill, or thyme for a unique twist.
—
6. Salt & Pepper: The Simple Yet Essential Finish
✔️ Why It Works:
Salt enhances the natural flavors of the potato and other toppings.
Black pepper adds a mild kick of spice without overpowering the dish.
✔️ How to Use It:
Use sea salt or flaky salt for a gourmet touch.
Add freshly ground black pepper for a deeper flavor.
Try garlic salt, smoked salt, or truffle salt for a unique variation.
—
Final Thoughts: Build Your Perfect Classic Baked Potato
Classic toppings provide the perfect balance of flavor and texture, making a baked potato a comforting and satisfying dish. Whether you stick to butter and salt or go all out with a fully loaded combination of cheese, bacon, and sour cream, these timeless toppings will always be a favorite. Mix and match to create your ideal baked potato, and enjoy a dish that never goes out of style!
Healthy Alternatives to Traditional Baked Potatoes
While a classic baked potato is already a nutritious and filling dish, there are several ways to make it even healthier without sacrificing flavor or texture. Whether you’re looking to reduce calories, increase fiber, or add more nutrients, these alternatives will help you enjoy a baked potato that fits your dietary goals.
—
1. Swap Russet Potatoes for Sweet Potatoes
✔️ More Vitamins and Antioxidants
Sweet potatoes are packed with beta-carotene, which converts to vitamin A in the body, supporting eye health and immunity.
They also contain more vitamin C and fiber than russet potatoes.
✔️ Lower Glycemic Index
Unlike white potatoes, sweet potatoes have a lower glycemic index, meaning they cause a slower, more gradual rise in blood sugar.
This makes them a great option for those managing diabetes or looking to sustain energy levels.
✔️ Naturally Sweet Flavor
Their natural sweetness means you don’t need as much butter or cheese for flavor.
Try topping them with a sprinkle of cinnamon and a dollop of Greek yogurt for a nutritious twist.
—
2. Use Smaller, Fiber-Rich Potatoes
✔️ Yukon Gold or Red Potatoes
Yukon Gold and red potatoes have thinner skins and naturally buttery textures, reducing the need for extra fats like butter or oil.
They contain higher levels of potassium compared to russets, which help regulate blood pressure.
✔️ Baby or Fingerling Potatoes
These small potatoes have a higher skin-to-flesh ratio, meaning more fiber per serving.
They’re a great option if you’re looking for a nutrient-dense, portion-controlled alternative.
—
3. Bake Without Oil for a Lower-Fat Option
✔️ Skip the Olive Oil for Crispiness Without Calories
Instead of brushing your potato with oil before baking, simply bake it dry for a naturally crispy skin.
If you still want a little flavor, use a light spritz of cooking spray or broil the potato for the last 5 minutes.
✔️ Use Herbs Instead of Salt for Seasoning
Cut back on sodium by using fresh or dried rosemary, thyme, garlic powder, or smoked paprika instead of excessive salt.
A squeeze of fresh lemon juice can also add brightness without extra sodium.
—
4. Replace Butter and Sour Cream with Healthier Toppings
Instead of loading your baked potato with butter, sour cream, and cheese, try these nutritious swaps:
✔️ Greek Yogurt Instead of Sour Cream
Offers probiotics, protein, and a tangy flavor similar to sour cream with fewer calories and fat.
✔️ Avocado Instead of Butter
Mashed avocado provides healthy monounsaturated fats and adds a creamy texture without saturated fat.
✔️ Cottage Cheese for Extra Protein
Adds calcium, protein, and a slight saltiness while being much lower in fat than traditional cheese toppings.
✔️ Nutritional Yeast for a Cheesy Flavor
This plant-based topping gives a cheesy, nutty taste while adding B vitamins and plant protein.
—
5. Try a Plant-Based Loaded Baked Potato
If you want a fiber-packed, plant-based meal, consider swapping out traditional toppings for these nutrient-dense options:
✔️ Black Beans & Salsa
Provides protein and fiber while keeping things low-fat and flavorful.
✔️ Steamed Broccoli & Hummus
A delicious way to add iron, calcium, and plant-based protein without extra dairy.
✔️ Mushroom & Spinach Sauté
Adds umami flavor, antioxidants, and vitamins for a hearty, satisfying topping.
—
Final Thoughts: A Healthier Baked Potato Your Way
By making small swaps—whether it’s switching the potato type, baking without oil, or choosing nutrient-rich toppings—you can enjoy a baked potato that’s just as delicious but more aligned with your health goals. Try experimenting with these options to create the perfect balanced and wholesome baked potato!
Conclusion: The Perfect Baked Potato, Every Time
Baking the perfect potato in the oven is simple, but small details can make a big difference in achieving that crispy skin and fluffy interior. From choosing the right potato variety—like Russet for crispiness or Yukon Gold for a creamier texture—to using the right baking techniques, every step matters.
By baking directly on the oven rack, skipping the foil for better texture, and seasoning with olive oil and sea salt, you’ll get a restaurant-quality baked potato at home. Adjusting the temperature and baking time ensures even cooking, and experimenting with healthy toppings can make your potato even more nutritious and delicious.
Whether you enjoy it plain, fully loaded, or with a healthy twist, a perfectly baked potato is a versatile, satisfying, and wholesome meal that never goes out of style. Now that you know the secrets, it’s time to preheat that oven and enjoy the ultimate baked potato experience!
1 thought on “How to Bake the Perfect Potato in the Oven (Crispy Skin & Fluffy Inside)”