
Frozen hash browns are a breakfast staple that can be cooked in multiple ways to achieve a crispy, golden-brown texture. Whether you prefer pan-frying, baking, or air-frying, the key to perfect hash browns lies in the right technique and a few simple tricks. In this guide, you’ll learn how to cook frozen hash browns to perfection, avoid common mistakes, and discover creative ways to serve them. Get ready to elevate your breakfast game with crispy and delicious hash browns every time!
Why Frozen Hash Browns Are a Breakfast Favorite
Convenience: Quick and Easy to Prepare
One of the biggest advantages of frozen hash browns is how convenient they are. Unlike homemade hash browns, which require peeling, shredding, and squeezing out excess moisture from fresh potatoes, frozen hash browns come pre-prepped and ready to cook. This saves a significant amount of time, making them a great option for busy mornings or when you need a quick meal without extra effort.
Another benefit is their long shelf life. Unlike fresh potatoes that can sprout or go bad quickly, frozen hash browns can be stored in the freezer for months, allowing you to have a ready-to-cook breakfast ingredient whenever you need it. This makes them a reliable staple for meal planning, especially for families or those who enjoy hearty breakfasts without the hassle of prepping ingredients from scratch.
Additionally, frozen hash browns require minimal cleanup. Since they come pre-shredded and portioned, you don’t have to deal with potato starch, multiple utensils, or a messy kitchen. Whether you cook them in a pan, oven, or air fryer, you’ll have a satisfying, crispy dish with minimal effort and mess.
Versatility: Can Be Used in Different Recipes
Frozen hash browns are more than just a side dish for breakfast—they are a highly versatile ingredient that can be incorporated into a variety of meals. Their crispy texture and mild potato flavor make them the perfect base for both savory and even some unexpected sweet dishes.
One of the best things about frozen hash browns is that they can be cooked in different ways. You can pan-fry them for a traditional crispy texture, bake them in the oven for a hands-free option, or use an air fryer for an extra crunch with less oil. This adaptability allows you to customize them based on your cooking preference and available kitchen tools.
Beyond the classic breakfast plate, hash browns can be used in various creative recipes:
Hash Brown Casseroles – Mix them with eggs, cheese, and bacon or sausage for a hearty breakfast bake.
Loaded Hash Browns – Top them with sour cream, melted cheese, and green onions for a diner-style experience.
Breakfast Burritos – Add crispy hash browns to a wrap with scrambled eggs, cheese, and salsa.
Hash Brown Waffles – Press them in a waffle iron to create crispy hash brown waffles, perfect for pairing with fried eggs or chicken.
Potato Crust for Quiche – Instead of a pastry crust, use hash browns as a crunchy base for a delicious quiche.
Their neutral taste also allows them to absorb different flavors, making them suitable for a range of seasonings and toppings. Whether you enjoy them simply salted or spiced up with garlic powder, smoked paprika, or cayenne pepper, they can be easily adapted to suit different cuisines and personal tastes.
Perfect Texture: Crispy Outside, Soft Inside
One of the best things about hash browns is their signature texture—crispy on the outside, yet tender and fluffy on the inside. Achieving this balance is what makes them so satisfying, whether served as a side dish or the star of a meal. Frozen hash browns, when cooked properly, deliver that perfect crunch without the hassle of shredding and preparing fresh potatoes.
What Makes Hash Browns Crispy?
The crispiness of hash browns comes from two key factors: removing excess moisture and using the right cooking method. While frozen hash browns are pre-shredded and partially dehydrated, they can still contain some residual moisture from freezing. Cooking them at the right temperature and with enough oil or butter ensures they develop a golden-brown crust instead of turning soggy.
How to Get the Perfect Texture
Preheat Your Pan or Oven – A hot surface helps to create an instant crisp when the hash browns make contact.
Use the Right Fat – Butter gives a rich, diner-style flavor, while oil (like vegetable or avocado oil) provides an extra-crispy exterior.
Don’t Overcrowd the Pan – Spreading the hash browns in a thin, even layer ensures maximum surface area for crisping.
Flip at the Right Time – Let the hash browns cook undisturbed until they turn golden brown before flipping. Moving them too soon prevents proper crust formation.
Crispy vs. Soft: Customizing the Texture
Some people love their hash browns extra crispy, while others prefer a softer bite. If you want them extra crispy, use a little more oil and spread them out in a thin layer. For a softer texture, cook them with a lid on for part of the time to retain moisture.
Popular Brands: Choosing the Best Frozen Hash Browns
When it comes to frozen hash browns, not all brands are created equal. Some offer a crispier texture, while others have a more natural potato flavor. The brand you choose can make a big difference in the final result, so it’s worth knowing which ones stand out.
1. Ore-Ida: The Most Recognized Brand
Ore-Ida is one of the most popular and widely available frozen hash brown brands. Known for its crispy texture and consistent quality, Ore-Ida hash browns come in various styles, including shredded, diced, and patty forms. Their products are designed to cook up golden brown, whether you’re pan-frying, baking, or using an air fryer.
2. Trader Joe’s Hash Browns: A Favorite Among Foodies
Trader Joe’s frozen hash browns have gained a strong following due to their simple ingredients and great taste. They contain just potatoes, dextrose, and salt, making them a clean and natural option. Many people love using them for breakfast sandwiches or as a crispy side dish.
3. Alexia: A Gourmet Option
For those looking for a slightly healthier or gourmet take on hash browns, Alexia offers frozen hash browns made with Yukon Gold potatoes. They are known for their rich flavor and crispy texture, with some varieties including seasonings like rosemary and black pepper.
4. McCain: A Global Favorite
McCain is a well-known international brand offering frozen hash browns in various styles, including traditional shredded, diced, and even seasoned varieties. They are widely available in supermarkets worldwide and are known for their restaurant-quality taste.
5. Store Brands: Affordable and Reliable
Many grocery stores, including Walmart’s Great Value, Kroger’s Private Selection, and Whole Foods’ 365 Brand, offer their own versions of frozen hash browns. These can be a great budget-friendly alternative while still delivering good texture and flavor.
Which Brand is Best for You?
The best frozen hash brown brand depends on your cooking method and flavor preference:
If you want classic diner-style crispy hash browns, Ore-Ida or McCain are great choices.
For health-conscious or minimally processed options, Trader Joe’s or Alexia might be better.
If you’re looking for affordable, everyday hash browns, store-brand options can work well.
Best Methods to Cook Frozen Hash Browns
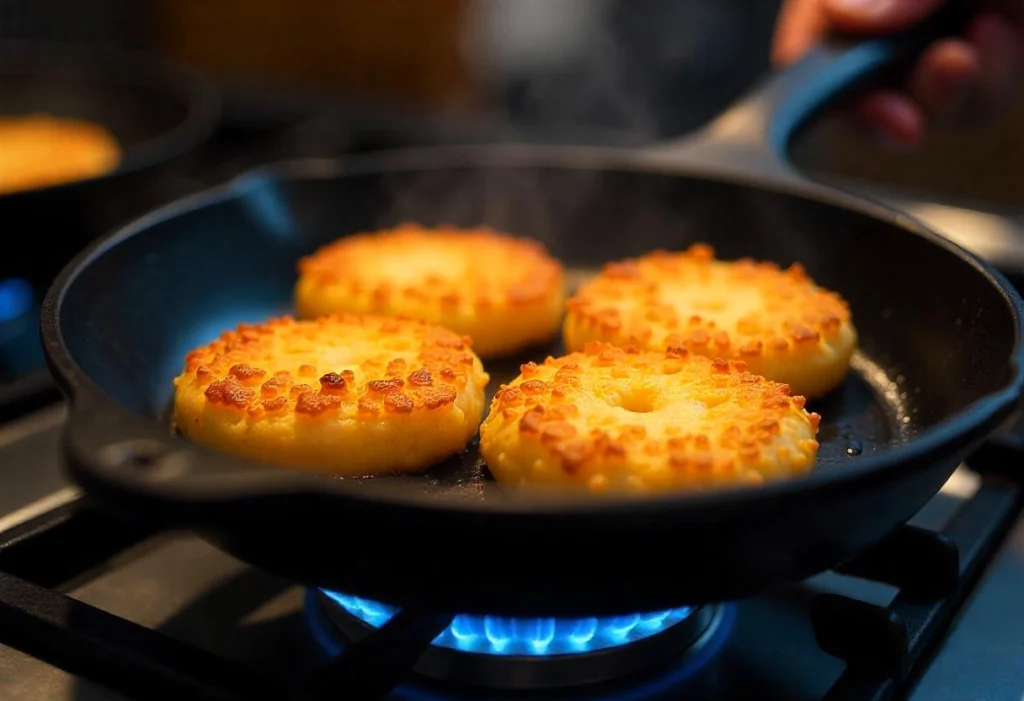
Pan-Frying for Crispy Perfection
Pan-frying is one of the best methods for cooking frozen hash browns because it creates a crispy, golden-brown exterior while keeping the inside soft and tender. This classic technique is simple, requires minimal ingredients, and delivers restaurant-quality hash browns every time.
1. Choosing the Right Pan
The type of pan you use plays a huge role in achieving crispy hash browns. Here are the best options:
Cast Iron Skillet – This is the best choice because it retains heat well, allowing for an even, crispy crust.
Non-Stick Pan – A good alternative if you want to use less oil, but it may not get as crispy as cast iron.
Stainless Steel Pan – Can work, but requires more oil to prevent sticking.
2. Preheating the Pan and Adding the Right Fat
For the crispiest hash browns, it’s essential to preheat your pan before adding the hash browns. A hot pan ensures they start crisping immediately instead of becoming soggy.
Heat the pan over medium-high heat for 2–3 minutes before adding fat.
Choose the right cooking fat:
Butter – Adds a rich, diner-style flavor but can burn if used alone.
Vegetable Oil or Avocado Oil – High smoke points make these ideal for crisping.
Butter + Oil Combination – This method provides both flavor and crispiness while preventing burning.
3. Cooking the Hash Browns for Maximum Crispiness
Once your pan is hot and your fat is melted, follow these steps:
Spread the hash browns in an even layer – Don’t overcrowd the pan. This ensures maximum surface area for crisping.
Let them cook undisturbed – Don’t flip too soon! Allow them to cook for 4–5 minutes until the bottom turns golden brown.
Flip carefully – Use a spatula to flip sections instead of stirring. This helps maintain their crispy structure.
Cook the other side for another 4–5 minutes – Add a little more oil or butter if needed.
4. Finishing Touches for Extra Crispiness
If you like extra crispy hash browns, press them down slightly with a spatula to create more contact with the pan.
For added flavor, season with salt, black pepper, or garlic powder right after flipping.
If you want a softer interior, cover the pan with a lid for a minute before removing from heat.
Why Pan-Frying is the Best Method
Pan-frying delivers the perfect balance of crispiness and flavor, making it a favorite method for cooking frozen hash browns. With the right pan, fat, and technique, you can achieve diner-style hash browns at home in just a few minutes.
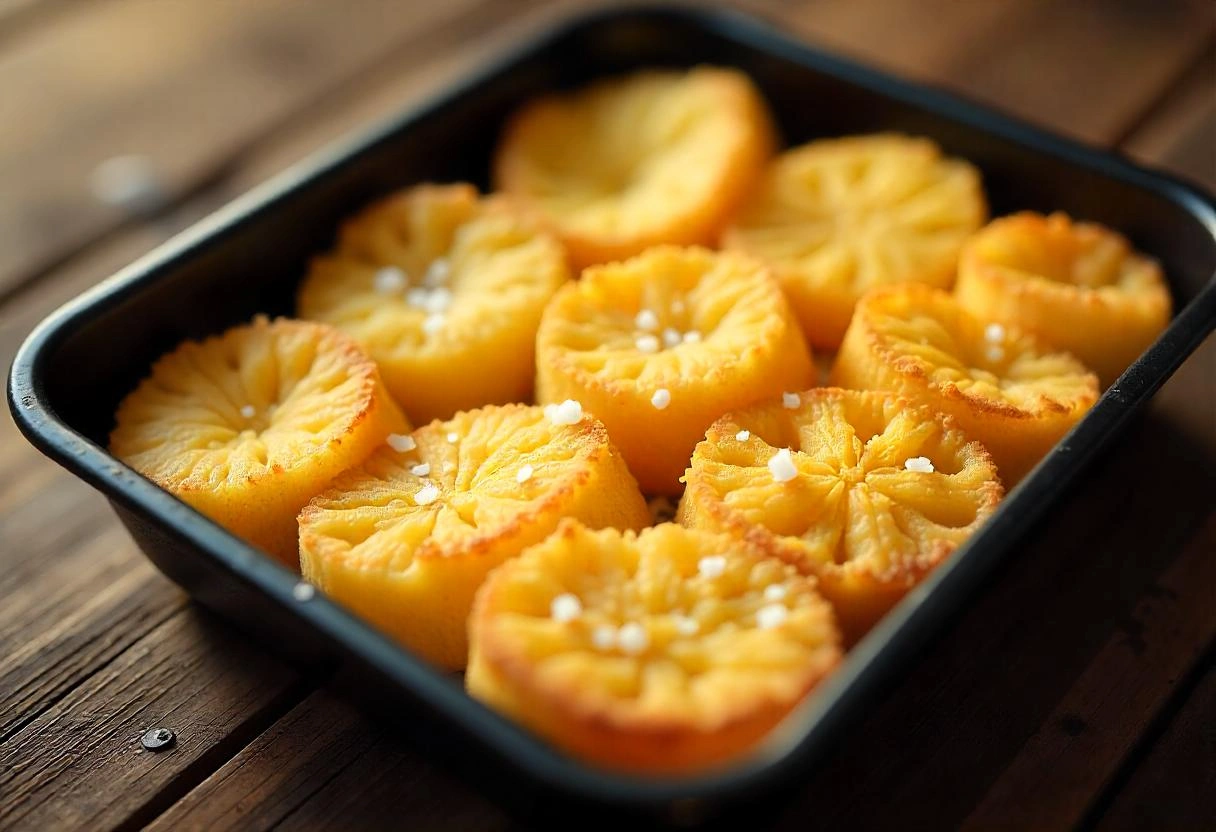
Baking for a Hands-Free Option
If you want crispy hash browns without standing over the stove, baking is a fantastic option. It requires minimal effort, making it perfect for busy mornings or when cooking for a crowd. The oven does all the work, allowing you to focus on preparing other breakfast items while your hash browns become golden and crispy.
1. Why Bake Hash Browns?
Less oil needed – Baking requires less oil than pan-frying, making it a slightly healthier alternative.
Even crispiness – The oven provides steady, even heat, ensuring consistent crispiness across all pieces.
Batch cooking friendly – You can cook a large quantity at once, making it ideal for feeding multiple people.
Hands-free cooking – No need to flip or monitor constantly; just set a timer and let the oven do the work.
2. Preparing Hash Browns for Baking
To get the best results, follow these preparation steps:
Preheat your oven to 425°F (220°C) – A high temperature ensures a crispy texture.
Line a baking sheet with parchment paper or foil – This prevents sticking and makes cleanup easier.
Lightly grease the baking sheet – Use cooking spray or a thin layer of oil to help crisp up the hash browns.
3. How to Bake Hash Browns for Maximum Crispiness
Spread hash browns in a thin, even layer – Crowding them will result in steaming instead of crisping.
Drizzle or spray with oil – This helps them achieve a golden-brown crust.
Bake for 15–20 minutes – Let them crisp up undisturbed.
Flip halfway through – Use a spatula to turn them for even browning.
Bake for another 10–15 minutes – Keep an eye on them until they reach your desired crispiness.
4. Tips for Even Better Baked Hash Browns
For extra crispiness, place the baking sheet on the middle or upper rack for more direct heat.
Use a convection oven if possible – The circulating air helps crisp up the edges.
Add seasoning after flipping – This ensures even distribution of flavors like garlic powder, smoked paprika, or black pepper.
Why Baking is a Great Alternative
Baking frozen hash browns gives you a crispy texture with less oil and effort. It’s ideal for meal prepping, entertaining, or simply enjoying a stress-free breakfast. If you love the taste of crispy hash browns but prefer a hands-off approach, this method is for you!

Air Frying for Extra Crispiness
Air frying is one of the best ways to cook frozen hash browns because it delivers exceptional crispiness with less oil. The rapid air circulation in an air fryer mimics deep-frying, creating golden-brown, crispy hash browns without excessive grease. It’s a quick, efficient, and healthier method that requires minimal effort.
1. Why Use an Air Fryer for Hash Browns?
Extra crispy texture – The hot air circulation ensures all sides get crispy without needing to flip constantly.
Healthier option – Uses significantly less oil compared to pan-frying or deep-frying.
Faster cooking time – Air frying is quicker than baking, making it great for busy mornings.
Mess-free and easy cleanup – No splattering oil or greasy pans to wash.
2. Preparing Hash Browns for the Air Fryer
To get the best results, follow these simple preparation steps:
Preheat the air fryer to 375°F (190°C) – A preheated air fryer ensures immediate crisping.
Lightly coat the air fryer basket with cooking spray – This prevents sticking and enhances crispiness.
Arrange hash browns in a single layer – Overcrowding leads to uneven cooking and soggy pieces.
3. Cooking Instructions for Maximum Crispiness
Spray or drizzle a little oil over the hash browns – While air frying requires less oil, a small amount helps enhance crispiness.
Cook for 10–15 minutes – Let the hash browns cook undisturbed for the first 8–10 minutes.
Shake the basket or flip halfway through – This ensures even browning on all sides.
Check for crispiness and adjust as needed – If you prefer extra crunch, cook for an additional 2–3 minutes.
4. Tips for the Best Air-Fried Hash Browns
For extra crispy edges, lightly press the hash browns down with a spatula halfway through cooking.
Use a higher temperature (400°F/200°C) for the last few minutes to achieve an ultra-crunchy texture.
Season after cooking – Sprinkle salt, pepper, or any preferred seasonings while they’re still hot for the best flavor absorption.
Add cheese in the last 2 minutes if you want cheesy, crispy hash browns.
Why Air Frying is a Game-Changer
Air frying frozen hash browns offers a faster, healthier, and crispier alternative to traditional methods. It’s perfect for those who love extra crunch without the hassle of deep-frying. Whether you’re making shredded hash browns, patties, or diced hash browns, the air fryer ensures they come out crispy and delicious every time.
Tips for Making Extra Crispy Hash Browns
Avoid Overcrowding the Pan or Baking Sheet
One of the biggest mistakes when cooking frozen hash browns is overcrowding the pan or baking sheet. While it may be tempting to cook a large batch at once, this can result in soggy, unevenly cooked hash browns instead of the crispy, golden texture you’re aiming for. Proper spacing is key to achieving perfect hash browns, whether you’re pan-frying, baking, or air-frying.
1. Why Overcrowding Leads to Soggy Hash Browns
When hash browns are too close together, several issues can occur:
Trapped steam – Instead of crisping up, excess moisture gets trapped between the pieces, leading to a soft, mushy texture.
Uneven cooking – The heat distribution becomes inconsistent, causing some areas to be undercooked while others overcook.
Less browning and crispiness – When hash browns are stacked or too close together, they don’t make enough contact with the hot surface, preventing proper caramelization.
2. How to Properly Space Hash Browns for Crispy Results
To ensure evenly cooked, crispy hash browns, follow these spacing guidelines:
For Pan-Frying:
Use a large enough skillet to allow hash browns to spread out in a single layer.
If cooking shredded hash browns, press them down slightly so they get maximum contact with the pan.
Cook in batches if necessary rather than overcrowding.
For Baking:
Arrange hash browns in a single layer on a parchment-lined baking sheet.
If baking multiple batches, use two baking sheets instead of piling them on one.
Leave at least ½ inch (1.3 cm) of space between each piece for proper airflow.
For Air-Frying:
Place hash browns in a single layer in the air fryer basket.
Shake the basket halfway through cooking to ensure all sides get crispy.
If making a large batch, cook in multiple rounds rather than overcrowding the fryer.
3. The Role of Proper Air Circulation
Giving hash browns enough space allows:
Heat to circulate evenly, resulting in uniform cooking.
Crisp edges to form rather than trapping steam.
Golden-brown color to develop, which enhances both flavor and texture.
4. What to Do If You Need to Cook a Large Batch
If you’re preparing hash browns for a group and need to cook a large quantity:
Use multiple pans or baking sheets – This allows for even spacing.
Keep cooked batches warm – Place finished hash browns in an oven set to 200°F (93°C) while cooking the rest.
Stir or flip halfway through – This ensures all sides cook evenly, even if some pieces are closer together.
Final Tip: Quality Over Quantity
While it may take slightly longer to cook in batches, avoiding overcrowding ensures crispy, evenly cooked hash browns that are worth the wait. The key to perfect hash browns is proper heat exposure and airflow, so give them space to crisp up beautifully!
Use High Heat and Let Them Crisp Undisturbed
Cooking frozen hash browns to crispy perfection requires the right temperature and technique. One of the most common mistakes people make is constantly stirring or flipping too soon, which prevents the hash browns from developing a golden-brown crust. By using high heat and allowing them to crisp undisturbed, you’ll achieve that irresistible crunch on the outside while keeping the inside tender.
1. Why High Heat is Essential
High heat is key to achieving a crispy texture because:
It quickly evaporates excess moisture, preventing sogginess.
It creates caramelization, enhancing flavor and color.
And it reduces cooking time, ensuring the hash browns cook evenly without becoming greasy.
If the heat is too low, the hash browns will:
Absorb more oil, making them greasy and heavy.
Steam instead of fry, resulting in a soft and mushy texture.
Take longer to cook, leading to inconsistent browning.
For best results, use medium-high to high heat when pan-frying or searing on a griddle. If baking, set the oven to at least 425°F (220°C), and for air frying, cook at 375–400°F (190–200°C) for optimal crispiness.
2. Let Them Cook Undisturbed for a Golden Crust
Many people flip or stir hash browns too soon, preventing a crispy crust from forming. To get perfectly crispy hash browns:
Spread them in a thin, even layer – This maximizes surface contact with the pan or baking sheet.
Press them down lightly with a spatula – This helps create a better crust when pan-frying.
Let them cook undisturbed for at least 4–5 minutes – Avoid the urge to move them around too soon.
Flip only once – After 5–7 minutes, check for a golden-brown crust before flipping.
If you constantly move or flip them too early, they won’t develop the crunchy exterior that makes hash browns so delicious.
3. When to Flip or Stir
Pan-Frying: Flip once when the bottom is golden and crisp (about 5–7 minutes).
Baking: No flipping needed, but halfway through baking, rotate the tray for even crisping.
Air Frying: Shake the basket or turn hash browns halfway through cooking.
4. Bonus Tip: Use the Right Fat for Extra Crispiness
While high heat is crucial, using the right fat enhances crispiness:
Butter + oil – Butter adds flavor, while oil prevents burning.
Olive or avocado oil – Great for high-heat cooking with a neutral taste.
Bacon grease – Adds a smoky, savory flavor.
Final Thoughts
By using high heat and letting the hash browns crisp undisturbed, you’ll achieve perfectly golden, crispy potatoes every time. Patience is key! Resist the urge to stir or flip too early, and you’ll be rewarded with a crunchy, flavorful texture that’s worth the wait.
Drain Excess Moisture Before Cooking
One of the most important steps for achieving crispy, delicious hash browns is ensuring that you remove excess moisture before cooking. Frozen hash browns contain water, and if this moisture isn’t removed, it can result in soggy, greasy hash browns instead of the crispy texture you desire. Draining moisture properly is an essential step, whether you’re frying, baking, or air frying, to ensure your hash browns turn out crisp and golden.
1. Why Excess Moisture is a Problem
When cooking frozen hash browns, the moisture in the potatoes is released as they heat up. If this moisture isn’t drained off properly, the hash browns will:
Become soggy and limp – Moisture prevents the potatoes from crisping up, leaving them with a soft, unappetizing texture.
Fry unevenly – Water hinders the even browning process, causing some areas to cook unevenly while others remain raw or undercooked.
Absorb excess oil – Moisture will cause hash browns to absorb more oil than necessary, resulting in greasy, heavy potatoes.
2. How to Drain Moisture from Frozen Hash Browns
Before cooking frozen hash browns, it’s important to drain or remove excess moisture. Here’s how to do it effectively:
For Shredded Hash Browns:
Thaw the frozen hash browns: Let them sit out for 5-10 minutes to thaw slightly. If you’re in a hurry, you can microwave them for a minute or so.
Place hash browns on a clean kitchen towel or paper towels: Spread them out to allow the moisture to be absorbed.
Press gently: Use another towel or your hands to gently press out any excess water.
Squeeze in a cheesecloth: If you have cheesecloth, you can wrap the hash browns in it and squeeze out extra liquid. This method is especially helpful for shredded hash browns.
For Hash Brown Patties:
Pat dry with paper towels: Since patties tend to hold onto more moisture, use paper towels to blot them and absorb the excess water.
Leave them to air-dry: After patting, let the patties sit on a wire rack for a few minutes to allow any remaining moisture to evaporate.
3. Additional Tips for Draining Moisture
Use a fine mesh sieve: For diced or chopped hash browns, you can run them under cold water and then let them sit in a fine mesh sieve to drain off any water.
Avoid over-thawing: If the hash browns are left to thaw too much, they can become mushy. Thawing just enough to break apart any clumps is sufficient to get rid of excess moisture.
Don’t skip this step: Even if you’re in a rush, taking the time to properly drain moisture is crucial for ensuring crispy results.
4. How to Prevent Future Moisture Problems
To prevent moisture buildup in the future:
Store hash browns properly: If you make homemade hash browns and freeze them, try to freeze them in a single layer on a baking sheet. Once frozen, transfer them to a zip-top bag. This helps keep them from sticking together and retains less moisture.
Use a paper towel: When storing frozen hash browns in the freezer, place a paper towel inside the bag to absorb any extra moisture that might form during freezing.
Final Thoughts
By taking the time to drain excess moisture before cooking, you’ll set the stage for crispy, evenly cooked hash browns every time. Even a small amount of moisture can drastically affect the texture, so don’t skip this important step. Whether you’re frying, baking, or air frying, properly draining hash browns is key to achieving the perfect crunch.
Add Butter at the End for Extra Flavor
Adding butter to hash browns is a delicious way to enhance their flavor and elevate their texture. While many people choose to cook hash browns entirely in butter, a great method to achieve maximum flavor without making them overly greasy is to add butter at the end of cooking. This allows the butter to melt evenly over the crispy surface, imparting a rich, indulgent taste that perfectly complements the potatoes.
1. Why Add Butter at the End?
Cooking hash browns in butter from the beginning is common, but adding butter toward the end of cooking offers several advantages:
Retained crispy texture: Butter added too early can cause hash browns to absorb too much fat, which makes them soggy. By waiting until the last few minutes of cooking, you allow the hash browns to crisp up first, keeping them light and crunchy while still gaining that buttery richness.
Better flavor infusion: Adding butter at the end ensures that the butter doesn’t burn or brown, which preserves its pure flavor. It then has the chance to infuse your crispy hash browns without becoming bitter.
Customizable richness: Adding butter at the end allows you to control the richness based on your taste. You can add just a small amount for a light finish, or melt a generous dollop of butter for a more indulgent dish.
2. How to Add Butter for Maximum Flavor
To get the best results when adding butter to your hash browns, follow these steps:
Pan-Frying:
After your hash browns have reached the desired crispiness, lower the heat to medium.
Add 1-2 tablespoons of butter to the pan and allow it to melt over the hash browns, stirring gently to coat them.
Let it cook for an additional minute, allowing the butter to sizzle and infuse the crispy hash browns with flavor.
Avoid letting the butter brown or burn by keeping the heat moderate.
Baking:
Once your hash browns have finished baking, remove them from the oven and immediately add a small pat of butter on top of each serving.
Let the butter melt naturally over the warm hash browns for a smooth, rich finish.
Air-Frying:
After the hash browns have crisped up in the air fryer, add butter directly to the basket.
Give it a quick toss to coat the hash browns with melted butter before serving.
3. Which Type of Butter to Use?
You can get creative with the type of butter you use to add extra flavor to your hash browns:
Unsalted butter: Offers the cleanest, most neutral butter flavor. You can control the amount of salt you add to the dish.
Salted butter: Adds an extra burst of savory flavor that can be ideal for more savory hash browns.
Herb-infused butter: Consider using garlic butter, rosemary butter, or parsley butter for an extra layer of flavor. These butters melt perfectly over hot hash browns and elevate the dish to new levels of taste.
Clarified butter (Ghee): This option has a higher smoke point than regular butter, meaning it won’t burn as easily, and it imparts a nutty, rich flavor.
4. Flavor Enhancements with Butter
You can also incorporate additional ingredients into your butter for even more flavor complexity:
Garlic: Sauté minced garlic in butter before adding it to your hash browns. The warm, aromatic garlic blends beautifully with the crispy potatoes.
Cheese: Stir in some shredded cheddar, parmesan, or grated mozzarella after adding the butter for a creamy, melty finish.
Fresh herbs: Add finely chopped fresh herbs such as chives, rosemary, or thyme to your butter just before melting it over the hash browns. The herbs bring a fragrant and fresh element to the dish.
Spices: A sprinkle of paprika, cayenne pepper, or black pepper can enhance the butter’s flavor and add some extra heat or depth.
5. The Right Amount of Butter
While butter can take hash browns to the next level, it’s essential not to overdo it. Here’s a general guide for the right amount of butter to use:
For a batch of 2-4 servings of hash browns, add 1–2 tablespoons of butter at the end.
For individual servings, use about 1 teaspoon per serving, or adjust to your taste preference.
Final Thoughts
Adding butter at the end of cooking allows you to infuse your hash browns with a rich, creamy flavor while maintaining their crispiness. Whether you go with classic unsalted butter or experiment with herb-infused variations, this simple step can transform your hash browns into a delectable treat. The result is crispy, flavorful hash browns with just the right touch of indulgence!
Delicious Ways to Serve Hash Browns
Classic Diner-Style with Eggs and Bacon
One of the most beloved ways to serve crispy hash browns is in the traditional diner-style breakfast with eggs and bacon. This classic combination brings together the best of both worlds: hearty, savory flavors and crispy textures that complement each other perfectly. Whether you’re cooking for yourself or serving a crowd, this comforting breakfast has a timeless appeal that never goes out of style.
1. Why Eggs and Bacon Pair Perfectly with Hash Browns
The crispy texture of hash browns contrasts beautifully with the creamy yolk of fried or scrambled eggs, creating a satisfying balance. The salty, savory taste of crispy bacon enhances the hash browns, adding a touch of smokiness that elevates the overall flavor profile. Each element in this trio plays a key role:
Hash Browns: Crispy on the outside, soft on the inside, hash browns offer a satisfying texture that works well with the smoothness of eggs.
Eggs: Whether scrambled, fried, or poached, eggs provide a creamy, rich contrast to the crunch of the hash browns and the crispiness of bacon.
Bacon: The saltiness and smokiness of bacon bring an extra layer of depth to the dish, making it a filling and flavorful breakfast.
This diner-style breakfast is more than just a meal; it’s an experience, offering comfort and nostalgia with each bite.
2. How to Serve Hash Browns with Eggs and Bacon
To create the ultimate classic diner-style breakfast, follow these simple steps:
Cooking the Hash Browns: Start by cooking your hash browns to a perfect crispy golden brown. Whether you prefer to pan-fry, bake, or air-fry, make sure you follow the necessary tips to achieve that ideal crispness.
Frying Eggs: Choose your favorite way to cook the eggs. For the classic diner experience, fried eggs with runny yolks are a favorite, as the yolk can be used to add a creamy texture when mixed with the crispy hash browns. Scrambled eggs also work well, offering a fluffier and softer contrast.
Crispy Bacon: Cook bacon until it’s perfectly crisp, but not burnt. Whether you choose to pan-fry it, bake it, or air-fry it, make sure it’s crispy enough to stand up to the texture of the hash browns and eggs.
3. Adding Toppings and Variations
While the classic combination of hash browns, eggs, and bacon is delicious on its own, there are many ways to customize and elevate this diner-style breakfast to suit your tastes:
Cheese: Adding shredded cheese to your scrambled eggs or on top of your crispy hash browns can make the dish even more indulgent. Cheddar, Swiss, or even goat cheese can add a creamy, melty element.
Herbs and Spices: A sprinkle of fresh herbs like chives, parsley, or dill can brighten up the dish and add freshness. A dash of black pepper, paprika, or cayenne pepper can add a bit of heat and depth.
Sauces and Condiments: A drizzle of hot sauce, ketchup, or a dollop of sour cream can complement the flavors of the hash browns, eggs, and bacon. For a more indulgent touch, consider a spoonful of gravy or hollandaise sauce over the eggs.
Vegetables: Add sautéed vegetables like mushrooms, spinach, or onions to the mix for a healthier, more colorful twist. These can be incorporated into the eggs or served on the side.
Avocado: For a modern twist, add sliced avocado on top of your hash browns or eggs. The creamy texture of the avocado pairs wonderfully with the crispy hash browns and adds a fresh, buttery flavor.
4. Making It a Full Meal
To transform your classic diner-style hash browns with eggs and bacon into a more substantial meal, you can add side dishes and drinks that complement the hearty breakfast. Consider pairing your breakfast with:
Toast or English Muffins: Serve the hash browns with a side of buttered toast or a toasted English muffin to complete the meal. You can also offer options like buttermilk biscuits or pancakes for a truly indulgent spread.
Fresh Fruit: A side of fresh fruit, like sliced oranges, berries, or grapefruit, can provide a refreshing contrast to the richness of the eggs and bacon.
Coffee or Fresh Juice: No diner-style breakfast is complete without a steaming cup of coffee or a glass of freshly squeezed orange juice. These beverages enhance the overall experience, making it feel like a trip to your favorite breakfast spot.
5. Variations on the Classic Diner Breakfast
If you’re in the mood to experiment with flavors, here are a few fun twists on the classic diner-style hash browns with eggs and bacon:
Southwestern Style: Top your hash browns with salsa, guacamole, and jalapeños for a spicy kick. Serve with scrambled eggs and chorizo for a hearty southwestern breakfast.
Veggie-Loaded: Make it a vegetarian breakfast by swapping the bacon for grilled mushrooms or vegetarian sausage and adding more vegetables to your hash browns or eggs.
Smoked Salmon: For a touch of luxury, replace the bacon with smoked salmon and top your eggs with a spoonful of cream cheese and a sprinkle of capers for a bagel-inspired twist.
Final Thoughts
There’s something undeniably comforting and satisfying about the classic diner-style breakfast with hash browns, eggs, and bacon. This combination is a time-honored favorite because of the way the textures and flavors work together so harmoniously. Whether you’re sticking to the classic recipe or adding your own spin, hash browns with eggs and bacon offer a hearty and delicious way to start the day.
Loaded Hash Browns with Cheese and Sour Cream
For a decadent twist on your classic hash browns, loaded hash browns with cheese and sour cream are an absolute treat. This combination takes your crispy, golden hash browns to the next level by adding creamy, melty cheese and tangy sour cream, creating an irresistible dish that’s both indulgent and comforting. Whether you’re serving them for breakfast, brunch, or as a side dish to a hearty meal, loaded hash browns are sure to be a crowd-pleaser.
1. The Basics of Loaded Hash Browns
At its core, loaded hash browns are simply crispy hash browns topped with a variety of flavorful ingredients, with cheese and sour cream being the stars of the show. The cheese melts into the crispy potatoes, adding a gooey, rich texture that complements the crunch, while the sour cream provides a cooling contrast with its tanginess.
Cheese: The type of cheese you use can make all the difference. Classic choices include cheddar cheese for its sharp flavor, Monterey Jack for a creamy melt, or even Swiss cheese for a nutty taste. If you like things a little more adventurous, try pepper jack for a hint of spice or blue cheese for a tangy, bold flavor.
Sour Cream: A dollop of sour cream on top adds a cool, creamy contrast to the warm, crispy hash browns. The slight acidity of sour cream balances the richness of the cheese and complements the salty flavor of the potatoes.
2. Building Layers of Flavor
To elevate your loaded hash browns beyond just cheese and sour cream, consider layering in additional toppings that add even more flavor and texture:
Bacon or Sausage: For a meaty option, crumbled crispy bacon or sausage crumbles add a savory, smoky flavor that enhances the overall richness of the dish. The crispy bacon pairs perfectly with the crispy hash browns, while sausage offers a hearty, spiced element.
Green Onions or Chives: A sprinkle of chopped green onions or chives can add a mild onion flavor that brightens up the dish. The green color also adds a pop of freshness and vibrancy, which contrasts nicely with the golden-brown hash browns.
Jalapeños: If you like a little heat, sliced jalapeños (fresh or pickled) will give the dish a spicy kick. The heat from the peppers pairs wonderfully with the richness of the cheese and the tang of the sour cream.
Sautéed Vegetables: Consider adding sautéed mushrooms, bell peppers, or spinach for a veggie boost. These vegetables add texture, flavor, and nutrition to your loaded hash browns, balancing the richness of the cheese and sour cream.
3. How to Make Loaded Hash Browns
Making loaded hash browns is surprisingly simple, and you can customize them to suit your tastes. Here’s how to create the perfect crispy, cheesy, sour cream-loaded hash browns:
1. Prepare the Hash Browns: Start by cooking your hash browns to perfection. Whether you choose to pan-fry, bake, or air-fry, make sure the hash browns are crispy on the outside and soft on the inside.
If you’re using frozen hash browns, follow the cooking instructions for the best texture, ensuring they’re golden brown and crispy.
For homemade hash browns, you can either grate fresh potatoes or use pre-shredded ones. Season with salt and pepper, and make sure to drain excess moisture before cooking to achieve a crispy texture.
2. Top with Cheese: Once your hash browns are cooked, sprinkle your cheese of choice over the top. For the best melt, use shredded cheese, as it will distribute evenly and melt more thoroughly. You can either melt the cheese on top by placing the hash browns under a broiler for a few minutes or add it just after cooking for a perfect, gooey finish.
3. Add Sour Cream: After the cheese has melted to your liking, spoon a generous dollop of sour cream over the hash browns. The cool, creamy texture of sour cream will contrast with the warm, crispy potatoes and melted cheese.
4. Add Toppings: Finally, garnish your loaded hash browns with any additional toppings you like, such as crispy bacon, sautéed vegetables, or fresh herbs.
4. Variations of Loaded Hash Browns
While cheese and sour cream are the base for loaded hash browns, feel free to experiment with other toppings and flavor combinations to make this dish your own. Here are some ideas:
BBQ Loaded Hash Browns: Top with BBQ pulled pork or chicken, melted cheddar cheese, and a drizzle of BBQ sauce for a southern-inspired twist.
Mexican Loaded Hash Browns: Add guacamole, salsa, black beans, and a sprinkle of cilantro for a Mexican flavor profile. You can also use jalapeños for added heat.
Breakfast Style: For a complete breakfast, top your loaded hash browns with a fried egg, bacon, and a sprinkle of cheese. This combination will make for a filling, hearty meal.
5. How to Serve Loaded Hash Browns
Loaded hash browns are perfect on their own as a hearty breakfast or brunch, but they also make an excellent side dish for lunch or dinner. They pair well with many different meals:
Eggs: Serve alongside scrambled or fried eggs for a complete breakfast.
Grilled Meats: Pair them with steak, grilled chicken, or pork chops for a delicious side.
Salads: Serve with a crisp green salad to balance the richness of the loaded hash browns.
Final Thoughts
Loaded hash browns with cheese and sour cream are a comfort food classic that can be customized to suit your tastes. Whether you prefer the simplicity of cheese and sour cream or like to add bacon, jalapeños, or sautéed vegetables, this dish is versatile, delicious, and satisfying. It’s the perfect way to upgrade your hash browns and make them the star of any meal.
Breakfast Burrito Filling with Scrambled Eggs
A breakfast burrito is an iconic breakfast item, and one of the most popular and satisfying fillings is scrambled eggs. Scrambled eggs serve as the perfect base, providing a soft, creamy texture that complements the other ingredients while being versatile enough to pair with a wide range of toppings and fillings. The combination of eggs with warm tortillas creates a filling and delicious meal that can be enjoyed any time of day.
1. Why Scrambled Eggs Make the Perfect Breakfast Burrito Filling
Scrambled eggs are the perfect choice for a breakfast burrito because of their mild flavor and smooth texture. They also offer a high-protein content, making your burrito filling both filling and nutritious. Their fluffiness adds to the overall mouthfeel, creating a contrast with other ingredients like crispy bacon, sautéed vegetables, or cheese.
Flavor: Scrambled eggs have a subtle flavor, which acts as the ideal neutral base to complement stronger ingredients. Whether you want a spicier burrito with salsa and jalapeños or a richer option with cheese and bacon, scrambled eggs balance out the flavor profile.
Texture: The soft and creamy texture of scrambled eggs adds a delicate mouthfeel to the burrito. This texture contrasts beautifully with crispy hash browns, crispy bacon, or other crunchy fillings you may add to the burrito.
2. How to Make Scrambled Eggs for Your Burrito
To ensure your scrambled eggs are perfect for a breakfast burrito, you need to get the technique just right. Overcooking or under-seasoning the eggs can result in a dry, bland burrito. Here’s how to make soft, fluffy scrambled eggs that will enhance your breakfast burrito:
1. Crack and Whisk: Start by cracking your eggs into a bowl. Whisk them thoroughly until the yolks and whites are fully combined. This step will help you achieve a uniform texture in the eggs. You can add a small amount of milk or cream to make the eggs even fluffier, though this is optional.
2. Cook Over Low Heat: Use a non-stick skillet over low to medium heat to scramble your eggs. The key is to cook the eggs slowly to retain moisture and prevent them from becoming rubbery. Stir the eggs gently and frequently, allowing them to form soft curds. It’s important to avoid scrambling too vigorously.
3. Seasoning: Season your scrambled eggs with salt and pepper to taste. You can also add some extra flavor by mixing in fresh herbs, like chives or cilantro, or a pinch of garlic powder or onion powder for an added layer of flavor.
4. Don’t Overcook: Scrambled eggs can go from soft and creamy to dry and rubbery quickly, so remove them from the heat when they’re just set but still slightly runny. The eggs will continue to cook in the residual heat from the pan, resulting in perfectly soft scrambled eggs.
3. Customizing Scrambled Eggs for Your Burrito
Once you have the perfect scrambled eggs, you can customize them with different ingredients to add more flavor and texture to your breakfast burrito. Here are a few ideas to elevate your scrambled eggs:
Cheese: Adding cheese to your scrambled eggs while cooking will create a cheesy, gooey texture that enhances the overall flavor. Popular choices include cheddar, Monterey Jack, or pepper jack for a bit of spice. You can also sprinkle cheese on top of the eggs right before removing them from the heat for a melty finish.
Vegetables: You can fold in sautéed vegetables like onions, bell peppers, or spinach to give the eggs extra flavor and nutrition. These vegetables add color and texture to your scrambled eggs, making them even more filling and satisfying.
Salsa and Avocado: For added freshness, top the scrambled eggs with salsa or guacamole. The acidity of the salsa and the creaminess of the avocado balance the richness of the eggs and make the burrito feel lighter.
Bacon or Sausage: Crispy bacon or sausage can be crumbled into the scrambled eggs, adding a savory, salty crunch. This combination is a classic that pairs perfectly with the soft, creamy eggs.
4. Assembling the Breakfast Burrito
Once your scrambled eggs are ready, it’s time to assemble the burrito. A warm tortilla is the base of the burrito, and it’s important to make sure your tortilla is pliable enough to roll without cracking. You can use flour tortillas, whole wheat tortillas, or even corn tortillas, depending on your preference.
1. Warm the Tortilla: Heat your tortilla in a dry skillet or in the microwave for a few seconds to make it soft and easy to roll.
2. Add Scrambled Eggs: Spoon your freshly made scrambled eggs onto the center of the tortilla. Be generous with the amount, as the eggs will be the main filling of the burrito.
3. Add Other Fillings: After placing the scrambled eggs, add any other ingredients you desire, such as cheese, cooked vegetables, bacon, or even some crispy hash browns for extra texture. Be sure not to overfill the burrito to avoid making it difficult to wrap.
4. Roll It Up: Fold the sides of the tortilla inward, then roll it up tightly from the bottom to enclose all the fillings. Make sure the burrito is snug but not too tight, as you don’t want the eggs to spill out.
5. Grill (Optional): If you like your burrito crispy on the outside, you can briefly grill it in a pan after it’s rolled up. This will add a golden, crispy layer to the outside, creating an irresistible crunch.
5. Variations to Try with Scrambled Eggs
To make your scrambled egg breakfast burrito even more interesting, here are a few variations to try:
Chorizo Scrambled Eggs: For a spicy twist, cook chorizo and scramble it with your eggs. This Mexican-inspired combination adds bold flavor to your burrito.
Southwest Scrambled Eggs: Add black beans, corn, and a sprinkle of cumin to your scrambled eggs for a Southwest-inspired burrito. You can also top it with cilantro and a squeeze of lime juice for an extra burst of flavor.
Vegetarian Scrambled Eggs: For a meat-free option, try adding mushrooms, zucchini, and tomatoes to your scrambled eggs. The veggies provide a hearty, nutritious filling while keeping the burrito light and fresh.
6. Serving Suggestions
Breakfast burritos with scrambled eggs can be served on their own or with a side of your favorite breakfast items. Here are some ideas to complement your burrito:
Serve with fresh fruit or a side of roasted potatoes for a balanced meal.
Add a side salad with a light vinaigrette if you prefer something refreshing on the side.
Pair with a fresh smoothie or coffee for a complete breakfast or brunch.
Conclusion
Scrambled eggs make for a delicious, versatile, and nutritious filling in your breakfast burrito. They’re easy to make, customizable to your taste, and pair wonderfully with a variety of ingredients. Whether you prefer a classic scramble with cheese and bacon or a more vegetable-filled option, scrambled eggs are the perfect base for a breakfast burrito that’s both satisfying and comforting.
Hash Brown Casserole for a Hearty Meal
Hash brown casserole is a classic comfort food that takes the humble hash brown and transforms it into a satisfying, hearty dish. This versatile casserole can be served for breakfast, brunch, or dinner, and is perfect for feeding a crowd. It’s a great choice when you want something filling, flavorful, and easy to prepare. By combining frozen hash browns with ingredients like cheese, cream, and seasonings, you can create a dish that’s both comforting and customizable. Whether you’re making it for a special occasion or as a simple weeknight meal, hash brown casserole is sure to be a crowd-pleaser.
1. What Makes Hash Brown Casserole a Hearty Meal?
Hash brown casserole is known for its rich, indulgent flavors and dense texture, making it a filling meal. The key to its heartiness lies in the balance of creamy and crispy elements, which come together to create a deliciously satisfying dish. The frozen hash browns are the perfect base, providing both structure and substance, while ingredients like cheese, cream of chicken soup, and sour cream contribute to its creamy, comforting nature. This combination makes the casserole substantial enough to be served as a main dish on its own or as a side dish to accompany meats or vegetables.
Filling and Substantial: The combination of potatoes and cheese provides a rich source of carbohydrates and fats, which gives the dish its filling and satisfying quality.
Savory Flavors: With the addition of spices, herbs, and creamy ingredients like sour cream or cream of mushroom soup, hash brown casserole is full of flavor that will keep you coming back for more.
Texture Contrast: The crispy top layer and creamy interior create a wonderful contrast of textures that elevate the overall eating experience. When baked properly, the casserole’s top will crisp up, while the inside remains soft and creamy.
2. Ingredients for a Classic Hash Brown Casserole
The beauty of a hash brown casserole lies in its simplicity and flexibility. A basic recipe can easily be customized to suit different tastes and dietary preferences. Here’s what you’ll need for a classic hash brown casserole:
Frozen hash browns: These are the base of your casserole and provide the bulk of the dish. You can use shredded or diced hash browns, depending on the texture you prefer. Using frozen hash browns eliminates the need for prep time, making this casserole quick and easy to assemble.
Cheese: A generous amount of cheddar cheese is a must for that classic cheesy flavor. You can also mix in Monterey Jack or cream cheese for added richness and creaminess.
Cream of chicken soup: This canned ingredient is a shortcut to making your casserole creamy and flavorful. If you prefer a vegetarian version, you can substitute it with cream of mushroom soup or a homemade cream sauce.
Sour cream: Sour cream adds a tangy richness that balances out the richness of the cheese and soup.
Seasonings: Salt, pepper, garlic powder, and onion powder are essential for bringing out the savory flavors in the casserole. You can also add a pinch of paprika, parsley, or chives for an extra layer of flavor.
Butter: For richness and to help the casserole brown on top, butter is a key ingredient. It can be mixed into the casserole or drizzled on top before baking.
3. How to Make Hash Brown Casserole
Making hash brown casserole is straightforward and doesn’t require much hands-on time. Here’s a simple step-by-step guide to putting it together:
1. Preheat the Oven: Preheat your oven to 350°F (175°C). This ensures the casserole will cook evenly and give it that golden, crispy finish.
2. Combine Ingredients: In a large bowl, combine your frozen hash browns, cheese, sour cream, cream of chicken soup, and seasonings. Stir everything together until the ingredients are evenly mixed. If you like, you can also add some cooked onions, garlic, or bacon for extra flavor.
3. Grease the Baking Dish: Lightly grease a 9×13-inch baking dish with butter or cooking spray to prevent the casserole from sticking.
4. Transfer to Dish: Spoon the hash brown mixture into the prepared baking dish, spreading it out evenly. Make sure it’s packed down gently to avoid any air pockets that can affect the texture.
5. Top with Butter: To help the casserole crisp up on top, you can dot the surface with small pieces of butter or drizzle melted butter over the top of the casserole before baking.
6. Bake: Place the dish in the preheated oven and bake for 45-60 minutes, or until the top is golden and crispy and the casserole is hot throughout. You can cover the casserole with aluminum foil during the first part of baking to prevent over-browning and then remove the foil for the last 15 minutes to achieve the crispy top.
7. Let It Rest: Once baked, let the casserole cool for a few minutes before serving to allow it to set and make it easier to cut into squares.
4. Variations to Try
While the classic hash brown casserole is delicious as-is, there are plenty of ways to mix things up and tailor the dish to your preferences. Here are some variations to consider:
Add Bacon or Sausage: For a heartier version, add crisp bacon or cooked sausage to the casserole mixture. These savory meats add both flavor and texture, making the dish even more satisfying.
Vegetarian Options: Skip the meat and add vegetables like bell peppers, spinach, or mushrooms to make the casserole more nutritious and filling.
Spicy Hash Brown Casserole: If you like a bit of heat, stir in some jalapeños, hot sauce, or chopped green chilies. Pair it with pepper jack cheese for a spicy kick.
Use Different Cheeses: Experiment with different types of cheese, like Monterey Jack, mozzarella, or Swiss for varying flavors and textures. You can even use a mix of cheeses for a more complex flavor profile.
Top with Crispy Topping: For a crunchy texture, sprinkle cornflakes or panko breadcrumbs on top before baking. These will crisp up and provide an extra layer of texture.
5. Serving Suggestions
Hash brown casserole can be served in a variety of ways to suit different occasions and tastes. Here are some ideas for how to serve it:
With Eggs and Bacon: For a complete breakfast or brunch, serve hash brown casserole with scrambled eggs or a fried egg on top. A side of crispy bacon or sausage links would round out the meal perfectly.
As a Side Dish: Hash brown casserole is an excellent side dish to serve with meat like roast chicken, steak, or grilled pork chops. Its rich, cheesy texture complements savory meats beautifully.
Topped with Sour Cream or Salsa: If you want to add a fresh twist, serve the casserole with a dollop of sour cream, or for a tangy option, top it with salsa and a sprinkle of fresh cilantro.
Conclusion
Hash brown casserole is the ultimate comfort food for anyone craving a hearty, satisfying meal. Its creamy, cheesy layers, combined with crispy hash browns, make it a perfect option for any occasion. Whether you stick with the classic version or try a creative variation, hash brown casserole is a versatile dish that can be customized to fit any flavor profile. It’s a great choice for family dinners, potlucks, or any time you’re in the mood for something warm and comforting.
Common Mistakes to Avoid When Cooking Frozen Hash Browns
Cooking on Low Heat, Leading to Soggy Texture
Cooking frozen hash browns on low heat is a mistake many people make when trying to get the perfect crispy texture. While it may seem like a gentle, slower approach would give the best results, cooking hash browns on low heat can actually lead to a disappointing soggy texture. This is due to several factors that affect how hash browns cook, particularly the moisture content in the potatoes.
1. Excess Moisture Accumulation
Frozen hash browns contain a significant amount of moisture that needs to be cooked off to achieve a crispy texture. When you cook hash browns on low heat, the heat is not high enough to evaporate this moisture quickly. Instead, the water in the hash browns begins to release slowly and remains trapped in the pan or baking sheet, causing the hash browns to steam rather than fry. This results in a soggy texture, as the potatoes are sitting in their own released moisture rather than crisping up.
2. Slow Cooking Prevents Crisping
Crispiness in hash browns is achieved by rapidly cooking the exterior of the potatoes, which creates a golden, crunchy texture. This is why higher heat is necessary to achieve that perfect crispiness. When cooking on low heat, the surface of the hash browns doesn’t have enough heat to crisp up properly, and the longer cooking time allows the hash browns to soften without developing that crispy exterior.
The process of caramelization and Maillard reaction—which are responsible for browning and enhancing the flavor of the hash browns—requires a higher cooking temperature. On low heat, these reactions do not occur as efficiently, and the result is an underwhelming texture that doesn’t have the satisfying crunch people expect from perfectly cooked hash browns.
3. Impact on Cooking Methods
This issue becomes particularly noticeable when pan-frying or baking hash browns. In pan-frying, if the pan is not heated sufficiently, the frozen hash browns will absorb more oil and fat, causing them to become greasy and soggy. The same issue occurs in the oven, where low heat will bake the hash browns slowly and prevent the exterior from crisping up. The inside may cook and soften, but without that hot, intense heat, they won’t develop the necessary texture.
4. The Solution: Use High Heat
To avoid a soggy texture, it’s important to cook hash browns at higher heat to quickly dry out the moisture and promote crispy texture. Whether you are frying, baking, or air-frying your hash browns, using medium-high to high heat ensures the surface crisps up, moisture evaporates, and the result is deliciously crispy hash browns.
For Pan-Frying: Heat the pan until it’s hot before adding the hash browns. This way, the potatoes will immediately start to crisp and not steam in their own moisture.
For Baking: Preheat the oven to a higher temperature, like 425°F (220°C), so the heat is intense enough to crisp the hash browns without them becoming soggy.
Also for Air-Frying: Air fryers work best at higher temperatures, typically around 375°F (190°C) to 400°F (200°C), which creates the crispiness without needing excessive oil.
5. Takeaway: Quick and Hot is Key
Ultimately, the key to achieving crispy hash browns is to use the right cooking temperature. Cooking on low heat will likely lead to sogginess, so always opt for a higher cooking temperature to quickly seal the surface, dry out the moisture, and get that satisfying crunch.
Not Preheating the Pan or Oven Properly
One of the most common mistakes people make when cooking frozen hash browns is not preheating the pan or oven properly. Preheating is an essential step for ensuring that your hash browns cook evenly and develop that crispy, golden texture we all love. Failing to preheat either your pan or oven can have a negative impact on both the texture and the overall cooking process of the hash browns.
1. Uneven Cooking
When you don’t preheat the pan or oven, the hash browns are introduced to a surface that isn’t hot enough. In the case of pan-frying, placing hash browns in a cold or only slightly warm pan causes them to start cooking unevenly. Some parts may cook too slowly, while others may start to steam as the moisture is released from the potatoes. This leads to uneven browning, with parts of the hash browns remaining soft and soggy, while others may burn. Preheating the pan ensures that the hash browns hit a hot surface immediately, allowing them to crisp up from the moment they make contact.
Similarly, if you are baking hash browns, placing them in an unheated oven will cause them to cook more slowly and unevenly. Without the right initial heat, the potatoes might cook through without getting the desired crispy exterior. Preheating ensures that the hash browns are exposed to a high, consistent temperature that promotes even cooking and crisping.
2. Longer Cooking Time
If the cooking surface isn’t hot enough from the start, the hash browns may need a longer time to cook. This extended cooking time can cause the potatoes to become overly soft or greasy, especially if you’re frying in oil. In addition, longer cooking times at lower temperatures can result in excess moisture being released, leading to soggy hash browns rather than crispy ones. Preheating the pan or oven to the right temperature means your hash browns cook efficiently and quickly, keeping their texture intact.
3. Impact on Crispiness
Crispiness is the hallmark of great hash browns, and preheating plays a crucial role in achieving that. When the cooking surface is preheated, it allows the exterior of the hash browns to crisp up right away, while the interior can cook more gently. Without preheating, the hash browns sit in a cooler environment, and the moisture released from the potatoes makes it harder for the surface to achieve a crunchy texture. In contrast, when you preheat your pan or oven properly, the heat seals the potatoes quickly, locking in their moisture and allowing the surface to crisp up.
4. Effects of Not Preheating the Oven for Baking
In the case of baking, hash browns require an oven temperature of about 425°F (220°C) to ensure a nice, crispy result. If you don’t preheat the oven, you risk placing the hash browns in a slowly warming environment. As the oven heats up, the hash browns cook unevenly, and they are more likely to be soggy or soft rather than crisp. To avoid this, always give your oven at least 10-15 minutes to preheat to the desired temperature before placing the hash browns in.
5. How to Properly Preheat
For Pan-Frying: Heat the pan over medium-high heat for a few minutes before adding the hash browns. A quick test is to flick a drop of water onto the pan; if it sizzles immediately, the pan is hot and ready.
For Baking: Preheat the oven to 425°F (220°C) or the recommended temperature for the specific recipe. Allow the oven to fully reach temperature before placing the hash browns on the baking sheet.
And for Air Frying: If your air fryer requires preheating, follow the manufacturer’s instructions. Typically, air fryers preheat in just a few minutes, and once the desired temperature is reached (around 375°F (190°C) to 400°F (200°C)), you can start cooking your hash browns.
6. Takeaway: Always Preheat for Perfect Hash Browns
Preheating is a simple but essential step that can drastically improve the outcome of your hash browns. Whether you’re pan-frying, baking, or air-frying, starting with a hot cooking surface ensures even cooking, helps avoid sogginess, and results in the crispy texture everyone loves. So, next time you make hash browns, don’t skip the preheating step—your hash browns will thank you for it!
Skipping Oil or Butter for Crispiness
One of the key components in achieving perfectly crispy frozen hash browns is the use of oil or butter. Many people might think that skipping oil or butter will make the dish healthier or easier to prepare, but this can have a significant impact on the texture and flavor of your hash browns. Oil or butter is essential for promoting crispiness, flavor, and a satisfying texture. When cooking hash browns, it’s important not to skip this step.
1. The Role of Oil or Butter in Achieving Crispiness
The primary reason for using oil or butter is to create a barrier between the hash browns and the cooking surface. This fat ensures that the hash browns don’t stick to the pan, and more importantly, it helps the exterior of the potatoes crisp up and turn golden brown. Without oil or butter, the potatoes would just cook in their own moisture, which would result in a soggy texture instead of a crispy one.
Oil: Oils with a high smoke point, such as vegetable oil, canola oil, or avocado oil, are ideal for frying frozen hash browns. These oils create an even coating that crisps the outside of the hash browns while keeping the interior soft and tender. They also allow for even heat distribution, preventing the hash browns from burning or sticking to the pan.
Butter: Butter adds a rich flavor to hash browns that oil cannot replicate. While it has a lower smoke point than oil, using butter in moderation can add a golden, slightly crisp exterior. Butter can also help enhance the natural potato flavor and make the hash browns taste indulgent and delicious.
2. Achieving a Crispy Golden Crust
When frying hash browns in a pan, the heat needs to be high enough to quickly cook the potatoes and evaporate any excess moisture. The oil or butter helps to do just that by forming a thin, crisp layer around the potatoes. Without it, the hash browns will not achieve that satisfying crunch that is characteristic of perfectly cooked hash browns.
For oven-baked hash browns, oil is still a critical ingredient. Brushing a light coating of oil onto the hash browns or tossing them in oil before baking ensures that they don’t dry out during cooking. The oil also helps them crisp up in the oven, just like it would in a frying pan, and gives them that desirable golden brown color.
3. Flavor Enhancement
Another important factor to consider is the flavor that oil or butter imparts to the hash browns. While the potatoes themselves offer a mild taste, the fat used for cooking helps elevate their flavor. Butter, for instance, adds a rich, creamy taste that complements the potatoes perfectly. Meanwhile, oils with subtle flavors, like olive oil, can add an extra layer of complexity without overpowering the natural flavor of the hash browns.
Additionally, the oil or butter can carry seasonings like garlic, rosemary, or thyme, making your hash browns even more flavorful. When you skip this step, you miss out on the opportunity to add that extra layer of richness and taste, making your hash browns less savory and less satisfying overall.
4. Creating a Crispy Texture without Excess Grease
Some people worry that using oil or butter will make their hash browns too greasy, but this is not the case when done properly. The right amount of oil or butter will create a light coating that allows for the crisping process to take place without soaking the hash browns in fat. By using the proper cooking technique (such as using just enough oil to coat the pan or tossing the hash browns lightly in oil before baking), you can achieve crispiness without an overly greasy or oily result.
Moreover, using a paper towel to blot excess oil after frying can help remove any residual grease, leaving your hash browns crispy and delicious without the heavy, greasy feel.
5. Alternative Methods of Adding Fat
If you’re looking for a healthier option, you can try using olive oil spray or coconut oil as a lighter alternative to traditional butter or vegetable oils. These options still help to achieve the crispy texture but with a different flavor profile. Additionally, using a non-stick skillet or air fryer can also reduce the amount of fat needed, but it’s still important to use some oil to promote crispiness.
6. The Takeaway: Don’t Skip the Fat
While it may be tempting to skip the oil or butter to make your hash browns healthier, it’s an essential ingredient for achieving that golden, crispy texture. Oil and butter create the perfect cooking surface, provide flavor, and help with crisping. Whether you choose vegetable oil, olive oil, or butter, don’t make the mistake of skipping this step if you want the perfect hash browns every time.
In summary, oil or butter is key for both the texture and flavor of your hash browns. Skip it at your own risk—without fat, you’re likely to end up with soggy, unappetizing hash browns rather than the crispy, golden potatoes you’re craving.
Flipping Too Soon, Causing Them to Break
When it comes to cooking frozen hash browns, timing is everything. One common mistake that can lead to less-than-perfect hash browns is flipping them too soon. Hash browns, particularly those that are fried in a pan, need time to properly crisp up and set before they’re flipped. If you rush this step, you might end up with broken, unevenly cooked hash browns that lack the crispiness and texture you desire.
1. The Importance of Letting Them Set
When you first add frozen hash browns to a hot pan, they start to release moisture as they cook. This moisture needs time to evaporate, and the hash browns need a few minutes on one side to form a golden, crispy crust. If you flip them too soon, the exterior hasn’t had enough time to solidify, and the hash browns are still too soft and fragile. At this point, flipping them can cause them to break apart, leaving you with uneven pieces and a mess in the pan.
Allowing the hash browns to cook undisturbed on one side ensures that a solid, crispy crust forms. The crust holds the potatoes together, making it easier to flip them without them falling apart. If you try to flip them too early, you risk breaking the delicate structure of the hash browns, resulting in a soggy or unevenly cooked mess.
2. The Ideal Cooking Time for Flipping
How long should you wait before flipping frozen hash browns? The answer depends on the heat and thickness of the hash browns, but in general, you should wait 3-5 minutes on the first side. The exact time can vary, so it’s important to keep an eye on the progress.
Pan-Frying: If you’re frying hash browns in a skillet, use medium-high heat to cook them. After about 3-5 minutes, gently lift the edge of a hash brown with a spatula to check if it’s golden brown and crispy. If it easily lifts and shows a crisp, golden edge, it’s time to flip. If it’s still sticking or appears soft, give it another minute or two to set.
Baking: For oven-baked hash browns, flipping may not be necessary, but for even cooking, you should check halfway through the cooking time (typically 20-25 minutes at 425°F (220°C)). If you do decide to flip, ensure that the hash browns are golden and crisp on the bottom before doing so.
3. The Risk of Overworking the Hash Browns
Flipping too soon also means you might be handling the hash browns more than necessary. Overworking or moving the hash browns around too much can cause them to break apart, especially if they’re frozen and haven’t had time to cook through. By flipping them prematurely, you risk losing that beautiful crispy texture on both sides, and the result is likely to be more like a mashed potato mix than crispy hash browns.
To avoid this, resist the urge to flip them repeatedly. Let them cook on one side until they’ve fully formed a golden crust, then carefully flip them to finish cooking the other side.
4. How to Flip Hash Browns Without Breaking Them
When you do flip hash browns, it’s important to do so with care. Here are a few tips for flipping hash browns without causing them to break:
Use a Wide Spatula: A large, wide spatula is essential for supporting the hash browns when flipping. A narrow spatula can cause the hash browns to collapse or break, while a wide one helps distribute the weight evenly.
Flip in One Go: Instead of flipping small sections, try to flip the whole hash brown at once. If you have large frozen hash brown patties, use the spatula to get underneath the entire piece and flip it smoothly. Avoid flipping in halves or smaller sections, as this can cause the hash browns to fall apart.
Be Gentle: When flipping, avoid using a forceful motion. Gently slide the spatula underneath the hash brown and use a quick but smooth flipping motion. This prevents the hash browns from breaking apart mid-flip.
Allow the Hash Browns to Set: After flipping, allow the hash browns to cook undisturbed on the second side, just as you did with the first side. This will help them become crisp and golden without breaking apart.
Check Also
5. The Takeaway: Patience is Key
Flipping hash browns too soon is one of the easiest ways to ruin your batch. To ensure a crisp, perfectly cooked result, give them time to set on one side before attempting to flip. By being patient and allowing the hash browns to form a crispy crust, you’ll avoid breaking them and end up with hash browns that have the right texture, color, and crunch. The key is to wait for the right moment—when the hash browns are golden brown and easily lift from the pan. So next time, remember: patience is key to perfect, crispy hash browns.