
Crispy on the outside, tender on the inside—chicken katsu is a beloved Japanese dish that’s both simple and incredibly satisfying. This golden, panko-breaded chicken cutlet is deep-fried to perfection and traditionally served with tonkatsu sauce, shredded cabbage, and steamed rice. Whether you’ve enjoyed it at a Japanese restaurant or as part of a comforting katsu curry, learning how to make it at home is easier than you think!
In this guide, I’ll show you how to make authentic chicken katsu with step-by-step instructions, tips for achieving the crispiest coating, and variations to suit your taste. Ready to master this Japanese favorite? Let’s get started!
What is Chicken Katsu? A Brief Introduction
The Origins of Chicken Katsu
Chicken katsu, a crispy, breaded cutlet, is a Japanese dish with strong Western influences. Its roots can be traced back to tonkatsu, a similar dish made with pork, which was introduced to Japan in the late 19th century during the Meiji era (1868–1912). This was a time when Japan was actively adopting elements of Western cuisine, and tonkatsu was inspired by European-style breaded and fried meats, such as Austrian Wiener schnitzel and French côtelette.
Originally, tonkatsu was served as a yoshoku (Western-style Japanese dish) in restaurants catering to a growing interest in European food. However, over time, it became a staple of Japanese cuisine, served with rice, shredded cabbage, and a rich tonkatsu sauce (a sweet and tangy Worcestershire-style sauce).
As Japanese cuisine evolved, variations of tonkatsu emerged, including chicken katsu (torikatsu), which uses chicken breast or thigh instead of pork. Chicken katsu became popular for its lighter taste and was embraced in bento boxes, katsu sandwiches, and katsu curry dishes. Today, it is a common comfort food enjoyed across Japan and internationally.
Whether served on a plate with rice, inside a fluffy sandwich, or as part of a flavorful curry, chicken katsu has become a versatile and beloved dish worldwide.
What Makes Chicken Katsu Different from Other Fried Chicken?
At first glance, chicken katsu may look similar to other types of fried chicken, but it has several distinct characteristics that set it apart. From its unique breading to its cooking technique, chicken katsu stands out among global fried chicken varieties like Southern fried chicken, tempura, schnitzel, and karaage.
1. Panko Breadcrumb Coating for Extra Crispiness
One of the defining features of chicken katsu is its panko breadcrumb coating. Unlike regular breadcrumbs, panko is made from crustless white bread that is processed into large, airy flakes. This results in a lighter, crunchier, and crispier texture compared to the denser and oil-absorbing coating found in traditional fried chicken recipes. The larger panko crumbs also create a distinctive golden-brown crust that remains crispy longer after frying.
2. Thin, Evenly Pounded Chicken Cutlets
Unlike Southern-style fried chicken, which often uses bone-in pieces with a thick batter, chicken katsu is made with boneless chicken breasts or thighs, which are sliced and pounded thin to ensure quick and even cooking. This technique not only makes the chicken tender but also creates the perfect balance between the crispy coating and the juicy meat inside.
3. A Simpler, Three-Step Breading Process
Chicken katsu follows a traditional three-step breading process:
1. Flour – Lightly coats the chicken to help the egg adhere.
2. Egg wash – Ensures the panko sticks properly.
3. Panko breadcrumbs – Creates the signature crispy crust.
Unlike buttermilk-based marinades used in American fried chicken, which tenderize the meat and add a tangy flavor, chicken katsu keeps it simple with just salt, pepper, and a light dusting of flour before coating. This allows the natural flavor of the chicken and the crunch of the panko to shine.
4. Deep-Frying at the Right Temperature
Chicken katsu is typically deep-fried at 170–180°C (340–360°F), ensuring a crispy, golden-brown crust without overcooking the inside. Compared to double-fried Korean fried chicken or heavily battered American fried chicken, katsu has a more delicate, airy texture with a clean, crisp bite.
5. Served with Tonkatsu Sauce Instead of Gravy
While Southern fried chicken is often served with gravy or hot sauce, chicken katsu is paired with tonkatsu sauce—a thick, sweet, and tangy Japanese condiment made with Worcestershire sauce, soy sauce, sugar, and fruit puree. This sauce enhances the umami flavor of the dish and complements the crispy cutlet without overpowering it.
6. Often Served with Rice and Shredded Cabbage
Unlike Western fried chicken, which is typically enjoyed with fries, biscuits, or coleslaw, chicken katsu is commonly served with steamed rice and shredded cabbage. The cabbage provides a refreshing crunch that balances the richness of the fried cutlet, while the rice makes it a satisfying meal. Some variations, like katsu curry, feature chicken katsu smothered in a flavorful Japanese curry sauce.
Conclusion
Chicken katsu may share some similarities with other fried chicken dishes, but its panko coating, light seasoning, and Japanese-inspired serving style make it a unique and beloved dish. Whether you enjoy it as part of a traditional Japanese meal or in a fusion-style katsu sandwich, its crispy texture and deliciously simple flavors make it a must-try dish!
Popular Ways to Serve Chicken Katsu
Chicken katsu is a versatile dish that can be enjoyed in several ways, each offering a unique flavor experience. Whether served traditionally with rice or creatively incorporated into other meals, this crispy cutlet pairs well with a variety of sauces and side dishes. Here are some of the most popular ways to serve chicken katsu:
—
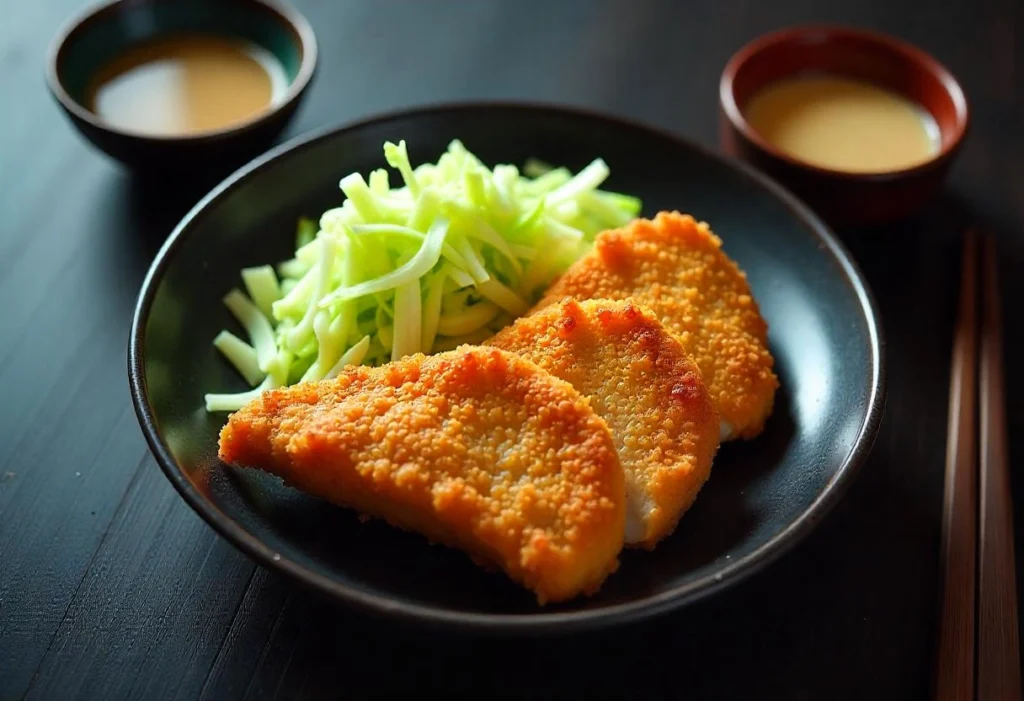
1. Classic Chicken Katsu with Rice and Tonkatsu Sauce
One of the most common and traditional ways to enjoy chicken katsu is with steamed Japanese rice and tonkatsu sauce. This simple yet satisfying combination highlights the crispy cutlet’s texture and the sweet, tangy flavors of the sauce.
Tonkatsu Sauce: A thick, umami-rich sauce made from Worcestershire sauce, soy sauce, sugar, and fruit puree. It adds depth and enhances the crispy breading.
Shredded Cabbage: Often served as a side to balance the richness of the fried chicken with a fresh, crunchy texture.
Miso Soup & Pickles: A small bowl of miso soup and a side of tsukemono (Japanese pickles) often accompany this dish in traditional Japanese meals.
—
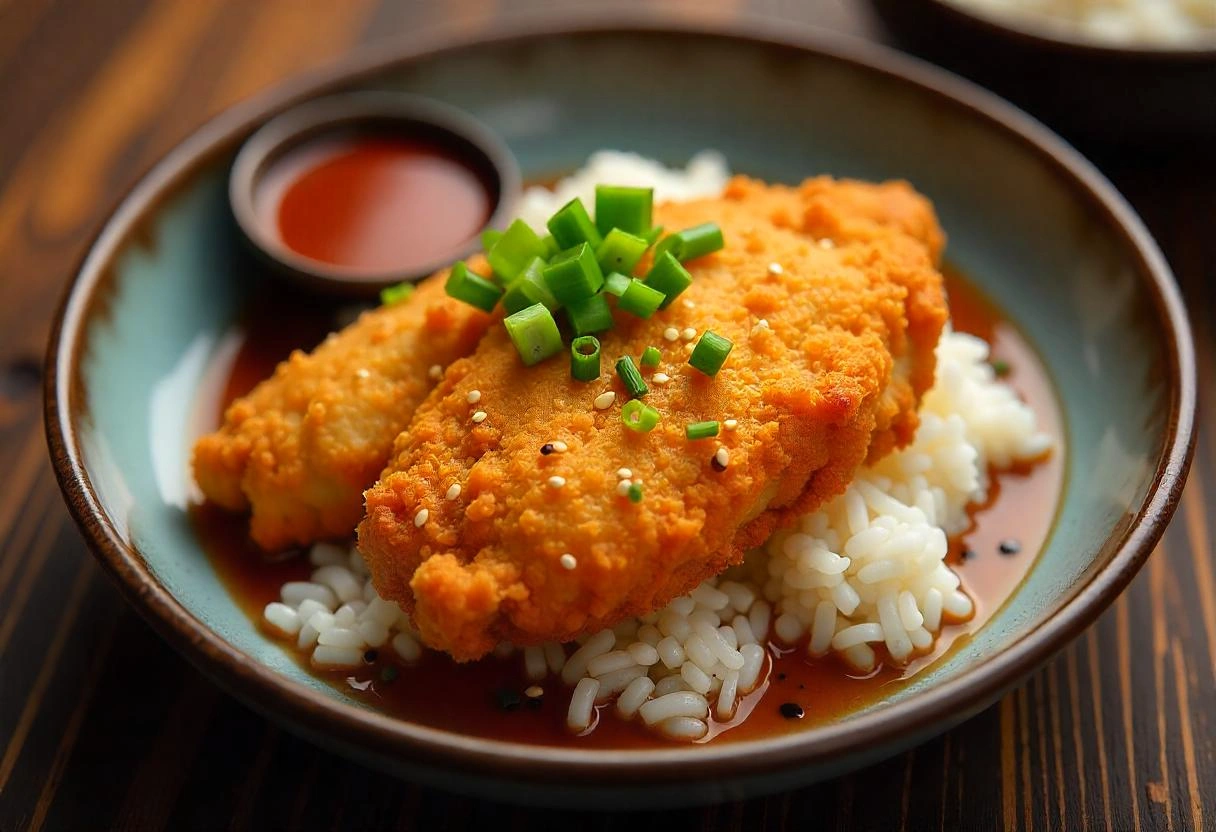
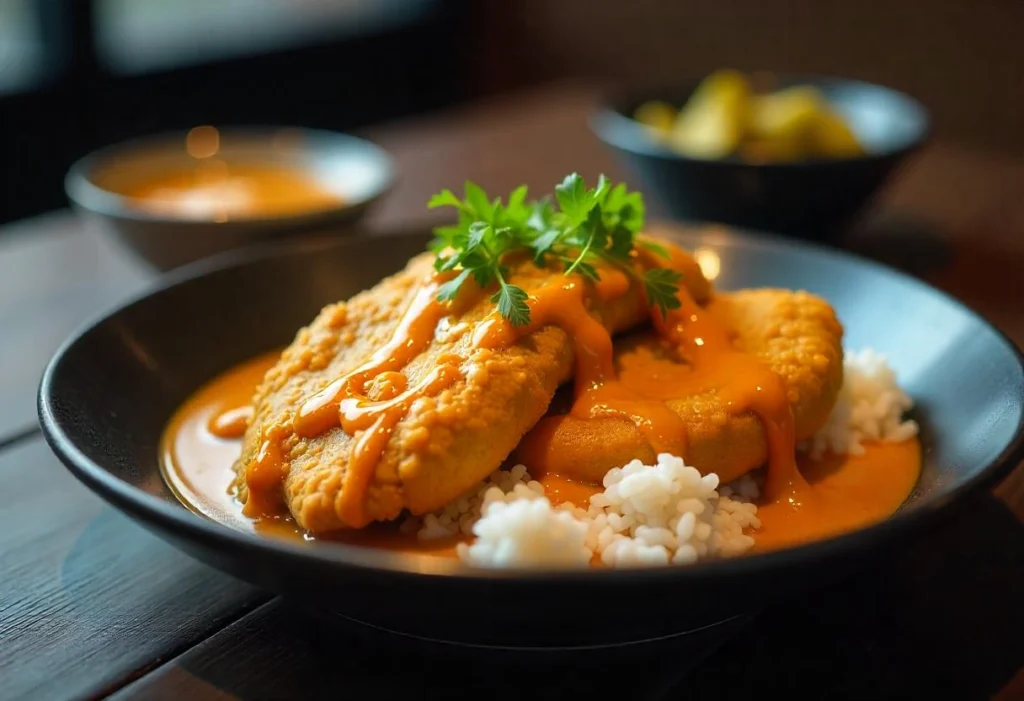
2. Chicken Katsu Curry (Katsu Kare)
For those who love Japanese curry, chicken katsu makes a perfect pairing. Katsu curry is a hearty dish where the crispy chicken cutlet is served over rice and smothered in a rich, mildly spiced Japanese curry sauce.
Japanese Curry Sauce: A thick, savory curry sauce made from a roux, carrots, potatoes, onions, and mild curry spices.
Rice Base: The cutlet is usually placed on a bed of fluffy white rice before the curry sauce is poured over it.
Customization: Some variations include adding cheese on top of the katsu or serving it with a soft-boiled egg for extra richness.
—
3. Katsu Donburi (Chicken Katsu Don)
If you love rice bowls, then katsu don is a must-try! This dish features chicken katsu simmered in a savory-sweet broth with eggs and onions, then served over a bowl of steamed rice.
Egg and Dashi Broth: The katsu is cooked briefly in a light soy sauce, dashi, mirin, and sugar broth, which soaks into the rice and adds an umami-packed flavor.
Soft-Cooked Egg: The beaten eggs partially set in the broth, creating a creamy, custard-like texture that coats the katsu.
Green Onion Garnish: Sliced scallions or mitsuba (Japanese parsley) are sprinkled on top for a fresh touch.
—
4. Chicken Katsu Sandwich (Katsu Sando)
For a modern and portable twist, chicken katsu is often served as a Japanese-style sandwich (katsu sando), which has gained popularity worldwide.
Japanese Milk Bread (Shokupan): Soft and fluffy, this bread complements the crispy texture of the katsu.
Tonkatsu Sauce & Japanese Mayo: Spread over the bread for extra creaminess and tangy flavor.
Cabbage Filling: Thinly shredded cabbage adds crunch and freshness.
Optional Variations: Some versions include cheese, a fried egg, or mustard for a bolder flavor.
—
5. Chicken Katsu with Salad or Noodles
For a lighter alternative, chicken katsu can be paired with salads or noodles instead of rice.
Chicken Katsu Salad: Sliced katsu served over a bed of mixed greens, cucumbers, and cherry tomatoes, drizzled with a sesame or miso dressing.
Chicken Katsu Ramen: Some ramen shops offer a crispy katsu cutlet on the side, which can be dipped into a bowl of rich, flavorful broth.
Katsu with Cold Soba or Udon: Served alongside chilled noodles and a soy-based dipping sauce, this makes for a refreshing summer meal.
—
Conclusion
From the classic rice plate to curry, donburi, and sandwiches, chicken katsu is a versatile dish that can be enjoyed in many ways. Whether you prefer it crispy with tonkatsu sauce or smothered in curry, there’s a chicken katsu dish for every craving. Try experimenting with different serving styles to find your favorite way to enjoy this Japanese comfort food!
Ingredients You’ll Need for the Perfect Chicken Katsu
Choosing the Right Chicken
The success of chicken katsu starts with selecting the right cut of chicken. While any boneless chicken can technically be used, certain cuts work better than others in terms of texture, flavor, and juiciness. Here’s what you need to know when choosing the perfect chicken for katsu.
—
1. Chicken Breast vs. Chicken Thigh: Which One is Better?
Both chicken breast and chicken thigh can be used for chicken katsu, but they offer different characteristics:
Chicken Breast (Lean & Firm Texture)
The most common choice for chicken katsu.
It has a mild flavor and a firmer, lean texture.
When pounded to an even thickness, it cooks quickly and stays juicy inside.
Ideal for those who prefer a lighter, healthier option.
Chicken Thigh (Juicy & Flavorful)
A great alternative for those who enjoy tender, more flavorful meat.
Contains more fat than chicken breast, resulting in a richer, juicier bite.
Tends to stay moist even if slightly overcooked.
Works well for deep-frying due to its higher fat content, which adds to the flavor.
Which should you choose?
If you prefer a classic, crispier katsu with a firmer bite, go for chicken breast.
If you want a juicier, more indulgent katsu, opt for chicken thigh.
—
2. Bone-In vs. Boneless Chicken
Boneless chicken is always the best choice for chicken katsu, as it ensures even cooking and easy slicing.
Bone-in chicken is not recommended because it takes longer to cook, and the crispy coating may burn before the inside is fully done.
For convenience, buy pre-cut boneless skinless chicken breasts or thighs. If using bone-in chicken, remove the bones carefully before proceeding with the recipe.
—
3. Skin-On vs. Skinless Chicken
Skinless chicken is preferred because the crispy panko breading provides all the crunch you need.
Skin-on chicken can be used, but the skin may cause the breading to separate during frying.
If using chicken with skin, make sure to pat it dry before breading and frying to ensure the coating adheres properly.
—
4. Preparing the Chicken for the Best Results
Once you’ve chosen the right cut, proper preparation is key to achieving the perfect texture and even cooking. Follow these steps:
A. Pound the Chicken to an Even Thickness
Use a meat mallet or rolling pin to gently pound the chicken to about ½ inch (1.3 cm) thickness.
This ensures even cooking and prevents the outside from burning before the inside is done.
B. Trim Excess Fat and Tendons
Remove any large pieces of fat or tough tendons to ensure a clean, tender bite.
This is especially important when using chicken thighs, as they may have more fatty bits.
C. Lightly Season the Chicken
Before breading, season the chicken lightly with salt and pepper to enhance its natural flavor.
Some variations include marinating the chicken in soy sauce, sake, or garlic for extra depth of flavor.
—
Conclusion
The right chicken choice can make or break your chicken katsu. While chicken breast is the traditional option, chicken thigh offers extra juiciness and flavor. Whichever you choose, pounding it evenly, trimming excess fat, and seasoning it properly will ensure your katsu turns out crispy, tender, and delicious.
Essential Coating Ingredients
The crispy, golden crust is what makes chicken katsu so delicious, and achieving that perfect crunch comes down to using the right coating ingredients. The traditional Japanese breading process involves three key components: flour, eggs, and panko breadcrumbs. Each ingredient plays a specific role in creating the signature crispy texture.
—
1. All-Purpose Flour: The Base Layer for Adhesion
Before dipping the chicken into the egg mixture, it’s first coated in a thin layer of flour. This step is essential for helping the egg stick to the chicken, ensuring an even breading.
Why is flour important?
It absorbs excess moisture from the chicken, creating a dry surface for the egg wash to cling to.
It helps seal in the juices, preventing the meat from drying out during frying.
It creates an extra layer of crispiness when fried.
Types of flour to use:
All-purpose flour is the most commonly used and works well for chicken katsu.
Cake flour can be used for a slightly lighter and crispier texture.
Avoid whole wheat flour, as it can create a denser crust and alter the traditional taste.
Pro Tip: Lightly season the flour with a pinch of salt, garlic powder, or white pepper to enhance the overall flavor.
—
2. Egg Wash: The Binding Agent
After flouring, the chicken is dipped into a beaten egg mixture, which acts as a glue that holds the panko breadcrumbs in place. The eggs also add richness and moisture to the coating.
How to prepare the egg wash:
Beat 1 to 2 eggs in a shallow bowl until smooth.
Add a splash of milk or water to thin it out slightly, making the coating lighter.
For extra crispiness, mix in a teaspoon of Dijon mustard or soy sauce for added depth of flavor.
Why eggs are essential:
They ensure the breadcrumbs stick firmly to the chicken, preventing them from falling off while frying.
They help create a uniform, golden crust.
Pro Tip: Whisk the eggs thoroughly for a smooth consistency and shake off any excess egg wash before coating with panko.
—
3. Panko Breadcrumbs: The Key to a Crispy, Airy Texture
The final and most crucial step is coating the chicken in panko breadcrumbs, which give chicken katsu its signature crispy texture. Unlike regular breadcrumbs, panko is coarser, lighter, and creates a crispier crust.
Why use panko instead of regular breadcrumbs?
Larger, flakier crumbs create a crunchier and less greasy coating.
They absorb less oil compared to fine breadcrumbs, making the katsu lighter and crispier.
They give the cutlet an authentic Japanese-style crunch.
Types of panko to use:
Japanese-style white panko: The most common type, made from crustless white bread and processed into airy flakes.
Whole wheat panko: A healthier alternative with a slightly nuttier flavor.
Fresh panko (homemade): Made by grating fresh white bread and drying it slightly for a light, crisp texture.
Pro Tip:
For extra crispy katsu, let the breaded chicken rest for 5-10 minutes before frying. This helps the coating adhere better.
For a lighter, flakier texture, gently press the panko onto the chicken without overpacking it.
—
4. Optional Seasonings for Extra Flavor
While the classic coating uses only flour, egg, and panko, you can add seasonings to enhance the taste. Some optional additions include:
Garlic powder or onion powder – Adds a subtle savory depth.
Paprika or cayenne pepper – For a mild heat kick.
Grated Parmesan cheese – Mixed into the panko for a richer, umami-packed crust.
Sesame seeds – Adds a nutty flavor and an extra crunch.
—
Conclusion
The key to achieving the perfectly crispy and golden chicken katsu lies in using the right coating ingredients. Flour creates a base for adhesion, eggs act as a binder, and panko breadcrumbs provide the signature crunch. By choosing high-quality panko and seasoning the layers properly, you can make a restaurant-quality chicken katsu at home!
The Perfect Chicken Katsu Sauce
While chicken katsu is delicious on its own, it’s the katsu sauce that elevates it to the next level. This thick, tangy, and slightly sweet sauce is an essential part of the dish, adding a deep umami flavor that perfectly complements the crispy fried chicken. Whether you make it from scratch or use a store-bought version, knowing the right balance of flavors is key to achieving the perfect chicken katsu experience.
—
1. What is Katsu Sauce?
Katsu sauce, also known as tonkatsu sauce, is a Japanese-style Worcestershire-based sauce. It has a sweet, tangy, and savory profile, with hints of fruitiness and umami. It is similar to Western barbecue sauce but has a more complex depth due to the use of soy sauce, vinegar, and various seasonings.
Traditionally, tonkatsu sauce is used for pork katsu, but it pairs just as well with chicken katsu.
—
2. Key Ingredients of Katsu Sauce
A good chicken katsu sauce has a balance of sweetness, acidity, and umami. Here are the main ingredients:
Worcestershire Sauce – Provides tangy, slightly spicy, and umami flavors.
Ketchup – Adds a rich tomato base with mild sweetness.
Soy Sauce – Enhances the savory depth and adds saltiness.
Sugar or Honey – Balances out the acidity with a touch of sweetness.
Apple or Plum Puree – Adds natural fruitiness, commonly found in Japanese tonkatsu sauce.
Rice Vinegar or Mirin – Brings mild acidity to brighten the flavors.
Garlic & Ginger – Optional but can add a subtle warmth and depth.
Mustard or Dijon – Adds a slight tangy sharpness.
Pro Tip: Some Japanese brands of tonkatsu sauce include pureed vegetables like onions, carrots, and celery, which create a richer taste.
—
3. How to Make Homemade Chicken Katsu Sauce
If you don’t have store-bought tonkatsu sauce, making it at home is simple. Here’s an easy and authentic recipe:
Ingredients:
¼ cup Worcestershire sauce
¼ cup ketchup
1 tablespoon soy sauce
1 tablespoon brown sugar (or honey)
1 teaspoon rice vinegar (or apple cider vinegar)
½ teaspoon Dijon mustard (optional)
½ teaspoon grated garlic (optional)
½ teaspoon grated ginger (optional)
Instructions:
1. In a small bowl, whisk together Worcestershire sauce, ketchup, soy sauce, and brown sugar until well combined.
2. Add rice vinegar, mustard, garlic, and ginger if using, and mix thoroughly.
3. Let the sauce sit for 5-10 minutes to allow the flavors to meld.
4. Serve it alongside your crispy chicken katsu!
Storage Tip: Store homemade katsu sauce in an airtight container in the refrigerator for up to two weeks.
—
4. Store-Bought Katsu Sauce Options
If you prefer a ready-made sauce, here are some popular Japanese brands to look for:
Bull-Dog Tonkatsu Sauce – The most famous brand, with a perfect balance of sweetness, tang, and umami.
Otafuku Tonkatsu Sauce – Slightly thicker and sweeter, great for those who like a richer flavor.
Ikari Tonkatsu Sauce – A less sweet, more umami-forward option.
Pro Tip: If you can’t find tonkatsu sauce in stores, you can substitute it with a mix of Worcestershire sauce, barbecue sauce, and a little honey.
—
5. Other Sauces That Pair Well with Chicken Katsu
While katsu sauce is the most traditional option, you can also experiment with other sauces for different flavor variations:
Japanese Curry Sauce – A rich, spiced curry sauce poured over chicken katsu to create katsu curry.
Spicy Mayo (Sriracha Mayo) – A creamy and slightly spicy alternative.
Teriyaki Sauce – For a sweeter, glossy, and soy-based coating.
Ponzu Sauce – A citrusy soy-based sauce that adds a fresh, tangy twist.
Honey Mustard Sauce – A mild and sweet option for a Western-style pairing.
—
Conclusion
The perfect chicken katsu sauce is a balance of sweet, tangy, and umami flavors that enhances the crispy chicken cutlet. Whether you make a homemade version with simple pantry ingredients or use a store-bought tonkatsu sauce, this flavorful condiment is a must-have for an authentic chicken katsu experience. Experiment with different variations to find your favorite pairing!
Recommended Side Dishes
While chicken katsu is the star of the meal, the right side dishes can elevate the experience by adding contrasting textures and complementary flavors. Whether you want a traditional Japanese-style meal or a more creative fusion plate, the right accompaniments can make your chicken katsu dinner more satisfying. Here are some classic and modern side dish ideas to pair with your crispy, golden katsu.
—
1. Classic Japanese Sides
For an authentic Japanese meal, these traditional sides are commonly served alongside chicken katsu:
Steamed Rice (Gohan)
A simple bowl of steamed white rice is the most traditional pairing for chicken katsu. The mild flavor and fluffy texture help balance out the richness and crunch of the katsu.
Best rice options:
Japanese short-grain rice (sticky and slightly chewy)
Sushi rice (similar texture but seasoned for extra flavor)
Brown rice (for a nuttier, healthier alternative)
Pro Tip: Drizzle some katsu sauce or a fried egg over your rice for an extra indulgence!
Miso Soup
A warm bowl of miso soup is a light yet flavorful side that adds depth to your meal. Made with miso paste, tofu, seaweed, and green onions, this umami-rich soup balances the crispiness of chicken katsu.
Variations:
Add shiitake mushrooms for an earthy taste.
Use red miso paste for a deeper, more intense flavor.
Mix in silken tofu or daikon radish for extra texture.
Pro Tip: Serve the miso soup in a small bowl with a side of pickled vegetables to cleanse the palate between bites.
Shredded Cabbage Salad
A pile of thinly shredded cabbage is the classic side served with chicken katsu in Japan. The fresh crunch of cabbage cuts through the richness of the fried chicken, making each bite feel lighter.
How to prepare it:
Use a sharp knife or mandoline to finely shred green cabbage.
Toss with a simple yuzu dressing, sesame dressing, or a light vinegar-based sauce.
Garnish with toasted sesame seeds or sliced scallions for extra flavor.
Pro Tip: Serve the cabbage on the same plate as the katsu, and drizzle some katsu sauce or Japanese mayo over it for an extra pop of flavor.
—
2. Japanese-Inspired Side Dishes
For a more varied Japanese-inspired meal, try these flavorful side dishes:
Japanese Potato Salad
This creamy yet slightly tangy potato salad is a common Japanese side dish made with:
Mashed potatoes (for a soft, creamy texture)
Japanese mayo (Kewpie) for extra richness
Diced cucumbers, carrots, and ham for a crunchier texture
The mild, slightly sweet taste makes it a perfect contrast to the crispy chicken katsu.
Japanese Pickles (Tsukemono)
Pickled vegetables, known as tsukemono, add a refreshing acidity to balance the richness of fried foods. Common Japanese pickles include:
Takuan (yellow pickled daikon radish)
Umeboshi (pickled plums)
Kyuri-zuke (pickled cucumbers)
These pickles cleanse the palate and provide a nice contrast to the deep-fried texture of chicken katsu.
Onigiri (Japanese Rice Balls)
If you want to make your chicken katsu meal more fun, serve it with onigiri—Japanese rice balls wrapped in seaweed.
Fill with tuna mayo, salted salmon, or pickled plum for extra flavor.
Serve them plain with a sprinkle of furikake (Japanese rice seasoning) for a simple, flavorful touch.
—
3. Western-Style and Fusion Sides
If you want to get creative, try pairing your chicken katsu with some Western or fusion-style side dishes:
French Fries or Sweet Potato Fries
For a more casual, fast-food-inspired meal, serve chicken katsu with crispy fries or sweet potato fries. The crunchy texture and salty seasoning make them a fun alternative to rice.
Try seasoning with:
Japanese furikake (for a salty, umami-rich taste)
Truffle salt or Parmesan cheese for a gourmet touch
Garlic Butter Noodles
A plate of garlic butter noodles is an indulgent side that pairs beautifully with chicken katsu.
Toss cooked udon or ramen noodles with garlic, soy sauce, and butter.
Add a touch of sesame oil and scallions for extra flavor.
Coleslaw (Japanese-Style or Classic American)
For a fresh, crunchy contrast, try a Japanese-style coleslaw with sesame dressing, or stick with a classic American coleslaw with a tangy, creamy dressing.
Japanese-style: Shredded cabbage + carrots + sesame dressing
Classic American: Shredded cabbage + mayo + vinegar + sugar
Both work well as a refreshing balance to the crispy chicken.
—
4. Sauce Pairings for Extra Flavor
If you want to switch things up, try different sauces for dipping your chicken katsu:
Spicy Sriracha Mayo – For a creamy, spicy kick
Honey Mustard – A sweet and tangy alternative
Teriyaki Sauce – A glossy, sweet-savory glaze
Ponzu Sauce – A citrusy soy-based sauce for a fresh contrast
—
Conclusion
Choosing the right side dishes for chicken katsu can turn a simple meal into a well-rounded and satisfying dining experience. Whether you go for classic Japanese options like steamed rice and miso soup, or explore fusion pairings like garlic butter noodles or sweet potato fries, the key is balancing crispy, rich flavors with fresh and light elements.
Try experimenting with different side dishes to find your perfect chicken katsu meal!
Step-by-Step Guide to Making Crispy Chicken Katsu
Preparing the Chicken Cutlets
The secret to perfect chicken katsu starts with properly preparing the chicken cutlets. The right techniques ensure tender, juicy meat with a uniform shape that fries evenly and achieves the crispy, golden-brown coating characteristic of authentic Japanese katsu. Follow these steps to prepare the chicken cutlets like a pro before moving on to breading and frying.
—
1. Choosing the Right Cut of Chicken
Traditionally, chicken katsu is made with boneless, skinless chicken breasts. However, you can also use chicken thighs if you prefer juicier, more flavorful meat.
Chicken breast – Leaner, firmer texture, crisps up well.
Chicken thigh – Slightly fattier, juicier, and more tender.
Pro Tip: If using chicken thighs, trim excess fat for even cooking and a cleaner bite.
—
2. Flattening the Chicken for Even Cooking
One of the most important steps in preparing the chicken cutlets is pounding the meat to an even thickness. This ensures that the chicken:
✅ Cooks evenly without raw spots
✅ Fries quickly without overcooking the outside
✅ Stays tender without drying out
How to Flatten the Chicken:
1. Place the chicken breast or thigh between two sheets of plastic wrap or parchment paper.
2. Use a meat mallet, rolling pin, or the bottom of a pan to gently pound the thicker parts until the cutlet is about ½ inch (1.3 cm) thick.
3. Try to maintain an even thickness across the entire piece for uniform frying.
Pro Tip: Avoid pounding too hard—gentle, even pressure prevents the meat from tearing.
—
3. Trimming and Slicing for the Perfect Cutlet
If the chicken breast is too large, you can slice it in half horizontally to create two thinner cutlets.
For thick chicken breasts: Slice them in half lengthwise to create two even fillets.
For uniform shape: Trim any uneven edges for a clean, professional look.
Some variations of chicken katsu use smaller, bite-sized pieces, perfect for bento boxes or kids’ meals. If you prefer this, you can cut the chicken into smaller strips or nuggets before breading.
—
4. Seasoning the Chicken for Maximum Flavor
Before breading, it’s important to season the chicken. While katsu is traditionally served with a flavorful sauce, a well-seasoned cutlet enhances the overall taste.
Basic Seasoning:
Salt and black pepper – Essential for enhancing the natural flavor.
Garlic powder or onion powder – Adds subtle depth without overpowering the dish.
Optional Enhancements:
Soy sauce or mirin – A quick marinade for an umami boost.
Mustard or wasabi paste – Adds a mild, tangy heat to the chicken.
A touch of sugar – Balances flavors if marinating.
If you want a deeper flavor, you can marinate the chicken for 15-30 minutes in a light soy sauce mixture before breading.
Pro Tip: Don’t over-season! The crispy coating and katsu sauce will provide most of the flavor.
—
5. Drying the Chicken Before Breading
For the best crispy texture, make sure the chicken is dry before coating it in flour and breadcrumbs.
Use paper towels to pat the chicken dry.
Remove excess moisture to help the coating stick better.
Pro Tip: If the chicken is too wet, the breading may fall off during frying.
—
Conclusion
Properly preparing the chicken cutlets is essential for making authentic and delicious chicken katsu. By flattening, trimming, seasoning, and drying the chicken before breading, you’ll achieve tender, juicy meat with a crispy, golden-brown crust. Taking these extra steps will ensure your chicken katsu is restaurant-quality every time!

Breading the Chicken Correctly
One of the defining characteristics of chicken katsu is its crispy, golden-brown crust, achieved through a well-executed breading process. Proper breading ensures the panko coating adheres firmly, creating a crunchy exterior that doesn’t fall off during frying. Below is a step-by-step guide to perfectly breading your chicken katsu for the best texture and flavor.
—
1. Setting Up a Proper Breading Station
To streamline the process, organize a three-step breading station before you begin. This helps prevent mess and ensures a smooth workflow. You’ll need three separate shallow bowls or plates:
1. Flour (First Coating) – Helps the egg stick to the chicken.
2. Egg Wash (Second Coating) – Binds the breadcrumbs to the chicken.
3. Panko Breadcrumbs (Final Coating) – Creates the signature crispy crust.
Pro Tip:
Use one hand for dry ingredients (flour and panko) and the other for wet ingredients (egg wash) to avoid clumping.
Keep a tray or plate nearby for the breaded chicken before frying.
—
2. Step-by-Step Breading Process
Step 1: Coat the Chicken in Flour
Lightly dredge the prepared chicken cutlet in all-purpose flour or cornstarch.
Shake off any excess flour—too much can create a gummy texture.
The flour absorbs moisture, ensuring the egg wash sticks evenly.
Step 2: Dip in Egg Wash
Beat one or two eggs in a bowl. For extra crispiness, you can mix in:
1 tbsp of milk (for a lighter texture)
1 tsp of soy sauce (for extra umami flavor)
Fully submerge the floured chicken, making sure it’s coated evenly.
Let excess egg drip off before moving to the next step.
Step 3: Coat with Panko Breadcrumbs
Gently press the chicken into the panko breadcrumbs, making sure every part is fully covered.
For an extra crispy crust, lightly press the panko onto the chicken with your hands.
Ensure no wet spots are visible—every inch should be fully coated.
Pro Tip:
For an ultra-crispy crust, double-dip the chicken:
1. Flour → Egg → Panko → Egg again → More panko
This creates a thicker, crunchier texture, similar to tonkatsu-style cutlets.
—
3. Choosing the Right Breadcrumbs for Maximum Crispiness
Why Panko is Best
Traditional Japanese panko breadcrumbs are key to the light, crispy texture of chicken katsu. Unlike regular breadcrumbs, panko is airier and absorbs less oil, preventing the coating from becoming greasy.
Regular breadcrumbs – Smaller, finer crumbs; results in a denser, less crispy coating.
Panko breadcrumbs – Larger, flaky crumbs; create a light, crispy texture.
Panko Variations:
Plain panko – The most common, allows the chicken flavor to shine.
Seasoned panko – Pre-seasoned with salt, garlic, or herbs (check for salt levels).
Homemade panko – Made by pulsing white bread (without crusts) in a food processor and drying in the oven.
Pro Tip: If panko is unavailable, use crushed cornflakes for a similar crunch!
—
4. Letting the Breading Set for Better Adhesion
Once the chicken is coated, let it rest for 5-10 minutes before frying. This allows the breading to firmly stick to the chicken, reducing the chances of it falling off in the oil.
For even better results, place the breaded chicken in the fridge for 15-30 minutes before frying. This:
✅ Helps the breading adhere more securely.
✅ Prevents the coating from absorbing too much oil.
✅ Ensures a crisper, more even fry.
Pro Tip: If frying in batches, keep breaded cutlets on a wire rack instead of stacking them to avoid crushing the coating.
—
Conclusion
A well-breaded chicken cutlet is the foundation of a perfect chicken katsu. By setting up a proper breading station, using panko breadcrumbs, and letting the coating rest before frying, you ensure a crispy, golden-brown crust that stays intact. Mastering these techniques will take your homemade chicken katsu to restaurant-quality levels!
Frying to Perfection
The final step in making authentic chicken katsu is frying it to perfection. A crispy, golden-brown crust with juicy, tender chicken inside is what makes chicken katsu so irresistible. Achieving this perfect balance requires the right oil, temperature control, and frying technique. Below is a step-by-step guide to frying crispy, restaurant-quality chicken katsu every time.
—
1. Choosing the Right Oil for Frying
The oil you use plays a major role in the flavor, texture, and crispiness of the chicken katsu. You’ll want an oil that:
✅ Has a high smoke point (to prevent burning)
✅ Has a neutral flavor (so it doesn’t overpower the dish)
✅ Produces a light, non-greasy crispiness
Best Oils for Chicken Katsu:
Vegetable oil – Affordable and widely available.
Canola oil – Neutral taste, great for deep frying.
Peanut oil – Slightly nutty flavor, high smoke point.
Sunflower oil – Clean, light texture.
Rice bran oil – Commonly used in Japanese cooking for its light, crisp finish.
Avoid: Olive oil or butter, as they have low smoke points and can burn quickly.
Pro Tip: If you want extra Japanese authenticity, use rice bran oil, which is commonly used in tonkatsu restaurants in Japan.
—
2. Getting the Right Frying Temperature
Oil temperature is critical for achieving a crispy coating without making the chicken greasy.
Ideal frying temperature: 170-175°C (340-350°F)
If the oil is too hot, the panko will burn before the chicken cooks through.
If the oil is too cold, the chicken will absorb too much oil and become greasy.
How to Check Oil Temperature Without a Thermometer:
1. Drop a few panko crumbs into the oil.
If they sizzle immediately and float, the oil is ready.
If they burn quickly, it’s too hot—reduce the heat.
If they sink without sizzling, it’s too cold—wait a bit longer.
2. Use a wooden chopstick or spoon—if small bubbles form around it, the oil is at the right temperature.
Pro Tip: Maintain the temperature by adjusting the heat between batches. Adding cold chicken can lower the oil temperature.
—
3. Frying the Chicken to Perfection
Once your oil is ready, it’s time to fry the chicken katsu!
Step-by-Step Frying Guide:
1. Carefully lower the breaded chicken into the hot oil—away from you to prevent splashing.
2. Fry in small batches to prevent overcrowding, which can lower the oil temperature.
3. Cook for 3-4 minutes per side until golden brown and crispy.
4. Use tongs or a slotted spoon to gently flip the cutlet halfway through cooking.
5. When fully cooked, the chicken should be deep golden-brown and have an internal temperature of 75°C (165°F).
Pro Tip: Keep the heat steady—don’t raise or lower the heat too much, as temperature fluctuations can lead to uneven frying.
—
4. Draining Excess Oil for a Crisp Finish
After frying, proper draining is key to keeping the crust crisp and not greasy.
Best Draining Methods:
Place the fried chicken on a wire rack to allow excess oil to drip off.
Avoid placing it directly on paper towels, as this can make the bottom soggy.
If needed, lightly dab the edges with a paper towel to absorb excess oil.
Pro Tip: If frying multiple batches, keep the cooked cutlets in a warm oven (90°C/200°F) to stay crisp while finishing the rest.
—
5. Slicing for the Perfect Presentation
Once the chicken has rested for 2-3 minutes, it’s time to slice and serve.
Use a sharp knife to cut the chicken into even ½ to 1-inch strips.
Always slice against the grain for tender, easy-to-bite pieces.
Arrange the slices neatly on a plate to showcase the crispy golden crust.
Pro Tip: In Japan, chicken katsu is often served pre-sliced for easy eating with chopsticks.
—
Conclusion
Mastering the frying technique is what separates great chicken katsu from a greasy or soggy cutlet. By choosing the right oil, maintaining proper temperature, frying in batches, and draining correctly, you’ll get a crispy, golden-brown crust with a juicy, flavorful inside—just like in a Japanese restaurant. Follow these steps, and you’ll be able to fry chicken katsu to perfection every time!
Draining & Serving
Once your chicken katsu is perfectly fried to a crispy golden-brown, the final steps—draining excess oil and serving it the right way—are just as important. Proper draining ensures that your crust stays crunchy and not greasy, while serving it in the traditional Japanese style elevates the experience.
—
1. Properly Draining the Fried Chicken Katsu
After removing the fried chicken cutlet from the oil, it’s crucial to drain the excess oil to keep the panko coating crisp and prevent sogginess.
Best Methods for Draining Chicken Katsu:
1. Use a Wire Rack (Best Method)
Place the fried chicken on a wire cooling rack set over a baking sheet.
This allows air to circulate around the entire cutlet, keeping it crispy on all sides.
Commonly used in professional kitchens to maintain texture.
2. Paper Towels (Alternative Method)
Place the katsu on paper towels to absorb excess oil.
Tip: Avoid pressing the paper towel against the chicken, as this can make the crust soggy.
3. Tilting the Chicken on Its Side
Some chefs stand the cutlet upright on a wire rack to let oil drain evenly from both sides.
Pro Tips for Keeping Chicken Katsu Crispy:
✅ Don’t cover hot katsu with a lid or foil—it traps steam and makes the crust soggy.
✅ If frying in batches, keep cooked katsu warm in a low-temperature oven (90°C/200°F) until ready to serve.
—
2. How to Slice Chicken Katsu for the Best Presentation
In Japan, chicken katsu is typically pre-sliced into bite-sized pieces before serving, making it easier to eat with chopsticks or a fork.
How to Slice Chicken Katsu Properly:
Use a sharp chef’s knife or a Japanese santoku knife for clean cuts.
Let the katsu rest for 2-3 minutes before slicing to allow the juices to settle.
Slice against the grain for a more tender bite.
Cut into ½ to 1-inch thick strips—not too thin, so the crispy crust stays intact.
✅ Pro Tip: Wipe your knife with a dry towel between cuts to keep the slices clean.
—
3. Traditional & Popular Ways to Serve Chicken Katsu
Chicken katsu is a versatile dish that can be served in different ways, depending on the occasion and personal preference.
1. Classic Japanese Chicken Katsu Plate
This is the most traditional way to serve chicken katsu, commonly found in Japanese restaurants and homes.
What’s on the plate?
Steamed Japanese rice – A neutral base that pairs well with crispy katsu.
Shredded cabbage – Adds freshness and crunch to balance the fried cutlet.
Tonkatsu sauce – The essential dipping sauce (see below).
A slice of lemon – Provides brightness and enhances flavor.
Japanese pickles (tsukemono) – Often served as a side for a refreshing contrast.
✅ Pro Tip: In Japan, shredded cabbage is often dressed with a light sesame dressing or simple vinegar-based sauce for extra flavor.
—
2. Chicken Katsu Curry
A popular comfort food dish where crispy chicken katsu is served with rich, thick Japanese curry over rice.
How it’s served:
A plate of steamed white rice.
A crispy sliced chicken katsu placed on top.
Generous ladle of Japanese curry sauce poured over the rice and chicken.
Garnished with fukujinzuke (Japanese pickled radish) on the side.
✅ Pro Tip: Serve the curry sauce on the side if you want to maintain the crispiness of the chicken until the last bite.
—
3. Chicken Katsu Sandwich (Katsu Sando)
A Japanese-style sandwich made with crispy chicken katsu, soft shokupan (Japanese milk bread), and a sweet-savory katsu sauce.
How it’s served:
Lightly toasted milk bread or white sandwich bread.
Chicken katsu, placed between the bread with tonkatsu sauce.
Optional: Shredded cabbage or Japanese mayo for extra flavor.
Cut into small, neat rectangles—perfect for snacking!
✅ Pro Tip: Use soft, fluffy bread to contrast the crispy chicken texture.
—
4. Chicken Katsu Donburi (Katsudon)
A heartier rice bowl version where chicken katsu is simmered in a savory-sweet egg sauce and served over rice.
How it’s served:
A bowl of steamed white rice.
Sliced chicken katsu, simmered in a sauce made of:
Dashi (Japanese stock)
Soy sauce
Mirin (sweet rice wine)
Beaten eggs, gently cooked until soft
Topped with sliced green onions and sometimes nori strips.
✅ Pro Tip: This is a great way to use leftover chicken katsu!
—
4. The Best Sauce for Chicken Katsu
The signature sauce that pairs with chicken katsu is tonkatsu sauce—a rich, tangy, and slightly sweet sauce that enhances the dish.
How to Make Homemade Tonkatsu Sauce:
Ingredients:
3 tbsp Worcestershire sauce
2 tbsp ketchup
1 tbsp oyster sauce (or soy sauce as an alternative)
1 tsp sugar
½ tsp Dijon mustard (optional, for a hint of spice)
Instructions:
1. Mix all ingredients in a small bowl until well combined.
2. Adjust sweetness by adding more sugar if desired.
3. Serve it in a small dipping dish or drizzle over sliced chicken katsu.
✅ Pro Tip: If you prefer a spicier sauce, add a dash of hot sauce or chili flakes.
—
Conclusion
Perfecting your chicken katsu experience doesn’t stop at frying—it’s all about draining it properly, slicing it correctly, and serving it in a delicious way. Whether you enjoy it with rice, in curry, as a sandwich, or in a rice bowl, the crispy panko-coated cutlet, paired with tonkatsu sauce, makes for an unforgettable Japanese meal.
By following these tips, you’ll be able to serve restaurant-quality chicken katsu at home, impressing friends and family with your authentic Japanese cooking skills!
Tips and Variations for the Best Homemade Chicken Katsu
How to Make Chicken Katsu Healthier
Chicken katsu is undeniably delicious and satisfying, but since it’s deep-fried, it can be high in calories and fat. If you’re looking for a healthier version without compromising on flavor and crispiness, there are several simple modifications you can make. From baking instead of frying to using leaner cuts of chicken, here’s how you can enjoy a healthier chicken katsu without guilt.
—
1. Use Leaner Cuts of Chicken
Traditional chicken katsu is made with chicken thighs, which are juicy and flavorful but also higher in fat. A healthier alternative is to use chicken breast, which is leaner and lower in calories while still delivering a crispy, satisfying bite.
Best Chicken Choices for a Healthier Katsu:
Chicken Breast (Best Choice) – High in protein, low in fat, and stays tender when properly cooked.
Chicken Tenderloins – A naturally softer cut, making them a great alternative to whole chicken breasts.
Skinless Chicken Thighs – Still flavorful but with less fat than traditional bone-in, skin-on thighs.
✅ Pro Tip: If using chicken breast, pound it lightly to an even thickness to ensure it stays juicy and tender after cooking.
—
2. Bake or Air Fry Instead of Deep Frying
The biggest source of extra calories in chicken katsu comes from deep frying in oil. By baking or using an air fryer, you can achieve a crispy texture with significantly less oil.
How to Bake Chicken Katsu:
1. Preheat oven to 220°C (425°F).
2. Place a wire rack on a baking sheet to allow airflow for crispiness.
3. Lightly spray or brush the coated chicken with olive oil or avocado oil.
4. Bake for 18-22 minutes, flipping halfway through.
5. Finish with 1-2 minutes under the broiler for extra crispiness.
How to Make Air-Fried Chicken Katsu:
1. Preheat the air fryer to 200°C (400°F).
2. Lightly spray the panko-coated chicken with oil.
3. Air fry for 8-10 minutes per side, flipping once.
4. Check for doneness (internal temperature should reach 75°C/165°F).
✅ Pro Tip: Use panko breadcrumbs instead of regular breadcrumbs to achieve a crispy texture without deep frying.
—
3. Use Healthier Coating Ingredients
The traditional breading process uses white flour, eggs, and panko breadcrumbs, but healthier substitutions can make a big difference.
Healthier Breading Alternatives:
✅ Pro Tip: Lightly toast whole wheat panko in the oven before using to enhance crunchiness without extra oil.
—
4. Make a Lighter Chicken Katsu Sauce
Tonkatsu sauce is delicious but can be high in sugar and sodium. Instead of using store-bought tonkatsu sauce, try making a lighter homemade version.
Healthier Tonkatsu Sauce Recipe:
3 tbsp low-sodium Worcestershire sauce
2 tbsp unsweetened ketchup
1 tbsp reduced-sodium soy sauce
1 tsp honey or maple syrup (instead of sugar)
½ tsp Dijon mustard (for extra depth of flavor)
✅ Pro Tip: You can also substitute tonkatsu sauce with a light teriyaki glaze or a simple lemon-soy dipping sauce for a refreshing alternative.
—
5. Serve with Lighter, More Nutritious Sides
Instead of pairing chicken katsu with white rice and heavy sides, opt for lighter and more nutritious options.
Healthier Side Dish Alternatives:
Brown rice or quinoa – Higher in fiber and more nutrient-dense than white rice.
Steamed or roasted vegetables – Broccoli, carrots, and bok choy add vitamins and minerals.
Shredded cabbage with lemon dressing – A classic Japanese pairing that adds freshness.
Miso soup – A light and comforting side with probiotics.
Cucumber and seaweed salad – A refreshing and low-calorie accompaniment.
✅ Pro Tip: Add a protein-packed miso soup or edamame for a well-balanced, nutritious meal.
—
Conclusion
Enjoying chicken katsu in a healthier way is possible with a few simple changes. By choosing leaner chicken cuts, baking or air-frying instead of deep frying, using healthier breading ingredients, making a lighter sauce, and serving with nutritious sides, you can still enjoy the crispy, flavorful experience of chicken katsu without excess calories and fat.
With these health-conscious modifications, you can make homemade chicken katsu a regular part of your diet while keeping it both delicious and nutritious!
Spicy Chicken Katsu Version
If you love bold flavors and a bit of heat, a spicy chicken katsu version is a great way to add an extra kick to this classic dish. The crispy, golden-brown panko coating pairs beautifully with spicy marinades, seasonings, or sauces, making it a delicious option for those who enjoy heat. Here’s how you can create a spicier twist on chicken katsu while keeping its signature crispy texture intact.
—
1. Adding Heat to the Marinade
Marinating the chicken before breading it infuses it with extra flavor and spice. A simple marinade with spicy ingredients can enhance the taste without overpowering the classic chicken katsu experience.
Spicy Marinade Recipe:
2 tbsp soy sauce (or low-sodium option)
1 tbsp sriracha (or more, depending on spice tolerance)
1 tbsp rice vinegar (adds a tangy balance)
1 tsp garlic powder
1 tsp onion powder
½ tsp cayenne pepper (adjust for spice level)
½ tsp black pepper
How to Marinate:
1. Place the chicken in a bowl or ziplock bag.
2. Pour the marinade over the chicken and coat evenly.
3. Let it marinate for at least 30 minutes or up to 4 hours in the refrigerator for deeper flavor.
4. Pat the chicken dry before breading to ensure the coating sticks well.
✅ Pro Tip: If you want extra-spicy chicken katsu, let the chicken marinate overnight for a more intense flavor.
—
2. Spicing Up the Breading
The traditional panko coating can be customized to include heat, making every bite crispy and flavorful. Instead of just plain panko breadcrumbs, try mixing in spicy seasonings.
Spicy Breading Mix:
2 cups panko breadcrumbs (or whole wheat panko for a healthier twist)
1 tsp cayenne pepper (adjust to taste)
1 tsp paprika (adds smoky depth)
½ tsp chili powder (for a layered heat effect)
½ tsp garlic powder
How to Bread the Chicken:
1. Dredge the marinated chicken in flour (for a crispy base).
2. Dip into beaten eggs (for binding the breadcrumbs).
3. Coat with the spicy panko mixture, pressing it firmly to adhere.
✅ Pro Tip: For extra crunch, double-coat the chicken by dipping it in egg and panko twice before frying.
—
3. Creating a Spicy Katsu Sauce
Traditional tonkatsu sauce is tangy and slightly sweet, but you can easily transform it into a spicy katsu sauce with a few adjustments.
Spicy Katsu Sauce Recipe:
3 tbsp tonkatsu sauce (store-bought or homemade)
1 tbsp sriracha or gochujang (Korean chili paste)
1 tsp chili flakes or hot sauce
½ tsp wasabi paste (optional for a unique kick)
1 tsp honey or maple syrup (balances the heat)
How to Make It:
1. Mix all the ingredients in a small bowl until well combined.
2. Taste and adjust spice level according to preference.
3. Drizzle over crispy chicken katsu or serve as a dipping sauce.
✅ Pro Tip: For a creamy spicy version, mix the sauce with Japanese mayo or Greek yogurt for a milder but flavorful dip.
—
4. Serving Spicy Chicken Katsu
Spicy chicken katsu pairs well with a variety of side dishes that balance the heat. Here are some great ways to serve it:
Best Side Dishes for Spicy Chicken Katsu:
Steamed Jasmine or Brown Rice – Helps mellow out the spice.
Shredded Cabbage Salad – Tossed with sesame dressing for a cooling effect.
Spicy Mayo Slaw – A creamy contrast to the crispy chicken.
Pickled Vegetables (Takuan or Kimchi) – Adds acidity and crunch.
Miso Soup – A comforting, umami-rich side.
✅ Pro Tip: Want to make it even spicier? Serve it with a side of wasabi mashed potatoes or chili-infused miso soup for an extra fiery meal.
—
Conclusion
Spicy chicken katsu is a delicious twist on the traditional Japanese dish, bringing together crispy texture and bold flavors. Whether you add heat through the marinade, breading, sauce, or sides, there are plenty of ways to customize this dish to your spice level. Try this fiery version of chicken katsu and enjoy a spicy, crispy, and satisfying meal that’s sure to impress!
How to Store and Reheat Chicken Katsu
Chicken katsu is best enjoyed fresh and crispy, but if you have leftovers, proper storage and reheating techniques can help preserve its texture and flavor. Whether you plan to eat it the next day or store it for a longer period, here’s how to keep your chicken katsu crispy and delicious.
—
1. Proper Storage for Chicken Katsu
To maintain the crispy texture and prevent sogginess, it’s important to store chicken katsu correctly.
How to Store in the Refrigerator:
1. Let the chicken katsu cool completely – Storing it while it’s still hot will create steam, making the breading soggy.
2. Use an airtight container – Line the container with a paper towel to absorb excess moisture.
3. Separate layers – If storing multiple pieces, place parchment paper or another paper towel between layers.
4. Refrigerate for up to 3 days – Beyond this, the texture may deteriorate.
How to Store in the Freezer:
If you want to keep chicken katsu for a longer period, freezing is a great option.
1. Cool the chicken katsu completely before freezing.
2. Wrap each piece individually with plastic wrap or aluminum foil to prevent freezer burn.
3. Place the wrapped pieces in a freezer-safe bag or container and label with the date.
4. Freeze for up to 2 months for the best quality.
✅ Pro Tip: Do not freeze chicken katsu with sauce on it, as the sauce will make the breading mushy when thawed.
—
2. Best Ways to Reheat Chicken Katsu
To restore the crispy texture, avoid using the microwave as it will make the breading soft and soggy. Instead, use one of the methods below:
Reheating in the Oven (Best Method for Crispiness)
1. Preheat the oven to 190°C (375°F).
2. Place chicken katsu on a wire rack over a baking sheet to allow even air circulation.
3. Heat for 10-12 minutes, flipping halfway through.
4. If needed, broil for 1-2 minutes for extra crispiness.
✅ Why This Works: The dry heat of the oven helps crisp up the panko coating while keeping the chicken juicy.
Reheating in an Air Fryer (Quick & Crispy Option)
1. Preheat the air fryer to 180°C (350°F).
2. Place the chicken in the basket in a single layer (avoid overcrowding).
3. Air fry for 5-7 minutes, flipping halfway through.
✅ Why This Works: The hot circulating air crisps up the coating while keeping the inside tender.
Reheating on the Stovetop (For Small Batches)
1. Heat a non-stick pan over medium heat with a small amount of oil.
2. Place the chicken in the pan and heat for 3-5 minutes per side, flipping occasionally.
3. Remove once the exterior is crispy and the chicken is warmed through.
✅ Why This Works: The direct heat helps re-crisp the breading while keeping the chicken moist.
—
3. How to Reheat Frozen Chicken Katsu
If you stored chicken katsu in the freezer, thawing and reheating it correctly will help preserve its texture.
Step-by-Step Reheating Process:
1. Do not microwave to thaw – This will make the breading soggy.
2. Transfer the frozen chicken katsu to the refrigerator overnight to defrost slowly.
3. Follow one of the oven or air fryer reheating methods mentioned above.
4. If reheating directly from frozen, add a few extra minutes to the cooking time.
✅ Pro Tip: For best results, reheat frozen chicken katsu in an air fryer or oven rather than on the stovetop.
—
4. How to Store and Reheat Chicken Katsu Sauce
Storing the Sauce:
Refrigerator: Store homemade or store-bought tonkatsu sauce in a sealed jar or airtight container for up to 2 weeks.
Freezer: Pour into an ice cube tray and freeze for up to 3 months for easy portioning.
Reheating the Sauce:
Microwave: Heat in short 10-second bursts, stirring between each interval.
Stovetop: Warm in a small saucepan over low heat, stirring occasionally.
✅ Pro Tip: If the sauce thickens too much in the fridge, add a splash of water while reheating to restore consistency.
—
Conclusion
By storing and reheating chicken katsu correctly, you can enjoy its crispy texture and juicy interior even after a few days. The oven and air fryer are the best methods to bring back the crunch, while proper storage techniques help prevent sogginess. Whether you’re enjoying leftovers or meal-prepping, following these steps will ensure your chicken katsu stays delicious every time!
Frequently Asked Questions About Chicken Katsu
Can I Make Chicken Katsu Without Panko?
Panko breadcrumbs are a key ingredient in traditional chicken katsu, giving it that light, crispy, and airy texture. However, if you don’t have panko on hand or want to try a different breading, there are several alternatives that can still deliver a crunchy coating. Here’s a look at the best substitutes and how they compare to classic panko-breaded chicken katsu.
—
1. Best Panko Substitutes for Chicken Katsu
If you don’t have panko, here are some great alternatives you can use:
A. Regular Breadcrumbs
Texture: Finer and denser than panko, resulting in a less airy crust.
Best for: A slightly different but still crunchy katsu experience.
How to Use: Use a 1:1 replacement for panko, but toast the breadcrumbs slightly for better crispiness.
✅ Tip: Add a bit of grated Parmesan cheese to the breadcrumbs to enhance flavor and crunch.
B. Crushed Cornflakes
Texture: Crunchy and slightly sweet, giving a unique flavor to chicken katsu.
Best for: A crispier and more golden coating.
How to Use: Crush cornflakes into small but not too fine pieces and use them in place of panko.
✅ Tip: Mix cornflakes with a little flour or cornstarch to help the coating stick better.
C. Crushed Crackers (Saltine or Ritz Crackers)
Texture: Crunchy with a slightly buttery taste.
Best for: A richer flavor and firm coating.
How to Use: Crush crackers finely and use them as a 1:1 substitute for panko.
✅ Tip: If using salted crackers, reduce the salt in your seasoning to avoid an overly salty taste.
D. Ground Nuts (Almonds, Pecans, or Walnuts)
Texture: Crunchy but with a slightly nutty taste.
Best for: A gluten-free alternative with extra flavor.
How to Use: Blend nuts in a food processor until they reach a coarse texture, then coat the chicken as you would with panko.
✅ Tip: Mix nuts with ground flaxseeds or parmesan cheese for a more balanced flavor.
E. Shredded Coconut
Texture: Light and crispy with a slightly sweet taste.
Best for: A tropical twist on chicken katsu.
How to Use: Use unsweetened coconut flakes, and mix with a small amount of regular breadcrumbs for a balanced coating.
✅ Tip: Serve coconut-crusted katsu with a spicy mayo or curry sauce for a delicious pairing.
—
2. How to Make Chicken Katsu Without Panko
If you’re using an alternative coating, follow these steps to ensure the best texture and flavor:
Step 1: Prepare the Chicken
Use boneless, skinless chicken breasts or thighs and pound them evenly to about ½ inch thickness.
Season with salt, pepper, and optional spices like garlic powder or paprika.
Step 2: Set Up the Breading Station
1. Flour: Coat the chicken in all-purpose or cornstarch flour (this helps the coating stick).
2. Egg Wash: Dip the chicken into beaten eggs to create a binding layer.
3. Alternative Coating: Use any of the panko substitutes mentioned above, pressing firmly to coat evenly.
Step 3: Fry or Bake the Chicken
Frying: Heat oil to 175°C (350°F) and fry for 3-4 minutes per side until golden brown.
Baking: Bake at 200°C (400°F) for 20-25 minutes, flipping halfway through for even crispness.
Air Frying: Cook at 180°C (360°F) for 12-15 minutes, spraying lightly with oil for extra crunch.
✅ Tip: If using finer breadcrumbs or nuts, press the coating firmly to ensure it sticks well to the chicken.
—
3. How Do Non-Panko Versions Compare?
Each alternative has different results, so choosing the right one depends on personal preference:
✅ Conclusion: If you want the closest texture to traditional panko, use crushed cornflakes or crushed crackers. For healthier, gluten-free options, go with ground nuts or coconut flakes.
—
Conclusion
While panko is the traditional choice for chicken katsu, there are plenty of great alternatives that can still give you a crispy and flavorful result. Whether you’re using cornflakes for crunch, crushed crackers for richness, or nuts for a gluten-free twist, each substitute brings a unique texture and taste. Try experimenting with different coatings to find your favorite version of chicken katsu!
What’s the Best Way to Keep Chicken Katsu Crispy?
Chicken Katsu is all about that signature crispy, golden-brown crust that contrasts perfectly with the tender, juicy chicken inside. However, keeping it crispy—whether before serving or after storing—can be tricky. Here are the best methods to ensure your Chicken Katsu stays crispy for as long as possible.
—
1. Proper Frying Technique for Maximum Crispiness
Getting the crispiest Chicken Katsu starts with the right frying technique. If your katsu is soggy, it might be due to incorrect frying.
✅ Use the Right Oil and Temperature
Best oils: Neutral oils with a high smoke point, like vegetable oil, canola oil, or peanut oil.
Ideal frying temperature: 175-180°C (350-360°F). If the oil is too cold, the chicken absorbs too much oil, making it greasy. If it’s too hot, the crust burns before the inside cooks.
How to test: Drop a small breadcrumb into the oil—if it sizzles immediately and floats to the surface, it’s ready!
✅ Don’t Overcrowd the Pan
Fry in small batches to prevent the temperature from dropping.
Overcrowding traps steam, making the coating soggy instead of crispy.
✅ Double-Fry for Extra Crispiness
First fry: Cook at 175°C (350°F) for 3-4 minutes per side until golden brown.
Second fry: After resting for 2 minutes, fry again at 190°C (375°F) for 30-45 seconds. This removes excess oil and makes the crust extra crispy.
—
2. The Right Way to Drain Fried Chicken Katsu
Improper draining can make your crispy katsu turn soft too quickly. Here’s how to do it right:
❌ Avoid Paper Towels
Placing katsu directly on paper towels traps steam underneath, softening the crust.
✅ Use a Wire Rack
After frying, place the katsu on a wire rack (over a baking sheet) to let excess oil drain.
This keeps the bottom from getting soggy while allowing air circulation around the cutlet.
✅ Pro Tip: If you must use a plate, line it with crumpled parchment paper instead of paper towels—it absorbs oil without trapping steam.
—
3. Keeping Chicken Katsu Crispy Before Serving
If you’re making Chicken Katsu ahead of time or cooking in batches, here’s how to maintain crispiness before serving:
✅ Keep It Warm in the Oven
Temperature: 90-100°C (200°F).
Method: Place katsu on a wire rack over a baking sheet and keep it in the oven until serving.
Why it works: This prevents moisture buildup while keeping the crust warm and crisp.
✅ Serve Immediately After Frying
The longer katsu sits, the more it absorbs moisture, softening the crispy texture.
Serve it right after frying for the best crunch.
—
4. Storing Chicken Katsu Without Losing Crispiness
Proper storage is key to preventing the breading from becoming soggy when refrigerating or freezing.
✅ Refrigeration (Short-Term Storage)
Cool Completely First: Never store hot katsu in the fridge—it traps steam, making it soggy.
Use an Airtight Container with Paper Towels: Layer the bottom with paper towels to absorb moisture.
Best if eaten within: 1-2 days for optimal crispiness.
✅ Freezing (Long-Term Storage)
Freeze Uncooked Battered Katsu: Bread the chicken and freeze it before frying for the best results.
Freezing Cooked Katsu:
1. Let it cool completely.
2. Place on a baking sheet and freeze for 30 minutes.
3. Transfer to an airtight container or freezer bag with parchment paper between layers.
Best if eaten within: 1-2 months for best texture.
—
5. Reheating Chicken Katsu While Keeping It Crispy
When reheating Chicken Katsu, avoid the microwave—it makes the coating soggy. Instead, use these methods:
✅ Oven (Best Method)
Preheat to 200°C (400°F).
Place katsu on a wire rack over a baking sheet.
Bake for 10-12 minutes until crispy and heated through.
✅ Air Fryer (Quickest Method)
Preheat to 180°C (360°F).
Air-fry for 5-7 minutes, flipping halfway.
✅ Skillet Reheating (Crispier Alternative)
Heat a dry skillet over medium heat.
Reheat for 2-3 minutes per side, pressing down lightly for even crispness.
—
6. Final Tips to Keep Chicken Katsu Crispy
✅ Use cornstarch in your breading: Mixing a little cornstarch with flour helps absorb moisture, making the crust crispier.
✅ Serve with sauce on the side: Don’t drizzle sauce directly on the katsu—it softens the coating. Instead, serve it on the side for dipping.
✅ Cut just before serving: Slicing chicken katsu immediately lets moisture escape, softening the crust. Wait until serving to keep the cutlets crispy.
—
Conclusion
The secret to keeping Chicken Katsu crispy is a combination of proper frying, draining, storing, and reheating techniques. By using the right oil temperature, a wire rack for draining, and avoiding steam traps, you can enjoy perfectly crispy katsu every time. Follow these steps, and your homemade Chicken Katsu will stay light, crunchy, and delicious—just like at a Japanese restaurant!
Can I Use a Different Meat for Katsu?
Absolutely! While Chicken Katsu is one of the most popular variations, the Katsu technique—which involves breading and deep-frying meat to a crispy golden perfection—can be applied to various proteins. Whether you prefer a different type of meat for dietary, taste, or texture preferences, there are plenty of delicious alternatives. Let’s explore some of the best options and how they compare to traditional Chicken Katsu.
—
1. Pork Katsu (Tonkatsu) – The Classic Choice
Before Chicken Katsu became widely popular, Tonkatsu (pork cutlet katsu) was the original version of this dish in Japan.
✅ Why It Works Well:
Rich and juicy texture: Pork has a naturally higher fat content than chicken, leading to a more moist and flavorful bite.
Traditional appeal: Tonkatsu is a staple in Japanese cuisine, often served with shredded cabbage and tonkatsu sauce.
🥩 Best Pork Cuts for Katsu:
Pork Loin (Rōsu Katsu): Slightly fatty, making it extra juicy.
Pork Tenderloin (Hire Katsu): Leaner and softer in texture.
🔥 Cooking Tip:
Pork takes slightly longer to cook than chicken, so make sure it reaches 145°F (63°C) internally and let it rest before slicing.
—
2. Beef Katsu – A Meaty Alternative
If you love a heartier, steak-like texture, Beef Katsu is an excellent alternative. Known as Gyukatsu in Japan, this version is growing in popularity, especially in Tokyo.
✅ Why It Works Well:
Rich, beefy flavor: Perfect for meat lovers who prefer a bolder taste than chicken or pork.
Can be cooked to preferred doneness: Some people enjoy it medium-rare rather than fully cooked.
🥩 Best Beef Cuts for Katsu:
Sirloin: Good balance of fat and tenderness.
Ribeye: Extra juicy and flavorful.
Tenderloin (Filet Mignon): The softest, most delicate cut.
🔥 Cooking Tip:
For medium-rare Gyukatsu, fry for just 45-60 seconds per side at 375°F (190°C), then let it rest before slicing.
—
3. Fish Katsu – A Lighter, Crispier Option
For those who prefer seafood, Fish Katsu (also called Katsuo Katsu or Fish Fry Katsu) is a fantastic, lighter alternative. It’s especially popular in Hawaii and Japanese coastal regions.
✅ Why It Works Well:
Flaky texture pairs beautifully with crispy breading.
Quick cooking time—usually done in 2-3 minutes.
Lower in fat and calories than pork or beef.
🐟 Best Fish for Katsu:
White Fish (Cod, Haddock, or Halibut): Mild, flaky, and holds up well to frying.
Salmon: Rich, flavorful, and adds healthy omega-3 fats.
Tuna: Used in Katsuo Katsu, typically seared and served rare.
🔥 Cooking Tip:
Fish cooks quickly, so fry at 350°F (175°C) for about 2 minutes per side until golden and crispy.
—
4. Tofu Katsu – A Vegetarian Favorite
For a meat-free option, Tofu Katsu is a delicious and satisfying alternative. It retains the crispy coating while offering a soft, creamy bite inside.
✅ Why It Works Well:
Great for vegetarians or those wanting a lighter meal.
Absorbs flavors well, making it versatile.
High in protein but lower in fat.
🥢 Best Type of Tofu for Katsu:
Extra Firm Tofu: Holds its shape and has a meaty texture.
Firm Tofu: Softer but still works if pressed well.
🔥 Cooking Tip:
Press the tofu for at least 30 minutes to remove excess water, then coat and fry at 350°F (175°C) for 3-4 minutes per side.
—
5. Shrimp Katsu – A Crispy Seafood Delight
Shrimp Katsu, also known as Ebi Katsu, is another seafood-based alternative that’s incredibly popular in Japan.
✅ Why It Works Well:
Naturally sweet and tender inside, crispy outside.
Bites-sized and easy to eat—great for sandwiches or bento boxes.
🍤 Best Shrimp for Katsu:
Large Shrimp (16-20 count per pound): These work best as they don’t overcook easily.
🔥 Cooking Tip:
Fry shrimp at 350°F (175°C) for 1-2 minutes per side until golden brown.
—
6. Plant-Based Katsu – Vegan Alternatives
If you want a fully plant-based version of katsu, there are several vegan alternatives that mimic the texture and crispiness of meat-based katsu.
✅ Great Plant-Based Options:
Seitan Katsu: Has a chewy, meat-like texture.
Eggplant Katsu: Soft inside, crispy outside—pairs well with Japanese curry.
Mushroom Katsu (Portobello or King Oyster Mushrooms): Juicy, earthy flavor with a meaty bite.
🔥 Cooking Tip:
Coat plant-based katsu just like meat-based versions and fry at 350°F (175°C) for 3-5 minutes per side, depending on thickness.
—
Final Thoughts: Choosing the Best Katsu Alternative
If you’re looking to switch up your Chicken Katsu routine, there are plenty of other delicious meats (and plant-based options) to try. Here’s a quick comparison:
Ultimately, the Katsu technique works on almost any protein, so feel free to experiment and find your favorite version. Whether you stick to the classic pork or chicken, or try tofu, fish, or beef, there’s a crispy, delicious katsu for everyone!
Conclusion
Chicken Katsu is a beloved Japanese dish that combines crispy, golden-brown breading with juicy, tender chicken. Whether you’re making it for a weeknight dinner, a bento box, or a special meal, this dish is both easy to prepare and incredibly satisfying.
By following the right techniques—choosing the best cut of chicken, using authentic panko bread crumbs, and frying to perfection—you can achieve restaurant-quality Chicken Katsu at home. Pair it with fluffy rice, shredded cabbage, miso soup, or Japanese curry to create a well-balanced meal. And if you’re looking for variety, consider trying pork (Tonkatsu), beef, fish, or even plant-based katsu for a fun twist!
Now that you know how to make Chicken Katsu from scratch, why not give it a try? Gather your ingredients, heat up your oil, and enjoy the crispy, flavorful goodness of homemade Chicken Katsu!
Have you tried making Chicken Katsu before? Let us know in the comments below!
OHHMZB GRclMXuL hvM