
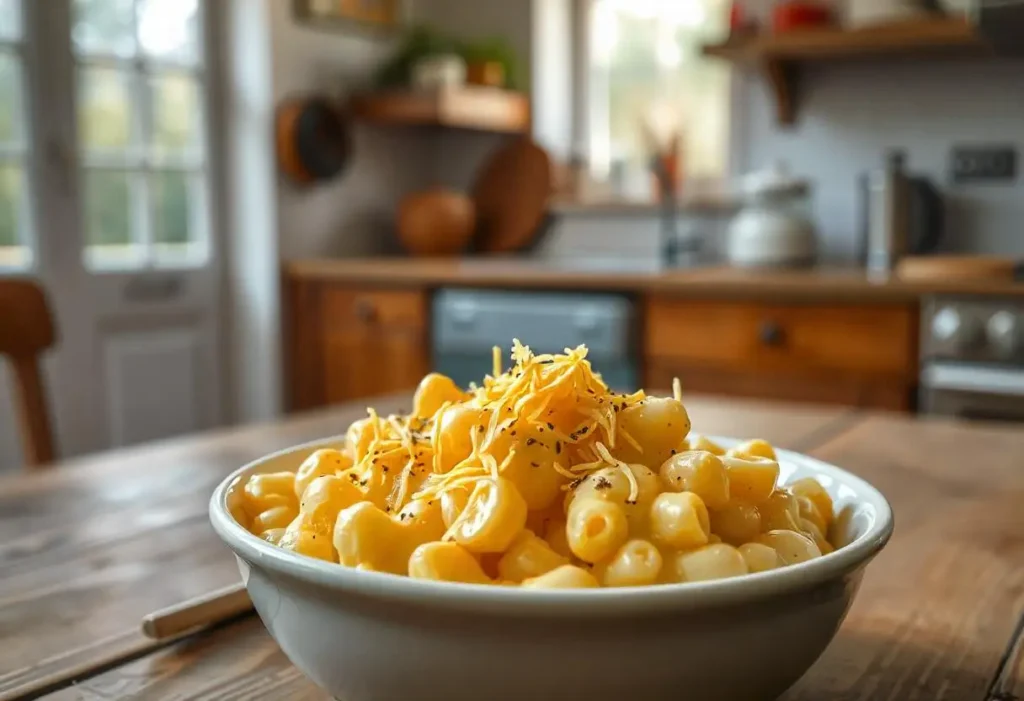
Mac and cheese is the ultimate comfort food—creamy, cheesy, and incredibly satisfying. While store-bought versions or boxed mixes are convenient, nothing beats homemade mac and cheese made from scratch. With just a few simple ingredients, you can create a rich and velvety cheese sauce that coats every bite of pasta perfectly.
In this recipe, I’ll show you how to make the creamiest mac and cheese with real cheese, milk, butter, and a simple roux. Whether you prefer it stovetop or baked, this easy recipe will become your go-to for family dinners or special occasions. Plus, I’ll share expert tips to keep your mac and cheese from becoming grainy or dry and fun variations to customize your dish.
Let’s get started on making the best homemade mac and cheese from scratch!
Ingredients for the Creamiest Mac and Cheese
Macaroni Pasta: Choosing the Right Pasta for the Best Texture
The type of pasta you choose can significantly impact the texture and overall experience of your mac and cheese. While traditional elbow macaroni is the most common choice, other pasta shapes can enhance the dish by holding onto the creamy cheese sauce even better. Here’s what you need to know when selecting the perfect pasta:
1. Best Pasta Shapes for Mac and Cheese
While classic elbow macaroni works well, consider these other shapes for added texture and sauce retention:
Cavatappi – Spiral-shaped pasta that holds sauce in its ridges, making each bite extra flavorful.
Shells (Conchiglie) – Perfect for trapping cheese sauce inside their curved shape.
Fusilli or Rotini – Twisted pasta shapes that catch more sauce, adding a unique texture.
Orecchiette – Small, round pasta that cradles the cheese sauce like tiny bowls.
2. Should You Use Regular or Whole Wheat Pasta?
Regular pasta (made from refined flour) is soft, smooth, and traditional for mac and cheese.
Whole wheat pasta adds more fiber and a slightly nutty flavor but can be firmer in texture. If you prefer a healthier option, whole wheat pasta works, but you may need to cook it slightly longer for a softer bite.
3. Cooking Pasta to the Right Doneness
Cook to al dente – Since the pasta will continue to absorb moisture from the cheese sauce, boiling it until just tender (al dente) prevents it from becoming mushy.
Salt the water generously – This enhances the flavor of the pasta before it even touches the cheese sauce.
Drain but don’t rinse – Rinsing removes the starch that helps the sauce cling to the pasta. If you need to prevent sticking, toss the drained pasta with a little butter or oil.
Choosing the right pasta shape and cooking it correctly will ensure your mac and cheese has the perfect balance of creaminess and texture, making every bite irresistibly delicious.
Cheese Selection: Best Cheeses for Creamy Mac and Cheese
The key to making rich, creamy mac and cheese is choosing the right cheeses. While cheddar cheese is the most popular option, using a blend of cheeses can add depth of flavor, better meltability, and the perfect texture. Here’s how to pick the best cheeses for your mac and cheese:
1. Best Melting Cheeses for a Smooth, Creamy Sauce
For a luxuriously smooth sauce, you’ll need cheeses that melt well. Here are some of the best options:
Sharp Cheddar – The classic choice, offering a bold, tangy flavor and excellent meltability.
Gruyère – Adds a mild nuttiness and makes the sauce extra creamy.
Monterey Jack – Mild and buttery, this cheese melts beautifully into the sauce.
Fontina – Smooth and rich, Fontina helps create a velvety texture.
Gouda – Slightly sweet and creamy, perfect for extra indulgence.
Mozzarella – Provides great stretchiness, but should be used in combination with a stronger cheese.
2. Flavor-Boosting Cheeses to Mix In
To enhance the taste of your mac and cheese, consider mixing in small amounts of these cheeses:
Parmesan – Adds a salty, umami kick and deepens the overall flavor.
Blue Cheese – A bold choice for those who enjoy a tangy, pungent bite.
Smoked Gouda – Adds a smoky depth that pairs well with bacon or spicy mac and cheese.
Brie – Creates an ultra-creamy consistency with a mild, buttery flavor.
3. Pre-Shredded vs. Block Cheese: Which One to Use?
Always use block cheese and shred it yourself – Pre-shredded cheese contains anti-caking agents like potato starch, which can prevent smooth melting and make your sauce grainy.
Finely shred cheese for easy melting – Smaller shreds melt faster and more evenly, preventing clumps.
4. How to Get the Perfect Cheese Sauce
Melt cheese gradually – Adding cheese too quickly or at high heat can cause it to separate and become grainy.
Use a roux as a base – A combination of butter and flour thickens the sauce, allowing the cheese to blend smoothly.
Mix different cheeses – Combining at least two types of cheese ensures a balanced flavor and texture.
By selecting the right cheeses and following proper melting techniques, you’ll achieve a perfectly smooth, creamy, and flavorful mac and cheese every time!
Dairy and Fats: The Secret to Rich and Creamy Mac and Cheese
The combination of milk, butter, and cream plays a crucial role in achieving the perfect creamy mac and cheese. These ingredients create the foundation of the sauce, ensuring a smooth texture, rich flavor, and velvety consistency. Choosing the right dairy and fats can make all the difference in how your mac and cheese turns out.
1. Best Dairy Options for a Creamy Cheese Sauce
The type of dairy you use will affect the overall richness and consistency of your mac and cheese. Here are some of the best choices:
Whole Milk (Full-Fat Milk) – The most commonly used base, whole milk provides a smooth texture and balances creaminess without making the dish too heavy.
Heavy Cream – For extra indulgence, heavy cream adds richness and a silkier texture, making the mac and cheese ultra-luxurious.
Half-and-Half – A great middle-ground option, half-and-half is a mix of milk and cream, offering both lightness and richness.
Evaporated Milk – A common ingredient in Southern-style mac and cheese, evaporated milk gives a creamy consistency without excess water.
Buttermilk – Adds a slight tang, which can enhance the flavor, though it’s best used in small amounts mixed with other dairy.
💡 Tip: If you want extra creaminess, try using a combination of whole milk and heavy cream for the best balance of richness and smoothness.
2. The Role of Butter in Mac and Cheese
Butter is essential for both flavor and texture in mac and cheese. Here’s how it enhances the dish:
Forms the base of the roux – A mixture of butter and flour is used to create a thick, creamy sauce that prevents the cheese from clumping.
Adds richness – Butter gives mac and cheese a deep, buttery flavor that enhances the overall taste.
Prevents pasta from sticking – Tossing drained pasta with a bit of butter before mixing it with the cheese sauce helps coat each piece evenly.
3. Can You Use Alternative Dairy Options?
If you need a dairy-free or lighter option, there are several substitutes that work well:
Almond Milk or Cashew Milk – These are creamy and mild, making them good dairy-free alternatives.
Oat Milk – Naturally thicker than other plant-based milks, oat milk helps mimic the creaminess of dairy.
Coconut Milk (Unsweetened) – Can be used for a richer, slightly sweet twist, but be mindful of the flavor.
Vegan Butter or Margarine – Works as a butter substitute, though it may slightly alter the taste.
💡 Tip: If using non-dairy alternatives, opt for unsweetened versions to avoid adding an unintended sweetness to your mac and cheese.
4. How to Keep Your Sauce Smooth and Creamy
To achieve the perfect mac and cheese sauce, follow these best practices:
Warm your milk before adding it to the roux – This prevents lumps and helps create a smoother sauce.
Add cheese gradually – Stirring in cheese slowly over low heat prevents separation and ensures a velvety consistency.
Avoid overcooking – Overheating can cause the cheese sauce to break or become grainy.
By choosing the right milk, butter, and fats, you’ll create a luxuriously creamy, flavorful, and satisfying mac and cheese that’s far better than anything from a box!
Other Essentials: Key Ingredients for Perfect Mac and Cheese
Beyond pasta, cheese, and dairy, a few other essential ingredients play a crucial role in making smooth, flavorful, and well-balanced mac and cheese. These ingredients help thicken the sauce, enhance flavor, and add depth to the dish.
1. Flour: The Secret to a Smooth Cheese Sauce
Flour is a key ingredient in the roux, a mixture of butter and flour that forms the base of the cheese sauce. It helps thicken the sauce and prevents the cheese from becoming grainy.
How to Make a Roux:
Melt butter over medium heat and whisk in an equal amount of flour.
Cook for about 1–2 minutes, stirring constantly to remove the raw flour taste.
Gradually whisk in warm milk to create a smooth, lump-free sauce.
Common Mistake: If the roux is not cooked long enough, it may leave a raw flour taste in the mac and cheese. Be sure to cook it until it turns a light golden color.
💡 Alternative: If you want to skip flour, you can use cornstarch or blend some of the cooked pasta into the sauce to create natural thickness.
2. Seasonings: Enhancing Flavor Beyond Just Cheese
Cheese alone isn’t always enough to create a well-balanced flavor. Adding seasonings can elevate the taste of your mac and cheese.
Salt – Essential for bringing out the cheese’s natural flavors.
Black Pepper or White Pepper – Adds a mild kick without overpowering the dish.
Mustard (Dry or Dijon) – A secret ingredient that enhances the sharpness of the cheese without making it taste like mustard.
Paprika or Smoked Paprika – Adds warmth and a hint of smokiness.
Garlic Powder & Onion Powder – Boosts umami flavors and gives depth to the sauce.
Nutmeg (a pinch) – A classic addition to creamy sauces like béchamel, nutmeg subtly enhances the richness of the cheese sauce.
💡 Tip: Add seasonings gradually and taste as you go to avoid overpowering the dish.
3. Breadcrumbs: The Key to a Crispy Baked Topping
If you’re making baked mac and cheese, a crispy topping adds texture and contrast to the creamy pasta. The best breadcrumb choices include:
Panko Breadcrumbs – Light and crispy, they provide the best crunch.
Buttered Regular Breadcrumbs – Tossing breadcrumbs in melted butter before baking ensures a golden, crispy finish.
Crushed Crackers (like Ritz) – Adds extra flavor and a buttery crunch.
Parmesan Cheese in the Topping – Mixing Parmesan with breadcrumbs creates a savory, crispy crust.
💡 Tip: Broil the mac and cheese for 1–2 minutes at the end of baking for an extra crispy top.
4. Acidic Ingredients: Preventing a Grainy Cheese Sauce
Sometimes, cheese sauces can turn grainy due to proteins clumping together. A touch of acid helps stabilize the sauce. Some good options include:
A splash of lemon juice or vinegar – Just a tiny bit can help keep the sauce smooth.
A spoonful of sour cream or Greek yogurt – Adds a subtle tang while helping emulsify the sauce.
Worcestershire sauce or hot sauce – Provides depth and umami while keeping the cheese sauce creamy.
💡 Tip: Add acidic ingredients after melting the cheese to avoid curdling.
—
By including these essential ingredients, you can ensure your mac and cheese has the perfect texture, rich flavor, and a creamy consistency every time!
Step-by-Step Guide to Making Mac and Cheese from Scratch
Cooking the Pasta: Getting the Perfect Texture for Mac and Cheese
Cooking the pasta properly is just as important as making a creamy cheese sauce. If the pasta is too soft, it will become mushy in the sauce; if it’s too firm, it won’t hold the cheese well. By following the right cooking techniques, you can ensure your mac and cheese has the perfect balance of tenderness and structure.
1. Choosing the Right Pasta Shape
While classic elbow macaroni is the go-to choice, there are many pasta shapes that work well for mac and cheese, each affecting the texture of the dish:
Elbow Macaroni – Traditional and perfect for holding onto the cheese sauce.
Cavatappi – A spiral-shaped pasta that provides extra surface area for sauce to cling to.
Shells (Conchiglie) – Small pockets that trap the creamy cheese sauce inside.
Fusilli or Rotini – Twisted pasta shapes that help capture more sauce in their grooves.
💡 Tip: Choose pasta with ridges or curves for better sauce absorption and texture.
2. How Long to Cook Pasta for Mac and Cheese
Cooking pasta just right is key to avoiding a mushy final dish. Follow these steps:
Cook pasta to “al dente” – This means the pasta is tender but still slightly firm when bitten.
Reduce cooking time by 1–2 minutes – Since the pasta will continue absorbing moisture from the cheese sauce, slightly undercooking it prevents it from becoming overly soft.
Taste-test before draining – Always check the texture before draining, as different brands may cook at slightly different times.
💡 Tip: If making baked mac and cheese, cook the pasta even firmer (about 2 minutes less than al dente), since it will soften further in the oven.
3. Salting the Water: Why It Matters
Salting pasta water is an essential step that adds flavor from the inside out. Without it, your pasta can taste bland even with a great sauce.
How much salt to use? About 1–2 tablespoons of salt per gallon of water. The water should taste slightly salty, like seawater.
When to add salt? Always add salt once the water is boiling before adding pasta.
💡 Tip: If you forget to salt the water, you can still enhance the flavor by seasoning the cheese sauce well.
4. Should You Rinse the Pasta After Cooking?
Many people wonder whether they should rinse their pasta before adding it to mac and cheese. Here’s what to do:
Do NOT rinse if making stovetop mac and cheese – The starchy surface helps the cheese sauce cling to the pasta better.
DO rinse if making baked mac and cheese – A quick rinse with cool water stops the cooking process and prevents over-softening before baking.
💡 Tip: If you’re worried about the pasta sticking together, toss it with a small amount of butter or oil after draining.
—
By choosing the right pasta shape, cooking it to al dente, and properly salting the water, you’ll create a mac and cheese dish with perfectly tender, sauce-coated pasta every time!
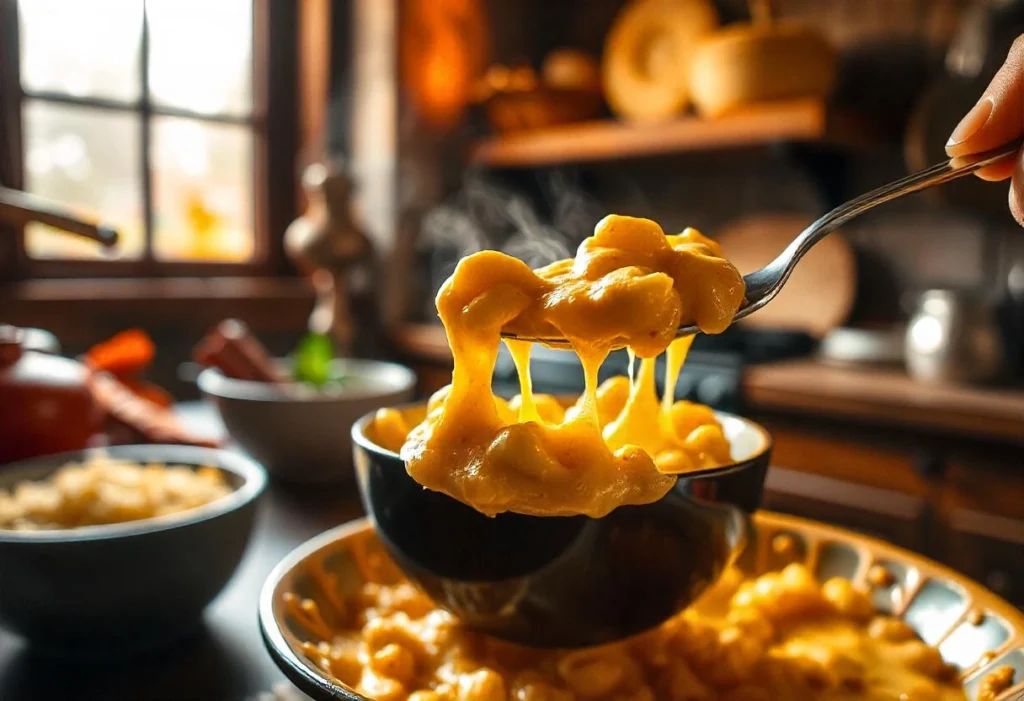
Making the Cheese Sauce: The Key to Creamy, Velvety Mac and Cheese
The cheese sauce is the heart of mac and cheese, giving it that rich, creamy, and indulgent texture. A well-made sauce should be smooth, thick, and full of deep, cheesy flavor. To achieve this, follow the right techniques and avoid common mistakes that can make your sauce grainy or clumpy.
—
1. Starting with a Roux: The Foundation of a Creamy Sauce
A roux (a mixture of butter and flour) is essential for thickening the cheese sauce and ensuring it coats the pasta evenly. Here’s how to make it:
1. Melt butter in a pan over medium heat. Use unsalted butter to control the saltiness of the dish.
2. Whisk in an equal amount of flour (e.g., 2 tablespoons of butter + 2 tablespoons of flour). Stir continuously to prevent lumps.
3. Cook the roux for 1–2 minutes until it turns a light golden color. This removes the raw flour taste and enhances the sauce’s flavor.
💡 Tip: If you prefer a thinner sauce, reduce the amount of flour slightly or add extra milk later.
—
2. Adding the Milk: Creating a Smooth Base
Once the roux is ready, gradually whisk in warm milk to form a smooth sauce.
Which milk to use?
Whole milk – Creates a balanced, creamy texture.
Heavy cream – Adds richness for extra indulgent mac and cheese.
Half-and-half – A mix of milk and cream for a silky consistency.
How to add milk without lumps:
Add milk slowly while whisking continuously.
Use warm milk to prevent temperature shock and ensure smooth blending.
Stir constantly until the sauce thickens slightly (about 3–5 minutes).
💡 Tip: If the sauce becomes too thick, add a splash of milk to adjust the consistency.
—
3. Melting the Cheese: How to Get a Silky Smooth Sauce
Adding cheese at the right time and in the right way ensures a smooth, creamy, and non-grainy sauce. Follow these steps:
1. Lower the heat to low or remove the pan from heat before adding cheese. High heat can cause cheese to separate and turn grainy.
2. Use freshly shredded cheese. Pre-shredded cheese contains anti-caking agents that prevent smooth melting.
3. Add cheese gradually, one handful at a time, stirring until fully melted before adding more. This prevents clumping and ensures even melting.
💡 Best Cheese for a Creamy Sauce:
Sharp Cheddar – The classic mac and cheese choice, offering a strong, tangy flavor.
Gruyère – Adds a mild nuttiness and helps create a smooth texture.
Monterey Jack – Buttery and mild, perfect for enhancing creaminess.
Gouda – Rich and slightly sweet, excellent for a luxurious sauce.
Fontina – Creamy and mild, melts beautifully into the sauce.
💡 Tip: For a more flavorful mac and cheese, use a mix of at least two cheeses—one for meltability (like Monterey Jack) and one for sharpness (like Cheddar or Gruyère).
—
4. Seasoning the Sauce: Enhancing the Flavor
A good cheese sauce isn’t just about cheese—it needs the right seasonings to enhance the flavors. Here are some must-have additions:
Salt – Brings out the richness of the cheese.
Black or White Pepper – Adds a hint of spice and depth.
Dijon Mustard or Dry Mustard Powder – Gives a subtle tang and sharpness.
Garlic Powder & Onion Powder – Boosts the savory umami notes.
Paprika (Regular or Smoked) – Adds warmth and a touch of smokiness.
A Pinch of Nutmeg – A classic addition to creamy sauces like béchamel, nutmeg subtly enhances richness.
💡 Optional Enhancements:
A splash of hot sauce (like Tabasco) – Balances the richness without making it spicy.
A dash of Worcestershire sauce – Adds an umami depth.
—
5. Preventing Common Cheese Sauce Mistakes
To keep your sauce smooth and creamy, avoid these pitfalls:
❌ Adding cheese over high heat – Causes the fat to separate, leading to a greasy or grainy texture.
❌ Using pre-shredded cheese – Contains anti-caking agents that prevent smooth melting.
❌ Not stirring constantly – Can result in uneven melting and clumps.
❌ Skipping the roux – Without it, the sauce may turn watery instead of creamy.
—
By following these steps, you’ll achieve a perfectly creamy, flavorful cheese sauce that makes your mac and cheese irresistibly rich and delicious!
Combining Pasta and Sauce: Achieving the Perfect Mac and Cheese Texture
Once your pasta is perfectly cooked and your cheese sauce is rich and creamy, it’s time to combine them for the ultimate mac and cheese experience. This step is crucial because improper mixing can lead to a dish that is either too dry, too soupy, or unevenly coated. By following the right techniques, you can ensure that every bite is perfectly creamy, cheesy, and well-balanced.
—
1. Draining and Preparing the Pasta for Mixing
Before adding the pasta to the sauce, it’s important to handle it properly to avoid excess moisture or clumping.
✅ Drain Well but Don’t Rinse
Why? The starch on the pasta helps the cheese sauce cling better. Rinsing washes it away, leading to a thinner sauce.
Exception: If making baked mac and cheese, a quick rinse with cool water can stop the cooking process to prevent mushy pasta.
✅ Reserve Some Pasta Water
Saving ½ cup of pasta water can be useful for adjusting the sauce consistency later.
If the mac and cheese starts to dry out, adding a small amount of pasta water helps loosen it while keeping it creamy.
✅ Toss Pasta with Butter (Optional)
If you need to hold the pasta before mixing, tossing it with a little butter prevents sticking.
—
2. Mixing the Pasta with Cheese Sauce
To ensure every bite is evenly coated and ultra-creamy, follow these best practices when combining the pasta and sauce.
🔥 Use Low Heat
Once the cheese sauce is ready, reduce the heat to low or even turn it off before adding pasta.
High heat can cause the cheese to break and become grainy.
💡 Add Pasta Gradually
Instead of dumping all the pasta in at once, add it in batches while stirring to coat evenly.
This prevents overcrowding, ensuring every piece gets a smooth, velvety coating of sauce.
💦 Adjust Consistency if Needed
If the mac and cheese looks too thick, stir in:
A splash of warm milk
A small amount of reserved pasta water
A little extra melted butter or cream for extra richness
If the sauce is too thin, let the mac and cheese sit for a few minutes to thicken naturally as the pasta absorbs moisture.
—
3. Enhancing Texture: Stovetop vs. Baked Mac and Cheese
Your method of serving mac and cheese will affect how you combine the sauce and pasta.
🔥 For Stovetop Mac and Cheese (Creamy & Smooth)
Mix the pasta and sauce together in the pot over low heat for 1–2 minutes.
Stir continuously to ensure even coating.
Serve immediately while warm and creamy.
🍽️ For Baked Mac and Cheese (Golden & Crispy)
Only mix three-fourths of the sauce with the pasta initially.
Pour the mixture into a buttered baking dish and top with the remaining sauce for extra creaminess.
Add a crispy breadcrumb topping (like panko + butter + Parmesan).
Bake at 375°F (190°C) for 15–20 minutes, then broil for a golden crust.
💡 Tip: If baking, slightly undercook the pasta (by 1–2 minutes) so it doesn’t become mushy in the oven.
—
4. Final Touches: Making It Even Better
Before serving, consider these small but impactful additions to take your mac and cheese to the next level.
🧀 Extra Cheese for a Creamier Finish
Stir in a small handful of shredded cheese just before serving for extra gooeyness.
Adding a bit of cream cheese or mascarpone can make it even richer.
🌿 Fresh Garnishes for a Pop of Flavor
Chopped parsley – Adds a fresh contrast to the rich cheese.
Cracked black pepper – Enhances depth and complements the cheese.
A drizzle of truffle oil – For a gourmet touch.
🔥 For a Little Heat
Sprinkle crushed red pepper flakes or a few dashes of hot sauce for a mild kick.
Smoked paprika adds a subtle smokiness that pairs well with cheese.
—
Avoiding Common Mistakes When Combining Pasta and Sauce
❌ Overheating the cheese sauce – Can cause it to break or turn grainy.
❌ Not stirring enough – Leads to uneven sauce distribution.
❌ Adding too much pasta at once – Results in a dry mac and cheese.
❌ Skipping the resting time – Letting mac and cheese sit for 1–2 minutes before serving helps the sauce thicken to the perfect consistency.
—
By following these steps, you’ll ensure your mac and cheese is perfectly creamy, rich, and evenly coated, whether served stovetop or baked.
Optional Additions: Elevating Your Mac and Cheese
Mac and cheese is delicious on its own, but adding extra ingredients can take it to the next level. Whether you want to enhance the flavor, add texture, or introduce a protein boost, these optional additions allow you to customize your mac and cheese to fit your taste.
—
1. Extra Cheese for More Flavor and Creaminess
If you love ultra-cheesy mac and cheese, consider adding more varieties of cheese for a deeper, richer flavor.
🧀 Cheese Blends for the Ultimate Flavor:
Parmesan – Adds a salty, nutty depth.
Cream Cheese or Mascarpone – Makes the sauce extra silky and smooth.
Blue Cheese – A bold, tangy option for those who love strong flavors.
Smoked Gouda – Introduces a subtle smokiness for a gourmet twist.
💡 Tip: Stir in extra cheese after turning off the heat to prevent it from becoming grainy.
—
2. Protein Additions for a Heartier Meal
To make mac and cheese a full meal, adding protein can make it more filling and satisfying.
🍖 Meat Additions:
Bacon or Pancetta – Crispy and smoky, adding crunch and richness.
Grilled Chicken – A lean protein that pairs well with creamy cheese.
Shrimp or Lobster – For a luxurious seafood twist.
Ground Beef or Sausage – Turns mac and cheese into a hearty casserole.
🥚 Egg Yolks for Extra Richness:
Whisking in a raw egg yolk while the sauce is warm creates a silkier, custard-like texture.
💡 Tip: If using meat, cook it separately and stir it in at the end to keep textures distinct.
—
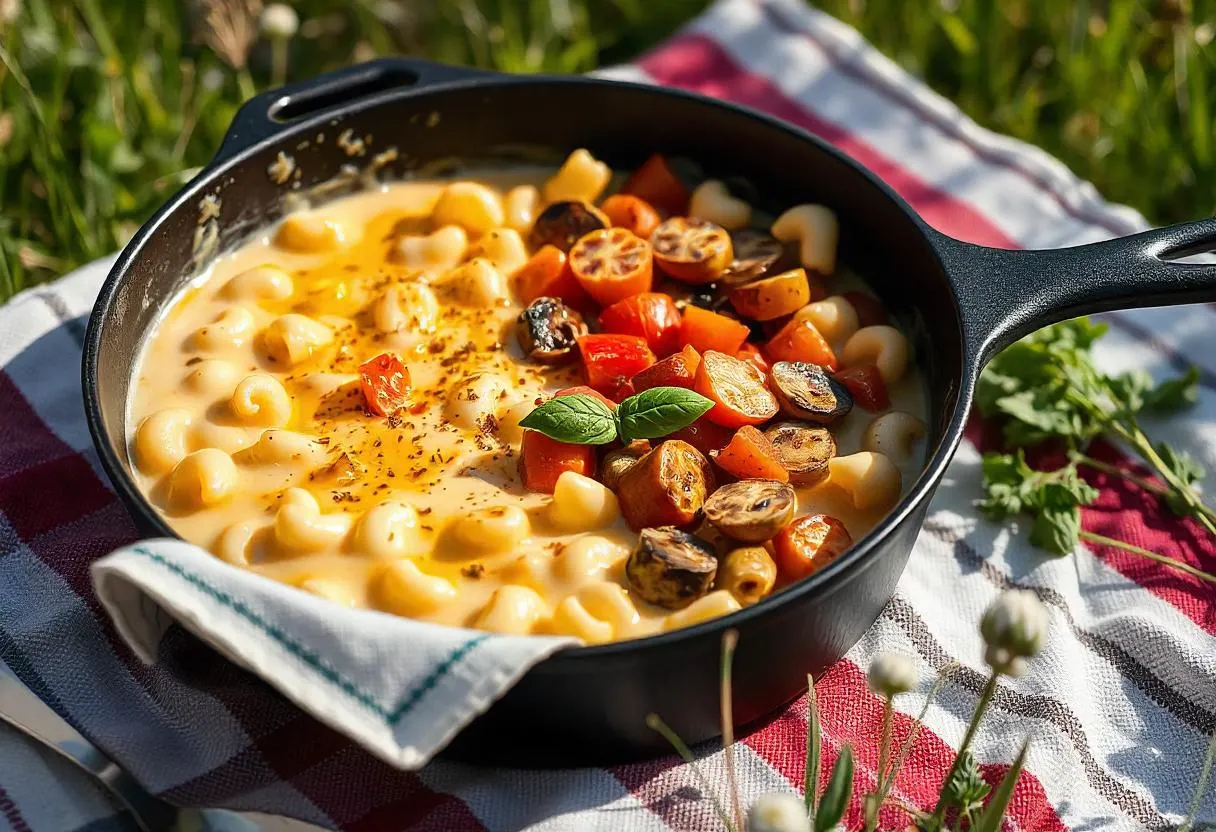
3. Vegetables for Added Nutrition and Flavor
Adding veggies to mac and cheese can boost nutrition while introducing fresh flavors and textures.
🥦 Best Vegetables to Add:
Broccoli or Cauliflower – Lightly steamed for a tender bite.
Spinach or Kale – Wilted greens add color and nutrients.
Mushrooms – Sautéed for a savory, umami-rich addition.
Caramelized Onions – Enhance the dish with a sweet, rich depth.
Roasted Red Peppers – Bring a mild sweetness and pop of color.
💡 Tip: Sauté or roast veggies before adding them to prevent excess moisture.
—
4. Crunchy Toppings for Texture
Adding a crispy topping transforms mac and cheese into a textural delight, especially if you’re baking it.
🥖 Best Toppings for a Crispy Finish:
Buttered Panko or Breadcrumbs – Light and crunchy, adding a contrast to the creamy sauce.
Crushed Crackers (Ritz, Saltines, or Cheez-Its) – A buttery, flavorful alternative to breadcrumbs.
Crumbled Bacon – A smoky, crispy finish.
Toasted Nuts (Almonds, Walnuts, or Pecans) – Adds crunch and a nutty taste.
💡 Tip: Toss breadcrumbs in melted butter and Parmesan before sprinkling over the top for extra flavor.
—
5. Spices and Sauces to Enhance Flavor
Mac and cheese benefits from a little seasoning boost to balance its richness.
🌶️ Spices & Seasonings:
Smoked Paprika – Adds warmth and a slight smokiness.
Cayenne Pepper – Brings mild heat without overpowering the cheese.
Mustard Powder – Enhances the cheese’s sharpness.
Nutmeg (a pinch) – A secret ingredient for depth in creamy sauces.
🔥 Flavorful Sauces:
Hot Sauce (Tabasco, Sriracha, or Buffalo Sauce) – A spicy kick to cut through the richness.
Worcestershire Sauce – Adds umami depth without overwhelming the cheese.
Truffle Oil – A drizzle over finished mac and cheese creates a gourmet touch.
💡 Tip: Add seasonings gradually and taste as you go to avoid overpowering the cheese flavor.
—
6. Unique Twists for a Special Touch
For those looking to experiment, try these creative variations:
🍔 Cheeseburger Mac and Cheese – Mix in cooked ground beef and top with shredded cheddar.
🦞 Lobster Mac and Cheese – Stir in chunks of lobster for an indulgent seafood version.
🌽 Mexican-Style Mac and Cheese – Add roasted corn, jalapeños, and Cotija cheese.
🧄 Garlic & Herb Mac and Cheese – Mix in roasted garlic and fresh herbs like thyme or basil.
🍕 Pizza Mac and Cheese – Add mini pepperoni and Italian seasoning for a pizza-inspired twist.
—
Final Thoughts
These optional additions allow you to customize your mac and cheese to fit your cravings, whether you prefer extra creamy, crunchy, meaty, or veggie-packed versions. Experiment and find your perfect mac and cheese masterpiece!
Tips for the Perfect Creamy Texture
Avoiding Grainy Cheese Sauce: Tips for a Smooth and Creamy Texture
A grainy cheese sauce is one of the most frustrating issues when making mac and cheese. Instead of a smooth, velvety texture, the cheese can separate, clump, or become gritty, ruining the dish. This happens when the proteins in cheese coagulate and break apart, usually due to excessive heat or improper melting techniques. Below are the key causes of grainy cheese sauce and how to prevent them for perfectly creamy mac and cheese every time.
—
1. Use the Right Cheese for a Smooth Melt
Not all cheeses melt smoothly. Some varieties become grainy or rubbery when heated due to their moisture and protein content.
✅ Best Cheeses for a Creamy Sauce:
Cheddar (Mild, Medium, or Sharp) – Melts well, but extra-sharp can sometimes turn grainy.
Gouda – Smooth and creamy with a slight sweetness.
Gruyère – Adds a rich, nutty flavor and melts beautifully.
Fontina – A great melting cheese with a buttery texture.
Monterey Jack – Mild and extra creamy when melted.
Mozzarella (Low-Moisture) – Stretches rather than turns grainy, best in blends.
American Cheese or Velveeta – Processed cheeses melt exceptionally well due to stabilizers.
🚫 Cheeses That Can Become Grainy:
Parmesan & Pecorino Romano – Better as a finishing cheese, as they don’t melt smoothly.
Feta & Cotija – Crumble instead of melting.
Pre-Shredded Cheese – Contains anti-caking agents that prevent smooth melting.
💡 Tip: Always grate cheese from a block for the smoothest melt.
—
2. Avoid High Heat – Low and Slow is Key
Overheating cheese is the #1 reason for grainy sauce. High heat forces the proteins to separate from the fats, causing a gritty texture.
🔥 Best Heat Settings for a Smooth Sauce:
Use low to medium-low heat when making the cheese sauce.
Never boil the sauce—simmering is fine, but boiling is too harsh.
Remove the pot from heat before adding cheese to prevent overheating.
💡 Tip: If you accidentally overheat your sauce and it starts separating, try whisking in a splash of warm milk or cream to help re-emulsify it.
—
3. Add Cheese Gradually for Even Melting
Dumping all the cheese in at once can shock the sauce, leading to uneven melting.
🧀 Proper Cheese-Adding Technique:
1. Turn off the heat before adding cheese.
2. Add cheese in small handfuls, stirring constantly to melt each portion before adding more.
3. Use gentle stirring motions—vigorous whisking can break the sauce’s emulsion.
4. If needed, keep the sauce warm but not hot while stirring.
💡 Tip: If the sauce thickens too much, add a little warm milk to bring it back to a creamy consistency.
—
4. Use a Starch-Based Thickener for Stability
A roux (butter + flour mixture) or a cornstarch slurry helps stabilize the sauce and prevent separation.
🥄 How to Make a Roux for a Stable Cheese Sauce:
1. Melt butter in a pan over medium-low heat.
2. Stir in an equal amount of flour and cook for 1–2 minutes, stirring constantly.
3. Slowly whisk in warm milk, ensuring no lumps form.
4. Cook until slightly thickened, then turn off heat before adding cheese.
💡 Tip: If skipping the roux, you can mix cheese with a small amount of cornstarch before adding it to the sauce.
—
5. Use Acidic Ingredients to Help Emulsify
A touch of acid can keep the cheese proteins from clumping.
🍋 Best Acidic Additions:
A splash of lemon juice – Helps keep the sauce smooth.
A teaspoon of Dijon mustard – Adds flavor while preventing separation.
A little white wine or vinegar – Works well in gourmet mac and cheese recipes.
💡 Tip: Add acidic ingredients before stirring in the cheese to prevent graininess.
—
6. Avoid Excess Moisture from Add-Ins
Adding wet ingredients (like steamed vegetables or cooked meat) without draining them properly can cause the sauce to break.
🌽 How to Prevent Excess Moisture Issues:
Drain veggies well before adding them to the sauce.
Cook meats separately and pat them dry before mixing in.
Avoid adding cold liquids—always use warm milk or cream to keep the sauce stable.
💡 Tip: If the sauce becomes too thin, whisk in a little extra cheese or a small spoon of roux to bring back the creamy consistency.
—
7. Rescue a Grainy Cheese Sauce
If your cheese sauce already turned grainy, don’t worry—it can still be saved!
🛠️ How to Fix a Broken Cheese Sauce:
1. Remove from heat immediately.
2. Add a few spoonfuls of warm milk, cream, or pasta water.
3. Whisk gently and consistently until the sauce smooths out.
4. If needed, blend the sauce with an immersion blender to re-emulsify it.
💡 Tip: If the sauce remains grainy, use it for a baked mac and cheese recipe, where a breadcrumb topping can mask the texture.
—
Final Thoughts
A grainy cheese sauce can ruin mac and cheese, but by following these simple steps—using the right cheese, gentle heat, a roux base, and proper emulsifiers—you can ensure a silky, creamy sauce every time. If things go wrong, don’t panic! A little warm milk, acid, or whisking can bring it back to perfection.
Adding a Flavor Boost: Elevating Your Mac and Cheese
A classic mac and cheese is rich, creamy, and comforting, but adding extra flavors can take it from simple to spectacular. Whether you prefer a subtle depth of flavor or a bold, spicy kick, these additions help create a gourmet twist on your mac and cheese. Let’s explore different ways to boost the flavor and make your dish stand out.
—
1. Enhance the Cheese Flavor with Seasonings
While cheese is the star of mac and cheese, a few well-chosen seasonings can enhance its natural flavors and create a more complex taste.
🧂 Best Seasonings to Boost the Cheese Flavor:
Mustard Powder – Adds a slight tang and sharpness, making the cheese flavor more pronounced.
Smoked Paprika – Provides a mild smokiness that pairs well with cheddar and gouda.
Cayenne Pepper or Red Pepper Flakes – Adds just a touch of heat to balance the richness.
Nutmeg (a pinch) – Often used in creamy sauces, nutmeg subtly enhances the depth of flavor.
Onion Powder & Garlic Powder – Brings a savory umami note without overpowering the cheese.
White Pepper (instead of black pepper) – Has a milder, less earthy taste that blends well in cheese sauces.
💡 Tip: Start with a small amount of seasoning and taste as you go to avoid overpowering the dish.
—
2. Add Umami for a Richer, More Savory Taste
Umami is the fifth taste, known for its deep, savory, and satisfying flavor. Adding umami-rich ingredients makes mac and cheese even more delicious.
🍄 Umami-Boosting Ingredients:
Worcestershire Sauce – A dash enhances the savory depth of the cheese sauce.
Soy Sauce or Tamari – Adds saltiness and umami while complementing cheese flavors.
Miso Paste – A small spoonful creates a creamy, salty richness.
Caramelized Onions – A sweet-savory addition that deepens the overall taste.
Mushroom Powder or Truffle Oil – Introduces an earthy umami kick, great for gourmet mac and cheese.
💡 Tip: When using Worcestershire sauce or miso paste, mix them into the milk before adding them to the cheese sauce for even distribution.
—
3. Bring in Some Heat for a Spicy Kick
If you love spicy food, adding a bit of heat can balance out the richness of the cheese.
🔥 Best Spicy Additions:
Jalapeños (Fresh or Pickled) – Adds a fresh, tangy spice.
Hot Sauce (Sriracha, Tabasco, or Buffalo Sauce) – Gives a tangy, spicy depth.
Chipotle Peppers in Adobo Sauce – Introduces a smoky heat that pairs well with cheddar.
Cajun or Creole Seasoning – Brings a bold, spiced flavor profile.
Crushed Red Pepper or Chili Flakes – Provides an adjustable level of heat.
💡 Tip: For a milder spice, mix a small amount of hot sauce directly into the cheese sauce instead of sprinkling chili flakes on top.
—
4. Add Depth with Herbs & Aromatics
Fresh and dried herbs can add a bright, earthy contrast to the creamy cheese.
🌿 Best Herbs for Mac and Cheese:
Thyme or Rosemary – Woody herbs that add a slightly peppery, fragrant touch.
Basil or Oregano – Brings a mild Italian flavor, great if adding tomatoes.
Chives or Green Onions – A fresh, mild onion flavor that enhances sharp cheese.
Parsley – Adds color and freshness to balance out richness.
Sage – Works well with brown butter mac and cheese for a nutty, warm taste.
💡 Tip: Fresh herbs work best as a finishing touch, while dried herbs should be added during the cooking process to fully release their flavors.
—
5. Introduce a Smoky, Meaty Twist
Adding smoky or meaty elements can bring a bold, indulgent flavor to mac and cheese.
🥓 Best Meaty & Smoky Additions:
Crispy Bacon or Pancetta – A salty, crunchy contrast to the creamy pasta.
Smoked Sausage or Andouille – Adds a deep, savory flavor with a slight spice.
Ham or Prosciutto – Brings a delicate, slightly sweet saltiness.
Pulled Pork or Smoked Brisket – A hearty addition for a BBQ-style mac and cheese.
Smoked Paprika or Liquid Smoke – Adds depth without actual meat.
💡 Tip: If using meat, cook it separately and stir it in just before serving to maintain texture.
—
6. Play with Texture for Extra Crunch
A textural contrast can make mac and cheese even more satisfying.
🥖 Best Toppings for Crunch:
Toasted Panko or Breadcrumbs – A crispy topping for baked mac and cheese.
Crushed Crackers (Ritz or Cheez-Its) – Adds a buttery, cheesy crunch.
Toasted Nuts (Almonds, Walnuts, or Pecans) – Brings an unexpected nutty texture.
French-Fried Onions – A crispy, flavorful topping for an extra-savory twist.
💡 Tip: Toss breadcrumbs with melted butter and a little Parmesan before sprinkling on top for extra flavor.
—
7. Try Unique Additions for a Creative Twist
For those who love experimenting in the kitchen, these unique flavors can transform your mac and cheese into something unexpected.
🧀 Creative Flavor Twists:
Buffalo Mac and Cheese – Mix in Buffalo sauce and top with blue cheese crumbles.
Truffle Mac and Cheese – Drizzle with truffle oil for a luxurious touch.
Italian Mac and Cheese – Stir in sun-dried tomatoes, pesto, or Italian sausage.
Taco Mac and Cheese – Add taco seasoning, ground beef, and jalapeños.
French Onion Mac and Cheese – Mix in caramelized onions and Gruyère cheese for a French onion soup-inspired dish.
💡 Tip: Balance strong flavors by using milder cheeses if adding bold ingredients.
—
Final Thoughts
A great mac and cheese can be as simple or as flavor-packed as you like. Whether you choose extra seasonings, herbs, heat, smoky meats, or crunchy toppings, these flavor boosts let you customize your mac and cheese to fit your cravings. Try different combinations and discover your perfect bowl of elevated, gourmet mac and cheese!
How to Prevent Dry Mac and Cheese: Tips for a Creamy, Moist Dish
One of the biggest disappointments in homemade mac and cheese is when it turns out dry instead of creamy. Whether you’re making a stovetop version or baking it in the oven, there are key techniques to ensure your mac and cheese stays rich, saucy, and indulgently smooth. Below are the most common reasons mac and cheese can become dry—and how to fix them.
—
1. Use Enough Sauce to Coat the Pasta
The most important rule for preventing dry mac and cheese is to make more sauce than you think you need. Pasta absorbs liquid as it sits, so if your mac and cheese starts off with just the right amount of sauce, it will likely dry out over time.
🧀 How to Ensure Plenty of Sauce:
Increase the cheese sauce-to-pasta ratio—use at least 1 ½ to 2 cups of sauce per 8 ounces of pasta.
Add extra milk or cream to the cheese sauce to keep it fluid.
Use pasta water—a few tablespoons help maintain moisture and bind the sauce.
💡 Tip: If making baked mac and cheese, keep the sauce slightly thinner before baking to compensate for absorption.
—
2. Cook Pasta Al Dente (Not Overcooked!)
Overcooked pasta soaks up more sauce and becomes mushy, leading to a drier dish.
🍝 How to Cook Pasta for Creamy Mac and Cheese:
Boil pasta 1-2 minutes less than the package instructions for a firm, al dente texture.
Rinse the pasta briefly with warm water after draining to stop the cooking process (optional).
Toss cooked pasta with a bit of butter or oil to prevent it from sticking and soaking up too much sauce.
💡 Tip: If you plan to bake your mac and cheese, cook the pasta even firmer (about 2 minutes less) so it doesn’t get overcooked in the oven.
—
3. Use the Right Cheese & Dairy for a Creamy Texture
Not all cheeses melt the same way. Some cheeses release oil instead of melting smoothly, making mac and cheese greasy rather than creamy.
🧀 Best Cheeses for a Creamy Sauce:
Cheddar (Medium or Sharp) – A classic, smooth-melting cheese.
Gouda or Fontina – Adds a buttery, creamy texture.
Gruyère – Adds richness and flavor while melting beautifully.
Monterey Jack – A mild, ultra-creamy cheese that blends well.
Velveeta or American Cheese – Processed, but excellent for maintaining creaminess.
🚫 Cheeses to Avoid Alone (Mix with Melting Cheeses):
Parmesan & Pecorino Romano – Great for flavor, but too dry for a main cheese.
Feta & Cotija – Crumble rather than melt.
Pre-Shredded Cheese – Contains anti-caking agents that prevent smooth melting.
🥛 Best Dairy Choices for Extra Creaminess:
Heavy Cream or Half-and-Half – Makes the sauce rich and luscious.
Whole Milk – Works well but is slightly less creamy than heavy cream.
Evaporated Milk – Helps prevent curdling and keeps the sauce smooth.
Cream Cheese or Sour Cream – Adds silkiness and helps prevent dryness.
💡 Tip: Mix different cheeses for a balance of flavor and texture. For example, a combo of cheddar + Gouda + cream cheese makes an incredibly creamy sauce.
—
4. Keep the Sauce Loose Before Baking
If you’re making baked mac and cheese, the oven thickens the sauce, which can make it dry.
🔥 How to Keep Baked Mac and Cheese Moist:
Use extra sauce—the pasta will absorb moisture during baking.
Thin the sauce slightly before baking by adding a splash of milk or cream.
Cover the dish with foil for the first half of baking to trap moisture.
Don’t overbake—20-25 minutes at 350°F (175°C) is enough.
💡 Tip: If your mac and cheese looks too dry after baking, stir in a little warm milk or melted butter before serving.
—
5. Use a Roux or Starch for a Stable Sauce
A grainy or separated cheese sauce often leads to a drier dish. Using a properly made roux (butter + flour mixture) or a cornstarch slurry helps stabilize the sauce and prevent it from breaking.
🥄 How to Make a Roux for a Stable Cheese Sauce:
1. Melt butter over medium-low heat.
2. Stir in an equal amount of flour and cook for 1-2 minutes, stirring constantly.
3. Slowly whisk in warm milk or cream, making sure there are no lumps.
4. Once the mixture thickens slightly, remove from heat and gradually stir in cheese.
💡 Tip: If you prefer a gluten-free option, a cornstarch slurry (1 tablespoon cornstarch mixed with 2 tablespoons cold milk) works as a substitute.
—
6. Avoid Overheating the Cheese Sauce
Overheating or boiling the cheese sauce causes it to separate, leading to a dry and clumpy texture.
🔥 How to Prevent Overheating the Sauce:
Melt cheese on LOW heat, not high.
Turn off the heat before adding cheese to prevent separation.
Add cheese in small batches, stirring constantly for smooth melting.
If the sauce thickens too much, add a splash of warm milk and whisk gently.
💡 Tip: If your sauce separates, try blending it with an immersion blender or stirring in a small amount of warm cream.
—
7. Add Moisture with Mix-Ins
Adding ingredients like vegetables or proteins can absorb liquid, making mac and cheese dry.
🥦 How to Keep Mix-Ins from Drying Out the Dish:
Use cooked and well-drained vegetables (e.g., spinach, broccoli) to avoid excess water absorption.
Pre-cook meats like bacon, sausage, or chicken, and chop them into small pieces before adding.
Stir mix-ins in at the very end, rather than cooking them in the sauce for too long.
💡 Tip: If using mix-ins, add extra sauce to compensate for any absorption.
—
8. Reheating Mac and Cheese Without Drying It Out
Leftover mac and cheese tends to dry out when reheated.
🔥 Best Reheating Methods:
On the Stovetop: Add a splash of milk or cream and warm it over low heat, stirring until creamy.
In the Microwave: Stir in a little milk, cover loosely, and heat in 30-second bursts, stirring in between.
In the Oven: Place in a baking dish, mix with a bit of milk, cover with foil, and bake at 300°F (150°C) for 15-20 minutes.
💡 Tip: Adding a little butter or shredded cheese while reheating helps bring back creaminess.
—
Final Thoughts
To prevent dry mac and cheese, always use plenty of sauce, the right cheeses, and careful heat control. Cooking pasta al dente, using a stable roux-based sauce, and keeping moisture in baked versions ensures a rich, creamy, and perfectly saucy mac and cheese every time!
Delicious Variations to Try
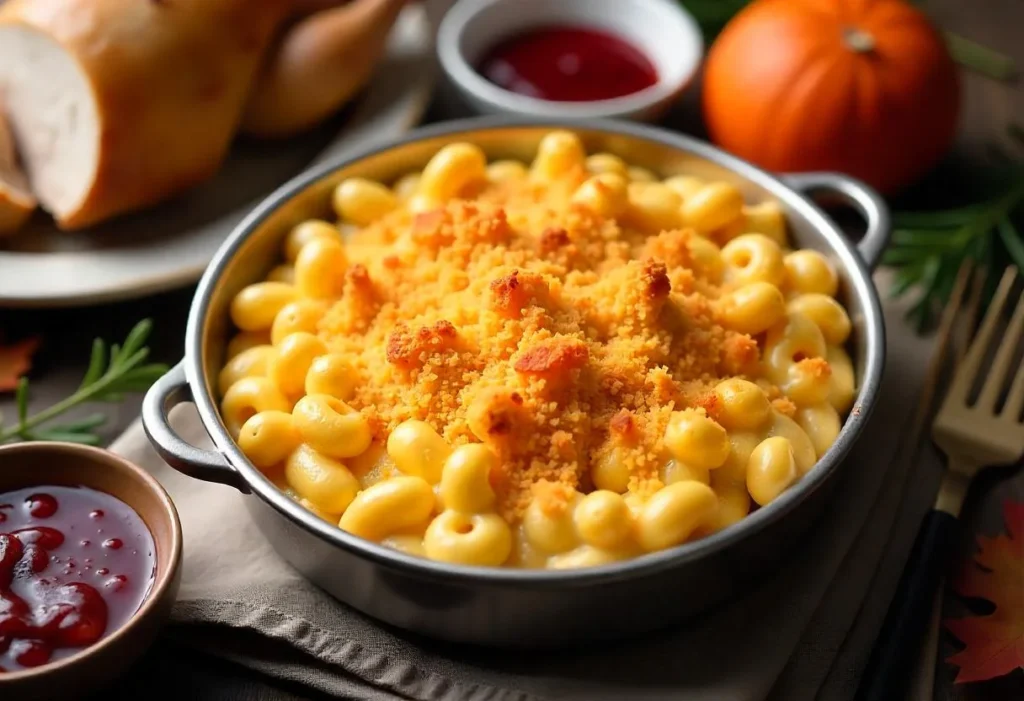
Baked Mac and Cheese with a Crispy Topping
Baked mac and cheese is a classic comfort food that combines creamy, cheesy pasta with a golden, crispy topping for an irresistible texture contrast. The rich, velvety cheese sauce coats the pasta, while the crunchy topping adds depth and flavor. If you love restaurant-style baked mac and cheese, mastering the right technique is essential to achieving a perfectly creamy interior with a golden, crunchy crust.
Here’s how to make the best baked mac and cheese with a crispy topping:
—
1. Choosing the Right Topping for Maximum Crispiness
A good topping adds crunch and enhances flavor. Here are some popular options:
🥖 Breadcrumbs (Classic and Crispy)
Panko breadcrumbs: The best choice for extra crunch since they’re lighter and crispier than regular breadcrumbs.
Regular breadcrumbs: A good option, but they absorb more moisture, making them slightly less crispy.
Crushed crackers (e.g., Ritz or saltines): Add a buttery flavor and crunch.
Crushed cornflakes: A unique choice that gives a light, crispy texture.
🧀 Cheese Topping (Extra Gooey & Golden)
Shredded cheddar or Parmesan sprinkled on top melts beautifully and creates a slightly crispy, cheesy crust.
Gruyère or Monterey Jack adds a richer, more complex flavor.
🥓 Other Topping Ideas (For Extra Flavor & Crunch)
Crispy bacon bits: Adds a smoky, salty crunch.
Toasted nuts (e.g., almonds, pecans): Great for a gourmet touch.
Herbed topping: Mix in dried oregano, thyme, or parsley for extra flavor.
💡 Tip: Combining buttery panko breadcrumbs with shredded Parmesan creates a perfectly crispy, flavorful topping.
—
2. Preparing the Topping for Maximum Crispiness
A dry topping can burn easily, while a well-coated, seasoned topping stays golden and crunchy.
🥄 How to Prepare the Best Breadcrumb Topping:
1. Melt 2 tablespoons of butter in a pan over medium heat.
2. Stir in ¾ cup of panko breadcrumbs until they’re lightly toasted and golden brown.
3. Add a pinch of salt, garlic powder, or paprika for extra flavor.
4. Remove from heat and mix with 2 tablespoons of grated Parmesan for a cheesy crunch.
💡 Tip: Pre-toasting the breadcrumbs before baking prevents them from becoming soggy and ensures maximum crispiness.
—
3. Baking Mac and Cheese for the Perfect Balance of Creamy & Crispy
Baking mac and cheese thickens the sauce, so it’s important to start with a slightly looser cheese sauce to prevent dryness.
🔥 Baking Instructions:
1. Preheat oven to 350°F (175°C).
2. Prepare the mac and cheese as usual, ensuring the sauce is slightly runny to compensate for baking.
3. Transfer the pasta mixture into a buttered baking dish.
4. Evenly spread the crispy topping over the mac and cheese.
5. Bake uncovered for 20–25 minutes or until the topping is golden and the cheese sauce is bubbling.
💡 Tip: If the topping starts to brown too quickly, cover it loosely with foil for the first 10 minutes, then remove it to crisp up the top.
—
4. How to Keep Baked Mac and Cheese Creamy
Baking mac and cheese can sometimes cause it to dry out. Here’s how to ensure it stays creamy inside:
Use extra sauce – The pasta absorbs liquid as it bakes, so make a slightly thinner cheese sauce before baking.
Stir in a little heavy cream or milk before baking – This helps keep the pasta moist.
Bake just until the top is golden – Overbaking can dry out the dish.
Mix some cheese into the topping – This helps trap moisture while adding extra flavor.
💡 Tip: After baking, let the mac and cheese rest for 5–10 minutes before serving. This allows the sauce to settle and keeps it creamy.
—
5. Customizing Your Baked Mac and Cheese
Baked mac and cheese is incredibly versatile! Here are some fun variations to try:
🌶 Spicy Baked Mac and Cheese – Add chopped jalapeños or a pinch of cayenne for heat.
🥓 Bacon Mac and Cheese – Stir in crispy bacon bits before baking.
🦐 Seafood Mac and Cheese – Add lobster, shrimp, or crab for a gourmet twist.
🥦 Vegetable Mac and Cheese – Mix in sautéed spinach, mushrooms, or roasted broccoli for extra nutrients.
💡 Tip: Experiment with different cheeses like smoked Gouda, Havarti, or Brie for a unique flavor profile.
—
Final Thoughts
Baked mac and cheese with a crispy topping is the perfect balance of creamy and crunchy. Using panko breadcrumbs, pre-toasting the topping, and making a rich, saucy base ensures that every bite is flavorful, gooey, and deliciously crispy. With these tips, you’ll have a restaurant-quality baked mac and cheese that everyone will love!
Spicy Mac and Cheese: Adding Heat to Your Comfort Food
If you love a little kick in your comfort food, spicy mac and cheese is the perfect way to elevate this classic dish. The creamy, cheesy base pairs beautifully with bold, spicy flavors, creating a delicious balance of heat and richness. Whether you prefer a subtle warmth or a fiery kick, there are many ways to customize your mac and cheese to bring the heat.
Here’s how to make the best spicy mac and cheese, along with tips on choosing the right spices, peppers, and sauces.
—
1. Choosing the Right Spicy Ingredients
To achieve the perfect level of heat, you can incorporate spices, fresh or dried chilies, hot sauces, or spicy cheeses. Each ingredient brings a unique type of heat, so it’s easy to customize based on your spice tolerance.
🌶 Spices for Subtle Heat
Adding dry spices directly to your cheese sauce ensures a consistent level of heat throughout the dish. Here are some great options:
Cayenne pepper – Adds a smoky, medium heat. Start with ¼ teaspoon and adjust to taste.
Smoked paprika – A mild heat with a deep, smoky flavor.
Crushed red pepper flakes – A classic addition for a slightly sharper heat.
Black or white pepper – Adds mild warmth and enhances other flavors.
Chili powder – Offers a balanced heat with a touch of smokiness.
🔥 Fresh & Dried Chili Peppers for Extra Spice
For those who love a real kick, adding fresh or dried chilies can significantly increase the heat level.
Jalapeños – Mild to moderate spice; add them diced for bursts of heat.
Serrano peppers – A step up from jalapeños with more pronounced heat.
Chipotle peppers in adobo sauce – Smoky, spicy, and slightly sweet, perfect for mixing into the sauce.
Habanero or ghost peppers – Extremely hot! Use sparingly for an intense burn.
💡 Tip: To reduce the intensity of fresh chilies, remove the seeds and inner membranes before chopping.
🌶 Hot Sauces for a Tangy Kick
Adding a splash of hot sauce can enhance flavor without overpowering the dish. Some great choices include:
Sriracha – Mild, slightly sweet, and garlicky.
Buffalo sauce – Creamy, buttery, and medium-hot.
Tabasco – Vinegary with a sharp heat.
Cholula or Tapatío – A more balanced, mild heat with a rich flavor.
💡 Tip: Start with 1 teaspoon of hot sauce and add more as needed for your preferred spice level.
🧀 Spicy Cheeses for an Extra Kick
If you want heat infused into the cheese itself, try incorporating spicy cheeses into your blend.
Pepper Jack – A creamy, mildly spicy cheese with flecks of jalapeño.
Spicy Cheddar – Some varieties include habanero or chipotle for extra heat.
Ghost Pepper Cheese – Extremely spicy; use in moderation.
💡 Tip: Mix spicy cheeses with mild, melty cheeses like mozzarella or Monterey Jack for a balanced heat.
—
2. How to Make Spicy Mac and Cheese
Once you’ve chosen your spice elements, it’s time to put everything together.
🔥 Step-by-Step Spicy Cheese Sauce:
1. Melt 2 tablespoons of butter over medium heat.
2. Stir in 2 tablespoons of flour to create a roux, cooking for 1-2 minutes.
3. Gradually whisk in 2 cups of milk, stirring until smooth and slightly thickened.
4. Add your chosen spices (e.g., ½ teaspoon cayenne, ½ teaspoon smoked paprika, and a dash of red pepper flakes).
5. Remove from heat and stir in 2-3 cups of shredded cheese, including spicy varieties.
6. Mix in fresh or pickled jalapeños for an extra kick.
7. Stir in a splash of hot sauce for additional heat and tang.
—
3. Serving & Pairing Spicy Mac and Cheese
Spicy mac and cheese pairs well with ingredients that balance the heat or enhance the flavor.
🥩 Protein Additions:
Spicy buffalo chicken – Toss shredded chicken in buffalo sauce and mix it in.
Chorizo or spicy sausage – Adds bold, smoky flavor.
Crispy bacon bits – The salty crunch contrasts beautifully with the creamy heat.
🥦 Vegetable Additions:
Roasted bell peppers – Sweetness balances the spice.
Caramelized onions – Adds depth and a touch of sweetness.
Grilled corn – A slightly smoky, sweet flavor that cools down the heat.
🍞 Crunchy Topping Options:
Panko breadcrumbs mixed with chili powder for an extra spicy crunch.
Crushed Flamin’ Hot Cheetos for a fun, ultra-spicy topping.
💡 Tip: To cool down the heat, serve spicy mac and cheese with a side of sour cream or a drizzle of ranch dressing.
—
4. Customizing Spice Levels
If you’re serving mac and cheese to both spice lovers and those who prefer milder flavors, here’s how to adjust the heat:
🔥 For a Mild Kick:
Use only smoked paprika and black pepper for a gentle warmth.
Swap fresh chilies for mild hot sauce like Cholula or a small amount of buffalo sauce.
Use regular cheddar and Monterey Jack instead of spicy cheeses.
🔥🔥 For Medium Spice:
Add ½ teaspoon cayenne and a few sliced jalapeños.
Use Pepper Jack cheese in the mix.
Stir in a teaspoon of Sriracha or Tabasco.
🔥🔥🔥 For Maximum Heat:
Mix in diced habaneros or ghost peppers (with caution!).
Use extra-hot ghost pepper cheese.
Add 1+ tablespoon of hot sauce directly to the cheese sauce.
Finish with Flamin’ Hot Cheeto crumbs on top for a fiery crunch.
💡 Tip: If your mac and cheese turns out too spicy, balance it by stirring in a little extra cream, milk, or shredded mozzarella to tone down the heat.
—
Final Thoughts
Spicy mac and cheese is a bold and flavorful twist on the classic dish. By adjusting spices, chilies, cheeses, and sauces, you can create a mac and cheese that’s mildly warm or insanely hot. Whether you like jalapeño mac and cheese, buffalo-style spice, or a fiery ghost pepper version, there are endless ways to customize this dish.
Get creative, experiment with different heat levels, and enjoy the perfect balance of creamy, cheesy, and spicy in every bite!
Loaded Mac and Cheese: A Flavor-Packed Twist on the Classic Dish
If you love mac and cheese but want to take it to the next level, loaded mac and cheese is the ultimate way to do it. By adding a variety of savory, crunchy, and creamy mix-ins, you can create a hearty, indulgent dish that’s perfect for dinner, parties, or even a game-day treat. Whether you prefer a meaty, veggie-packed, or extra-cheesy version, there are endless ways to customize your mac and cheese to make it truly loaded.
Here’s how to make the best loaded mac and cheese, with plenty of delicious topping and mix-in ideas.
—
1. Choosing the Right Base for Loaded Mac and Cheese
A strong, creamy base is key to supporting all the extra mix-ins. Before adding toppings, make sure your mac and cheese is:
🧀 Extra cheesy – Use a mix of cheeses like cheddar, mozzarella, Gruyère, or Monterey Jack for the ultimate melt.
🥛 Creamy and rich – A thicker sauce ensures the mix-ins don’t dry out the dish. Add heavy cream, evaporated milk, or cream cheese for extra richness.
🍜 Perfectly cooked pasta – Elbow macaroni, cavatappi, or shells hold the cheese sauce best and provide a great texture.
💡 Tip: Start with a slightly looser cheese sauce than usual, as the added ingredients will absorb some of the moisture.
—
2. Best Mix-Ins for Loaded Mac and Cheese
To truly load up your mac and cheese, you need a balance of textures and flavors. Here are some amazing mix-ins to consider:
🥓 Protein Additions (For a Hearty Twist)
Adding protein makes mac and cheese more satisfying and filling:
Crispy bacon bits – Adds a salty crunch and smoky flavor.
Grilled or shredded chicken – Perfect for a Buffalo chicken mac and cheese.
Ground beef or sausage – Creates a cheeseburger mac or a spicy Cajun-style dish.
Pulled pork – A great BBQ-inspired twist with smoky, tender meat.
Lobster or shrimp – For a gourmet, seafood-loaded mac and cheese.
🥦 Vegetable Additions (For a Fresh & Flavorful Boost)
If you want to add color and nutrients, these vegetables blend well with mac and cheese:
Roasted broccoli – Adds texture and a slightly nutty flavor.
Caramelized onions – Brings sweetness and depth.
Sautéed mushrooms – Earthy and umami-packed.
Roasted bell peppers – Slightly sweet and smoky.
Jalapeños – Adds a spicy kick to balance the richness.
Sun-dried tomatoes – Gives a tangy, slightly sweet flavor.
💡 Tip: If using fresh veggies, sauté or roast them first to remove excess moisture and concentrate their flavors.
🧀 Extra Cheesy Additions (For Maximum Indulgence)
For cheese lovers, loading mac and cheese with more cheese makes it even better!
Crumbled blue cheese – Great for a Buffalo chicken mac.
Smoked Gouda – Adds a deep, smoky richness.
Parmesan or Pecorino Romano – Gives a sharp, salty finish.
Brie or cream cheese – Makes the sauce even creamier.
💡 Tip: Sprinkle some extra shredded cheese on top before baking to create a gooey, cheesy crust.
—
3. Toppings for the Perfect Crunch
The best loaded mac and cheese isn’t just creamy—it also has a crispy, crunchy topping for texture contrast. Here are some of the best options:
🥖 Crunchy Toppings
Toasted panko breadcrumbs – The classic crispy topping.
Crushed crackers (Ritz, saltines, or Goldfish) – Adds a buttery crunch.
Crushed Flamin’ Hot Cheetos – A spicy, bold topping for heat lovers.
French fried onions – Crispy and slightly sweet.
Toasted nuts (pecans, almonds, or walnuts) – A unique gourmet touch.
🔥 Flavor-Boosting Toppings
Drizzle of hot sauce or buffalo sauce – For extra heat.
BBQ sauce – Pairs well with pulled pork mac and cheese.
Chopped green onions or chives – Adds freshness and mild onion flavor.
Dollop of sour cream – Perfect for a Tex-Mex mac.
💡 Tip: If you’re baking your loaded mac and cheese, toss the topping in melted butter first for extra crispiness.
—
4. How to Make Loaded Mac and Cheese (Step-by-Step Guide)
Step 1: Cook the Pasta
Boil your choice of pasta until just al dente. Drain and set aside.
Step 2: Make the Cheese Sauce
1. Melt butter in a saucepan and whisk in flour to create a roux.
2. Slowly add milk and/or heavy cream, whisking until smooth.
3. Stir in shredded cheese a little at a time until melted.
4. Add seasonings like garlic powder, smoked paprika, and black pepper.
Step 3: Mix in the Loadable Ingredients
Stir in your choice of protein, vegetables, and extra cheese.
If using crispy bacon, reserve some for garnish.
Step 4: Transfer to a Baking Dish (Optional for Baked Version)
If baking, pour the mac and cheese into a greased casserole dish.
Step 5: Add the Crunchy Topping
Sprinkle breadcrumbs, crushed crackers, or cheese on top.
Step 6: Bake (Optional)
Bake at 375°F (190°C) for 20–25 minutes, or until the top is golden and bubbly.
Step 7: Garnish and Serve
Add final toppings like green onions, hot sauce, or fresh herbs before serving.
—
5. Delicious Loaded Mac and Cheese Variations
🍗 Buffalo Chicken Mac and Cheese – Mix in shredded chicken, hot sauce, and blue cheese, then top with ranch dressing.
🥓 Bacon Cheeseburger Mac – Add ground beef, cheddar, and crispy bacon, and top with pickles for a burger-inspired dish.
🦞 Lobster Mac and Cheese – Stir in lobster chunks, use Gruyère and white cheddar, and top with buttery breadcrumbs.
🌮 Tex-Mex Mac and Cheese – Add taco-seasoned ground beef, black beans, and jalapeños, then top with tortilla strips.
🥦 Veggie Lovers’ Mac – Mix in roasted broccoli, mushrooms, bell peppers, and spinach for a plant-based version.
💡 Tip: Experiment with different flavor combinations to create your own signature loaded mac and cheese!
—
Final Thoughts
Loaded mac and cheese is the ultimate comfort food upgrade. By adding savory meats, roasted vegetables, extra cheese, and crunchy toppings, you can transform this classic dish into a hearty, flavor-packed meal. Whether you’re making it for a special occasion or just indulging in cheesy, carb-filled goodness, loaded mac and cheese is guaranteed to be a crowd-pleaser.
What’s your favorite way to load up your mac and cheese? Let us know in the comments!
Gluten-Free or Dairy-Free Options for Mac and Cheese
Mac and cheese is a beloved comfort food, but for those with gluten or dairy sensitivities, enjoying this dish can be a challenge. Fortunately, with the right ingredient swaps, you can still create a creamy, cheesy, and delicious mac and cheese that’s entirely gluten-free, dairy-free, or both!
Here’s how to adjust the classic mac and cheese recipe to fit your dietary needs while maintaining flavor and texture.
—
1. Choosing a Gluten-Free Pasta
Traditional mac and cheese relies on wheat-based pasta, which contains gluten. Luckily, there are many gluten-free pasta alternatives that work beautifully in mac and cheese:
🍝 Best Gluten-Free Pasta Options:
Brown rice pasta – A popular choice with a texture similar to regular pasta.
Chickpea or lentil pasta – High in protein and fiber, great for a nutritious twist.
Quinoa pasta – Holds its shape well and has a mild flavor.
Corn pasta – Has a chewy texture, but can be slightly sweeter.
Gluten-free elbow macaroni or shells – Many brands offer 1:1 replacements for regular pasta.
💡 Tip: Gluten-free pasta can sometimes get mushy, so cook it slightly under al dente to prevent overcooking when mixed with the cheese sauce.
—
2. Making a Gluten-Free Cheese Sauce
The traditional mac and cheese sauce starts with a roux (flour and butter mixture), which thickens the sauce. To make it gluten-free, swap out the all-purpose flour for a suitable alternative.
🥄 Gluten-Free Thickening Agents:
Gluten-free all-purpose flour – Works just like regular flour in a roux.
Cornstarch slurry – Mix 1 tbsp cornstarch with 2 tbsp cold milk and add it to the sauce.
Arrowroot powder – A great alternative that thickens without altering flavor.
Potato starch – Provides a smooth, creamy consistency.
💡 Tip: If you want to skip the roux entirely, blend in pureed cauliflower or butternut squash for a natural thickener!
—
3. Dairy-Free Cheese Alternatives
For a dairy-free version, you’ll need to replace butter, milk, and cheese with plant-based alternatives while still achieving a creamy texture and rich flavor.
🥛 Best Dairy-Free Milk Options:
Unsweetened almond milk – Mild flavor, good for a lighter sauce.
Cashew milk – Creamy and slightly sweet, great for cheese sauces.
Coconut milk (full-fat) – Adds richness but may have a slight coconut taste.
Oat milk – Neutral flavor and creamy consistency.
Soy milk – A versatile option with a neutral taste.
🧈 Butter Substitutes:
Vegan butter – Works as a 1:1 replacement for regular butter.
Olive oil or avocado oil – Adds richness and a smooth texture.
Coconut oil (refined) – Works well if you don’t want a coconut flavor.
🧀 Best Dairy-Free Cheese Alternatives:
Nutritional yeast – Adds a cheesy, umami flavor without dairy.
Dairy-free shredded cheese – Brands like Daiya, Violife, and Follow Your Heart melt well.
Cashew cheese sauce – Blended cashews, lemon juice, and nutritional yeast create a creamy alternative.
Tofu-based cheese sauce – Blended silken tofu can mimic a creamy cheese texture.
💡 Tip: If using store-bought vegan cheese, choose one that melts well. Adding a splash of dairy-free milk can improve the texture.
—
4. Achieving a Creamy, Flavorful Dairy-Free Sauce
To mimic the rich, creamy texture of a traditional cheese sauce, try this easy homemade vegan cheese sauce:
Dairy-Free Cheese Sauce Recipe
✅ Ingredients:
1 cup raw cashews (soaked for 2–4 hours)
1 cup unsweetened plant-based milk (oat, almond, or cashew)
1/4 cup nutritional yeast (for cheesy flavor)
2 tbsp lemon juice
1 tbsp olive oil or vegan butter
1 tsp garlic powder
1/2 tsp onion powder
1/2 tsp turmeric (for color, optional)
1/2 tsp paprika
Salt and pepper to taste
✅ Instructions:
1. Blend all ingredients in a high-speed blender until smooth.
2. Heat over low heat, stirring frequently until warm and slightly thickened.
3. Mix with cooked gluten-free pasta and enjoy a creamy, dairy-free mac and cheese!
💡 Tip: If you prefer a stretchy cheese sauce, add 1 tbsp tapioca starch to the blended mixture before heating.
—
5. Topping and Baking Gluten-Free or Dairy-Free Mac and Cheese
For a baked version, you’ll need a gluten-free or dairy-free crispy topping to add texture and crunch.
🥖 Gluten-Free Crunchy Toppings:
Gluten-free breadcrumbs – Many brands offer great alternatives.
Crushed gluten-free crackers – Like Simple Mills or Mary’s Gone Crackers.
Crushed nuts (almonds, pecans, or walnuts) – Adds a nutty crunch.
Toasted quinoa or sunflower seeds – A unique, nutritious topping.
🧀 Dairy-Free Topping Ideas:
Extra nutritional yeast – Gives a cheesy flavor without dairy.
Vegan Parmesan (cashews + garlic powder + salt) – Mimics real Parmesan.
Drizzle of dairy-free butter – Helps create a golden-brown crust.
💡 Tip: For an extra crispy topping, mix breadcrumbs with olive oil or melted vegan butter before baking.
—
6. Store-Bought Gluten-Free & Dairy-Free Mac and Cheese Brands
If you don’t want to make it from scratch, here are some great pre-made options:
🥄 Gluten-Free Mac and Cheese Brands:
Annie’s Gluten-Free Mac & Cheese
Banza Chickpea Mac & Cheese
Goodles Gluten-Free Mac
🥄 Dairy-Free & Vegan Mac and Cheese Brands:
Daiya Deluxe Cheesy Mac
Annie’s Vegan Mac & Cheese
Kraft Vegan Mac & Cheese
💡 Tip: If using a store-bought dairy-free mac and cheese, add extra spices, nutritional yeast, or dairy-free cheese to enhance the flavor.
—
Final Thoughts
Making mac and cheese gluten-free or dairy-free doesn’t mean sacrificing taste or texture. By using gluten-free pasta, dairy-free cheese, and creative thickening alternatives, you can still enjoy a creamy, cheesy, and satisfying dish that fits your dietary needs.
Have you tried making gluten-free or dairy-free mac and cheese? Share your favorite tips and ingredients in the comments below!
Serving Suggestions and Storage Tips
Best Side Dishes to Pair with Mac and Cheese
Mac and cheese is a rich, creamy, and comforting dish that can stand alone as a meal, but pairing it with the right side dishes can elevate your dining experience. Whether you’re looking for something fresh and light to balance out the cheesiness or something savory and hearty to create a more satisfying meal, there are plenty of great options. Here are some of the best side dishes to serve with mac and cheese.
—
1. Fresh and Light Sides
Since mac and cheese is heavy and creamy, pairing it with a light, refreshing side can create a more balanced meal.
🥗 Crisp Green Salad
A simple salad with fresh greens, cherry tomatoes, cucumbers, and a light vinaigrette can cut through the richness of mac and cheese. Arugula, kale, or mixed greens work well, adding a hint of bitterness to balance the flavors.
🍋 Roasted or Steamed Vegetables
Vegetables add color, nutrients, and texture to your plate. Try:
Roasted broccoli – Its slightly crispy edges contrast nicely with creamy pasta.
Steamed green beans – A simple yet classic side.
Grilled asparagus – A touch of smokiness adds depth.
Sautéed spinach – Lightly cooked with garlic for a flavorful, healthy boost.
🥒 Pickles or Fermented Veggies
A small side of pickles, kimchi, or pickled onions adds a tangy, acidic contrast that cuts through the creamy, cheesy goodness of mac and cheese.
—
2. Savory and Protein-Packed Sides
Adding protein-rich sides makes mac and cheese a heartier and more complete meal.
🍗 Crispy Fried Chicken
The crunch of fried chicken pairs perfectly with the soft, creamy texture of mac and cheese. A buttermilk fried chicken or oven-baked crispy tenders are excellent choices.
🥓 Bacon-Wrapped Anything
Bacon’s salty, smoky flavor complements mac and cheese. Try:
Bacon-wrapped asparagus for a mix of crisp and tender.
Bacon-wrapped chicken bites for a protein boost.
Crispy bacon crumbles sprinkled over the mac and cheese itself!
🥩 BBQ or Smoked Meats
Smoky, charred, or slow-cooked meats pair exceptionally well with cheesy pasta. Options include:
BBQ pulled pork – A Southern classic with tangy BBQ sauce.
Grilled or smoked brisket – Rich, tender beef that complements the creaminess.
BBQ ribs – Sweet and smoky flavors balance the dish.
🍳 Eggs for a Brunch Twist
If serving mac and cheese for brunch, a fried or poached egg on top can make it extra indulgent. The runny yolk blends with the cheese sauce for an ultra-creamy bite.
—
3. Carby Comfort Food Sides
If you’re in the mood for double comfort food, these starchy sides make an indulgent pairing.
🥔 Garlic Bread or Cheesy Breadsticks
A crunchy, garlicky slice of bread or a warm breadstick helps scoop up all the extra cheese sauce.
🍠 Sweet Potato Fries
The slight sweetness of roasted or crispy sweet potato fries contrasts nicely with the savory cheese sauce.
🥖 Cornbread or Biscuits
A slice of buttery cornbread or flaky biscuits adds a soft, slightly sweet contrast to mac and cheese.
—
4. Spicy and Zesty Sides
If you love a little heat or tanginess, these sides will add an exciting twist to your mac and cheese meal.
🌶️ Buffalo Wings or Spicy Chicken
The spicy kick of buffalo wings or hot chicken pairs incredibly well with creamy mac and cheese. Serve with a side of ranch or blue cheese dressing for extra indulgence.
🫘 Spicy Baked Beans
Southern-style baked beans with a bit of spice add a smoky, slightly sweet contrast to mac and cheese.
🔥 Jalapeño Poppers
Cheesy, spicy, and crispy, these little bites bring a heat factor that complements mac and cheese.
—
5. Fun and Unique Side Pairings
If you want to get creative, these unique sides can make your mac and cheese meal extra special.
🍏 Apple Slaw or Pear Salad
A crunchy apple slaw or a pear and walnut salad adds a fresh, slightly sweet contrast.
🍤 Crispy Fried Shrimp
Mac and cheese with crispy shrimp is a surf-and-turf comfort food dream!
🍄 Sautéed Mushrooms
Earthy mushrooms cooked in garlic butter add a deep, umami flavor to balance the richness of the cheese sauce.
—
Final Thoughts
Mac and cheese is delicious on its own, but the right side dish can take it to the next level. Whether you choose something light and fresh, savory and meaty, or spicy and bold, these pairings will make your mac and cheese meal more satisfying and well-rounded.
What’s your favorite side dish to serve with mac and cheese? Let us know in the comments!
How to Store and Reheat Leftover Mac and Cheese
Mac and cheese is best enjoyed fresh, but sometimes you end up with leftovers that you don’t want to go to waste. Storing and reheating it properly ensures that it stays creamy, cheesy, and delicious rather than becoming dry or gummy. Follow these simple steps to keep your leftover mac and cheese tasting just as good as the first time!
—
1. How to Store Leftover Mac and Cheese
Proper storage is key to maintaining the texture and flavor of mac and cheese. Here’s how to store it correctly:
🥶 Refrigerating Mac and Cheese
Allow the mac and cheese to cool completely before storing.
Transfer it to an airtight container to prevent it from absorbing fridge odors.
Store in the refrigerator for up to 4–5 days.
💡 Tip: If you made baked mac and cheese, store it in the same baking dish (covered with plastic wrap or foil) or transfer it to a separate airtight container.
❄️ Freezing Mac and Cheese
Mac and cheese can be frozen, but it requires some special care to maintain its texture.
Portion the mac and cheese into individual servings for easy reheating.
Store in freezer-safe containers or heavy-duty freezer bags to prevent freezer burn.
Label with the date and use within 2–3 months for the best quality.
💡 Tip: If freezing, consider making mac and cheese with extra sauce, as pasta tends to absorb liquid when stored. This helps prevent it from drying out when reheated.
—
2. How to Reheat Mac and Cheese
Reheating mac and cheese properly ensures it stays creamy and delicious instead of dry or clumpy. Here’s how to reheat it using different methods:
🫕 Reheating on the Stovetop (Best Method)
The stovetop is the best way to reheat mac and cheese, as it allows you to restore moisture and prevent it from drying out.
✅ Steps:
1. Place the mac and cheese in a saucepan or skillet over low to medium heat.
2. Add a splash of milk, heavy cream, or broth (about 1–2 tablespoons per cup of mac and cheese). This helps recreate the creamy texture.
3. Stir constantly to prevent sticking or burning.
4. Once heated through and creamy, remove from heat and serve immediately.
💡 Tip: If the sauce is still too thick, add a little butter or extra cheese to refresh the flavor.
—
🔥 Reheating in the Oven (Best for Baked Mac and Cheese)
If you made baked mac and cheese, the oven is the best method to restore the crispy topping while keeping the inside creamy.
✅ Steps:
1. Preheat your oven to 350°F (175°C).
2. Place the mac and cheese in an oven-safe dish.
3. Add a little milk or cream to keep it from drying out (about 1–2 tablespoons per cup).
4. Cover with foil to trap moisture and bake for 15–20 minutes.
5. (Optional) Remove the foil, sprinkle extra cheese or breadcrumbs on top, and bake for another 5 minutes to crisp up the top.
💡 Tip: If the mac and cheese looks dry after reheating, stir in a little melted butter or extra cheese to bring back creaminess.
—
🎛️ Reheating in the Microwave (Quickest Method)
The microwave is the fastest way to reheat mac and cheese, but it can make the pasta dry and rubbery if not done carefully.
✅ Steps:
1. Place the mac and cheese in a microwave-safe bowl.
2. Add a splash of milk or cream to prevent dryness.
3. Cover the bowl with a damp paper towel to trap steam and keep it from drying out.
4. Heat in 30-second intervals, stirring between each, until heated through.
5. Once hot, stir well and serve.
💡 Tip: Microwaves can create hot spots, so stirring frequently ensures even heating.
—
🍳 Reheating in a Skillet (For a Crispy Twist!)
For a fun twist, try reheating mac and cheese in a skillet for a slightly crispy, golden-brown texture.
✅ Steps:
1. Heat a little butter or oil in a non-stick skillet over medium heat.
2. Add the mac and cheese, spreading it out evenly.
3. Let it sit for a minute to develop a slight crust, then stir occasionally.
4. If needed, add a splash of milk or cheese to refresh the sauce.
5. Serve immediately once heated through.
💡 Tip: If you love crispy edges, press the mac and cheese down slightly and let it brown before stirring.
—
3. How to Keep Leftover Mac and Cheese Creamy
Leftover mac and cheese tends to dry out as the pasta continues to absorb moisture. Here are some tricks to keep it creamy:
✔ Use extra sauce when making the original dish so that it doesn’t dry out after storing.
✔ Always add a splash of milk, cream, or broth when reheating to restore moisture.
✔ Reheat on low heat and stir frequently to keep the sauce smooth.
✔ Avoid overheating, as high heat can cause the sauce to break or become grainy.
—
Final Thoughts
Properly storing and reheating mac and cheese ensures that you can enjoy leftovers that are just as delicious as freshly made. Whether using the stovetop, oven, microwave, or skillet, the key is to add moisture and heat gently to maintain the creamy, cheesy texture.
Do you have a favorite method for reheating mac and cheese? Let us know in the comments!
Can You Freeze Mac and Cheese?
Yes! Mac and cheese can be frozen, making it a great option for meal prep, leftovers, or saving extra portions for later. However, the texture and creaminess may change slightly after freezing, so it’s important to follow the right techniques to maintain its deliciousness. Whether you’re freezing a big batch or just a few servings, here’s everything you need to know about freezing mac and cheese properly.
—
1. Can All Types of Mac and Cheese Be Frozen?
Most mac and cheese recipes can be frozen, but some types freeze better than others.
✔ Best for Freezing:
Baked mac and cheese – Freezes well because the cheese sauce is often thicker and less prone to separating.
Creamy stovetop mac and cheese – Can be frozen, but it may need a little extra milk or cheese when reheating to restore the creaminess.
Mac and cheese with mix-ins (bacon, veggies, chicken, etc.) – Can be frozen, but some add-ins, like crispy bacon or sautéed veggies, may soften after thawing.
❌ Not Ideal for Freezing:
Mac and cheese with a crispy topping (breadcrumbs, panko, or crackers) – The crunchy layer will become soggy after freezing and thawing.
Mac and cheese with delicate dairy (cream cheese, soft cheeses, or heavy cream-based sauces) – These can separate when thawed, becoming grainy or oily.
💡 Tip: If you plan to freeze mac and cheese, make a slightly thicker sauce to help it hold up better when reheated.
—
2. How to Freeze Mac and Cheese
To keep mac and cheese fresh and flavorful, follow these simple steps for freezing:
❄️ Freezing Individual Portions (Best for Quick Meals)
1. Let the mac and cheese cool completely before freezing.
2. Divide it into single-serving portions and place them in airtight, freezer-safe containers or heavy-duty freezer bags.
3. If using freezer bags, remove as much air as possible to prevent freezer burn.
4. Label with the date and store in the freezer for up to 2–3 months.
💡 Tip: Individual portions make reheating quick and convenient, perfect for busy days!
❄️ Freezing a Whole Batch (Best for Family Meals)
1. If freezing baked mac and cheese, assemble it in a freezer-safe baking dish but do not bake it yet.
2. Cover the dish tightly with plastic wrap and aluminum foil to prevent freezer burn.
3. Store in the freezer for up to 2 months.
4. When ready to bake, thaw overnight in the fridge, then bake as usual.
💡 Tip: You can also freeze fully baked mac and cheese, but the texture will be softer after thawing.
—
3. How to Thaw and Reheat Frozen Mac and Cheese
Proper thawing and reheating help restore the creamy texture and prevent mac and cheese from drying out or becoming grainy.
🧊 Thawing Frozen Mac and Cheese
The best way to thaw frozen mac and cheese is by transferring it to the refrigerator overnight.
If you’re in a hurry, you can thaw it using the defrost setting on your microwave, but this may slightly alter the texture.
🔥 Reheating Frozen Mac and Cheese
Once thawed, reheat mac and cheese using one of these methods:
🫕 On the Stovetop (Best for Creamy Mac and Cheese)
1. Place mac and cheese in a saucepan over low heat.
2. Add a splash of milk, cream, or broth to restore moisture.
3. Stir continuously until smooth and heated through.
🔥 In the Oven (Best for Baked Mac and Cheese)
1. Preheat the oven to 350°F (175°C).
2. Place thawed mac and cheese in an oven-safe dish.
3. Add a little extra cheese or a drizzle of milk if needed.
4. Cover with foil and bake for 20–25 minutes, then remove the foil and bake for another 5 minutes to crisp up the top.
🎛️ In the Microwave (Quickest Method)
1. Place thawed mac and cheese in a microwave-safe dish.
2. Add a splash of milk or cream to prevent dryness.
3. Cover with a damp paper towel to trap moisture.
4. Heat in 30-second intervals, stirring in between, until hot.
💡 Tip: If the sauce looks grainy or separated, stir in a little extra cheese or butter to bring back creaminess.
—
4. Pros and Cons of Freezing Mac and Cheese
✅ Pros:
✔ Great for meal prep – make ahead and store for quick meals.
✔ Reduces food waste – perfect for saving leftovers.
✔ Convenient – can be portioned into single servings for easy reheating.
❌ Cons:
❌ The texture may change slightly after freezing (can be less creamy or slightly grainy).
❌ Some cheeses and dairy-based sauces may separate when thawed.
❌ Crunchy toppings become soggy, so they may need to be added fresh after reheating.
—
Final Thoughts
Yes, you can freeze mac and cheese, but for the best results, use the right freezing and reheating techniques to maintain its delicious, creamy texture. Whether freezing a single portion or a whole batch, remember to add moisture when reheating to bring it back to life.
Have you tried freezing mac and cheese before? Let us know your experience in the comments!
Conclusion
Making creamy mac and cheese from scratch is easier than you think, and with the right ingredients and techniques, you can create a dish that’s rich, cheesy, and absolutely irresistible. Whether you prefer classic stovetop mac and cheese, a baked version with a crispy topping, or a bold twist with extra flavors, this comfort food can be customized to your taste.
We’ve covered everything from choosing the best pasta and cheese to preventing a grainy sauce, adding flavor boosts, and even storing leftovers properly. Now, you’re equipped with all the tips and tricks to perfect your mac and cheese every time!
So, what’s your favorite way to enjoy mac and cheese? Do you have any special ingredients or secret techniques? Share your thoughts in the comments! And if you try this recipe, let us know how it turned out—we’d love to hear from you.
Happy cooking!