
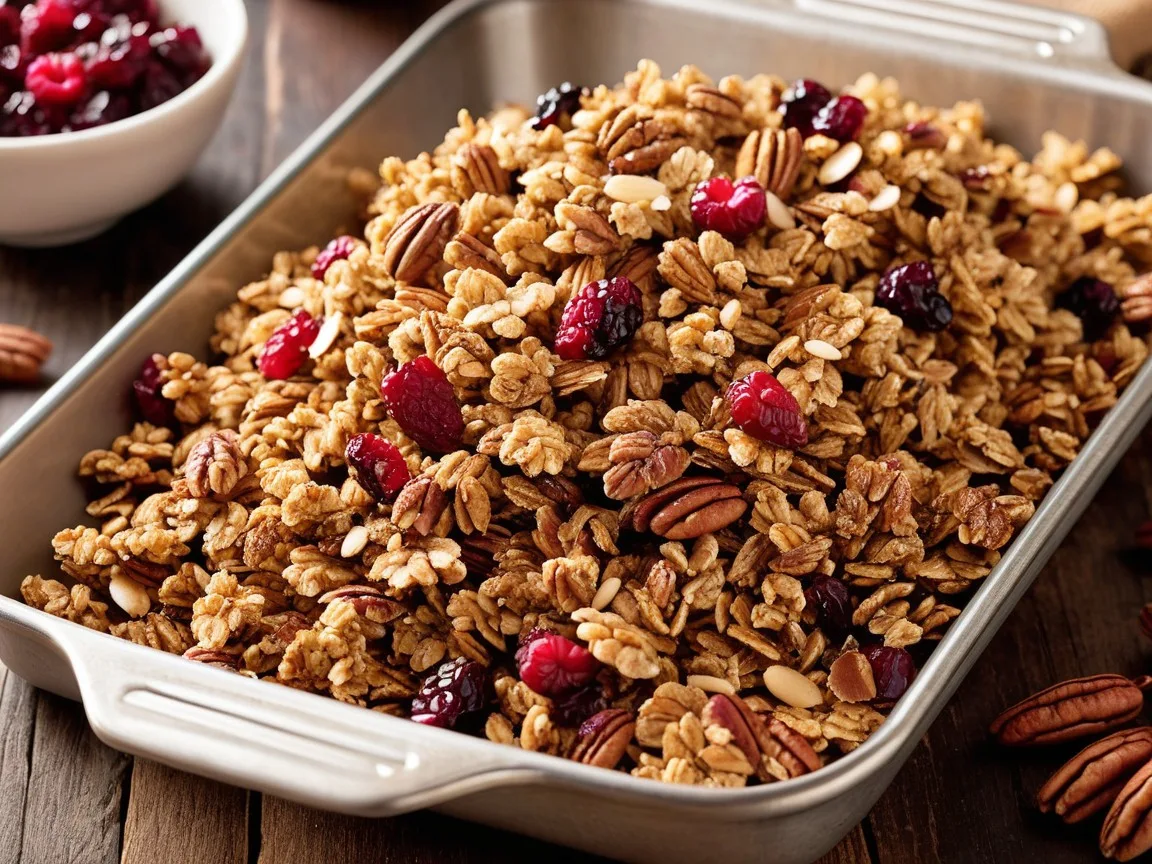
Homemade granola is a versatile, delicious, and nutritious snack that you can easily prepare in your own kitchen. Unlike store-bought versions, making granola at home allows you to control every ingredient, ensuring a healthier and more personalized treat. Packed with wholesome ingredients like oats, nuts, seeds, and dried fruits, granola is not only a great breakfast option but also a satisfying snack throughout the day.
What makes homemade granola even more appealing is its flexibility—you can adjust the sweetness, experiment with flavors, and create versions that suit your dietary needs, whether gluten-free, vegan, or nut-free. It’s cost-effective, free of unnecessary additives, and perfect for those who love a creative culinary experience.
In this guide, you’ll learn how to make homemade granola step-by-step, discover essential ingredients, and explore exciting customization ideas to create a granola that’s uniquely yours. Get ready to elevate your breakfast game with this simple and healthy recipe!
What Makes Homemade Granola a Healthy Option?
Control Over Ingredients
One of the biggest advantages of making granola at home is the complete control you have over the ingredients. Store-bought granola often contains hidden additives, excessive sugar, and unhealthy fats, which can undermine its health benefits. By preparing granola yourself, you ensure every component is as wholesome and natural as possible.
1. Adjusting Sweetness Levels
When you make homemade granola, you can choose how much and what type of sweetener to use. Natural options like honey, maple syrup, or agave nectar not only provide sweetness but also add subtle, unique flavors. This control helps avoid the overly sugary taste that many commercial granolas have, making your homemade version a healthier option. For an even lower-sugar alternative, you can opt for unsweetened granola or use naturally sweet ingredients like dried fruits.
2. Choosing High-Quality Ingredients
With homemade granola, you can prioritize quality by selecting organic oats, raw nuts, and seeds that are free from pesticides or harmful chemicals. You can also avoid artificial flavors and preservatives often found in packaged products. Using fresh, high-quality ingredients ensures a healthier and tastier result.
3. Avoiding Allergens and Unwanted Additives
Homemade granola is perfect for those with dietary restrictions or food allergies. If you’re allergic to nuts, you can leave them out or substitute them with seeds like sunflower or pumpkin seeds. Gluten-free oats can be used for those with gluten intolerance, and vegan recipes can omit ingredients like honey in favor of plant-based sweeteners.
4. Customizing Nutritional Value
Another benefit is tailoring the granola to meet your specific dietary goals. Want more protein? Add extra nuts or seeds. Looking for heart-healthy options? Use walnuts and flaxseeds. Need an energy boost? Incorporate ingredients like chia seeds or coconut flakes. Homemade granola gives you the freedom to design a recipe that suits your health and wellness goals.
By taking control of the ingredients, you can ensure your granola is not only delicious but also aligns with your nutritional preferences and lifestyle. It’s a small step that can make a big difference in creating a wholesome, guilt-free snack or meal addition.
Nutrient-Packed Ingredients
One of the main reasons homemade granola is such a healthy choice is due to the nutrient-dense ingredients that go into making it. Each component of granola contributes its own set of vitamins, minerals, healthy fats, and fiber, making it a powerful breakfast or snack option. Let’s take a closer look at the key ingredients and their nutritional benefits:
1. Oats: The Base of Granola
Oats are the foundation of any good granola recipe, and for good reason. They are an excellent source of complex carbohydrates, providing steady energy throughout the day without causing spikes in blood sugar. Oats are rich in fiber, especially beta-glucan, which has been shown to support heart health by lowering cholesterol levels. They also contain antioxidants and a variety of vitamins and minerals, such as iron, magnesium, and B-vitamins. The soluble fiber in oats can help with digestion and promote feelings of fullness, making it an ideal base for a balanced breakfast.
2. Nuts: A Healthy Dose of Protein and Good Fats
Nuts are an essential addition to homemade granola, offering a rich source of plant-based protein, healthy fats, and fiber. Depending on your preference, you can choose from a variety of nuts such as almonds, walnuts, pecans, or cashews. These nuts provide a substantial amount of monounsaturated fats (the “good” fats) which are beneficial for heart health. Almonds, for example, are known to support weight management and help reduce hunger, while walnuts are high in omega-3 fatty acids, which are crucial for brain health. Additionally, nuts are loaded with essential minerals like magnesium, calcium, and zinc.
3. Seeds: Tiny but Mighty
Seeds such as sunflower seeds, chia seeds, flaxseeds, and pumpkin seeds pack a powerful nutritional punch. They are high in omega-3 fatty acids, which are vital for reducing inflammation and promoting cardiovascular health. Chia seeds are particularly known for being rich in fiber, which aids digestion and helps regulate blood sugar. Flaxseeds are a great source of lignans (antioxidants that support hormone balance) and are also high in fiber. These seeds provide additional texture to granola and increase its overall nutritional profile.
4. Dried Fruits: Natural Sweetness with Extra Nutrients
Dried fruits like raisins, cranberries, apricots, or figs not only add natural sweetness but also bring in a variety of nutrients. They are excellent sources of vitamins like Vitamin C and Vitamin A, as well as potassium, which supports healthy blood pressure. Dried fruits are also rich in fiber, which aids digestion and helps with satiety. Cranberries, for example, contain antioxidants that promote urinary tract health, while apricots are high in beta-carotene, which benefits skin health.
5. Spices and Flavorings: More than Just Taste
Spices like cinnamon, nutmeg, and vanilla extract not only add flavor to your granola but also offer a variety of health benefits. Cinnamon is known for its anti-inflammatory properties and can help regulate blood sugar levels. Nutmeg contains compounds that promote digestive health and provide a soothing effect. Additionally, vanilla extract adds a touch of natural sweetness without adding sugar, and it also contains small amounts of antioxidants.
6. Healthy Sweeteners: Natural and Nutrient-Rich
Instead of using refined sugars, homemade granola recipes often rely on natural sweeteners like honey, maple syrup, or agave nectar. These alternatives not only add sweetness but also come with added nutrients. For instance, honey contains small amounts of vitamins (such as Vitamin B6) and minerals (like magnesium and zinc), along with antioxidants that help fight free radicals. Maple syrup is a source of manganese and zinc, both of which are essential for immune health.
By carefully choosing nutrient-dense ingredients, homemade granola becomes more than just a tasty snack—it’s a superfood-packed powerhouse that supports heart health, digestion, immunity, and energy. These nutrient-rich components work together to provide a balanced and satisfying meal or snack, making granola an excellent addition to any healthy diet.
Dietary Flexibility
One of the major advantages of homemade granola is its versatility in catering to a wide variety of dietary needs and preferences. Whether you’re following a specific diet for health reasons or simply trying to eat more mindfully, homemade granola can be easily customized to fit any lifestyle. By adjusting the ingredients and proportions, you can create a granola that aligns with your personal dietary goals, making it a truly adaptable snack or meal option.
1. Gluten-Free Granola
For those with gluten intolerance or celiac disease, homemade granola is an excellent choice because you can easily make it gluten-free. Many store-bought granolas contain hidden gluten in the form of wheat-based oats or other additives. However, by choosing certified gluten-free oats, you can ensure that your granola is completely free of gluten. Additionally, you can substitute other gluten-free ingredients, such as quinoa flakes or rice flakes, if desired. This allows individuals who need to avoid gluten to enjoy granola without worrying about cross-contamination or hidden sources of gluten.
2. Vegan and Plant-Based Options
For those following a vegan or plant-based diet, homemade granola can be made without any animal products. Traditional granola recipes often include honey as a sweetener, which is not considered vegan. However, you can easily substitute honey with plant-based alternatives like maple syrup, agave nectar, or date syrup. Additionally, you can ensure that your granola is entirely plant-based by selecting vegan-friendly oils (such as coconut oil or avocado oil) and skipping any dairy-based ingredients like butter. This way, you can enjoy a delicious, cruelty-free breakfast or snack.
3. Nut-Free Granola
Nut allergies are a concern for many, and store-bought granola often includes a variety of nuts like almonds, cashews, or walnuts. Fortunately, homemade granola is highly adaptable to be nut-free. If you’re making granola for someone with a nut allergy, simply omit the nuts and replace them with seeds, such as sunflower seeds, pumpkin seeds, or hemp seeds, which provide a similar texture and crunch. This makes it a safe and satisfying snack for children and adults with nut sensitivities, while still offering plenty of nutrients.
4. Low-Sugar and Sugar-Free Granola
For those who need to manage their sugar intake, such as individuals with diabetes or those following a low-carb or keto diet, homemade granola can easily be modified to be low-sugar or even sugar-free. Instead of using traditional sweeteners like granulated sugar, you can opt for natural sugar substitutes such as stevia, monk fruit sweetener, or erythritol. If you prefer a more naturally sweet flavor, you can rely on the sweetness of dried fruits like raisins, cranberries, or apricots to reduce the need for added sugar. This customization ensures that the granola remains flavorful while supporting a low-glycemic lifestyle.
5. High-Protein and Energy-Boosting Granola
Homemade granola can also be tailored for individuals looking to increase their protein intake or fuel their active lifestyle. For example, you can boost the protein content by adding ingredients like protein powder, Greek yogurt, hemp seeds, or peanut butter. These additions not only help in muscle repair and growth but also make the granola more filling and satisfying. If you’re an athlete or someone who enjoys regular exercise, a high-protein granola can serve as the perfect pre- or post-workout snack.
6. Low-Carb and Keto Granola
For those following a low-carb or keto diet, traditional granola might not fit into the carb constraints due to the high amount of oats and sweeteners. However, homemade granola can be adapted to a keto-friendly version by replacing oats with low-carb ingredients like coconut flakes, almond flour, or flaxseeds. You can also use sugar substitutes like erythritol or stevia instead of maple syrup or honey, which are too high in carbs for keto. This allows individuals following a keto diet to enjoy a crunchy, satisfying snack without worrying about exceeding their daily carb limits.
7. Paleo Granola
For individuals following a paleo diet, which emphasizes whole, unprocessed foods and excludes grains, legumes, and dairy, homemade granola can be made to fit these guidelines. Instead of oats, paleo granola typically uses nuts, seeds, and dried coconut as the base. You can sweeten your granola with raw honey or maple syrup and flavor it with spices like cinnamon or vanilla. By choosing paleo-approved ingredients, you can enjoy a satisfying snack that aligns with your dietary preferences.
8. Whole30-Compliant Granola
For those following the Whole30 program, which eliminates added sugars, grains, dairy, legumes, and processed foods for 30 days, making homemade granola is a great way to stay compliant. You can make a Whole30-approved granola by using unsweetened coconut flakes, seeds, nuts, and natural sweeteners like dates (if using sweeteners). Avoid honey or maple syrup during the 30-day period, as they are not allowed, but you can rely on naturally sweet ingredients like dried fruits and spices for flavor.
—
The Key to Flexibility
The true beauty of homemade granola lies in its adaptability to suit nearly every dietary preference or restriction. Whether you’re trying to lower your sugar intake, follow a plant-based diet, or enjoy a nutrient-packed snack that fits into a keto or paleo regimen, homemade granola can be tailored to meet your needs. By choosing the right ingredients and making simple swaps, you can create a granola that is not only delicious but also aligns perfectly with your health goals and dietary restrictions. This flexibility makes homemade granola a universally loved option that can be enjoyed by everyone, regardless of their unique dietary lifestyle.
Essential Ingredients for Homemade Granola
The Base: Oats
Oats are the cornerstone of homemade granola, providing the perfect foundation for a crunchy, satisfying snack. They are the primary grain used in granola recipes, offering both texture and numerous health benefits. Oats are packed with essential nutrients, making them a valuable addition to any diet. Let’s dive deeper into why oats are such an integral part of granola and why they’re so good for you.
1. Nutritional Benefits of Oats
Oats are a whole grain that provide a range of essential nutrients, including fiber, protein, vitamins, and minerals. They are an excellent source of complex carbohydrates, which provide long-lasting energy. The type of carbohydrate found in oats is absorbed slowly into the bloodstream, helping to maintain steady blood sugar levels and prevent the crashes that can occur with refined sugars.
Oats are also rich in beta-glucan, a type of soluble fiber that offers several health benefits. Studies have shown that beta-glucan can help lower cholesterol levels, particularly LDL cholesterol (the “bad” cholesterol), which contributes to cardiovascular disease. The fiber in oats also promotes digestive health, helping to regulate bowel movements and prevent constipation. Additionally, oats contain small amounts of iron, magnesium, phosphorus, B-vitamins, and zinc, all of which are important for overall health.
2. Types of Oats and Their Role in Granola
Not all oats are created equal, and the type of oats you use in your granola can influence both the texture and nutritional profile of the final product. The most commonly used oats in granola recipes are rolled oats, although there are other varieties as well. Here’s a breakdown of the most common types:
Rolled Oats: These are the most popular choice for granola. Rolled oats are steamed and flattened, making them quick to cook and easy to bake. They hold their shape well during baking, creating the perfect texture for granola—crunchy on the outside but soft on the inside.
Old-Fashioned Oats: Essentially the same as rolled oats, these oats are minimally processed and retain more of their whole-grain qualities. They offer a chewier texture compared to instant oats and are ideal for making granola.
Quick Oats: These oats are thinner and cook more quickly than rolled oats. While they can be used for granola, they tend to break down more easily during baking, leading to a softer texture. If you prefer a finer, less crunchy granola, quick oats may be a good option.
Steel-Cut Oats: These oats are less processed and have a coarser texture. While they can be used in granola, they require a longer cooking time and may not yield the same crunchy texture as rolled oats. They are generally better for savory dishes or as a base for oatmeal.
Gluten-Free Oats: For those with gluten sensitivities or celiac disease, it’s essential to use certified gluten-free oats. Oats are naturally gluten-free, but they are often processed in facilities that also handle wheat, which can lead to cross-contamination. Choosing oats labeled as “gluten-free” ensures they are safe for those with dietary restrictions.
3. Oats and Satiety
One of the reasons oats are such a great ingredient for granola is that they are incredibly filling. The high fiber content, particularly the beta-glucan, helps promote feelings of fullness, which can curb overeating and keep you satisfied for hours. This makes granola made with oats an excellent option for a balanced breakfast or snack. Paired with other ingredients like nuts and seeds, oats provide a combination of healthy fats, protein, and fiber that work together to keep you feeling full and energized throughout the day.
4. Oats and Heart Health
Oats have long been recognized for their heart-health benefits, primarily due to their fiber content. Specifically, beta-glucan has been shown to lower LDL cholesterol (the harmful type of cholesterol) and reduce the risk of heart disease. In fact, the U.S. Food and Drug Administration (FDA) has approved the claim that oats can help reduce the risk of heart disease when consumed as part of a healthy diet. By incorporating oats into your homemade granola, you’re making a heart-healthy choice that can have long-term benefits for cardiovascular health.
5. Oats for Digestive Health
The soluble fiber in oats not only benefits heart health but also plays a crucial role in digestive health. It helps to regulate bowel movements and prevent constipation by absorbing water and forming a gel-like substance that aids in smooth digestion. Oats are also a prebiotic food, meaning they help feed the beneficial bacteria in the gut, promoting a healthy microbiome. A healthy gut is essential for overall well-being, as it supports immune function, mental health, and nutrient absorption.
6. Oats and Their Versatility
Aside from their health benefits, oats are incredibly versatile and can be easily incorporated into a variety of recipes. In granola, they serve as the perfect base, offering a neutral, slightly nutty flavor that complements a wide range of ingredients. Oats also absorb flavors well, which means they take on the sweetness of honey, maple syrup, or dried fruits, as well as the warmth of spices like cinnamon and vanilla. This makes oats a perfect canvas for creativity when crafting your own granola recipes.
7. Oats as a Gluten-Free Option
While oats are naturally gluten-free, it’s important to ensure they have been processed in a facility that avoids cross-contamination with gluten-containing grains. Certified gluten-free oats are a great choice for those who follow a gluten-free diet. By using these oats in your homemade granola, individuals with gluten sensitivity or celiac disease can safely enjoy this delicious treat without worrying about the presence of gluten.
—
Conclusion
Oats are not just a key ingredient in granola—they’re a nutrient powerhouse that provides fiber, protein, vitamins, and minerals to support overall health. With their heart-healthy properties, digestive benefits, and ability to keep you feeling full, oats make the perfect base for a nutritious and satisfying granola. By choosing the right type of oats and incorporating them into your homemade granola recipe, you’re making a health-conscious choice that is as delicious as it is good for you. Whether you prefer a chewy, crunchy, or lightly sweet granola, oats are sure to be the foundational ingredient that ties it all together.
Add-Ins: Nuts and Seeds
Nuts and seeds are the perfect add-ins for homemade granola, adding both texture and a wide range of nutrients that elevate the overall health benefits of the recipe. Not only do they provide satisfying crunch, but they also contribute important healthy fats, protein, fiber, and various vitamins and minerals that make granola a more balanced and nourishing meal or snack. Let’s explore the role of nuts and seeds in homemade granola and how they can support your health and wellness.
1. Nutritional Powerhouses: Healthy Fats and Protein
Both nuts and seeds are rich in healthy fats, specifically monounsaturated fats and polyunsaturated fats, which are known for their heart-healthy benefits. These fats help reduce bad cholesterol levels and lower the risk of cardiovascular diseases. For example, almonds, walnuts, and pecans are high in monounsaturated fats, which promote better heart health and help reduce inflammation in the body. On the other hand, flaxseeds, chia seeds, and hemp seeds are excellent sources of omega-3 fatty acids, which support brain function and reduce inflammation.
Nuts and seeds are also high in plant-based protein, making them an essential part of a plant-based diet or any diet that prioritizes muscle recovery and growth. For instance, almonds and pumpkin seeds are particularly high in protein, which helps repair tissues, supports immune function, and contributes to overall body maintenance. By adding a variety of nuts and seeds to your granola, you’re boosting the protein content, making the granola more filling and energizing.
2. Rich in Fiber for Digestive Health
In addition to healthy fats and protein, nuts and seeds are also packed with fiber, which plays a crucial role in maintaining a healthy digestive system. Fiber helps regulate bowel movements, prevent constipation, and promote gut health by feeding beneficial gut bacteria. It also helps maintain a feeling of fullness for longer periods, which can prevent overeating and support weight management.
Almonds are particularly high in fiber, offering about 3.5 grams of fiber per ounce (28 grams), which aids in digestion and supports heart health.
Chia seeds and flaxseeds are particularly fiber-rich, containing more than 5 grams of fiber per tablespoon, making them excellent choices for improving gut health and maintaining digestive regularity.
By incorporating a variety of nuts and seeds, you can increase the fiber content of your homemade granola, making it a more satisfying and digestion-friendly option.
3. Antioxidants for Skin and Overall Health
Nuts and seeds are also loaded with antioxidants, which help combat oxidative stress and protect your body from free radical damage. Free radicals are unstable molecules that can contribute to the aging process and the development of chronic diseases such as heart disease, diabetes, and cancer. Antioxidants neutralize these free radicals, promoting better health and longevity.
Walnuts, for example, are particularly rich in polyphenolic antioxidants, which protect the body from oxidative damage and inflammation.
Pecans are another great source of antioxidants, particularly vitamin E, which helps maintain healthy skin, supports immune function, and reduces oxidative stress.
Chia seeds are also rich in antioxidants like quercetin, kaempferol, and chlorogenic acid, which are beneficial for reducing inflammation and supporting cellular repair.
Adding these antioxidant-rich nuts and seeds to your granola helps protect the body from the harmful effects of environmental stressors, while promoting healthier skin and overall well-being.
4. Heart Health: The Role of Omega-3s and Magnesium
Nuts and seeds are excellent sources of nutrients that are particularly beneficial for heart health. Omega-3 fatty acids, found in chia seeds, flaxseeds, and walnuts, help reduce inflammation in the body, lower blood pressure, and improve cholesterol levels. Omega-3s are also crucial for brain health and cognitive function.
Magnesium, found in pumpkin seeds and almonds, plays a key role in maintaining a healthy heart by regulating blood pressure, preventing arrhythmias (irregular heartbeats), and supporting overall cardiovascular function. A handful of magnesium-rich seeds or nuts in your granola can significantly improve heart health over time, helping to reduce the risk of heart disease.
5. Versatility: Customizing Your Granola
One of the greatest advantages of adding nuts and seeds to your homemade granola is the ability to customize the recipe based on your preferences and dietary needs. With such a wide variety of nuts and seeds to choose from, you can tailor your granola to meet specific nutritional goals or simply enjoy different flavor combinations. Here are some options to consider:
Almonds: A great source of protein, fiber, and healthy fats. They have a slightly sweet flavor and pair well with dried fruits like raisins, cranberries, or apricots.
Walnuts: Rich in omega-3 fatty acids and antioxidants. Their rich, earthy flavor complements warm spices like cinnamon and nutmeg.
Pecans: High in antioxidants and healthy fats, pecans add a buttery richness to granola that pairs well with maple syrup or honey.
Pumpkin Seeds: Packed with magnesium, protein, and healthy fats, pumpkin seeds add a crunchy texture and pair well with flavors like cinnamon and cloves.
Chia Seeds: A great source of omega-3s, fiber, and antioxidants, chia seeds can help thicken your granola when combined with liquids like almond milk or yogurt.
Hemp Seeds: Full of protein and healthy fats, hemp seeds provide a mild, nutty flavor and can be sprinkled on top of granola after baking for added crunch and nutritional boost.
You can experiment with different combinations of these nuts and seeds to create a personalized granola that not only satisfies your taste buds but also supports your nutritional needs.
6. The Satisfying Crunch and Texture
Nuts and seeds provide more than just nutritional value—they also contribute the essential crunch and texture that make granola so enjoyable. The crispiness of roasted almonds or the subtle crunch of pumpkin seeds adds an extra layer of texture that enhances the overall eating experience. The contrast between the chewiness of oats and the crispness of nuts and seeds gives granola its signature texture, making it satisfying to eat as a breakfast cereal, snack, or topping for yogurt and smoothies.
—
Conclusion
Incorporating a variety of nuts and seeds into your homemade granola not only enhances its flavor and texture but also boosts its nutritional profile. From heart-healthy omega-3 fatty acids and antioxidants to muscle-supporting protein and digestion-friendly fiber, these nutrient-packed add-ins turn granola into a well-rounded, satisfying, and nourishing treat. The versatility of nuts and seeds means you can customize your granola to meet your dietary goals, ensuring that every bite is both delicious and beneficial for your health. So, feel free to get creative with your combinations and enjoy the benefits of these crunchy, nutrient-rich additions to your homemade granola!
Sweeteners and Flavor Enhancers
Sweeteners and flavor enhancers are essential in transforming homemade granola from a simple mix of oats and nuts into a delightful, flavor-packed snack or breakfast. These ingredients not only provide sweetness but also add depth and complexity to the overall taste, making each bite more satisfying. What’s more, by carefully selecting the right sweeteners and flavor enhancers, you can ensure that your granola stays aligned with your dietary preferences while still delivering on taste. Let’s take a closer look at the different types of sweeteners and flavor enhancers you can use in your homemade granola.
1. Natural Sweeteners: Healthier Alternatives to Refined Sugar
When making homemade granola, it’s important to choose sweeteners that provide natural flavors while offering some nutritional value, as opposed to refined sugars that contribute empty calories. There are many natural sweeteners to choose from, and each one brings its own unique flavor profile and health benefits.
Maple Syrup: One of the most popular natural sweeteners for granola, maple syrup imparts a rich, earthy sweetness that complements the oats and nuts. It also contains small amounts of minerals such as manganese, zinc, and calcium, which support immune function and bone health. It’s a great option for those looking for a vegan-friendly sweetener as well.
Honey: Another classic sweetener, honey is known for its sweet, floral flavor and rich golden color. While it is higher in calories than some other options, it also provides antioxidants and has natural antimicrobial properties. If you’re not following a vegan diet, honey is a great choice for adding sweetness to granola while contributing some health benefits.
Agave Nectar: Agave nectar is a plant-based sweetener that has a mild, neutral flavor, making it a good choice for granola. It’s sweeter than honey or maple syrup, so you can use less of it. Agave is lower on the glycemic index than other sweeteners, meaning it has a smaller impact on blood sugar levels. However, it’s important to use agave in moderation, as it’s high in fructose.
Coconut Sugar: Derived from the sap of coconut palm trees, coconut sugar has a caramel-like flavor that’s perfect for granola. It also contains some trace minerals like iron, zinc, and potassium, which make it a slightly more nutritious alternative to regular white sugar. Coconut sugar has a lower glycemic index than refined sugar, making it a better option for those looking to keep blood sugar levels stable.
Date Syrup: Date syrup is made from dates and provides a rich, caramel-like sweetness with the added benefit of fiber and antioxidants. It’s a great natural sweetener for granola and is especially good for those who want to avoid refined sugars while still getting a deep, natural sweetness.
Stevia: For those looking for a zero-calorie sweetener, stevia is an excellent choice. It is derived from the leaves of the stevia plant and has a natural sweetness that can be 50 to 300 times sweeter than sugar. It doesn’t raise blood sugar levels, making it a good option for diabetics or those on low-sugar diets. However, stevia can sometimes have a bitter aftertaste, so it’s best to experiment with small amounts.
2. Flavor Enhancers: Elevating Your Granola’s Taste
Beyond sweetness, flavor enhancers play a key role in creating a well-rounded and aromatic granola. These ingredients bring complexity and depth, complementing the oats, nuts, and seeds, and adding new layers of taste that make your granola truly unforgettable.
Vanilla Extract: A small amount of vanilla extract can significantly elevate the flavor of your granola, adding a warm, aromatic note that complements other sweeteners and spices. Vanilla also pairs beautifully with the richness of nuts and the natural sweetness of dried fruits, making it a staple flavor enhancer in granola recipes.
Cinnamon: One of the most popular spices used in granola, cinnamon adds warmth and depth, enhancing the sweetness of your granola without being overpowering. It also brings health benefits, including anti-inflammatory properties and the ability to help regulate blood sugar levels. A dash of cinnamon can transform your granola into a comforting treat with a hint of spiciness.
Nutmeg: For an added layer of warmth and complexity, nutmeg is a great spice to include in your granola. Nutmeg has a sweet, slightly peppery flavor that pairs well with other warm spices like cinnamon and cloves. It’s also known for its digestive benefits and calming properties, making it a great choice for a relaxing, cozy snack.
Salt: While salt is typically not associated with sweetness, a pinch of salt can bring out the natural flavors of the sweeteners and other ingredients in your granola. A light sprinkle of sea salt or Himalayan pink salt can help balance the sweetness and intensify the overall flavor, creating a perfect sweet-salty contrast. Salt can also help to enhance the nuttiness of the granola, making it even more delicious.
Cocoa Powder: For a touch of chocolatey goodness, adding unsweetened cocoa powder to your granola mix is a great option. The deep, rich flavor of cocoa pairs perfectly with oats and nuts, and it gives your granola a slightly indulgent feel without added sugar. Cocoa powder is also packed with antioxidants, particularly flavonoids, which are beneficial for heart health.
Coconut Flakes: If you’re looking to add a tropical twist to your granola, unsweetened coconut flakes are a fantastic option. They provide a slightly sweet, nutty flavor and a chewy texture that contrasts with the crunch of the oats and nuts. Plus, coconut is rich in healthy fats and fiber, making it a nutritious addition to your granola.
3. The Role of Sweeteners in Granola’s Texture
In addition to their flavor contributions, sweeteners also play an important role in the texture of your granola. When baked, the sugars in the sweeteners help to caramelize the granola, creating a crispy, golden brown finish. This is one reason why liquid sweeteners such as honey, maple syrup, or date syrup are often used, as they provide moisture that binds the oats, nuts, and seeds together while contributing to that perfect crunch.
For a less clumpy, more crumbly granola, you can opt for a lighter hand with the sweeteners or use a combination of liquid and dry sweeteners to achieve the desired texture. The right balance of sweeteners and moisture levels ensures that your granola has the ideal consistency, whether you prefer big clusters or a more granular texture.
4. Natural Flavor Combinations
When it comes to flavor, granola offers endless possibilities for customization. You can pair sweeteners and flavor enhancers to suit your preferences. For example, maple syrup and cinnamon create a classic, warm flavor, while date syrup and cocoa powder combine for a rich, indulgent taste. For a more tropical variation, you can combine coconut flakes with honey and a hint of vanilla extract. The combinations are limitless, allowing you to create a granola that’s as unique as your taste buds.
—
Conclusion
Sweeteners and flavor enhancers are crucial elements in crafting the perfect homemade granola. Whether you prefer the natural sweetness of maple syrup, the warm flavors of cinnamon and vanilla, or the deep richness of cocoa powder, these ingredients allow you to customize your granola to suit your taste and dietary preferences. By experimenting with different sweeteners and flavor enhancers, you can create a granola that is not only delicious but also nourishing and satisfying. The right combination of sweetness and flavor will elevate your homemade granola from a simple snack to a gourmet treat you’ll love to enjoy every day.
Optional Extras
When making homemade granola, the beauty of the recipe lies in its versatility. Beyond the basic ingredients like oats, nuts, seeds, sweeteners, and flavor enhancers, there are many optional extras that can be added to customize your granola and take it to the next level. These add-ins allow you to experiment with different textures, flavors, and nutritional benefits, making your granola even more satisfying and enjoyable. Let’s explore some of the most popular and creative optional extras you can add to your granola.
1. Dried Fruits: Sweetness and Chewiness
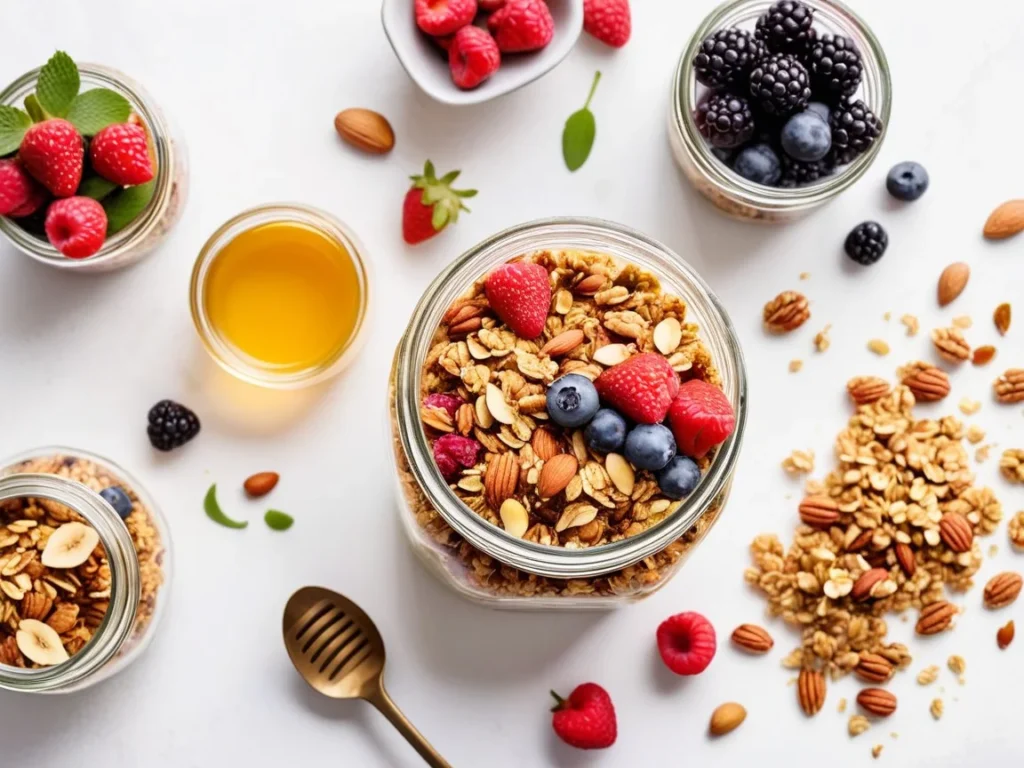
Dried fruits are a great way to add natural sweetness, vibrant color, and a chewy texture to your granola. They balance the crunchiness of oats and nuts while providing a burst of fruity flavor in every bite. Additionally, dried fruits are packed with fiber, antioxidants, and vitamins, making them a great choice for boosting the nutritional value of your granola. Here are some options to consider:
Raisins: A classic choice for granola, raisins add a sweet, slightly tangy flavor and are rich in iron and fiber. They also provide a good source of antioxidants.
Cranberries: Dried cranberries are slightly tart and add a nice contrast to the sweetness of granola. They’re packed with vitamin C and antioxidants, particularly flavonoids, which promote heart health and reduce inflammation.
Apricots: Dried apricots are sweet and soft, and they bring a fruity, tangy flavor to your granola. They are high in vitamin A, fiber, and potassium, which support eye health and digestion.
Dates: Chopped dates add a rich, caramel-like sweetness and are a great natural source of fiber, iron, and potassium. They’re an excellent way to boost the sweetness of your granola without added sugar.
Goji Berries: Known for their high antioxidant content, goji berries provide a slightly tart flavor and are packed with vitamin A, vitamin C, and iron. These berries are an excellent choice if you’re looking to add a superfood to your granola.
Banana Chips: For a crunchy twist, banana chips can add a touch of tropical flavor to your granola. They’re a good source of potassium and provide a sweet, slightly savory element that pairs well with oats.
When adding dried fruits, it’s important to consider their moisture content. For the best texture, add them after baking your granola, as adding them too early could cause them to become overly hard or tough during baking.
2. Superfoods and Boosters: Nutritional Powerhouses
If you want to make your granola even more nutrient-dense, consider adding some superfoods or other nutritional boosters. These ingredients are packed with vitamins, minerals, and other health-promoting properties that can give your granola a wellness boost. Here are some great options:
Chia Seeds: These tiny seeds are rich in omega-3 fatty acids, fiber, and protein, making them a fantastic addition to granola. They absorb liquid and expand, adding a slightly gelatinous texture when soaked. Chia seeds are also rich in antioxidants, which help protect your cells from oxidative damage.
Flaxseeds: Ground flaxseeds are a great source of omega-3 fatty acids and fiber, promoting heart health and digestion. They also contain lignans, which are plant compounds that may have cancer-fighting properties. Be sure to grind the flaxseeds for better absorption of their nutrients.
Hemp Seeds: Full of protein, healthy fats, and minerals, hemp seeds are an excellent source of plant-based nutrition. They have a mild, nutty flavor and a soft texture, making them a great addition to granola.
Spirulina: This blue-green algae is a nutritional powerhouse, providing a concentrated source of protein, iron, magnesium, and vitamins. Adding a small amount of spirulina powder to your granola can significantly increase its nutritional value. It adds a unique green color and an earthy flavor.
Maca Powder: A root vegetable from the Andes, maca powder is known for its ability to balance hormones and boost energy levels. It has a slightly nutty flavor and is rich in vitamins, minerals, and amino acids, making it an excellent addition to your granola for a natural energy boost.
Acai Powder: This superberry is rich in antioxidants, particularly anthocyanins, which have anti-inflammatory properties and may help protect the heart. Adding acai powder to granola can not only enhance the nutritional profile but also give your granola a vibrant color and slightly tart flavor.
3. Coconut: Tropical Flavor and Texture
Coconut is a versatile ingredient that adds both texture and flavor to your granola. It pairs well with a variety of other ingredients and helps create a tropical-inspired granola blend. There are several forms of coconut you can use:
Shredded Coconut: Unsweetened shredded coconut adds a chewy, slightly nutty texture and flavor to your granola. It’s a good source of fiber and healthy fats, particularly medium-chain triglycerides (MCTs), which support brain function and fat metabolism.
Coconut Flakes: Larger coconut flakes provide a satisfying crunch and are a great way to give your granola a tropical twist. Like shredded coconut, coconut flakes contain healthy fats and fiber.
Coconut Oil: If you’re using a fat to bind your granola, coconut oil is an excellent option. It has a mild coconut flavor and is a source of MCTs. Coconut oil also helps achieve a crispier texture when baked.
4. Chocolate: Indulgent and Delicious
For those who enjoy a bit of indulgence in their granola, adding chocolate is a great option. Whether you prefer dark chocolate, milk chocolate, or even chocolate chips, the rich, smooth taste of chocolate adds a decadent element to your granola. Here are a few chocolate options to consider:
Dark Chocolate Chips: Dark chocolate contains more cocoa solids and less sugar than milk chocolate, making it a slightly healthier option. It’s rich in antioxidants, particularly flavonoids, which promote heart health and protect the skin from UV damage.
Cocoa Nibs: If you want to add a less sweet, more intense chocolate flavor, cocoa nibs are a fantastic choice. They’re made from crushed cocoa beans and are packed with fiber, iron, and antioxidants. They provide a crunchy, slightly bitter taste that pairs well with the sweetness of granola.
Carob Chips: For those who avoid chocolate, carob chips are a great alternative. Carob is naturally sweet and contains fiber, calcium, and iron, making it a great substitute for chocolate in granola recipes.
5. Protein Boosters: For an Extra Energy Punch
To turn your granola into a more substantial, protein-packed snack, consider adding some protein boosters. These ingredients can help support muscle recovery, keep you feeling full, and contribute to a well-balanced diet.
Collagen Powder: Collagen is a protein that supports skin elasticity, joint health, and muscle function. Adding collagen powder to your granola mix can provide a protein boost without altering the flavor or texture too much.
Peanut Butter or Almond Butter: Adding a tablespoon of nut butter to your granola mix not only increases the protein content but also provides healthy fats. Nut butters like peanut butter or almond butter contribute a creamy, rich flavor and texture, making your granola even more indulgent and filling.
—
Conclusion
The beauty of homemade granola lies in its customization. While the basic recipe of oats, nuts, seeds, and sweeteners serves as a solid foundation, the addition of optional extras like dried fruits, superfoods, coconut, chocolate, and protein boosters allows you to create a granola that is uniquely suited to your tastes and dietary goals. Whether you’re looking to boost the nutritional value, add more flavor complexity, or indulge in a sweet treat, these extras give you endless opportunities to make your granola truly your own. The best part? You can always mix and match these options to find the perfect combination that suits your palate.
Step-by-Step Instructions for Making Granola
Preparation: The Key to Perfect Granola
Making homemade granola is a straightforward process, but it requires some care and attention to detail to ensure that the final product has the perfect texture, flavor, and crispiness. The preparation steps can vary slightly depending on the ingredients you use, but there are key techniques and tips that will help you achieve the best results. Let’s break down the process to ensure that your granola turns out perfectly every time.
1. Preheating the Oven
Before you begin mixing your ingredients, it’s important to preheat the oven to the right temperature. This step ensures that the granola bakes evenly and develops that desirable golden-brown color. Typically, granola is baked at a moderate temperature of 325°F (165°C), which is ideal for achieving a crispy texture without burning the oats. Preheating the oven ahead of time helps you avoid uneven cooking, especially if you use multiple trays.
2. Mixing the Dry Ingredients
The first step in the actual preparation is to combine your dry ingredients. This includes the base ingredients such as oats, seeds, and nuts. It’s important to mix them thoroughly in a large bowl so that the flavors and textures are evenly distributed throughout the granola.
Oats: Use old-fashioned rolled oats for the best texture. They retain their structure well during baking, creating that classic chewy-crispy texture that’s so appealing in granola. Avoid quick oats, as they tend to become too soft and soggy.
Nuts and Seeds: Chop larger nuts like almonds, walnuts, or pecans into smaller pieces to ensure they bake evenly. Chia seeds, flaxseeds, sunflower seeds, and pumpkin seeds can be added for extra nutrition and crunch.
Once your dry ingredients are combined, give the mixture a good stir to ensure all the nuts, seeds, and oats are evenly coated with the sweetener and oil you’ll be adding next.
3. Combining Wet Ingredients: Sweeteners, Oils, and Flavorings
The next step is to prepare the wet ingredients, which will coat the dry mixture and help the granola bake to crispy perfection. This typically includes sweeteners, oil, and any flavorings you’re adding, such as vanilla or cinnamon.
Sweeteners: Whether you’re using maple syrup, honey, or another natural sweetener, these should be measured carefully and mixed in well to coat the oats and nuts evenly. The sweeteners will caramelize as the granola bakes, helping to create crunchy clusters and a golden color.
Oil: Coconut oil, olive oil, or even vegetable oil can be used to add richness and help the granola crisp up during baking. The oil is essential to the baking process, as it prevents the granola from becoming too dry or hard. Make sure to melt the coconut oil or use a liquid form of oil to ensure even distribution throughout the mixture.
Flavorings: If you’re adding vanilla extract, cinnamon, or other spices, this is the time to mix them in. Stir the wet ingredients well, ensuring that all the dry ingredients are evenly coated.
It’s important to avoid over-saturating the granola with too much wet mixture, as this could result in a soggy texture. Just enough liquid should be used to lightly coat the oats and nuts, allowing the granola to bake evenly and crisp up.
4. Spreading the Granola onto a Baking Sheet
Once the wet and dry ingredients are fully combined, the next step is to spread the granola mixture onto a baking sheet. This step is crucial for achieving evenly baked granola.
Use Parchment Paper: To prevent the granola from sticking and make clean-up easier, line your baking sheet with parchment paper or a silicone baking mat.
Even Layer: Spread the granola mixture in an even, single layer. Be careful not to overcrowd the pan, as this can prevent the granola from crisping up properly. If you have a large batch, consider using two baking sheets to allow for better air circulation during baking.
For the best texture, do not press the mixture too tightly into the sheet. This will allow the granola to bake more evenly, and give it a better crunch once finished.
5. Baking and Stirring
The granola is now ready to be baked. It’s important to bake the granola low and slow, at a moderate temperature, to ensure that it cooks evenly without burning. Bake the granola at 325°F (165°C) for about 20-30 minutes, depending on the size of the batch and your oven.
Stirring: Halfway through the baking process, it’s a good idea to stir the granola. This will prevent the edges from over-baking and ensure that the granola cooks evenly. Stirring helps redistribute the mixture and allows all the ingredients to crisp up uniformly.
Watch Carefully: Keep a close eye on your granola in the final 5-10 minutes of baking. Granola can quickly go from golden to burnt, so it’s best to monitor the progress and adjust the baking time as needed.
6. Cooling the Granola
Once the granola reaches a golden brown color and crispy texture, remove it from the oven and let it cool completely on the baking sheet. Cooling is an essential step because as the granola cools, the sugars and oils solidify, forming crispy clusters. If you stir the granola while it’s still warm, it may not hold its shape.
Do Not Touch Immediately: Resist the temptation to touch or break up the granola right after removing it from the oven. Allow it to cool undisturbed for 10-15 minutes to ensure the clusters form.
Cooling Rack: For quicker cooling, you can transfer the granola to a cooling rack, which will help air circulate around it and speed up the cooling process.
7. Storing the Granola
Once the granola has completely cooled and is crisp to the touch, it’s time to store it. Proper storage ensures that your granola remains fresh and retains its crunch.
Airtight Containers: Transfer your cooled granola to an airtight container or jar to keep it from absorbing moisture and becoming soggy. It’s best stored at room temperature for up to 2-3 weeks. If you want to keep it longer, you can store it in the refrigerator or even freeze it for up to 2-3 months.
Add Dried Fruits Later: If you plan to add dried fruits like cranberries, raisins, or apricots, consider adding them after the granola has baked and cooled. Dried fruits can become overly hard or dry if baked, so mixing them in afterward ensures they remain chewy and fresh.
—
Conclusion
The preparation of homemade granola is a simple process that yields delicious results with a little bit of care and attention. By following the proper steps—such as preheating the oven, mixing ingredients evenly, baking at the right temperature, stirring halfway through, and letting the granola cool—you can achieve a perfectly crispy, flavorful granola every time. And by customizing your mix with your favorite ingredients and optional extras, you can create a unique granola blend that suits your tastes and dietary preferences. With just a few steps, you can enjoy the rewards of a wholesome, homemade snack or breakfast.
Mixing and Flavoring: Creating the Perfect Blend
Once you’ve gathered all your dry and wet ingredients, the next crucial step in the process of making homemade granola is mixing and flavoring. This is where the magic happens, as the right combination of ingredients can transform a simple batch of oats and nuts into a delicious, complex snack. This step ensures that all your granola ingredients are evenly distributed, coated in flavor, and ready to bake. Let’s explore how to achieve the perfect balance of flavors and textures through proper mixing and flavoring techniques.
1. Mixing Dry Ingredients Evenly
The first part of the mixing process involves thoroughly combining your dry ingredients. Whether it’s oats, seeds, nuts, or any other dry elements, it’s important that these ingredients are uniformly mixed before adding any wet ingredients.
Large Mixing Bowl: Use a large mixing bowl to ensure you have enough space to combine all your dry ingredients without spilling over. This also allows for easier tossing of the ingredients to ensure everything is evenly distributed.
Even Distribution: Stir the oats, seeds, and nuts well to make sure that everything is distributed evenly. If the dry ingredients are unevenly mixed, some portions of the granola may become too nut-heavy, while others may have an excess of seeds or oats, which can affect the final flavor and texture.
Avoid Clumping: If you’re using ingredients like shredded coconut or chopped nuts, be sure to break up any clumps so that they mix evenly with the rest of the dry ingredients. Clumping can result in uneven baking, where some parts of your granola are too crispy and others remain soft.
2. Combining Wet Ingredients with Dry Ingredients
Once the dry ingredients are well mixed, the next step is to add the wet ingredients—these typically include oils, sweeteners, and flavorings. The goal is to coat the dry ingredients evenly without oversaturating them.
Liquid Sweeteners: If you’re using honey, maple syrup, or another liquid sweetener, add them slowly to the dry ingredients, stirring gently as you go. This helps ensure that every oat and nut is coated with the sweetener, which will later caramelize during baking, providing the granola with that crispy, golden texture.
Oil for Crispiness: Use coconut oil, olive oil, or vegetable oil to help bind the mixture together and create a crispy texture. The oil will coat the oats and nuts, preventing them from burning and ensuring an even crunch throughout the granola.
Flavor Enhancers: This is the perfect time to add any flavorings like vanilla extract, cinnamon, or nutmeg. Start with small amounts—just a teaspoon of vanilla or a sprinkle of cinnamon can go a long way in flavoring your granola without overpowering the other ingredients.
Salt: Adding a pinch of salt is a simple yet effective way to bring out the sweetness of the granola and enhance its flavor. Salt acts as a flavor enhancer, balancing the sweetness and adding depth to your granola.
Mixing Process: Stir the mixture thoroughly to coat all the dry ingredients with the oil, sweeteners, and flavoring evenly. Ensure that all oats, nuts, and seeds are covered so they will bake uniformly. If needed, use your hands to gently toss and mix the granola, as this will allow you to feel whether everything is well-coated.
3. Creating Texture and Flavor Balance
Achieving the right balance of flavors and textures is what truly sets great granola apart. Mixing and flavoring your granola isn’t just about adding sweetness or spices—it’s about creating layers of flavor and texture that complement each other. Here are some key points to consider:
Sweetness Level: The amount of sweetener used should be adjusted to suit your taste. Some people prefer granola that is lightly sweetened, while others enjoy a more sugary treat. When using liquid sweeteners like honey or maple syrup, ensure that the amount doesn’t overpower the other flavors. If you’re adding dried fruits, such as raisins or cranberries, keep in mind that these will also contribute additional sweetness to the final product.
Spices and Aromatics: Spices like cinnamon, ginger, nutmeg, and cardamom can add warmth and depth to your granola. For a more exotic flavor, consider adding a touch of cloves or allspice. These spices create a cozy, aromatic flavor profile that pairs wonderfully with oats and nuts. A small dash of vanilla extract or almond extract can enhance the overall taste and add a comforting, familiar flavor.
Salty-Sweet Balance: Adding a small amount of salt—whether sea salt, Himalayan pink salt, or regular table salt—can elevate the granola and bring out the natural sweetness of the oats and nuts. A salty-sweet combination makes for a more addictive flavor, with the salt cutting through the sweetness and creating a perfect balance.
Texture Considerations: When mixing in your wet ingredients, keep in mind the texture you’re trying to achieve. For granola that has clusters, you may want to mix the ingredients in a way that encourages clumping. Some people prefer spreading the mixture thinly to create a more traditional, loose granola. If you’re aiming for more clumps, don’t stir too much after mixing the wet and dry ingredients; let the mixture sit for a minute to form natural clusters before baking.
4. Experimenting with Flavor Variations
While classic granola is delicious, it’s also fun to experiment with unique flavors and add-ins. This can be done during the mixing and flavoring process by incorporating ingredients that give your granola a creative twist. Here are a few ideas:
Citrus Zest: Add the zest of orange, lemon, or lime for a fresh, zesty flavor. The bright, citrusy notes will balance the sweetness and provide a refreshing contrast.
Cocoa Powder: For a chocolatey version of granola, add unsweetened cocoa powder to the wet mixture. This will give your granola a rich, deep chocolate flavor and a darker color.
Maple Pecan: A combination of maple syrup, pecans, and a touch of cinnamon can create a warming, fall-inspired granola. The nuts will add richness, while the maple syrup brings a delightful sweetness.
Spicy Granola: For a spicy kick, try adding a pinch of cayenne pepper or chili powder to your granola. The heat from the spices will contrast beautifully with the sweetness of the syrup or honey.
Herbs: For a more savory take on granola, consider adding herbs like rosemary or thyme to the wet mixture. This works especially well when you’re using nuts and seeds like almonds or sunflower seeds.
5. Ensuring Even Flavor Coating
To ensure that your granola has a uniform flavor, it’s important to make sure that all ingredients are evenly coated. Uneven mixing can result in some parts of the granola being overly sweet while others remain bland. Here’s how to achieve an even distribution:
Toss Gently but Thoroughly: Use a spoon or rubber spatula to gently fold the wet ingredients into the dry ingredients. If you want to make sure every oat is coated, it’s helpful to occasionally scrape the sides and bottom of the bowl to incorporate all of the wet ingredients.
Use Your Hands: If you’re finding it difficult to get an even coating with a spoon or spatula, use your hands to gently toss and mix the granola. This allows you to feel if the mixture is evenly distributed, ensuring the ingredients stick together.
—
Conclusion
The mixing and flavoring stage is where you can get creative and fine-tune your homemade granola. It’s about achieving a balanced flavor, ensuring even distribution of ingredients, and adding a personal touch to make the granola your own. By carefully combining your wet and dry ingredients, adjusting the level of sweetness, experimenting with spices, and ensuring everything is evenly coated, you can create granola that is flavorful, crispy, and absolutely irresistible. Whether you prefer classic flavors or enjoy adding a twist, this stage is key to making granola that’s tailored to your tastes and dietary needs.
Baking Tips: Ensuring Perfectly Baked Granola
The baking process is one of the most important stages in making homemade granola, as it transforms the mixture into a crispy, golden snack. While it may seem like a simple step, getting the perfect granola requires some attention to detail and a few helpful tips. Whether you’re aiming for crunchy clusters or a light, airy texture, the way you bake your granola can make all the difference. Let’s dive into some essential baking tips to ensure that your granola turns out perfectly every time.
1. Bake at a Low, Even Temperature
One of the most important factors when baking granola is the temperature of the oven. Granola should be baked at a moderate temperature, typically 325°F (165°C). Baking it at too high a temperature can cause the granola to burn quickly, especially the edges, while leaving the center undercooked. A lower temperature ensures that the granola bakes evenly, crisps up without burning, and develops that rich golden-brown color.
Even Heat Distribution: If your oven tends to have hot spots, it’s helpful to rotate your granola halfway through the baking process to ensure even baking.
Avoid High Heat: Using a temperature higher than 325°F can cause the sugars in the sweeteners (like honey or maple syrup) to burn, which will result in a bitter taste.
2. Spread the Granola Evenly on the Baking Sheet
For the best results, ensure that the granola is spread out in a single, even layer on the baking sheet. This allows the mixture to bake uniformly and achieve the perfect texture. If the granola is too crowded on the sheet, it will bake unevenly, with some parts being overly crispy while others remain soft.
Use a Large Baking Sheet: If you’re making a large batch of granola, it’s a good idea to use a larger baking sheet or even two, instead of overloading one sheet. This allows for better air circulation and an even distribution of heat.
Parchment Paper: Always line your baking sheet with parchment paper or a silicone baking mat to prevent the granola from sticking and make clean-up easier. This also helps ensure an even bake.
3. Stir During Baking to Prevent Burning
Granola has a tendency to cook unevenly, with the edges getting too crispy while the center remains soft if not stirred. To avoid this, it’s important to stir the granola halfway through the baking process. This ensures that the oats and nuts bake evenly and don’t burn on the edges.
How to Stir: Use a large spoon or spatula to gently stir the granola. Scrape the sides and bottom of the baking sheet to make sure all of it is evenly exposed to the heat.
Frequency of Stirring: Stirring once or twice is usually enough. Over-stirring can break up the clusters, which may be desirable for some, but for those who like larger granola clusters, limit stirring.
4. Keep an Eye on It During the Last Few Minutes
Granola can go from perfectly golden to over-baked very quickly. For this reason, it’s essential to keep a close eye on your granola during the last few minutes of baking. Even if your granola looks almost done, it can darken rapidly in the final stages.
Visual Cues: Look for a golden-brown color and crispy texture, but avoid waiting for the granola to reach a very dark color. If the granola is turning too brown, remove it from the oven immediately.
Touch Test: Once the granola is removed from the oven, let it sit for a few minutes to cool. When you touch it, it should feel crispy and firm. If it feels soft, return it to the oven for a few more minutes.
5. Avoid Overcrowding the Granola
When placing your granola on the baking sheet, try to spread it out as evenly as possible without overcrowding the mixture. Granola needs space to crisp up, so if the oats, nuts, and seeds are too close together, they will bake more slowly and unevenly. Overcrowding also inhibits the proper evaporation of moisture from the wet ingredients, which can result in a soggy texture rather than a crisp, crunchy one.
Leave Space for Airflow: Granola will bake better if there is enough space between the ingredients to allow the warm air to circulate. This helps the granola crisp up evenly from all sides.
6. Don’t Rush the Cooling Process
After baking, the cooling process is just as important as baking itself. Granola needs time to cool completely in order to firm up and crisp. Avoid stirring or breaking up the granola while it’s still hot, as this can prevent it from forming the crunchy clusters that many people love.
Cooling on the Baking Sheet: Let the granola cool on the baking sheet for at least 10-15 minutes. This allows the sugars and oils to solidify, creating that desirable crunch.
Cooling Rack: If you want to speed up the cooling process, you can transfer the granola to a cooling rack. This will allow air to circulate around the granola and cool it down more quickly while maintaining its crispness.
7. Make Clusters if Desired
Some people prefer their granola in large, crunchy clusters, while others like it more loose and crumbly. If you’re aiming for granola clusters, the trick is to press the granola down onto the baking sheet before baking, which encourages it to clump together during baking.
Press Down Gently: Before placing the granola in the oven, gently press the mixture down with a spatula to compact it slightly. This will help create larger clusters once it’s baked.
Don’t Stir Too Much: To maintain those large clusters, try to stir the granola sparingly. The more you stir, the smaller the clusters will be. If you want bigger clumps, it’s best to leave them alone after baking, allowing them to set as they cool.
8. Adjust for Your Preferences
Everyone’s oven is slightly different, and baking times can vary depending on the type of baking sheet you use and how much granola you’re making. If this is your first time baking granola, don’t be afraid to experiment with time and temperature.
Adjust Temperature: If you notice that the edges are browning too fast or the granola is cooking unevenly, try reducing the temperature slightly or rotating the sheet midway through the baking process.
Check for Doneness: If your granola doesn’t seem done after the recommended time, don’t hesitate to leave it in the oven a little longer. Always rely on the golden-brown color and the crunch test to determine doneness.
—
Conclusion
By following these baking tips, you can ensure that your homemade granola comes out crispy, golden, and perfectly baked every time. The key to great granola is a moderate oven temperature, stirring during baking, monitoring the granola in the final stages, and allowing it to cool properly. With just a little patience and attention to detail, you’ll be able to bake granola that’s crunchy, flavorful, and entirely to your liking. Whether you prefer clusters or loose granola, these tips will help you achieve your ideal texture and flavor. Happy baking!
Cooling and Storage: Preserving Freshness and Crunch
After your homemade granola comes out of the oven, it’s important to give it proper attention in the cooling and storage stages. These steps ensure that your granola stays crunchy, fresh, and delicious for longer. Cooling the granola correctly allows it to crisp up and set, while proper storage techniques help maintain its texture and prevent it from going stale. Here’s how to handle your granola after baking for the best results.
1. Cooling the Granola Properly
Once the granola has finished baking and reached a perfect golden-brown color, the next step is to cool it down. Cooling is crucial for ensuring that the granola becomes crunchy and firm, rather than softening as it cools. Here are the key steps for cooling granola:
Let It Cool on the Baking Sheet: After you’ve removed the granola from the oven, allow it to cool on the baking sheet for at least 10-15 minutes. The residual heat from the baking sheet will continue to crisp up the granola. If you stir it too soon, the granola may lose its texture and won’t form the crispy clusters many people love.
Don’t Stir Immediately: While it may be tempting to stir or break apart the granola as soon as it comes out of the oven, it’s best to let it sit undisturbed for a bit. This allows the sugars to cool and harden, resulting in the desired crunchy texture. If you stir it while it’s still hot, the granola might crumble, and you could lose those perfect clusters.
Spread Out for Faster Cooling: If you’re in a rush, you can spread the granola out on a cooling rack after 10 minutes of cooling on the baking sheet. The elevated rack allows air to circulate underneath, cooling the granola more quickly and ensuring that it remains crisp.
Room Temperature: Granola should be allowed to cool to room temperature before being stored. This prevents condensation from forming inside the storage container, which could make your granola soggy. It’s important to wait for it to cool completely, especially if you’re looking for a crunchy texture.
2. Breaking Up Clusters
Once the granola has cooled and set, you can break it into chunks or clusters if desired. If you’re aiming for large granola clusters, avoid stirring the granola during the cooling process. Allow it to form natural clumps as it cools, then gently break them apart. If you prefer a looser granola, you can break it up further after it cools down completely.
Handling Clusters: To get nice, large clusters, it’s best to let the granola cool in one piece and break it apart with your hands afterward. Using a spoon or spatula to break it up while it’s still warm could result in smaller, less appealing pieces.
Size Control: The size of the clusters is up to you. You can gently break the granola into bite-sized pieces, or leave it in larger chunks, depending on your preference and how you plan to use the granola (e.g., as a topping for yogurt or as a snack).
3. Storing Granola for Freshness
Proper storage is key to keeping your homemade granola fresh and crunchy for longer periods. If stored incorrectly, granola can lose its crisp texture, absorb moisture, or even become stale. Here’s how to store your granola to preserve its texture and flavor:
Airtight Container: Once your granola has cooled completely, transfer it to an airtight container. A glass jar, a resealable plastic bag, or a plastic or metal container with a tight-fitting lid all work well. Make sure the container is sealed tightly to keep air out and prevent the granola from going stale.
Avoid Moisture: Granola should be kept in a cool, dry place. Moisture is the enemy of granola because it can cause it to become soft and lose its crunch. Do not store granola in the refrigerator, as it can trap moisture and lead to sogginess. A pantry or cupboard with consistent temperature is ideal.
Glass Jars or Mason Jars: For a rustic, aesthetic touch, you can store your granola in mason jars or clear glass jars. These are not only practical but also make it easy to see how much granola is left and maintain the crunch factor.
Resealable Bags for Smaller Portions: If you want to portion your granola for easy access or travel, you can store it in resealable ziplock bags. These are especially handy for smaller servings, and you can easily take granola with you for on-the-go snacks.
4. How Long Does Homemade Granola Last?
Granola typically has a long shelf life, provided it’s stored correctly. When kept in an airtight container and in a dry, cool environment, homemade granola can last for up to 2 to 3 weeks.
Signs of Freshness: To check if your granola is still fresh, test it for crunchiness. If the granola has lost its crisp texture or feels soft or chewy, it may have absorbed moisture and is no longer as pleasant to eat. The flavor will also be a good indicator—if it smells off or tastes stale, it’s time to toss it.
Freezing for Longer Storage: If you want to extend the shelf life of your granola, you can store it in the freezer. Place the granola in a freezer-safe bag or container to keep it fresh for up to 3 months. When you’re ready to enjoy it, simply take out the portion you need and let it come to room temperature before eating.
5. Using Granola Before It Becomes Stale
To avoid your granola going stale, it’s best to use it within a reasonable amount of time. However, if you have a large batch and aren’t sure how to use it all up before it loses its freshness, here are a few ideas:
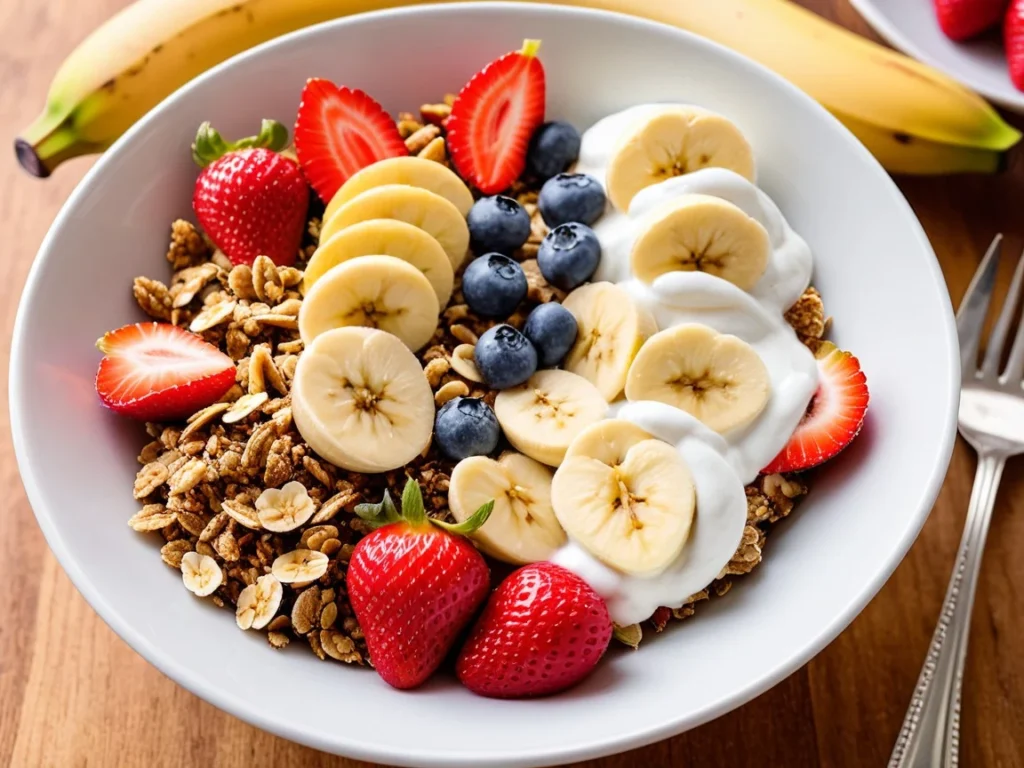
Topping for Smoothies: Add granola as a topping for your smoothie bowl for extra crunch and nutrients.
Mix with Yogurt: Combine your granola with Greek yogurt or plant-based yogurt for a delicious breakfast or snack.
Baking with Granola: You can also incorporate granola into other recipes, such as baked goods (muffins, cookies) or sprinkle it over pancakes or waffles.
Trail Mix: If you’ve made a nutty or dried fruit-packed granola, you can use it as a base for trail mix, mixing it with other dried fruits, nuts, or chocolate.
6. Checking for Freshness Regularly
To ensure that your granola is still fresh, give it a check every few days, especially if you’re storing it for an extended period. If you notice any moisture buildup inside the storage container or if it begins to soften, it may be time to either eat it quickly or transfer it to a new, drier container.
—
Conclusion
Proper cooling and storage are essential to preserving the flavor and texture of your homemade granola. Allowing the granola to cool completely ensures it reaches the perfect crunch, and storing it in an airtight container in a cool, dry place helps maintain its freshness for weeks. By following these tips, you’ll be able to enjoy your granola at its best for as long as possible. Whether you store it for snacking, sprinkling over your favorite yogurt, or using it as a topping for breakfast dishes, your homemade granola will remain fresh, flavorful, and crunchy when properly cooled and stored.
Customizing Your Granola: Flavor and Texture Ideas
Sweet or Savory Variations: Customizing Your Granola for Every Taste
One of the greatest advantages of making homemade granola is the ability to customize it to your personal taste preferences. While traditional granola is often associated with sweet flavors, there’s no reason why you can’t create a batch that is savory, or even a blend of both sweet and savory. Whether you have a sweet tooth or prefer more savory, herb-infused treats, granola offers endless possibilities for experimentation. Let’s dive into how you can create sweet and savory variations to cater to every flavor preference.
1. Sweet Granola Variations
Sweet granola is the classic choice for most granola recipes. It’s typically made with natural sweeteners like honey, maple syrup, or agave nectar, which caramelize and coat the oats and nuts, adding both sweetness and crunch. Here are a few ways you can adjust the sweetness of your granola or introduce new sweet flavors:
Fruits and Dried Fruits: To elevate the sweetness and add chewy texture, consider adding dried fruits like raisins, cranberries, apricots, blueberries, or apples. These will infuse your granola with natural sweetness and enhance its flavor complexity. You can also include fresh fruits like bananas or mango once the granola is done baking for a fresh burst of sweetness.
Spices: Sweet granola can benefit from a blend of warming spices. Consider adding a teaspoon of cinnamon, nutmeg, ginger, or vanilla extract to your mix. These spices enhance the sweetness without the need for excess sugar, creating a fragrant and flavorful base. You can also use pumpkin pie spice or apple pie spice for a seasonal twist.
Chocolate Flavors: For those who love chocolate, try mixing in chocolate chips, cacao nibs, or even cocoa powder to create a chocolatey granola. Dark chocolate pairs beautifully with the natural sweetness of honey or maple syrup, adding richness to the overall flavor. You can also swirl melted chocolate into your granola during the last few minutes of baking for a decadent, glossy finish.
Nut Butters: Sweetened nut butters, like peanut butter, almond butter, or cashew butter, can be a great addition for a creamy, rich flavor. Nut butters can also contribute healthy fats and protein to your granola, making it more filling. They can be melted and mixed into the granola before baking to create a sticky, golden coating that adds both flavor and crunch.
Coconut Flakes: Shredded coconut or coconut flakes bring a tropical sweetness to granola. Coconut pairs well with nuts and seeds, and it adds a chewy, slightly caramelized texture as it bakes. You can use unsweetened coconut for a more subtle coconut flavor, or sweetened coconut for a stronger burst of sweetness.
2. Savory Granola Variations
While granola is often seen as a sweet snack, there’s no reason why it can’t go in a savory direction. Savory granola can be an exciting and unique snack, perfect for topping salads, soups, or even enjoying on its own as a crunchy snack. To create a savory granola, you’ll want to focus on herbs, spices, and ingredients that bring umami and depth rather than sweetness.
Herbs and Spices: Swap out the sweet spices for savory herbs and spices like rosemary, thyme, oregano, garlic powder, onion powder, paprika, cumin, or turmeric. A touch of black pepper and sea salt can also be added to enhance the flavors. For a Mediterranean flair, try mixing in dried oregano and parsley; for an Asian-inspired granola, use five-spice powder and ginger.
Cheese: If you’re feeling adventurous, add parmesan or cheddar to your granola. Cheese can bring a deliciously savory, umami flavor to your batch. Just be careful not to add cheese before baking, as it can burn. Instead, sprinkle grated cheese over the granola during the last few minutes of baking, or stir it in once the granola is cool.
Nuts and Seeds: Opt for more savory nuts and seeds such as sunflower seeds, pumpkin seeds, walnuts, or almonds. Nuts like pecans or hazelnuts can also work well in savory granola for a more earthy, hearty flavor. Add a few tablespoons of sesame seeds or flaxseeds for extra crunch and texture.
Olive Oil or Avocado Oil: Instead of coconut or vegetable oil, try using extra virgin olive oil or avocado oil to coat your oats and nuts. These oils not only add depth and flavor but also bring healthy fats to your granola. They complement the savory seasonings, giving the granola a rich, satisfying taste.
Nutritional Yeast: For a cheesy, nutty flavor without the dairy, sprinkle in some nutritional yeast. This ingredient is vegan-friendly and adds a savory, umami flavor to your granola, which works well with garlic powder, onion powder, and other savory spices.
Soy Sauce or Tamari: To introduce a rich, salty flavor, you can drizzle a small amount of soy sauce or tamari over the granola before baking. This will give your granola an Asian-inspired taste that pairs wonderfully with roasted nuts and seeds.
3. Sweet and Savory Hybrid Granola
For those who enjoy a bit of balance, combining both sweet and savory elements in one granola can create an exciting and unique flavor profile. A sweet-savory hybrid granola can be the perfect snack for those who can’t decide between the two. Here’s how you can do it:
Sweet + Savory Nuts: Combine sweetened nuts like maple-roasted pecans with savory sunflower seeds or pumpkin seeds for a contrast of flavors and textures.
Honey and Herbs: Use honey or maple syrup as a base but add a touch of rosemary, thyme, or lavender to create a sweet-herbaceous combination that’s perfect for snacking.
Fruit and Cheese: Add dried fruit like apricots or cherries alongside parmesan or goat cheese in your granola. This combination offers a delightful contrast between sweet, tangy fruit and salty, savory cheese.
Spiced Chocolate: Combine chocolate with spices like cinnamon or chili powder to create a sweet-spicy granola. The addition of heat gives it an exciting twist.
4. How to Customize for Your Preferences
Making your own sweet or savory granola means you have full control over the ingredients and flavor combinations. Here are a few tips for customizing your granola:
Adjust the Sweetness: Depending on your taste, adjust the amount of sweetener (like honey or maple syrup). If you want a lighter sweetness, use less. For a richer, sweeter flavor, increase the sweetener slightly.
Season to Taste: Whether sweet or savory, always taste your granola before baking. Add a pinch more salt, spice, or sweetener as needed until you reach the perfect balance of flavors.
Texture Variations: If you prefer a crunchier, more textured granola, use fewer wet ingredients. For a chewier granola, increase the wet ingredients slightly, but be careful not to make it too moist, or it will not bake properly.
—
Conclusion
Whether you lean toward sweet or savory, the beauty of homemade granola lies in its versatility. By adjusting the types of sweeteners, spices, herbs, and additional ingredients, you can create a granola that suits any flavor preference or dietary need. Sweet granola works wonderfully with fruits, nuts, and spices, while savory versions can be enhanced with herbs, cheese, and savory oils. If you’re feeling adventurous, combining both sweet and savory ingredients creates a truly unique snack. Whatever your choice, your homemade granola will be a personalized creation that can be enjoyed as a snack, a topping, or a trail mix.
Crunch Factor: Achieving the Perfect Granola Crispiness
One of the most important characteristics of homemade granola is its crunch—that satisfying, crispy texture that makes it so enjoyable. Whether you’re eating it as a snack, topping yogurt, or adding it to a smoothie bowl, the crunch factor is essential to the overall enjoyment of granola. Achieving the perfect crunch can be a bit tricky, but with the right techniques and ingredients, you can ensure that your granola has that ideal crispy, crunchy texture. Let’s dive into the key factors that influence granola’s crunchiness and how you can master them.
1. The Right Balance of Wet and Dry Ingredients
The texture of your granola depends largely on the balance of wet and dry ingredients. Too much liquid can result in soggy, chewy granola, while too little can lead to dry, overly crispy, and crumbly bits. To achieve the right level of crunch, it’s important to use a moderate amount of wet ingredients (like honey, maple syrup, or oils) and ensure that they coat the oats and nuts evenly. Here are some tips for getting the balance just right:
Coating the Oats: Make sure that every oat flake is evenly coated with your sweetener and oil mixture. This helps the oats crisp up uniformly during baking. Use a spoon or spatula to mix everything well before spreading it on the baking sheet.
Adjust Wet Ingredients for Crunch: If you prefer a crunchier granola, slightly reduce the amount of liquid ingredients. Conversely, if you enjoy a chewier texture, increase the wet ingredients slightly. However, be cautious about using too much moisture as it may prevent the granola from crisping up properly.
2. Baking Temperature and Time
The baking temperature and time are crucial for achieving the right level of crunch. If the granola bakes too quickly at a high temperature, it may burn on the outside before fully crisping inside. On the other hand, baking at a too-low temperature may result in soggy granola that doesn’t crisp up. Here’s how to get the perfect bake:
Low and Slow: Bake your granola at a lower temperature, typically around 300°F (150°C). This allows the granola to cook evenly and ensures it gets crispy throughout. Slow baking helps the ingredients dry out and become crunchy without burning the sugars or nuts.
Stirring for Even Cooking: Stir the granola every 10-15 minutes while baking to ensure that it cooks evenly. This helps the oats and nuts toast without burning, and it prevents the granola from sticking to the baking sheet. If you want big clusters, avoid stirring too often, as this will break them up.
Check for Doneness: Keep an eye on your granola as it nears the end of its baking time. The granola should be golden brown, not too dark. If you find that your granola is too soft at the end of the baking time, leave it in the oven for another 5-10 minutes. The granola will continue to crisp up as it cools.
3. The Role of Oil and Fats
Adding a source of fat, such as coconut oil, olive oil, butter, or nut butters, is key to achieving a crunchy texture. The fat helps to create a crispy coating on the oats, nuts, and seeds, which contributes to the overall crunchiness. Here’s how fats influence the texture:
Crisping Power of Fat: Oils and fats help to create a barrier around the oats and nuts, which prevents them from absorbing too much moisture during baking. This allows the granola to bake up crispy and crunchy.
Choosing the Right Fat: For a lighter crunch, opt for coconut oil or olive oil. For a richer, denser crunch, consider using butter or ghee. Nut butters like peanut butter or almond butter can also help create a denser, chewier crunch, especially if you like your granola a little stickier.
Amount of Fat: Use about 1/4 to 1/3 cup of oil per batch of granola. Too little fat will prevent the oats from crisping up, and too much can make the granola greasy. Adjust the amount based on how rich and crunchy you want the final product.
4. Proper Cooling to Maintain Crunch
Cooling your granola properly after baking is just as important as the baking process itself when it comes to achieving the perfect crunch. If you don’t cool your granola correctly, it could lose its texture and become soft or stale. Here’s how to cool it to retain maximum crispness:
Let It Cool Completely: Once your granola is done baking, allow it to cool on the baking sheet for at least 10-15 minutes. During this time, the residual heat will continue to dry out the granola, allowing it to firm up and become crispier. Avoid touching the granola while it’s cooling to let the clusters set in place.
Don’t Stir While Cooling: After baking, resist the temptation to stir your granola while it’s cooling. If you stir it too soon, it can break up the clusters and reduce the overall crunchiness. Let it set in large chunks or clumps as it cools to form crispy clusters.
Avoid Moisture: To preserve the crunch, don’t store your granola while it’s still warm. Warm granola can trap moisture inside a storage container, leading to sogginess. Wait until the granola is completely cool before transferring it to storage.
5. The Importance of Clumping
For many people, part of the appeal of homemade granola is the big, crunchy clusters. Achieving these clusters can add to the overall texture and increase the crunch factor. If you prefer clustered granola, follow these tips:
Use Less Stirring: During the baking process, stir the granola less frequently to allow the oats to clump together. Stirring too much breaks up the clusters and results in loose granola. A less-stirred granola will naturally form larger, crispier clusters.
Press Down the Granola: After spreading the granola on the baking sheet, gently press it down with a spatula to create a packed layer. This encourages the granola to form larger clumps while baking. When it cools, you can break it into large, crispy chunks.
Add More Binding Ingredients: If you prefer more clustered granola, you can increase the amount of wet ingredients like honey or maple syrup slightly. This helps bind the oats together. However, be careful not to add too much, as it may make the granola overly sticky and prevent it from crisping up properly.
6. The Role of Baking Sheets and Parchment Paper
Choosing the right baking surface also plays a role in the final texture. The baking sheet should be large enough to spread the granola in an even layer to ensure uniform cooking.
Use Parchment Paper: Always line your baking sheet with parchment paper. This prevents the granola from sticking to the surface and makes for easier cleanup. It also allows the heat to circulate around the granola, helping it crisp up on all sides.
Avoid Overcrowding the Pan: Spread the granola evenly across the baking sheet. If the granola is piled too high or overcrowded, it won’t bake evenly, and some parts may become soggy. If necessary, bake in batches or use multiple pans.
—
Conclusion
The perfect crunch factor is all about balance, technique, and patience. From the right combination of wet and dry ingredients to proper baking time, temperature, and cooling methods, achieving crispy, crunchy granola requires attention to detail. Whether you’re after a loose granola or crunchy clusters, following these tips will help you achieve the ideal texture. By controlling the fat content, stirring at the right moments, and ensuring proper cooling, you’ll be able to create granola that’s perfectly crunchy, every time.
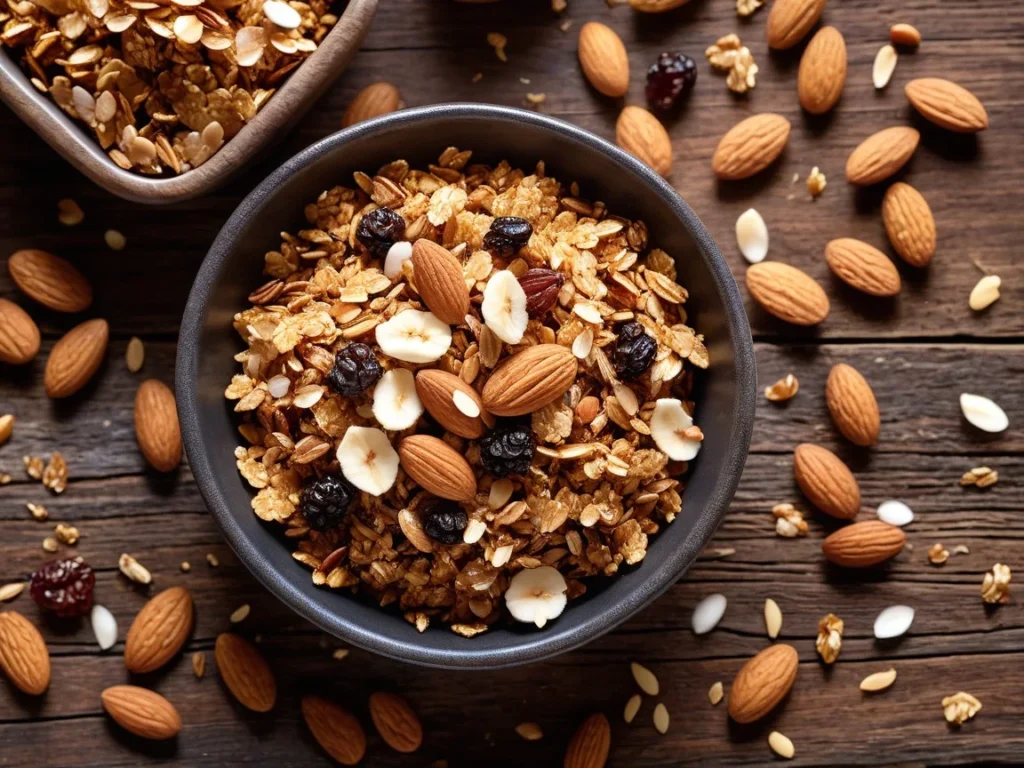
Unique Add-Ins: Elevating Your Granola with Creative Ingredients
While the core ingredients of homemade granola—oats, nuts, seeds, and sweeteners—form the foundation of the recipe, adding unique ingredients is what truly makes your granola stand out. These special add-ins not only enhance the flavor and texture but also allow you to experiment and personalize your granola to suit your tastes or dietary preferences. By introducing creative ingredients, you can elevate your granola to the next level, making it more exciting, nutritious, and tailored to your own style. Here are some unique add-ins you can try to bring new flavors and textures to your homemade granola.
1. Superfoods for Extra Nutrition
Incorporating superfoods into your granola is a great way to boost its nutritional profile. Superfoods are nutrient-dense ingredients packed with vitamins, minerals, antioxidants, and healthy fats. Adding them to your granola can turn your snack into a powerhouse of goodness:
Chia Seeds: These tiny seeds are packed with omega-3 fatty acids, fiber, and protein. They add a slight crunch and can also absorb liquid to help bind the granola together, offering a boost in both texture and nutrition. Soaking them before adding them to the mix can also give them a pudding-like consistency if desired.
Hemp Seeds: These seeds are rich in protein, omega-3s, and minerals. They have a mild, nutty flavor and soft texture that blends easily into granola. They’re also great for people following a vegan or plant-based diet.
Goji Berries: Known for their high levels of antioxidants, vitamin C, and iron, goji berries add a slight tartness and chewy texture to granola. Their bold red color also brings a pop of vibrancy to your mix.
Acai Powder: This antioxidant-rich powder is a perfect way to infuse granola with the distinctive flavor and health benefits of acai berries. Acai powder is high in vitamins A, C, and E and can give your granola a rich, berry-like taste.
Maca Powder: Derived from a root vegetable, maca powder is known for its adaptogenic properties, which can help support energy levels and balance hormones. It has a mild, earthy flavor and works well in granola, especially when paired with other spices like cinnamon or vanilla.
Spirulina: A superfood algae, spirulina is packed with protein, iron, and vitamin B12. Its deep green color and slightly bitter taste make it a unique addition. A small amount goes a long way, so use it sparingly to avoid overwhelming the flavor.
2. Unique Sweeteners
While classic granola recipes often rely on honey or maple syrup for sweetness, experimenting with alternative sweeteners can give your granola a more unique flavor profile. Here are a few options to explore:
Date Syrup: Made from dates, this syrup has a rich, caramel-like sweetness. It’s packed with fiber and minerals like potassium and magnesium. It also has a lower glycemic index than traditional sugars, making it a great option for those looking to manage blood sugar levels.
Coconut Sugar: Derived from the sap of coconut trees, coconut sugar has a rich, molasses-like flavor and contains iron, zinc, and calcium. It has a lower glycemic index compared to refined sugars, making it a great substitute for those looking for a more health-conscious sweetener.
Maple Sugar: If you love the flavor of maple syrup but want a more granular form, maple sugar is a great option. It brings the same rich, woodsy flavor as maple syrup but without the moisture. It’s also packed with minerals like calcium, potassium, and magnesium.
Monk Fruit Sweetener: A natural, calorie-free sweetener, monk fruit provides the sweetness of sugar without the calories or carbs. It’s perfect for those following low-carb or diabetic-friendly diets. It has a slightly different taste than traditional sweeteners, offering a clean, sweet flavor with no aftertaste.
Agave Syrup: A sweeter alternative to honey, agave syrup has a mild flavor and a lower glycemic index than table sugar. It’s easy to incorporate into granola and pairs well with nuts and seeds.
3. Exotic Fruits and Dried Fruits
While typical dried fruits like raisins, cranberries, and apricots are common in granola, there are many other exotic fruits and dried fruits that can add a unique twist to your mix. These fruits often have distinctive flavors and textures that elevate the granola:
Dragon Fruit: Known for its vibrant pink skin and white flesh speckled with tiny black seeds, dragon fruit is an exotic fruit that adds both color and a mild sweetness to granola. Dried dragon fruit slices bring a chewy texture and a subtle, tropical flavor.
Dried Mango: Sweet and chewy, dried mango can add a tropical twist to your granola. It pairs well with coconut flakes and nuts, creating a satisfying snack that’s full of flavor and texture.
Dried Pineapple: Sweet, tangy, and chewy, dried pineapple brings a tropical flair to granola. Its tartness balances the richness of nuts and seeds, creating a delicious contrast of flavors. Be sure to use unsweetened dried pineapple to avoid an overly sugary granola.
Dried Figs: Offering a natural sweetness and a chewy texture, dried figs are a fantastic add-in to your granola. They’re also packed with fiber and potassium, making them a great source of nutrition.
Dried Goji Berries: These small, bright-red berries are nutrient-dense and add a slightly tart flavor and chewy texture to granola. Rich in antioxidants, vitamin C, and iron, goji berries also bring a pop of color and excitement to your mix.
4. Unconventional Nuts and Seeds
While almonds, walnuts, and pecans are common granola ingredients, you can add some less traditional nuts and seeds for a fun and unexpected crunch. These unique additions bring not only a variety of textures but also new flavors to your granola:
Pistachios: Known for their distinct green color and nutty flavor, pistachios are a fun, unique nut to add to granola. They offer a creamy texture and a light sweetness that pairs well with dried fruits and spices.
Brazil Nuts: These large, nutrient-dense nuts have a rich, buttery flavor that adds a satisfying crunch to granola. High in selenium, they provide numerous health benefits while making the granola extra indulgent.
Macadamia Nuts: For a rich, creamy texture, macadamia nuts are a
Tips and Tricks for Perfect Granola Every Time
Avoid Over-Baking: Ensuring Perfectly Crispy, Not Burnt, Granola
One of the most common mistakes when making homemade granola is over-baking. While it’s tempting to leave your granola in the oven for a bit longer to ensure it’s crunchy, over-baking can lead to burnt, overly dark, and bitter granola that’s no longer enjoyable. Achieving the right level of crispiness is a delicate balance, and over-baking is one of the easiest ways to ruin your batch. Here’s how to avoid over-baking and get that perfect golden-brown, crispy texture.
1. Keep an Eye on the Time
Granola typically requires a low and slow bake, usually around 300°F (150°C), but the exact baking time can vary depending on your recipe and the thickness of the granola layer on the baking sheet. To prevent over-baking:
Set a Timer: Always set a timer when you first put your granola in the oven. It’s easy to get distracted, so setting an alarm helps ensure you don’t forget about it. For most recipes, granola should bake for 20-30 minutes, depending on your oven and the ingredients. However, don’t rely solely on the timer—keep an eye on the color and texture of the granola throughout the baking process.
Stir Occasionally: Stirring the granola every 10–15 minutes is crucial for even cooking and preventing burning. As the granola bakes, the edges tend to brown faster, while the middle might stay soft. Stirring helps redistribute the granola to ensure that all parts cook evenly. It also gives you an opportunity to monitor its progress and prevent the granola from burning in spots.
2. Color is Key: Watch for Golden-Brown
The most reliable indicator that your granola is ready is its color. The granola will gradually change from its initial pale, wet mixture to a golden-brown shade as it cooks. This transformation is important, as it signals that the granola has dried out and is starting to crisp. However, it can be easy to mistake a slight golden color for readiness and leave it in the oven too long. To avoid over-baking:
Look for Golden Brown: Your granola is done when it reaches a golden-brown hue. The oats and nuts should look toasted, but not dark brown or burnt. Check for any dark spots, especially on the edges or bottom, as these can be signs of over-baking. Keep in mind that granola will continue to cook and crisp up slightly once you remove it from the oven.
Smell the Granola: As granola bakes, it will fill your kitchen with a warm, nutty aroma. If the smell becomes too strong or starts to resemble burning, it’s a clear sign that you may have left it in the oven too long.
3. Factor in Residual Heat
The baking process doesn’t stop as soon as you remove the granola from the oven. The residual heat in the granola and on the baking sheet will continue to cook the mixture for a few minutes. This means you can often take the granola out of the oven a little earlier than you might think:
Remove It Just Before It’s Fully Done: If you’re aiming for crispy granola, it’s better to err on the side of caution and take it out a minute or two before it’s fully done. The granola will continue to crisp up as it cools, so removing it just before it reaches its perfect golden-brown color will ensure it doesn’t become overly hard or burnt during the cooling phase.
Cool on the Sheet: Allow the granola to cool completely on the baking sheet. The residual heat on the baking sheet will help dry out the granola, ensuring it’s fully crispy. If you transfer it too soon, it may become soft or lose its crunch.
4. Keep Granola Evenly Spread on the Sheet
How you arrange the granola on the baking sheet can also affect how evenly it cooks. Overcrowding the granola on the pan can result in uneven baking, causing parts of the granola to bake faster while others remain soft or raw. To avoid over-baking in these circumstances:
Use a Large Sheet: Make sure you’re using a large enough baking sheet to spread the granola out in an even layer. If the granola is packed too tightly, the parts in the middle may stay moist while the edges burn. If necessary, use two sheets or bake in batches.
Don’t Pile It Too High: Spread the granola out in a single, even layer. This allows the heat to circulate around the oats, nuts, and seeds, ensuring they cook uniformly. If you want larger clusters, you can gently press down the granola before baking, but avoid stacking it too thickly.
5. Check Early and Often
Another way to prevent over-baking is to check on your granola early in the baking process. As the granola gets close to being done, the color can change quickly, and it’s easy to miss the sweet spot where it’s perfectly crispy but not burnt. Here’s how to stay ahead of the game:
Check the Granola Every 10-15 Minutes: While baking, set a timer to remind yourself to check the granola at regular intervals. Give it a gentle stir to ensure even cooking and check its color and smell. You’ll be able to gauge how much longer it needs based on these checks.
Know Your Oven: Different ovens may cook at slightly different rates, so it’s important to understand how your oven behaves. Some ovens may cook faster, while others may take a little longer. If you’re trying out a new recipe, check on your granola a bit earlier than suggested to prevent over-baking.
—
Conclusion
Over-baking is one of the most common pitfalls in making granola, but with a little attention and care, you can avoid this mistake and achieve perfectly crispy, golden-brown granola every time. By monitoring the time, color, and smell, and factoring in the residual heat, you’ll ensure that your granola is crunchy without being burnt. Remember, granola continues to crisp up after you remove it from the oven, so it’s best to take it out just before it reaches its peak crunch. With these tips in mind, you’ll be able to make delicious, homemade granola that’s perfectly toasted and irresistibly crispy!
Balancing Ingredients: Creating a Well-Rounded, Flavorful Granola
One of the keys to making the best homemade granola is achieving the right balance between the various ingredients. Granola is a combination of grains, sweeteners, fats, flavors, and textures, and when these components are thoughtfully balanced, the result is a delicious, satisfying snack that has the perfect texture and taste. Getting the proportions just right can be the difference between a batch of granola that’s too sweet, too dry, or too clumpy. Here’s how to balance the ingredients to create a granola recipe that hits all the right notes.
1. Proportions of Dry vs. Wet Ingredients
Granola relies on a balance between dry and wet ingredients to ensure that it crisps up properly without becoming overly soggy or sticky. If the ratio of wet ingredients is too high, your granola will likely bake into a gooey mess, while an excess of dry ingredients can lead to a brittle, overly crumbly batch.
Oats as the Base: Oats make up the majority of most granola recipes and should always be the base. About 2 to 3 cups of oats per batch is typical, but this can vary depending on how much granola you want to make. To keep the granola from getting too dense or heavy, try not to exceed more than 3 cups of dry ingredients for every cup of wet ingredients.
Wet Ingredients (Sweeteners and Fats): The wet ingredients in granola—such as honey, maple syrup, coconut oil, or butter—are crucial for binding the granola together and adding sweetness and flavor. However, too much wet ingredients can make your granola overly sticky and clumpy, while too little will result in dry, crumbly clusters.
For a good balance, aim for about 1/2 to 2/3 cup of liquid sweeteners (like honey or maple syrup) per 3 cups of oats. Add about 1/4 cup of fat (like coconut oil or butter) to ensure the granola crisps up nicely in the oven. If you’re using a sticky ingredient like molasses, use it sparingly to avoid overwhelming the granola with too much moisture or a dominant flavor.
2. Sweetness vs. Savory Notes
Granola typically leans toward the sweet side, but balancing sweetness with a touch of savory flavors or even a spicy kick can create a more interesting and well-rounded final product. If your granola is too sweet, it can feel overpowering or cloying, while an overly savory granola might not appeal to the typical granola-loving palate.
Balancing Sweetness: To balance out the sweetness of your granola, you can use a combination of sweeteners. For example, mix a natural sweetener like maple syrup with coconut sugar or a touch of brown sugar for depth of flavor. You could also add a pinch of salt to enhance the sweetness, a common trick used in baking to bring out flavors.
Adding Savory Flavors: A dash of sea salt or a light sprinkling of herbs like rosemary can add an unexpected savory note to your granola. If you want to create a more nutty flavor profile, roasted nuts and seeds can contribute richness without overwhelming the sweetness.
A Hint of Spice: If you want to add complexity to your granola without making it too sweet, try incorporating spices like cinnamon, ginger, or cardamom. These warm spices not only bring depth but also provide a balance to the sugar, creating a more well-rounded flavor. A pinch of cayenne pepper can even give your granola a surprising kick if you want to balance the sweetness with a little heat.
3. Textural Balance: Crunch vs. Chewiness
One of the main appeals of granola is its texture, and balancing between crunchy and chewy elements is essential for a satisfying snack. If your granola is all crunchy, it might become difficult to chew and too hard, while a granola that’s too chewy could feel soft and lack the satisfying crunch that most people expect.
Crunch from Nuts and Seeds: Adding a variety of nuts and seeds to your granola not only boosts its nutritional content but also contributes a nice, crunchy texture. Nuts like almonds, pecans, and walnuts are great options, while pumpkin seeds and sunflower seeds provide extra bite. However, avoid adding too many seeds, as they can make the granola too hard or dense.
Chewiness from Dried Fruits: To balance the crunch, you can add dried fruits such as raisins, dried cranberries, apricots, or figs. Dried fruits give granola a chewy texture that contrasts beautifully with the crunch of nuts and oats. However, be mindful of the quantity, as too much dried fruit can make the granola overly sweet or sticky. A good balance is typically around 1/2 cup to 1 cup of dried fruits for every 3 cups of oats.
Use of Oats: The oats themselves provide the backbone of the texture. They’re soft when baked but can get a nice crispy edge if mixed with enough fat and sweetener. The type of oats you use can also impact the texture. Old-fashioned rolled oats are a great choice because they hold their shape during baking and offer a satisfying chewiness without becoming too soft. Quick oats can turn mushy if over-mixed or baked for too long, so they are not ideal for maintaining a crunchy texture.
4. Flavor Variety in Every Bite
Balancing flavor complexity within your granola can make it even more exciting. A granola that’s too one-dimensional can quickly become boring, while one that’s carefully crafted with multiple flavor notes can be exciting to eat. Think about the balance of sweetness, saltiness, spiciness, and nutty flavors when choosing your ingredients.
Sweet and Salty Harmony: Adding a small amount of sea salt or kosher salt is essential in balancing the sweetness of the granola. Salt helps to enhance the natural flavors of the oats and nuts, making the sweetness feel more rounded and less overpowering. You could also experiment with flavored salts like pink Himalayan salt or smoked salt for a unique flavor twist.
Citrus or Vanilla for Brightness: Sometimes a subtle hint of vanilla extract or the zest of orange or lemon can add a layer of brightness to your granola, helping to balance out the heavier, more rich flavors of nuts and seeds. These citrusy or vanilla flavors bring a refreshing, aromatic quality that lifts the overall taste.
Balance Sweeteners: If you’re using multiple sweeteners (e.g., honey, maple syrup, and coconut sugar), make sure they complement each other rather than compete. The goal is to have a cohesive sweetness profile that’s neither too sugary nor too subtle.
5. The Importance of Texture Balance
Beyond the flavor balance, textural balance is critical to a great granola. Granola should be crunchy with some parts that form clusters and other parts that are lighter and crisper. To achieve this:
Cluster Formation: To create clusters, mix your ingredients thoroughly but ensure that you’re not over-mixing. The fat and sweeteners should coat the dry ingredients enough to stick, but not so much that everything clumps together before baking. If you prefer large clusters, you can lightly press the mixture down with a spoon on the baking sheet before baking.
Even Cooking: Ensure your granola is spread out evenly on the baking sheet. Uneven distribution can cause certain areas to overcook while others remain undercooked, leading to an imbalance in the final texture.
—
Conclusion
Balancing ingredients is the key to making homemade granola that’s flavorful, crunchy, and perfectly textured. By carefully controlling the proportions of dry and wet ingredients, blending sweet and savory flavors, and striking a balance between crunchy and chewy, you can create a granola that’s well-rounded and satisfying in every bite. Experiment with different combinations of ingredients until you find the ideal balance for your taste. Whether you like your granola sweet, savory, or somewhere in between, mastering ingredient balance ensures a batch that’s both delicious and nutritionally sound.
Batch Cooking and Storage: Maximizing Freshness and Convenience
One of the biggest advantages of making homemade granola is the ability to prepare large batches in advance. This allows you to enjoy a healthy, ready-to-eat snack at any time, without needing to make it from scratch every few days. However, for batch cooking to be effective, it’s important to know how to properly store and preserve your granola to maintain its crunch, freshness, and flavor. Here’s how to approach batch cooking and storage so that your homemade granola stays as fresh and delicious as the day you made it.
1. Preparing Large Batches
Making a large batch of granola is easy and convenient, but it does require some thought to ensure that it cooks evenly and doesn’t become too dry or too dense. Batch cooking allows you to prepare granola in advance for several days or even weeks, saving time in the long run.
Batch Size Considerations: When deciding on the size of your batch, consider how much granola you typically consume in a week. A standard batch for most recipes is usually around 4–6 cups of oats, which results in about 6–8 servings. If you eat granola regularly, you can double or triple the recipe to make enough for multiple weeks. However, avoid making excessively large batches unless you have enough space to store it properly.
Even Layering on Baking Sheets: When making large batches, it’s essential to spread the granola out in an even layer on your baking sheets. If the mixture is too thick or unevenly spread, the granola may bake unevenly, with some parts overdone while others remain undercooked. You may need to use multiple baking sheets or bake in batches to ensure everything cooks at the right pace.
Adjusting Baking Time: If you’re doubling or tripling the recipe, be mindful of the baking time. Larger batches may require additional time in the oven to ensure everything bakes evenly. Start by baking for the usual time indicated in the recipe, then check the granola every 5 minutes to make sure it’s not over-baking. It may need a few more minutes than a single batch, but be careful not to burn it.
2. Cooling the Granola Properly
After baking, cooling your granola properly is crucial for achieving the right texture. If granola is stored while still warm, it may become soft or soggy, and you’ll lose the coveted crunchy texture that makes it so enjoyable.
Cool on the Baking Sheet: Once the granola is done baking, it should be left on the baking sheet to cool. The residual heat from the baking sheet helps it firm up and become crispier. Avoid moving the granola to another container or bowl while it’s still hot, as this can cause it to lose its crunch. Allow it to cool for at least 30 minutes to an hour, or until it reaches room temperature.
Separate Clusters if Necessary: If you’re looking for clustered granola, gently break it into pieces with a spatula after it has cooled. If you prefer smaller pieces or loose granola, simply break up larger clumps to distribute the crispiness more evenly. Cooling the granola before breaking it apart is key to maintaining the clusters without them becoming overly sticky or soft.
3. Storing Granola for Freshness
Proper storage is essential to ensure that your batch-cooked granola stays fresh, crunchy, and flavorful for as long as possible. Granola has a relatively long shelf life, but exposure to air, moisture, or heat can cause it to lose its crunch or develop an off flavor.
Airtight Containers: To preserve the freshness and texture of your homemade granola, store it in airtight containers. Glass jars, plastic storage bins, or resealable bags are great options for keeping air out. The less air exposure, the longer the granola will stay crunchy and flavorful. Mason jars or vacuum-sealed bags can also be effective for long-term storage.
Cool, Dry Storage: Keep the granola in a cool, dry place, away from heat sources or sunlight. A pantry, kitchen cabinet, or airtight container in a cupboard works well. Do not store granola in warm or humid environments, as moisture can cause it to lose its texture or develop mold.
Avoid Storing in the Fridge: While you might think storing granola in the fridge would keep it fresher, it can actually cause it to lose its crunch due to moisture in the air. It’s best to avoid refrigeration unless you have added ingredients that require it, such as certain fruits or wet ingredients that may spoil. Storing granola in a dry pantry or cabinet is your best bet.
4. Freezing Granola for Long-Term Storage
If you find yourself with a particularly large batch of granola, or if you want to preserve it for a longer period, freezing is an excellent option. Freezing helps prevent the granola from going stale while maintaining its freshness and crispiness for months.
Freezing in Portions: If you plan to freeze your granola, it’s best to do so in smaller portions. This allows you to defrost only the amount you need at a time, without having to thaw the entire batch. You can divide the granola into freezer-safe bags or airtight containers, making sure to remove as much air as possible before sealing.
Storage Duration: Granola can be kept in the freezer for up to 3–6 months. When you’re ready to eat it, simply remove a portion from the freezer and let it come to room temperature. Granola won’t require any reheating and should remain just as crunchy and fresh as it was when first made.
5. Shelf Life of Homemade Granola
Homemade granola has a relatively long shelf life compared to many homemade snacks, but the exact duration can depend on the ingredients and how it’s stored.
Fresh Granola: If stored in an airtight container in a cool, dry place, homemade granola will usually stay fresh for 2 to 3 weeks. The best way to tell if it’s still good is to check for any changes in smell or texture. If the granola starts to feel soggy or develops an off taste, it’s time to discard it.
Factors That Impact Shelf Life: The shelf life of your granola can be affected by ingredients like dried fruits, which can introduce moisture and shorten the shelf life. If your granola includes ingredients that spoil quickly (e.g., fresh fruit or yogurt), it may only stay fresh for a few days at room temperature, and you should refrigerate or freeze it.
—
Conclusion
Batch cooking your granola and storing it properly is a smart way to always have a nutritious, homemade snack on hand. With careful cooling, airtight storage, and the option of freezing, you can preserve your granola’s crunch and freshness for weeks or even months. By following the right storage practices, you’ll not only save time but also ensure that your granola stays as delicious and nutritious as it was when it was first baked. Whether you enjoy it for breakfast, as a topping for yogurt, or simply as a snack, batch cooking and storing granola properly guarantees you’ll always have a satisfying treat available.
Serving Suggestions: Creative Ways to Enjoy Your Homemade Granola
Once you’ve perfected your homemade granola, the fun doesn’t stop with just preparing it. Granola is a highly versatile food, and there are numerous serving suggestions that can elevate your granola experience. Whether you prefer it as a breakfast, snack, or dessert, here are a variety of ways to enjoy your homemade granola that will keep your meals exciting and flavorful.
1. Granola as a Breakfast Cereal
One of the most common and satisfying ways to serve granola is as a breakfast cereal. Granola can be paired with a variety of liquids and toppings to create a delicious and nutritious breakfast.
With Milk or Dairy Alternatives: For a classic cereal experience, serve your granola with a bowl of milk (dairy or non-dairy such as almond milk, oat milk, or coconut milk). The milk will soften the granola slightly, making it easier to chew, while still preserving its crunchy texture. For an extra protein boost, you could opt for Greek yogurt as the base for a more filling breakfast.
With Fresh Fruit: Granola pairs wonderfully with fresh fruits, adding both color and flavor. You can top your bowl with sliced bananas, berries (strawberries, blueberries, or raspberries), mango, or apple slices. The fresh fruit provides vitamins and fiber, while the granola adds crunch and richness. You can also combine fruit with yogurt for a granola parfait.
As a Parfait: Layer your granola with yogurt and fresh fruit to create a beautiful and nutritious parfait. Alternate layers of creamy yogurt, colorful fruit, and crunchy granola for a visually appealing breakfast that’s full of texture and flavor. You can also drizzle a little honey or sprinkle some cinnamon on top for extra flavor.
2. Granola in Smoothies or Smoothie Bowls
Granola makes an excellent topping or ingredient in both smoothies and smoothie bowls, providing a nice crunch to complement the creamy textures.
Smoothie Bowl Topping: For a smoothie bowl, pour your favorite blended smoothie (like a berry, mango, or green smoothie) into a bowl and top with a generous amount of granola. The crunch of the granola contrasts perfectly with the smoothness of the fruit and yogurt, creating a satisfying texture. You can also add extra toppings like coconut flakes, chia seeds, or sliced almonds for added nutrition.
Granola in Smoothies: For a more substantial smoothie, add a small handful of granola directly into the blender. Granola can act as a natural thickener and add some fiber to your smoothie. Combine it with fruits like bananas, berries, and spinach for a nutrient-packed drink.
3. Granola with Yogurt or Cottage Cheese
Granola is a fantastic pairing with both yogurt and cottage cheese, creating a combination of creamy and crunchy textures. These pairings also make for a high-protein breakfast or snack.
Yogurt Parfait: Layer Greek yogurt with granola and fruits like kiwi, berries, or pomegranate seeds for a healthy breakfast or snack. The protein from the yogurt and the fiber from the granola create a satisfying meal that will keep you full longer. Add a drizzle of honey or maple syrup for a touch of sweetness.
Cottage Cheese Combo: For a savory take, mix your granola with cottage cheese and add toppings like tomato slices, fresh herbs, or even a sprinkle of sea salt. This combination offers a balance of protein and healthy fats, and it’s a great way to enjoy granola in a savory context.
4. Granola as a Snack
Granola is the perfect on-the-go snack, providing a convenient, nutritious option for when you’re hungry between meals. Its portability and energy-boosting qualities make it a great choice for keeping in your bag or desk for a quick snack.
Single-Serve Snack: For a quick snack, simply grab a handful of granola, and you’re good to go. Pair it with a piece of fruit like an apple or banana for a well-balanced snack that provides a combination of carbs, fiber, and protein.
Granola Bars or Energy Bites: Granola can also be turned into energy bars or bites by pressing it into a pan and binding it together with nut butter and sweeteners like honey or maple syrup. Once pressed and chilled, cut into bars or roll into bite-sized balls for an easy, portable snack.
5. Granola in Baked Goods
Granola can be incorporated into baked goods to add texture, flavor, and nutritional value to a variety of treats.
In Muffins or Bread: Add granola to your muffin or bread batter for extra texture and flavor. The granola will create a delightful crunch in each bite. Granola pairs especially well in banana bread or carrot muffins, complementing the flavors while boosting fiber and protein content.
As a Topping for Baked Goods: Sprinkle granola over baked goods like coffee cakes, fruit crisps, or oatmeal cookies before baking. The granola will crisp up nicely in the oven, adding both texture and flavor to the final product.
6. Granola as a Dessert Topping
Granola can be used creatively as a topping for a variety of desserts, elevating simple treats with its crunchy texture and rich flavor.
On Ice Cream or Frozen Yogurt: Top a bowl of ice cream or frozen yogurt with granola to add crunch and a nutty flavor that complements the creamy texture of the dessert. You can also drizzle with chocolate or caramel sauce for a decadent treat.
With Puddings or Custards: Add granola to puddings, custards, or rice pudding for extra texture. The granola will contrast beautifully with the smooth, creamy base, creating a delightful mix of flavors and textures.
7. Granola as a Salad Topping
Granola can be used as a surprising and delicious topping for both sweet and savory salads.
On Fruit Salads: Sprinkle granola over a fresh fruit salad to add a crunchy texture and extra flavor. Combine a mix of tropical fruits like pineapple, mango, and papaya, and top with granola to make it more filling.
On Green Salads: For a more savory approach, use granola as a topping on green salads. The crunch from the granola can enhance salads made with arugula, spinach, or mixed greens, while a tangy vinaigrette dressing adds a burst of flavor. You can add cheese, seeds, and roasted vegetables for a full meal.
—
Conclusion
Granola is more than just a breakfast food—it’s a versatile ingredient that can be enjoyed in many ways. Whether you’re serving it with milk for a classic cereal, topping a smoothie bowl for added crunch, incorporating it into baked goods, or using it as a snack, the possibilities are endless. Experiment with different toppings, pairings, and combinations to find new ways to enjoy your homemade granola and make each serving an exciting, delicious experience. With so many options, you’ll never run out of ideas for how to use granola in your meals and snacks.
Conclusion: Embrace the Versatility of Homemade Granola
Homemade granola is more than just a delicious snack—it’s a versatile and healthy addition to your daily routine. By making it at home, you not only have full control over the ingredients but can also customize the flavor, texture, and nutritional profile to suit your preferences. From the base of oats to a variety of add-ins, sweeteners, and optional extras, every batch of homemade granola is an opportunity to experiment and create something uniquely yours.
With endless serving suggestions, whether as a breakfast, snack, or dessert, homemade granola fits seamlessly into any meal. Whether you enjoy it with milk, on top of yogurt, in a smoothie bowl, or as a topping for baked goods, its crunchy texture and nutrient-packed ingredients make it a truly satisfying choice. And with tips on batch cooking and storage, you can enjoy fresh granola whenever you need it, with minimal effort.
So, whether you’re preparing a batch to start your day or creating a wholesome snack for later, homemade granola is a convenient, customizable, and healthy option that’s sure to become a staple in your kitchen. Embrace the versatility and creativity that comes with making your own granola, and enjoy all the health benefits it has to offer.