
Pizza, a beloved dish enjoyed by people around the world, has its roots in Italy but has since evolved into countless variations. Whether it’s a thin, crispy crust topped with fresh ingredients or a thick, cheesy delight, pizza is a versatile and comforting meal that can be customized to suit anyone’s tastes. Making pizza at home allows you to take control of every aspect, from the dough to the toppings, ensuring a fresh, delicious result every time. In this guide, we’ll walk you through easy, step-by-step instructions for creating your very own homemade pizza, perfect for any occasion. From crafting the ideal dough to baking it to crispy perfection, you’ll learn how to make pizza just like a pro!
Essential Ingredients for Homemade Pizza
Pizza Dough Recipe
The foundation of any great homemade pizza starts with the dough. A good pizza dough is essential for achieving a delicious, chewy, and crisp crust. Making the dough from scratch is simpler than it may seem and requires just a few basic ingredients. Here’s how to prepare the perfect dough for your pizza.
Key Ingredients for Pizza Dough:
Flour: The best pizza dough starts with high-quality all-purpose flour or, for an even better texture, Italian “00” flour. This type of flour is finely milled and creates a dough that’s soft yet strong enough to hold toppings.
Yeast: Yeast is what helps the dough rise and gives it its light, airy texture. You can use active dry yeast or instant yeast. Instant yeast is more convenient since it doesn’t need to be activated in warm water.
Olive Oil: Olive oil not only adds flavor to the dough but also helps with the dough’s texture, making it soft and easy to handle. It also helps prevent the dough from sticking while rolling out.
Salt: Salt is crucial for flavor, and it also strengthens the dough by controlling the fermentation process. Be sure not to skip this ingredient, as it brings out the other flavors in the dough.
Warm Water: The water should be warm (around 100°F/37°C), not hot, as water that’s too hot can kill the yeast, and cold water will prevent the dough from rising properly.
Step-by-Step Instructions for Making Pizza Dough:
1. Activate the Yeast: Start by dissolving the yeast in warm water. Add a pinch of sugar to help the yeast activate. Let it sit for about 5 minutes until it becomes frothy. If the yeast doesn’t foam, it may be expired, and you’ll need to try again with fresh yeast.
2. Combine Dry Ingredients: In a large mixing bowl, combine the flour and salt. Mix well so the salt is evenly distributed throughout the flour.
3. Mixing the Dough: Make a well in the center of the dry ingredients and pour in the activated yeast mixture and olive oil. Stir with a spoon or your hands until the dough starts to come together. If the dough feels too sticky, add a little more flour, a tablespoon at a time. If it feels too dry, add a bit more water.
4. Knead the Dough: Once the dough begins to form, transfer it to a floured surface and knead it for about 8-10 minutes. The dough should be smooth, elastic, and slightly tacky, but not sticky. If necessary, sprinkle more flour as you knead to prevent sticking.
5. First Rise: Place the dough in a lightly oiled bowl and cover it with a clean kitchen towel or plastic wrap. Let it rise in a warm place for about 1-1.5 hours, or until it has doubled in size. This step is crucial for developing the dough’s airy texture.
6. Punch Down and Shape the Dough: After the dough has risen, punch it down gently to release the air bubbles. Transfer the dough to a floured surface and divide it into portions depending on how many pizzas you plan to make. Roll each portion into a ball, and let it rest for another 10-15 minutes before shaping.
Tips for the Best Pizza Dough:
Don’t rush the fermentation: Allowing the dough to rise slowly at room temperature will help develop better flavor and texture. If you’re in a hurry, you can speed up the process by placing the dough in a warm oven with just the light on.
Resting is key: After dividing the dough, let it rest for a few minutes before rolling it out. This makes the dough easier to stretch and less likely to tear.
Cold fermentation: For even better flavor, consider letting the dough rise in the refrigerator overnight. The cold fermentation process allows the dough to develop a more complex taste.
With this dough recipe, you’ll be ready to make the perfect pizza crust every time. Whether you prefer a thin, crispy crust or a thicker, chewy one, this dough is versatile and can be shaped to your preference!
Best Pizza Sauce
The pizza sauce is the unsung hero of a great pizza. A well-made sauce not only enhances the flavor of the pizza but also ties all the ingredients together. While store-bought pizza sauces can be convenient, making your own sauce from scratch is easy and yields a fresh, flavorful result. Whether you prefer a classic tomato sauce or a more creative twist, this section will guide you through creating the best pizza sauce for your homemade pizza.
Classic Tomato Pizza Sauce:
A traditional tomato-based pizza sauce is simple to make and only requires a few high-quality ingredients. Here’s how to create it:
Key Ingredients for Tomato Pizza Sauce:
Canned Tomatoes: Use high-quality canned San Marzano tomatoes for the best flavor. These tomatoes are known for their rich, sweet taste and are often used in authentic Italian pizza recipes.
Olive Oil: Olive oil helps to bring out the richness of the tomatoes while adding a touch of smoothness to the sauce.
Garlic: Fresh garlic adds depth and aroma to the sauce. If you prefer a milder flavor, you can sauté the garlic before adding the tomatoes.
Dried Herbs: Oregano, basil, and thyme are the classic herbs that give pizza sauce its distinctive taste. Adjust the amounts to your personal preference.
Salt and Sugar: Salt brings out the flavors of the tomatoes, while a pinch of sugar can balance the acidity of the tomatoes and enhance the sweetness.
Red Pepper Flakes (Optional): For a bit of heat, add red pepper flakes to taste.
How to Make Classic Tomato Pizza Sauce:
1. Prepare the Tomatoes: If using whole canned tomatoes, crush them by hand or blend them for a smoother sauce. Some people prefer a chunkier texture, so you can skip the blending if desired.
2. Cook the Sauce: In a saucepan, heat olive oil over medium heat. Add minced garlic and sauté for 1-2 minutes until fragrant but not browned. Then, add the crushed tomatoes, dried herbs, salt, and sugar. Stir well to combine.
3. Simmer the Sauce: Let the sauce simmer for about 20-30 minutes, stirring occasionally. The sauce should thicken slightly and develop a rich, aromatic flavor. Taste the sauce and adjust the seasoning as needed.
4. Cool and Use: Allow the sauce to cool before spreading it on your pizza dough. If it’s too runny, you can cook it for a few more minutes to thicken.
Alternative Pizza Sauces:
While tomato sauce is the classic choice, there are plenty of other options for those who want to try something different. Here are a few variations:
1. White Sauce (Alfredo Style): White sauce is a creamy, rich alternative to tomato sauce, and it pairs perfectly with white pizzas topped with ricotta, mozzarella, and veggies or chicken.
Key Ingredients for White Sauce:
Heavy cream or whole milk
Butter
Garlic
Parmesan cheese
Fresh herbs (e.g., thyme, rosemary)
How to Make White Sauce: Melt butter in a pan, sauté garlic, then add the cream and bring it to a simmer. Stir in grated Parmesan and fresh herbs. Cook until the sauce thickens, then spread it over the pizza dough.
2. Pesto Sauce: Pesto sauce, made from fresh basil, garlic, pine nuts, Parmesan, and olive oil, is a vibrant alternative that adds a fresh, herbal flavor to pizza.
Key Ingredients for Pesto Sauce:
Fresh basil leaves
Pine nuts (or walnuts for a more affordable option)
Garlic
Parmesan cheese
Olive oil
Salt and pepper
How to Make Pesto Sauce: Blend fresh basil, garlic, pine nuts, Parmesan, and olive oil until smooth. Season with salt and pepper to taste. This sauce pairs wonderfully with mozzarella and arugula.
3. BBQ Sauce: For a smoky, tangy twist, BBQ sauce works well on pizzas, especially those with chicken, bacon, or grilled vegetables.
Key Ingredients for BBQ Sauce:
Ketchup
Brown sugar
Vinegar
Worcestershire sauce
Smoky spices (paprika, garlic powder, onion powder)
How to Make BBQ Sauce: Mix ketchup, brown sugar, vinegar, and Worcestershire sauce in a saucepan. Add the spices and simmer until thickened, about 10-15 minutes. This sauce pairs perfectly with grilled chicken or pulled pork pizza.
Tips for the Perfect Pizza Sauce:
Avoid watery sauce: If your sauce is too watery, it can make your pizza soggy. You can cook it down longer to thicken it, or strain the excess liquid before applying it to the pizza.
Make it ahead of time: Pizza sauce, especially the tomato variety, tastes even better when it has time to sit and develop its flavors. Make your sauce a day ahead and store it in an airtight container in the fridge.
Use fresh ingredients: The quality of the ingredients you use will directly affect the flavor of your sauce. Fresh herbs and high-quality tomatoes make a big difference.
Control the seasoning: Pizza sauce should be flavorful but not overpowering. Taste it as you go and adjust the seasoning to your liking. You can add a pinch of red pepper flakes for spice or a little more sugar to balance the acidity.
—
With this pizza sauce recipe, you’ll be able to craft the perfect base for your pizza. Whether you stick with the traditional tomato sauce, try a creamy white sauce, or go for a flavorful pesto or BBQ sauce, you’ll elevate your homemade pizza to the next level with these easy-to-make options.
Mozzarella Cheese
Mozzarella cheese is the quintessential topping for pizza, and it plays a crucial role in achieving that perfect melt, stretch, and flavor. The type of mozzarella you choose can make or break your pizza, so it’s important to understand the differences between the varieties and how to use them to create the ideal pizza experience. Here, we’ll dive into everything you need to know about mozzarella cheese, from the different types to tips for getting the best results.
Types of Mozzarella Cheese:
1. Fresh Mozzarella (Bocconcini or Ciliegine)
Fresh mozzarella is the most traditional type of mozzarella used on pizza. It is soft, moist, and has a delicate, milky flavor. It comes in various forms, including small balls (ciliegine) or larger balls (bocconcini). It’s typically packed in water or whey to preserve its freshness.
Why Use Fresh Mozzarella?
Meltability: Fresh mozzarella melts beautifully, giving your pizza that signature gooey, stringy texture.
Flavor: Fresh mozzarella has a milder and creamier flavor compared to its aged counterpart, making it ideal for pairing with fresh toppings like basil, tomatoes, and olive oil.
Texture: It has a soft, creamy texture when it’s melted, which creates the ideal pizza cheese stretch.
Tips for Using Fresh Mozzarella:
Drain and Pat Dry: Fresh mozzarella is packed in liquid to maintain its freshness. Before using it on your pizza, make sure to drain it well and pat it dry with paper towels to prevent excess moisture that can make your pizza soggy.
Slice or Tear: Slice or tear the mozzarella into pieces to distribute it evenly across your pizza. Large chunks can also be placed in the center for a more indulgent, cheesy bite.
2. Low-Moisture Mozzarella (Shredded Mozzarella)
Low-moisture mozzarella is the most commonly used cheese for pizza in the U.S. and around the world. It has a firmer texture and a longer shelf life, which makes it convenient for many pizza recipes. It’s usually sold pre-shredded, although you can find it in block form as well.
Why Use Low-Moisture Mozzarella?
Longer Shelf Life: It lasts longer than fresh mozzarella and is less prone to spoilage.
Better for Melting: Low-moisture mozzarella has a firmer texture that allows it to melt more evenly and form a nice, golden-brown crust.
More Cheese Coverage: Since it’s typically shredded, it’s easy to spread over the pizza, ensuring an even layer of cheese.
Tips for Using Low-Moisture Mozzarella:
Avoid Overheating: While low-moisture mozzarella melts well, it can become greasy or tough if overcooked. Bake your pizza until the cheese is bubbly and golden, but avoid cooking it too long.
Combine with Other Cheeses: Low-moisture mozzarella pairs well with other cheeses like Parmesan, provolone, or cheddar to enhance flavor and texture.
3. Buffalo Mozzarella
Buffalo mozzarella, made from water buffalo milk, has a rich, slightly tangy flavor and a creamy texture. It’s often considered a premium mozzarella and is a staple in traditional Neapolitan pizza.
Why Use Buffalo Mozzarella?
Richer Flavor: Buffalo mozzarella has a more intense and complex flavor compared to cow’s milk mozzarella, making it ideal for more gourmet pizzas.
Creamier Texture: It has a smooth, silky texture that adds a luxurious mouthfeel to the pizza.
Tips for Using Buffalo Mozzarella:
Handle with Care: Buffalo mozzarella is very soft and delicate, so it’s important to slice or tear it gently. Due to its high moisture content, make sure to drain it thoroughly before using it.
Pair with Simpler Toppings: Buffalo mozzarella’s bold flavor shines best when paired with minimal toppings, such as a classic Margherita pizza with fresh basil and a drizzle of olive oil.
How to Use Mozzarella Cheese on Pizza:
1. Even Distribution: Whether you’re using fresh or low-moisture mozzarella, it’s essential to distribute the cheese evenly across the pizza. Too much cheese in one area can result in a greasy pizza, while too little can leave the crust dry. Aim for a balanced amount of cheese, covering the dough but leaving some space for the toppings.
2. Layering the Cheese: When assembling your pizza, you can add mozzarella cheese directly on top of the sauce, followed by your choice of toppings. If using fresh mozzarella, you can tear it into smaller pieces and scatter it across the pizza.
3. Melting and Browning: Mozzarella has a natural tendency to melt beautifully and create that iconic cheese pull. However, it can sometimes brown too quickly in the oven, especially if you’re using low-moisture mozzarella. To achieve a perfect golden top, ensure your oven is at the right temperature—typically between 450°F (232°C) and 500°F (260°C)—and keep an eye on the pizza to avoid overbaking.
Why Mozzarella is the Best Cheese for Pizza:
Perfect Melting Properties: Mozzarella has the ideal combination of moisture content and fat that allows it to melt perfectly, creating a smooth and stretchy cheese layer.
Mild, Creamy Flavor: Its neutral yet creamy taste complements a variety of toppings, from vegetables to meats, without overpowering them.
Signature Stretch: The signature cheese pull that mozzarella offers is a hallmark of a great pizza. It’s a key part of the pizza-eating experience, and mozzarella is the cheese that delivers it best.
Other Cheese Options to Complement Mozzarella:
While mozzarella is essential for pizza, you can enhance the flavor and texture of your pizza by mixing in other cheeses. Some popular options include:
Parmesan: Adds a nutty, sharp flavor that complements mozzarella.
Ricotta: For a creamy, slightly sweet topping, especially on white pizzas.
Provolone: Offers a sharper, more complex flavor and pairs well with mozzarella for extra depth.
—
Mozzarella cheese is the cornerstone of any great pizza. Whether you prefer the milder, creamier flavor of fresh mozzarella or the rich, stretchy melt of low-moisture mozzarella, understanding the differences and how to use them properly ensures a perfect pizza every time. Don’t forget to experiment with mixing different cheeses for a customized, flavorful pie!
Pizza Topping
Pizza toppings are where creativity and personal preference come into play. The beauty of making pizza at home is that you have the freedom to choose exactly what goes on top, whether you’re in the mood for a classic Margherita or something more adventurous. The right combination of toppings can elevate your pizza from good to great, and in this section, we’ll explore traditional favorites, unique combinations, and tips for building the perfect pizza.
Traditional Pizza Toppings:
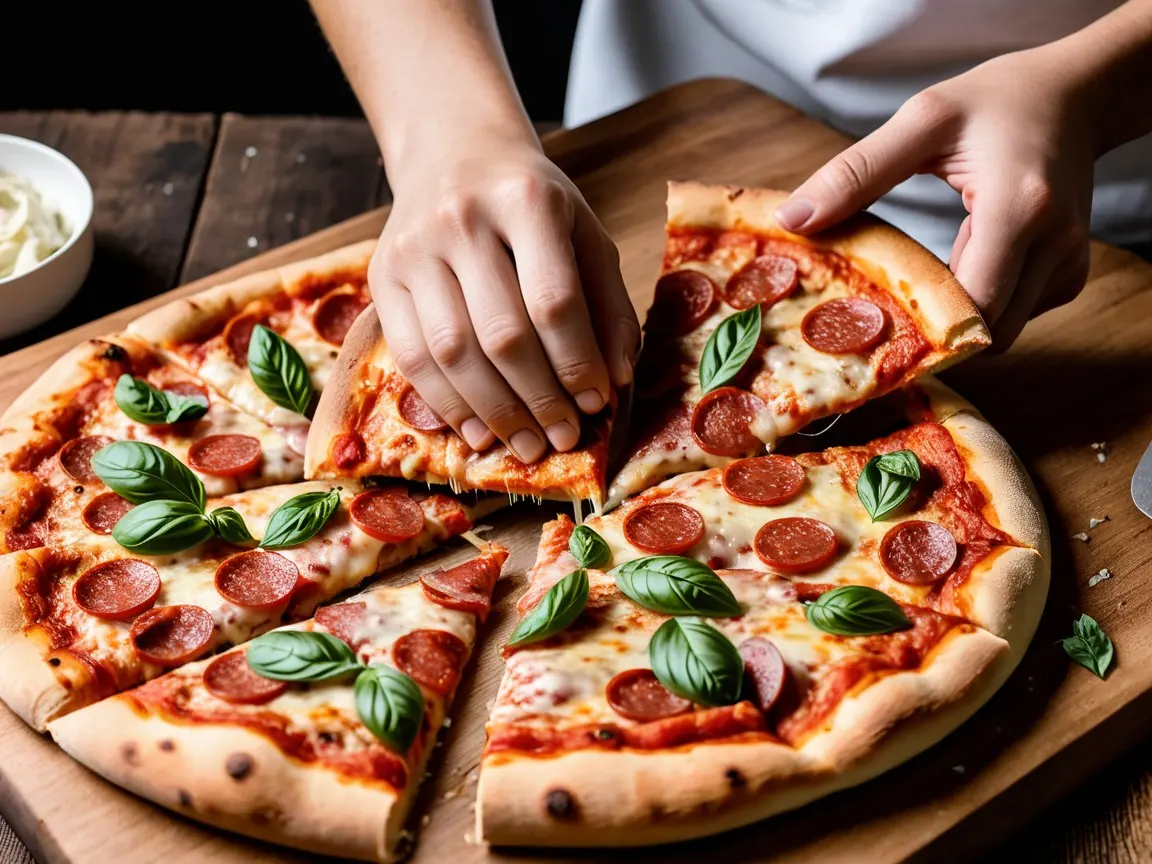
1. Pepperoni
Pepperoni is arguably the most iconic pizza topping. Its spicy, smoky flavor and crispy edges make it a favorite for many pizza lovers. When it cooks in the oven, pepperoni crisps up beautifully, releasing its oils and adding a savory richness to each bite.
Tips for Using Pepperoni:
Even Layering: Scatter the pepperoni slices evenly across the pizza to ensure each slice has a little bit of the crispy, flavorful topping.
Use High-Quality Pepperoni: For the best results, choose a good-quality pepperoni with balanced spice and flavor. Look for options with no added nitrates or preservatives for a more authentic taste.
2. Mushrooms
Mushrooms are a versatile topping that adds an earthy, umami flavor. They pair well with nearly any other topping, making them a go-to for both vegetarian and meat-lovers pizzas. Varieties like cremini, shiitake, or portobello can add depth to your pizza’s flavor profile.
Tips for Using Mushrooms:
Pre-cook Mushrooms: Mushrooms release a lot of moisture when they cook, which can make your pizza soggy. To avoid this, sauté the mushrooms in a little olive oil before adding them to the pizza.
Slice Evenly: Thinly slice your mushrooms so they cook evenly and blend well with the other toppings.
3. Olives
Olives, both black and green, are classic toppings on Mediterranean-style pizzas. Their salty, briny taste provides a sharp contrast to the richness of cheese and the sweetness of tomato sauce, balancing the flavors beautifully.
Tips for Using Olives:
Pit the Olives: If you’re using whole olives, be sure to pit them before adding them to your pizza.
Go for Variety: Experiment with different types of olives, like Kalamata, to add depth to your pizza.
4. Onions
Onions are a great way to add sweetness and a bit of bite to your pizza. Whether you prefer raw red onions, caramelized onions for a rich, sweet flavor, or white onions for a milder taste, onions are a versatile topping.
Tips for Using Onions:
Caramelize for Depth: If you like a sweeter flavor, try caramelizing the onions in a pan with olive oil until they turn golden and soft.
Balance the Intensity: Red onions are milder when raw and can be used in larger quantities, while white onions are sharper and should be used sparingly.
Creative and Gourmet Pizza Toppings:
1. Fresh Basil
Fresh basil is a must-have for a classic Margherita pizza. Its fragrant, slightly peppery flavor complements the mozzarella cheese and tomato sauce beautifully. Adding fresh basil after the pizza has baked helps preserve its flavor and vibrant color.
Tips for Using Fresh Basil:
Add After Baking: To preserve its delicate flavor, sprinkle fresh basil on the pizza after it’s come out of the oven.
Pair with Simpler Ingredients: Fresh basil works best when paired with simple, fresh toppings like tomatoes, mozzarella, and olive oil.
2. Arugula
Arugula adds a peppery kick to your pizza. Often used as a garnish after baking, it provides a crisp, fresh contrast to the warm, gooey cheese and rich toppings beneath.
Tips for Using Arugula:
Fresh Arugula: Add the arugula to your pizza once it’s out of the oven to keep it fresh and vibrant. It wilts quickly in the heat and will lose its signature crunch if added before baking.
Pair with Prosciutto: For a simple, gourmet combination, top your pizza with fresh arugula and thin slices of prosciutto.
3. Prosciutto
Prosciutto is a dry-cured, thinly sliced Italian ham with a delicate, salty flavor. It’s perfect for adding a touch of luxury to your homemade pizza. It pairs wonderfully with arugula, fresh mozzarella, or a drizzle of balsamic glaze.
Tips for Using Prosciutto:
Add After Baking: Prosciutto is delicate, so it’s best added to the pizza after it has finished baking to preserve its texture and flavor.
Use Sparingly: Since prosciutto is quite salty, a little goes a long way.
4. Goat Cheese
Goat cheese adds a creamy, tangy element to any pizza. It pairs particularly well with roasted vegetables or sweet toppings like caramelized onions and figs. It also works wonderfully with pesto sauce for a rich and flavorful pizza.
Tips for Using Goat Cheese:
Crumble for Even Coverage: Crumble goat cheese over your pizza before baking to ensure that the tangy flavor is spread evenly.
Pair with Sweet Toppings: Goat cheese works wonderfully with sweet toppings like figs, honey, or caramelized onions to create a balance of flavors.
Vegetarian Pizza Toppings:
1. Bell Peppers
Bell peppers, with their sweet and crunchy texture, are an excellent addition to vegetarian pizzas. You can use red, yellow, or green peppers, each bringing a slightly different flavor profile.
Tips for Using Bell Peppers:
Pre-roast or Sauté: Roasting or sautéing the peppers slightly before adding them to the pizza helps bring out their natural sweetness and softens them for a better texture.
Slice Thinly: Slice the peppers thinly to ensure they cook evenly and don’t overpower other toppings.
2. Spinach
Spinach adds a touch of freshness and a subtle earthy flavor to your pizza. It pairs well with ricotta cheese or as a complement to other hearty toppings like mushrooms or artichokes.
Tips for Using Spinach:
Wilt the Spinach: To avoid excess moisture on your pizza, sauté or wilt the spinach in a pan before using it as a topping.
Combine with Garlic: Pair spinach with garlic and olive oil for a simple but flavorful topping.
3. Artichokes
Artichokes, either fresh or marinated, are a flavorful and slightly tangy addition to pizza. They work especially well on Mediterranean-style pizzas with olives, sun-dried tomatoes, and feta cheese.
Tips for Using Artichokes:
Drain Marinated Artichokes: If using marinated artichokes from a jar, make sure to drain them well to avoid excess liquid on your pizza.
Slice Thinly: Thin slices of artichokes cook evenly and complement other Mediterranean toppings like olives and tomatoes.
Tips for the Perfect Pizza Toppings:
Don’t Overload the Pizza: It’s tempting to add all your favorite toppings, but too many can make the pizza soggy or unbalanced. Aim for a mix of 3-5 toppings for the best results.
Distribute Evenly: Spread your toppings evenly to ensure each slice has a good balance of flavors and textures. Don’t pile toppings all in the center of the pizza.
Mind the Cooking Time: Different toppings require different cooking times. For example, vegetables like mushrooms and onions might need to be pre-cooked, while delicate ingredients like fresh basil should be added after baking to preserve their flavor.
—
The right toppings are what truly make your pizza your own. Whether you stick to the classics like pepperoni and mushrooms or explore more adventurous options like goat cheese and prosciutto, the possibilities are endless. Get creative and enjoy experimenting with different combinations to find your perfect pizza!
Step-by-Step Guide to Making Pizza Dough
Kneading the Dough
Kneading is one of the most crucial steps in making pizza dough. It develops the gluten, which gives the dough structure, elasticity, and the ability to rise properly. Kneading the dough correctly ensures a soft, chewy texture with a light, airy crumb. While kneading might seem like a simple task, it requires proper technique and attention to detail. In this section, we’ll walk you through how to knead pizza dough effectively, share tips to get it just right, and explain why this step is so important for creating the perfect pizza crust.
Why Kneading is Important:
Kneading the dough activates the gluten in the flour. Gluten is a protein that gives the dough its structure and allows it to stretch and rise. When you knead, you’re essentially creating a network of gluten strands that trap air bubbles, which makes the dough rise and become light and chewy once baked.
If you don’t knead the dough properly, you might end up with a dense, tough crust that lacks the signature airy, chewy texture of great pizza. Kneading also ensures that the ingredients are fully incorporated and evenly distributed throughout the dough.
How to Knead Pizza Dough:
1. Prepare the Dough:
Before you start kneading, make sure that your dough has been mixed thoroughly. After combining your flour, water, yeast, and salt into a sticky dough, you’ll be ready to knead. At this point, the dough will likely be soft and somewhat sticky, which is perfectly normal.
2. Lightly Flour Your Surface:
Lightly flour your work surface and your hands to prevent the dough from sticking. Be cautious not to use too much flour, as you don’t want to dry out the dough. A little dusting is enough to help with handling.
3. Start Kneading:
Place the dough on the prepared surface and begin pushing it down with the palms of your hands. Fold the dough over itself, then press it down again. The motion should be firm but gentle—don’t be too aggressive, as you want to develop the dough without tearing it.
4. The Push and Fold Method:
The most common kneading method is the “push and fold” technique:
Push: With the heels of your hands, push the dough away from you with firm, even pressure.
Fold: Fold the dough back over itself toward you.
Repeat this process, rotating the dough 90 degrees after every fold to ensure even kneading. The idea is to stretch and fold the dough to build up the gluten network.
5. Check the Dough’s Consistency:
As you knead, the dough will gradually become less sticky and more elastic. Keep kneading until the dough feels smooth, elastic, and slightly tacky but not sticky. If it’s still too sticky, add small amounts of flour, but avoid overdoing it, as too much flour can make the dough stiff and dry.
6. Knead for the Right Amount of Time:
Typically, kneading should last about 8-10 minutes. However, you can tell the dough is ready when it feels smooth and bounces back when you press it lightly with your finger. If you pull a small piece of dough apart, it should stretch without tearing, forming a thin membrane (called the “windowpane test”).
The Windowpane Test:
One of the best ways to tell if your dough is kneaded properly is by performing the windowpane test. Take a small piece of dough and stretch it between your fingers. If the dough forms a thin, translucent sheet without tearing, it’s ready. This indicates that the gluten has developed well and the dough is elastic enough to hold air as it rises.
Using a Stand Mixer for Kneading:
If you don’t want to knead by hand, a stand mixer can be a great alternative. Using a dough hook attachment will help you knead the dough efficiently while saving time and effort. Here’s how to do it:
1. Attach the Dough Hook: Place the dough ingredients in the mixer bowl, and attach the dough hook.
2. Mix the Dough: Turn the mixer on low speed to combine the ingredients until the dough forms a rough ball.
3. Knead the Dough: Increase the speed to medium and let the stand mixer knead the dough for about 6-8 minutes. The dough should be smooth and elastic when done.
4. Check the Dough: Just as you would with hand kneading, check for the smooth, tacky texture and perform the windowpane test to ensure the dough is kneaded properly.
Kneading Tips for Success:
1. Don’t Over-Knead: While it’s important to knead the dough thoroughly, over-kneading can lead to a tough texture. Once the dough is smooth, elastic, and passes the windowpane test, it’s ready for the next stage.
2. Resting the Dough: After kneading, it’s important to let the dough rest. Resting allows the gluten to relax, which makes it easier to shape and stretch. It also gives the dough time to rise, creating the light, airy texture you want in your crust. Typically, you should let your dough rise for 1-2 hours, or until it has doubled in size. You can also refrigerate the dough overnight for a slower fermentation process, which will improve the flavor.
3. Hydration Level: The amount of water in your dough (hydration) affects the final texture. A wetter dough (higher hydration) tends to be more airy and bubbly, creating a slightly chewy, open crumb. If you want a crispier, more sturdy crust, you can reduce the water content slightly.
4. Room Temperature Matters: The temperature of your dough and your environment matters during kneading. If your dough feels too firm and difficult to knead, try letting it rest for a few minutes. Warmer environments help the dough rise faster, while colder environments slow down the fermentation process.
5. Avoid Over-Flouring: It’s easy to add too much flour during kneading, especially when the dough seems sticky. However, adding too much flour can make the dough dry and stiff. Add flour in small amounts if necessary and remember that a slightly sticky dough is okay. You can always adjust later when shaping the dough.
Troubleshooting Common Issues:
Dough is too sticky: If your dough is too sticky and doesn’t come together, it could be due to too much water or humidity in your environment. Add small amounts of flour until the dough becomes easier to handle, but don’t overdo it.
Dough is too dry: If the dough is crumbly or difficult to knead, you likely need more water. Add water a little at a time until it softens and becomes smooth.
Dough is too tough after baking: Over-kneading or too much flour can lead to a dense, tough pizza crust. Make sure to stop kneading when the dough feels elastic, and don’t add too much flour during the process.
—
Properly kneading pizza dough is key to achieving that perfect texture and flavor in your homemade pizza crust. Whether you’re kneading by hand or using a stand mixer, the goal is to develop the dough’s gluten so it can rise properly, creating a chewy yet tender crust that’s light and airy inside with just the right amount of crispness on the outside. With practice and attention to detail, you’ll master this essential step and set the stage for a delicious pizza.
Rising and Proofing
Rising and proofing are critical steps in the process of making pizza dough. These two phases allow the dough to develop its texture, flavor, and structure. While rising refers to the initial fermentation that causes the dough to expand, proofing involves the final rise before the dough is shaped and baked. Both steps are crucial for achieving that perfect airy, chewy crust with a flavorful depth. In this section, we will explore why rising and proofing are so important, how to do them properly, and what mistakes to avoid.
What is Rising and Proofing?
Rising: Rising is the process that happens after you’ve kneaded the dough. It occurs because the yeast ferments the sugars in the flour, producing carbon dioxide gas. These gas bubbles get trapped in the gluten network you developed during kneading, causing the dough to expand. The yeast also contributes to the flavor development of the dough.
Proofing: Proofing is the final rise before baking. It occurs after you’ve shaped the dough into pizza balls or your desired pizza crust shape. Proofing allows the dough to relax and continue expanding, which results in a light and airy texture when baked.
Although rising and proofing are often used interchangeably, they refer to different stages of the dough’s fermentation process, both of which are essential for achieving a great pizza crust.
Why Rising and Proofing Matter:
1. Texture: Rising and proofing give the dough its light and airy texture. The gases produced by the yeast create air pockets within the dough, which expand during baking, resulting in a soft, chewy interior with a crisp exterior.
2. Flavor: During the rising and proofing stages, the yeast ferments the sugars in the dough, producing complex flavors that develop over time. The longer the dough rises, the more flavorful it becomes.
3. Structure: These processes allow the dough to relax and develop elasticity. This makes it easier to stretch the dough into a pizza shape without tearing. Proper proofing also ensures that the dough holds its shape during baking, forming a beautiful crust.
How to Rise Your Dough:
1. Initial Rise (Bulk Fermentation): After kneading the dough, place it in a lightly oiled bowl. Cover it with a clean kitchen towel or plastic wrap to prevent it from drying out. The dough should then be left to rise in a warm place. Ideal temperatures for rising dough are between 75°F to 80°F (24°C to 27°C). At this temperature, the yeast will be most active.
Rising Time: The dough typically needs 1-2 hours for the initial rise, or until it has doubled in size. This rise allows the yeast to begin fermenting the dough and producing gas.
Tips for a Successful Rise:
Warm Environment: If your kitchen is cool, you can create a warm environment for the dough by placing the bowl in a turned-off oven with the light on or on top of a warm stovetop. Another option is to place a pan of hot water on the bottom rack of your oven to provide heat and humidity.
Avoid Over-Rising: Don’t let the dough rise for too long, as over-proofing can lead to a dough that’s too airy, weak, or has lost its structure. Keep an eye on the dough and punch it down if it has doubled in size before the time is up.
2. Punching Down the Dough:
After the dough has doubled in size, gently punch it down to release the air bubbles. This step helps redistribute the yeast and gases, ensuring an even texture and preventing the dough from becoming too airy. You don’t want to deflate it completely, but just enough to let the gases escape and give the dough a chance to rise again evenly.
Why Punch Down? Punching the dough down helps prevent large bubbles from forming in the dough, which could cause an uneven rise in the oven. It also helps strengthen the gluten network, improving the dough’s elasticity.
3. Shaping the Dough:
After the initial rise and punching down, divide the dough into portions (usually 2 for standard-sized pizzas or more for smaller ones). Shape each portion into a ball by folding the edges underneath and pinching them together. This process helps maintain the dough’s structure and promotes a uniform rise when proofed and baked.
How to Proof Your Dough:
1. Final Proofing: After shaping your dough, let it proof for a second time. This final rise allows the dough to relax and continue expanding. Proofing can take anywhere from 30 minutes to 1 hour, depending on the dough and ambient temperature. During this period, the yeast will continue to ferment the dough, creating a light, airy structure perfect for pizza.
Tips for Proofing:
Cover the Dough: Cover the dough balls loosely with a damp cloth or plastic wrap during proofing to keep them from drying out.
Space Between Dough Balls: If proofing multiple dough balls, make sure they are spaced apart on your work surface. This allows them to expand without sticking together.
Room Temperature: Let the dough proof at room temperature (around 70°F or 21°C). If the environment is too warm or too cold, the dough may rise too quickly or too slowly, affecting the texture.
2. Cold Proofing (Optional):
For enhanced flavor and texture, you can also opt for a cold fermentation method. Instead of proofing the dough at room temperature, you refrigerate it for 24 hours (or up to 72 hours). This slow fermentation process allows the dough to develop a more complex, slightly tangy flavor, and the dough becomes more elastic, making it easier to shape.
How to Cold Proof:
After the initial rise, punch the dough down and divide it into individual portions.
Place each dough ball in a lightly oiled container, cover it tightly with plastic wrap, and refrigerate it for 24-72 hours.
Remove the dough from the fridge 1-2 hours before you plan to bake, allowing it to come to room temperature for easier stretching.
Common Issues with Rising and Proofing:
1. Dough Isn’t Rising: If your dough isn’t rising, it could be due to inactive yeast or a cold environment. Check the expiration date of your yeast and ensure that your dough is in a warm, draft-free place. If the yeast is old, it may not be as active, and you’ll need to use a fresh batch.
2. Dough Is Over-Proofed: Over-proofed dough can collapse when you try to shape it or bake it, resulting in a dense, doughy crust. If your dough has risen too much, punch it down gently and allow it to rise again for a shorter period. Be sure to check the dough regularly during both the rising and proofing stages.
3. Slow Rise: If your dough is rising too slowly, it could be because the environment is too cold. Try moving the dough to a warmer spot or placing a pan of hot water near it. However, avoid excessive heat, as temperatures above 90°F (32°C) can kill the yeast.
The Ideal Rise and Proofing Times:
Initial Rise: 1-2 hours (until the dough has doubled in size)
Punch Down: After the initial rise, gently deflate the dough and divide it into portions.
Final Proof: 30 minutes to 1 hour (until dough has risen and is soft, puffy, and ready to stretch)
—
Rising and proofing are essential to creating the perfect pizza dough. These processes allow the dough to develop its flavor, texture, and structure, resulting in a crust that’s light, airy, and chewy. By following the right techniques and paying attention to the dough’s behavior, you can achieve the ideal rise and proofing conditions that will make your homemade pizza crust truly exceptional.
Stretching Pizza Dough
Stretching the pizza dough is one of the most critical steps in achieving a perfectly shaped pizza crust. Unlike rolling out the dough with a rolling pin, which can compress the dough and result in a dense crust, stretching the dough allows the natural air bubbles to remain intact, contributing to a light, airy texture. It also helps you achieve the thin, crispy edges and slightly thicker center that’s characteristic of a great pizza. In this section, we’ll go over how to stretch pizza dough correctly, including tips for success and common mistakes to avoid.
Why Stretching the Dough is Important:
Stretching the dough by hand (rather than using a rolling pin) preserves the dough’s air bubbles that were created during the fermentation process. These air pockets expand during baking, contributing to a light and chewy pizza crust. Stretching also allows for better control of the dough’s shape and thickness, enabling you to make the crust as thin or thick as you prefer.
Moreover, stretching the dough by hand enhances the pizza’s texture by creating a more uniform surface, which helps with even cooking. It also lets you shape the crust’s edge, which is often left thicker to form a crispy, golden crust.
How to Stretch Pizza Dough:
1. Prepare Your Dough:
After the dough has gone through its first rise and proofed (whether at room temperature or cold-proofed in the fridge), it should be ready to stretch. Gently punch down the dough to release excess air and divide it into portions (usually two for a standard pizza size). Roll the dough into smooth balls, and let them rest for 10-15 minutes on a lightly floured surface. This resting period helps the dough relax, making it easier to stretch without tearing.
2. Flour Your Surface:
Lightly flour your work surface and your hands to prevent the dough from sticking. Be careful not to add too much flour, as this can make the dough dry out. A little flour will help the dough glide smoothly while stretching.
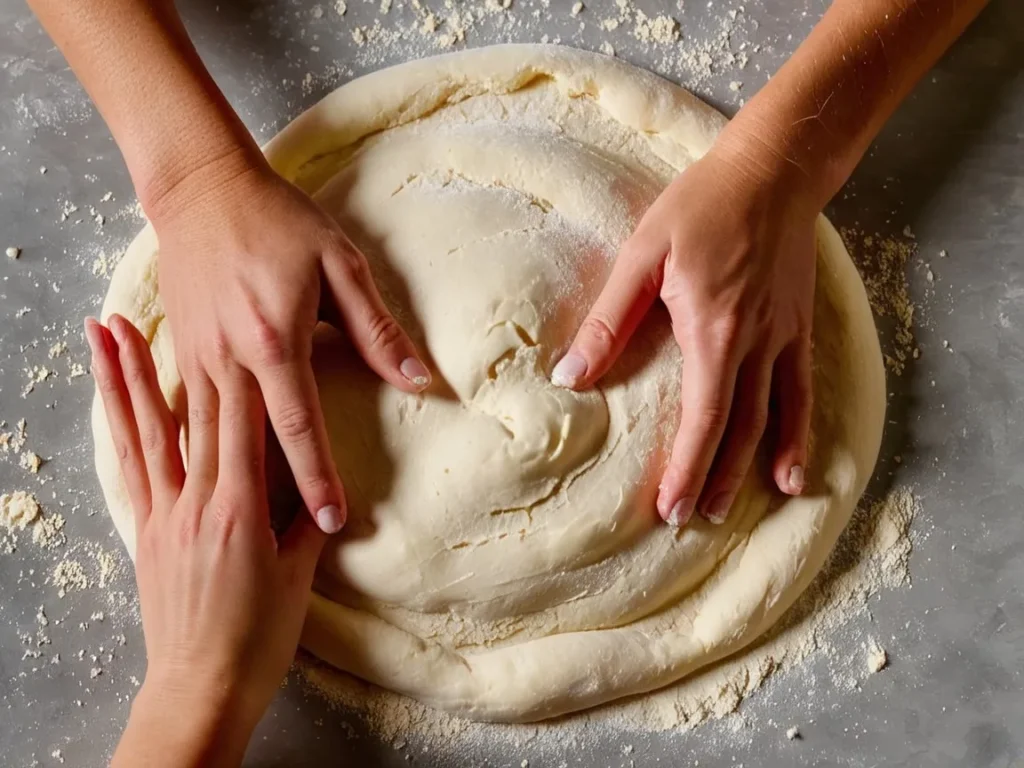
3. Start with Your Hands:
Begin by pressing the dough ball into a flat disc with your fingers and palms. Gently press out from the center to the edges, being careful not to apply too much force, which could cause the dough to tear. The goal is to create a uniform, circular shape with an even thickness.
Use Your Fingers: Press the dough with your fingertips, starting from the center and working your way outward. This method pushes air bubbles toward the edges, ensuring the crust remains puffy when baked.
4. Use Gravity to Help:
Once the dough is about the size of a small plate, you can start stretching it by hand. To do this, pick up the dough and hold it by the edges, letting gravity pull the dough downward. Rotate the dough slowly as it stretches, allowing the weight of the dough itself to do most of the work. Gently pull on the dough while rotating it, letting it stretch evenly. Be careful not to stretch the dough too quickly or forcefully, as this can cause it to tear or lose its shape.
5. Stretching with the Back of Your Hands:
For more control, you can also use the backs of your hands to stretch the dough. Hold the dough at the edges and gently drape it over your knuckles. Let gravity help with the stretch, and slowly rotate the dough as it expands. Avoid pulling too aggressively or using the tips of your fingers, as this can create thin spots or holes in the dough.
6. Work from the Center to the Edges:
Focus on stretching the dough evenly from the center to the edges, ensuring that the crust is slightly thicker than the center. The thickness of the edges will help create that classic pizza crust with a crispy outer layer.
7. Aim for the Desired Size and Thickness:
Stretch the dough until it reaches your desired size and thickness. Typically, a medium-sized pizza will have a diameter of about 12-14 inches (30-35 cm), and the thickness should be about 1/4 inch (0.6 cm) in the center. Keep an eye on the edges to ensure they remain slightly thicker than the center, as this gives the pizza its structure and shape during baking.
Tips for Stretching Pizza Dough:
1. Don’t Rush the Process:
Stretching pizza dough can take a little time, so be patient. Rushing through it may lead to tearing or uneven thickness. Let the dough relax if it becomes too tight during stretching—taking short breaks can help prevent this.
2. Work on a Pizza Peel or Baking Sheet:
If you’re using a pizza peel (a flat board used to transfer pizza to the oven), stretch the dough directly on the peel. Lightly flour the peel to prevent the dough from sticking. If you’re using a baking sheet, you can stretch the dough on the sheet itself or on a countertop, then transfer it onto the sheet. This step minimizes the risk of tearing and helps you keep the dough in the right shape.
3. Use Olive Oil for Extra Stretch:
If you find the dough hard to stretch or it’s sticking, lightly brush it with olive oil. This will help it stretch more easily and create a golden, crispy crust. Plus, it adds flavor to the crust.
4. Resting Periods for Difficult Dough:
If the dough resists stretching and keeps shrinking back into its original shape, it might be too tight. Allow the dough to rest for a few minutes and then try again. Resting helps the gluten relax, making it easier to stretch.
5. Avoid Overstretching:
If you overstretch the dough, it can become too thin in certain areas, leading to tears or holes. If this happens, it’s best to stop and gently work the dough back into shape by pinching or folding the thin spots. Stretch gradually and evenly to maintain consistency.
6. Be Gentle with the Corners:
As you stretch the dough, the corners may be more prone to tearing. Gently press the dough at the edges rather than pulling aggressively to avoid creating holes. Rotate the dough slowly to ensure even stretching.
7. Use a Rolling Pin If Necessary:
If you find that stretching by hand isn’t working or the dough is too difficult to manage, you can use a rolling pin for assistance. Lightly roll out the dough from the center to the edges, then continue stretching by hand. Keep in mind that using a rolling pin can compress the dough and reduce the texture, so use this method only if absolutely necessary.
Common Problems When Stretching Pizza Dough and How to Fix Them:
1. Dough is Too Elastic and Won’t Stretch:
This typically happens when the dough hasn’t had enough resting time after kneading. Let the dough rest for 10-15 minutes before attempting to stretch it. This allows the gluten to relax and makes it more pliable.
2. Tears in the Dough:
If your dough tears while stretching, it’s likely because you’re pulling too hard or unevenly. Be gentle and work in smaller, gradual motions. If a hole appears, you can pinch it back together, or gently press the dough to even it out.
3. Dough Shrinks Back:
If the dough keeps shrinking back into a ball after being stretched, it’s probably due to overworking the dough or not letting it rest enough. Let the dough relax for 5-10 minutes before continuing to stretch.
4. Uneven Thickness:
To avoid uneven thickness, always focus on working from the center outwards. If you find one part of the dough is thinner than another, gently press or fold it to ensure an even stretch.
—
Stretching pizza dough by hand is a skill that takes practice, but it’s worth the effort for the light, airy texture and the beautiful shape it creates. With a little patience and the right technique, you’ll be able to stretch dough like a pro, creating a perfect canvas for your favorite pizza toppings.
How to Prepare Pizza Sauce and Toppings
Best Pizza Sauce
A great pizza sauce is the heart of any delicious homemade pizza. It’s the layer of flavor that ties the crust, cheese, and toppings together, creating a harmonious and mouthwatering experience. While store-bought sauces can be convenient, nothing compares to the taste of a fresh, homemade pizza sauce made from high-quality ingredients. In this section, we’ll cover the characteristics of the best pizza sauce, how to make it at home, and tips for getting the perfect consistency and flavor.
—
Why Homemade Pizza Sauce is Better
1. Control Over Ingredients: Making your own sauce gives you the freedom to choose fresh, high-quality ingredients. You can adjust the seasoning, acidity, and sweetness to suit your preferences.
2. Freshness: Homemade sauce tastes brighter and fresher than store-bought options, which are often loaded with preservatives and artificial flavors.
3. Customization: You can tailor your pizza sauce to complement the toppings you’re using, whether you want a classic tomato flavor, a spicy kick, or a hint of sweetness.
4. Cost-Effective: Making pizza sauce at home is often more affordable than buying pre-packaged sauces, especially if you use pantry staples like canned tomatoes and dried herbs.
—
Key Ingredients for the Best Pizza Sauce
1. Tomatoes:
Tomatoes are the foundation of any pizza sauce. Opt for high-quality canned tomatoes, such as San Marzano tomatoes, which are known for their rich flavor and low acidity. Alternatively, you can use fresh, ripe tomatoes if they’re in season.
2. Garlic and Onion:
Fresh garlic adds depth and a savory note, while a touch of onion provides a subtle sweetness. Both ingredients help build a complex and well-rounded flavor.
3. Olive Oil:
A drizzle of extra virgin olive oil enhances the sauce’s richness and adds a touch of fruity flavor.
4. Herbs and Spices:
Classic Italian herbs like oregano, basil, and thyme are essential for a traditional pizza sauce. You can use dried herbs or fresh ones for a more vibrant flavor. A pinch of red pepper flakes adds a subtle heat, while black pepper provides a mild spice.
5. Salt and Sugar:
A pinch of salt enhances the natural flavors of the tomatoes, while a small amount of sugar balances the acidity of the tomatoes. The sugar is optional and can be adjusted based on your taste preferences.
6. Optional Additions:
You can experiment with other ingredients like grated Parmesan cheese, crushed fennel seeds, or even a splash of red wine for added depth and complexity.
—
How to Make the Best Pizza Sauce
Making pizza sauce at home is quick, simple, and doesn’t require any special equipment. Follow these steps for a foolproof recipe:
1. Start with Tomatoes:
If you’re using canned tomatoes, choose whole peeled or crushed tomatoes. If you prefer a smoother sauce, you can puree the tomatoes in a blender or food processor. For a chunkier texture, leave them as they are.
Tip: If you’re using fresh tomatoes, blanch them in boiling water for a few seconds, then peel off the skins and remove the seeds before blending.
2. Cook the Aromatics:
In a medium-sized saucepan, heat a tablespoon of olive oil over medium heat. Add minced garlic and finely chopped onion, and sauté until fragrant and translucent (about 2-3 minutes). Be careful not to burn the garlic, as it can turn bitter.
3. Add Tomatoes and Seasonings:
Stir in the tomatoes, along with dried or fresh herbs (oregano, basil, thyme), a pinch of salt, and a small amount of sugar. Add a dash of black pepper and red pepper flakes for extra flavor.
Optional: For a richer taste, add a tablespoon of tomato paste. This will thicken the sauce and intensify the tomato flavor.
4. Simmer the Sauce:
Lower the heat and let the sauce simmer gently for 15-20 minutes. This allows the flavors to meld and the sauce to thicken. Stir occasionally to prevent sticking.
Tip: If the sauce becomes too thick, add a splash of water to achieve your desired consistency.
5. Taste and Adjust:
Taste the sauce and adjust the seasoning as needed. If it’s too acidic, add a bit more sugar. If it needs more depth, add an extra pinch of salt or a drizzle of olive oil.
6. Blend (Optional):
For a smoother sauce, use an immersion blender to puree the sauce directly in the pan. If you prefer a chunkier texture, leave it as is.
7. Cool and Store:
Allow the sauce to cool completely before using it on your pizza. You can store leftover sauce in an airtight container in the refrigerator for up to a week or freeze it for up to three months.
—
Tips for Perfect Pizza Sauce
1. Keep It Simple:
The best pizza sauces are often the simplest. Avoid overloading the sauce with too many flavors or spices that might overpower the pizza toppings.
2. Don’t Overcook:
While simmering helps develop the flavors, overcooking can result in a sauce that tastes flat or overly concentrated. Stick to 15-20 minutes of simmering for optimal results.
3. No Need for Pre-Cooking (Raw Sauce Option):
If you’re short on time, you can skip cooking altogether and make a raw pizza sauce. Simply blend high-quality canned tomatoes with olive oil, salt, and your favorite seasonings. The sauce will cook on the pizza while it’s baking, giving it a fresh, vibrant flavor.
4. Consistency Matters:
The sauce should be thick enough to spread easily on the dough without making it soggy. If the sauce is too watery, it can affect the pizza’s texture.
5. Experiment with Flavors:
Don’t be afraid to experiment with different herbs, spices, and additional ingredients like roasted garlic, fresh basil leaves, or a splash of balsamic vinegar.
—
Common Mistakes to Avoid
1. Using Low-Quality Tomatoes:
The quality of the tomatoes will make or break your sauce. Avoid overly processed or low-quality canned tomatoes, as they can taste bland or metallic.
2. Overloading with Sugar:
While sugar can balance the acidity of the tomatoes, too much will make the sauce taste sweet and artificial. Add sugar sparingly and taste as you go.
3. Skipping the Simmering Step:
Even a quick simmer helps meld the flavors and thicken the sauce. Skipping this step can result in a sauce that tastes raw or underdeveloped.
—
Conclusion
The best pizza sauce is one that enhances the flavors of the crust, cheese, and toppings without overpowering them. By following these steps and tips, you can create a rich, flavorful sauce that’s perfectly balanced and complements any type of pizza. Whether you prefer a traditional tomato-based sauce or want to get creative with your own twist, a homemade pizza sauce will elevate your pizza to restaurant-quality deliciousness.
Prepping the Toppings
When it comes to making pizza, the toppings are where you can get creative and add your personal flair. Whether you prefer a classic Margherita pizza, a loaded meat lover’s pie, or a veggie-packed option, properly preparing your toppings ensures that your pizza bakes evenly and achieves the best possible flavor. In this section, we’ll dive into the key steps for prepping your pizza toppings, including tips for cutting, cooking, and combining ingredients to create a perfect harmony of flavors and textures.
—
Why Proper Topping Preparation Matters
1. Even Cooking: Ensuring all your toppings are prepped to similar sizes and thicknesses helps them cook evenly during baking.
2. Balanced Flavors: Prepping allows you to season or partially cook toppings that need an extra flavor boost before going on the pizza.
3. Avoid Soggy Crusts: Some ingredients release moisture while cooking, and improper preparation can lead to a soggy crust. Preparing toppings ahead of time minimizes this risk.
—
Common Pizza Toppings and How to Prep Them
1. Vegetables:
Vegetables are a pizza favorite, but they often need to be prepped to avoid excess moisture and ensure even cooking.
Bell Peppers: Slice into thin strips or small dice. Raw peppers retain a bit of crunch after baking, but you can also sauté them lightly for a softer texture.
Mushrooms: Clean them with a damp cloth (avoid rinsing to prevent water absorption) and slice thinly. Pre-sautéing mushrooms helps release moisture and enhances their earthy flavor.
Onions: Thinly slice or dice onions. If you prefer caramelized onions, sauté them beforehand for a sweet and rich flavor.
Tomatoes: Use firm, ripe tomatoes. Slice them thinly and pat them dry with a paper towel to remove excess moisture.
Spinach: Use fresh or baby spinach. It can be added raw, but a quick sauté helps reduce its water content and intensifies its flavor.
Zucchini or Eggplant: Slice thinly and salt the slices to draw out excess moisture. Pat them dry before adding to the pizza.
2. Meats:
Meats bring a hearty and savory component to pizza, but they often require cooking or seasoning before use.
Pepperoni and Salami: These cured meats don’t need cooking, but you can lightly crisp them in a pan if you prefer a crunchier texture.
Sausage: Remove the casing and cook the sausage before adding it to the pizza. Crumble or slice into bite-sized pieces.
Chicken: Use pre-cooked, shredded, or diced chicken. Season it with herbs or marinades to complement your pizza’s flavor profile.
Bacon: Precook bacon until it’s crispy and crumble it into small pieces. This prevents undercooked or greasy spots on your pizza.
Ground Beef: Brown the beef with seasonings and drain excess fat before using it as a topping.
3. Cheeses:
Cheese is an essential component of pizza, and preparing it correctly ensures the perfect melt and flavor.
Mozzarella: Use fresh mozzarella for a creamy texture or shredded mozzarella for even coverage. If using fresh, pat it dry to reduce moisture.
Parmesan: Grate Parmesan freshly for its salty, nutty flavor. Sprinkle it over the pizza just before or after baking.
Other Cheeses: Cheddar, provolone, ricotta, goat cheese, or blue cheese can add unique flavors. Crumble or shred these cheeses as needed.
4. Herbs and Garnishes:
Fresh herbs and greens add a burst of flavor and visual appeal.
Basil: Add fresh basil leaves after baking to avoid wilting. For a subtle flavor, tear the leaves and sprinkle them on top.
Arugula: Use fresh arugula as a post-bake garnish for a peppery bite. Drizzle with olive oil for extra flavor.
Oregano and Parsley: Sprinkle dried oregano before baking or use fresh parsley as a garnish after baking.
5. Other Toppings:
Olives: Slice or chop olives for an even distribution. Use pitted olives to avoid surprises.
Anchovies: These salty, umami-packed fish are best used sparingly. Place them whole or chopped on the pizza.
Pineapple: For Hawaiian-style pizza, use fresh or canned pineapple chunks. Drain and pat dry to reduce moisture.
—
Tips for Prepping Toppings
1. Keep Ingredients Uniform:
Slice or dice toppings into similar sizes to ensure even cooking. Thin slices also reduce weight, preventing the crust from becoming overloaded and soggy.
2. Don’t Overload the Pizza:
While it’s tempting to pile on toppings, too many can weigh down the crust and prevent it from baking evenly. A balance of ingredients ensures the crust remains crispy and light.
3. Season Toppings:
Lightly seasoning your toppings with salt, pepper, or herbs enhances their flavor. Be careful not to over-season if your pizza sauce or cheese is already salty.
4. Pre-Cook Moist Ingredients:
Vegetables and meats with high water content should be pre-cooked to reduce moisture. This prevents soggy crusts and creates concentrated, flavorful toppings.
5. Layer Toppings Strategically:
Place heavier toppings like meats closer to the crust and lighter toppings like herbs or greens on top. This helps distribute heat evenly and prevents delicate toppings from overcooking.
—
Common Mistakes to Avoid
1. Skipping Pre-Cooking:
Adding raw meats or water-heavy vegetables (like mushrooms or zucchini) directly to the pizza can result in uneven cooking and sogginess.
2. Overloading the Pizza:
Too many toppings can overwhelm the crust and lead to an undercooked base. Aim for moderation and balance.
3. Using Low-Quality Ingredients:
Since pizza toppings are simple, the quality of each ingredient matters. Opt for fresh, flavorful vegetables, high-quality meats, and good cheeses for the best results.
4. Forgetting About Garnishes:
Fresh garnishes like basil, arugula, or a drizzle of olive oil can elevate the pizza’s flavor and presentation.
—
Conclusion
Prepping your pizza toppings is an essential step in creating a delicious homemade pizza. By properly slicing, seasoning, and, if needed, pre-cooking your ingredients, you’ll ensure even cooking and balanced flavors. Whether you’re a fan of classic combinations or adventurous, unique toppings, a little preparation goes a long way in taking your pizza from good to gourmet.
Layering Your Pizza
Layering your pizza is more than just arranging toppings—it’s about creating a balance of textures and flavors while ensuring that everything cooks evenly. Proper layering ensures that your crust stays crispy, the toppings cook to perfection, and the cheese melts evenly into gooey, bubbly goodness. Whether you’re building a classic Margherita, a loaded meat lover’s pie, or a veggie-packed masterpiece, understanding the art of layering is key to creating a delicious pizza.
—
The Importance of Proper Layering
1. Even Cooking: Proper layering allows heat to penetrate all the ingredients evenly, ensuring that nothing burns or remains undercooked.
2. Balanced Flavors: The order in which you layer ingredients affects how flavors blend and interact, creating a harmonious taste in every bite.
3. Maintaining Crust Quality: Incorrect layering can lead to a soggy crust or uneven cooking. A well-layered pizza protects the crust while enhancing the overall texture.
—
Steps for Layering Your Pizza
1. Start with the Dough:
Preparation: Begin by stretching or rolling out your dough to your desired thickness. Place it on a pizza stone, baking sheet, or peel lined with parchment paper for easy handling.
Optional Pre-Bake: For a crispier crust, partially bake the dough (5-7 minutes) before adding toppings. This is especially helpful for thicker crusts.
2. Spread the Sauce:
Even Layer: Use a ladle or the back of a spoon to spread your pizza sauce evenly over the dough, leaving a 1-inch border around the edges for the crust.
Don’t Overdo It: Too much sauce can lead to a soggy pizza. Aim for a thin, even coating that allows the crust to shine through.
Customize: Depending on your preference, you can use a tomato-based sauce, pesto, alfredo, barbecue sauce, or even a white garlic sauce.
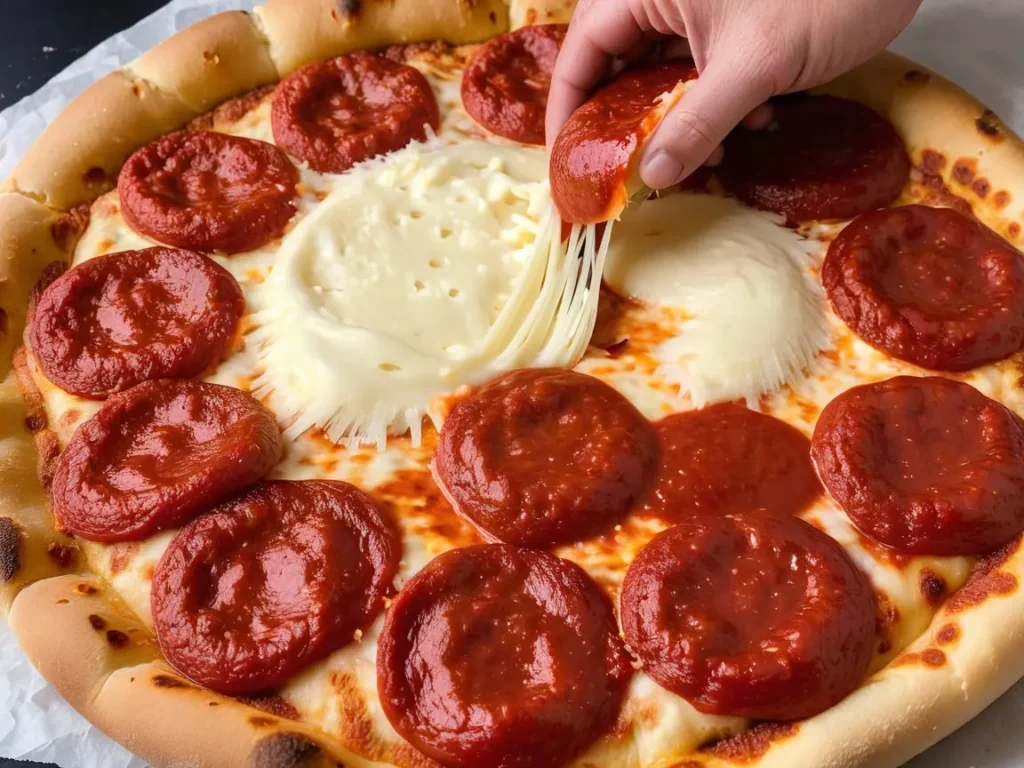
3. Add Cheese:
Base Cheese Layer: Sprinkle shredded mozzarella or place slices of fresh mozzarella evenly over the sauce. This creates a base layer that helps hold other toppings in place.
Alternative Cheeses: Add Parmesan, cheddar, provolone, or goat cheese for a flavor boost. These can be mixed with mozzarella or layered separately.
4. Layer the Toppings Strategically:
Heavier Toppings First: Place meats (like sausage, pepperoni, or cooked chicken) directly on top of the cheese. This keeps them close to the heat, ensuring they cook thoroughly and release their juices onto the cheese for added flavor.
Vegetables Next: Add lighter toppings like sliced bell peppers, onions, mushrooms, or spinach. If you’re using raw vegetables with high water content, avoid layering too thickly to prevent excess moisture from pooling on the pizza.
Delicate Ingredients Last: Reserve delicate ingredients like fresh herbs, arugula, or soft cheeses (ricotta, blue cheese) for the top layer or post-bake garnish.
5. Finish with a Cheese Sprinkle (Optional):
For an extra cheesy pizza, sprinkle a light layer of mozzarella or Parmesan on top of the toppings. This creates a golden, melty finish that holds everything together.
—
Tips for Perfect Layering
1. Balance is Key:
Avoid overloading your pizza with too many toppings. A well-balanced pizza has a variety of textures and flavors without overwhelming the crust or sauce.
2. Think About Texture:
Combine crunchy, soft, and melty elements for an interesting bite. For example, pair crispy bacon with creamy ricotta or fresh basil with savory sausage.
3. Avoid Overlapping Ingredients:
Spread toppings evenly to prevent crowding. Overlapping can create uneven cooking and result in soggy or raw spots.
4. Consider Moisture:
Some ingredients release moisture while cooking. To avoid sogginess, pat toppings like fresh mozzarella, tomatoes, and canned pineapple dry before layering.
5. Use Fresh Garnishes Post-Bake:
Ingredients like fresh basil, arugula, or a drizzle of olive oil are best added after the pizza comes out of the oven. This preserves their flavor and prevents wilting.
—
Common Layering Mistakes to Avoid
1. Overloading the Pizza:
Too many toppings can weigh down the pizza, making it difficult to cook evenly. Stick to a moderate amount of each ingredient for the best results.
2. Skipping Pre-Cooking:
Raw meats and water-heavy vegetables should be cooked or sautéed beforehand to ensure they’re fully cooked and don’t release excess moisture during baking.
3. Placing Delicate Ingredients Too Early:
Adding fresh herbs or greens before baking can cause them to burn or lose their flavor. Always add these as a final touch.
4. Uneven Distribution:
Clumping toppings in one area can lead to inconsistent cooking and an unbalanced bite. Spread ingredients evenly across the pizza.
—
Creative Layering Ideas
Classic Margherita: Start with tomato sauce, add fresh mozzarella slices, and finish with fresh basil leaves and a drizzle of olive oil post-bake.
Veggie Delight: Layer tomato sauce, shredded mozzarella, sautéed spinach, sliced mushrooms, bell peppers, and onions. Add a sprinkle of feta cheese for a tangy kick.
Meat Lover’s Pizza: Start with sauce, add mozzarella, and layer pepperoni, sausage, bacon, and a sprinkle of Parmesan.
Hawaiian Twist: Spread barbecue sauce instead of tomato sauce, add mozzarella, ham, and pineapple chunks for a sweet and savory combination.
—
Conclusion
Layering your pizza is an art that ensures your ingredients shine individually while working together to create a delicious and cohesive dish. By starting with a solid foundation of dough, spreading the sauce evenly, layering cheese and toppings strategically, and finishing with thoughtful garnishes, you’ll achieve a perfectly balanced pizza every time. Whether you prefer classic combinations or enjoy experimenting with unique flavors, mastering the layering process is key to elevating your homemade pizza to professional quality.
Perfecting Your Pizza Baking Technique
Using a Pizza Stone
A pizza stone is one of the best tools you can use to achieve a pizzeria-quality pizza at home. It’s a game-changer when it comes to creating a crust that’s perfectly crispy on the outside and soft and chewy on the inside. If you’re serious about homemade pizza, learning how to use a pizza stone effectively is essential. In this section, we’ll cover the benefits of using a pizza stone, how to properly use and maintain it, and tips for getting the best results.
—
Why Use a Pizza Stone?
1. Crispier Crust:
Pizza stones absorb moisture from the dough, creating a dry, crisp crust that mimics the effect of a brick oven.
2. Even Heat Distribution:
Made from materials like ceramic or cordierite, pizza stones distribute heat evenly, ensuring consistent baking across the entire crust.
3. Restaurant-Style Results:
A pizza stone creates the high-heat environment needed to achieve the perfect balance of a crunchy crust and melty toppings, similar to a wood-fired oven.
4. Versatility:
While primarily used for pizza, a pizza stone can also be used for baking bread, cookies, and other items that benefit from even heat and a crispy base.
—
How to Use a Pizza Stone
1. Choose the Right Stone:
Select a pizza stone made of durable materials like cordierite or ceramic. These materials are designed to withstand high temperatures and retain heat effectively. Ensure the stone fits your oven.
2. Preheat the Stone:
Place the pizza stone on the middle rack of a cold oven to prevent thermal shock (which can crack the stone).
Preheat the oven to 475°F to 500°F (245°C to 260°C) with the stone inside. This typically takes 30-45 minutes to ensure the stone is fully heated. A properly heated stone is crucial for creating a crispy crust.
3. Prepare the Pizza:
While the stone is heating, assemble your pizza on a pizza peel or a piece of parchment paper to make transferring easier. Lightly flour or cornmeal the peel to prevent sticking.
Avoid assembling the pizza directly on the stone, as the stone is too hot to handle and can’t be removed during the process.
4. Transfer the Pizza to the Stone:
Carefully slide the pizza off the peel onto the preheated stone. If using parchment paper, transfer the pizza along with the parchment.
The key to a clean transfer is ensuring the dough doesn’t stick to the peel. Give it a slight shake to confirm it slides easily.
5. Bake the Pizza:
Bake the pizza for 8-12 minutes, depending on the oven temperature and thickness of the crust. Keep an eye on the toppings and crust to prevent burning.
Rotate the pizza halfway through for even cooking if your oven has hot spots.
6. Remove the Pizza:
Once the pizza is done, use a peel or a large spatula to carefully remove it from the stone. Allow it to cool for a couple of minutes before slicing to let the cheese set.
7. Let the Stone Cool:
After baking, let the pizza stone cool completely in the oven before handling it. Sudden temperature changes can cause the stone to crack.
—
Tips for Using a Pizza Stone
1. Don’t Oil the Stone:
Pizza stones are porous and absorb oil, which can lead to smoke or odors. They work best without any oil.
2. Avoid Sudden Temperature Changes:
Never place a cold pizza stone in a hot oven or rinse a hot stone with cold water. The thermal shock can cause cracks.
3. Use Parchment Paper Sparingly:
While parchment paper can help prevent sticking, it can char or burn at high temperatures. If used, trim the edges to match the size of your pizza.
4. Experiment with Placement:
For a crispier crust, place the stone on the bottom rack. For more evenly cooked toppings, use the middle rack.
5. Preheat Longer for Thick Crusts:
If you’re making a thicker pizza or deep-dish style, allow the stone to preheat for an extra 10-15 minutes to ensure it’s fully heated.
—
Caring for Your Pizza Stone
1. Cleaning the Stone:
Allow the stone to cool completely before cleaning.
Avoid using soap, as the stone is porous and can absorb the soap, affecting the flavor of future pizzas.
Scrape off any leftover food with a spatula or a stiff brush. Wipe the stone with a damp cloth if necessary.
2. Storing the Stone:
Store your pizza stone in a dry place. Avoid stacking heavy items on it to prevent cracks or breakage.
Some bakers leave the stone in the oven, as it can help regulate heat distribution for other dishes.
3. Seasoning (Optional):
Over time, your stone will develop a natural seasoning from repeated use. This darkens the stone and helps it become more non-stick.
—
Common Mistakes to Avoid
1. Using a Cold Stone:
Adding pizza to an unheated stone results in an unevenly cooked crust. Always preheat the stone thoroughly.
2. Overloading with Toppings:
A pizza stone works best when the dough is not overly weighed down. Excessive toppings can lead to a soggy crust.
3. Skipping the Peel:
Attempting to place the pizza directly on the stone without a peel can result in a messy transfer and uneven cooking.
4. Cracking the Stone:
Sudden temperature changes, like rinsing a hot stone under cold water, can cause cracking. Handle the stone carefully to extend its lifespan.
—
Conclusion
A pizza stone is a powerful tool that transforms your homemade pizza into a culinary masterpiece. By mastering the art of preheating, transferring, and caring for your stone, you can achieve a perfectly crispy crust and evenly cooked toppings every time. Whether you’re a pizza enthusiast or a casual home cook, using a pizza stone is a simple yet effective way to elevate your pizza game.
How to Bake Pizza
Baking pizza is the final and most critical step in crafting a delicious homemade pie. A perfectly baked pizza has a crispy, golden crust, bubbling cheese, and evenly cooked toppings. Understanding the proper techniques and tips for baking pizza can make the difference between a soggy, undercooked pizza and one that rivals your favorite pizzeria. In this section, we’ll explore everything you need to know to bake the perfect pizza at home.
—
Step-by-Step Guide to Baking Pizza
1. Preheat Your Oven:
Temperature: The key to a great pizza is high heat. Preheat your oven to 475°F–500°F (245°C–260°C). Most home ovens can reach this range, but check your oven’s manual if you’re unsure.
Preheating Time: Allow your oven to preheat for at least 30 minutes to ensure consistent heat. If you’re using a pizza stone or steel, preheat it along with the oven.
2. Prepare Your Baking Surface:
Pizza Stone or Steel: Place the stone or steel on the middle or lower rack of your oven before preheating. These surfaces mimic the high heat and crispy results of a traditional pizza oven.
Baking Sheet or Pan: If you don’t have a stone, use a heavy-duty baking sheet. Line it with parchment paper or lightly dust it with flour or cornmeal to prevent sticking.
3. Assemble the Pizza:
Stretch or roll your pizza dough to the desired size and thickness.
Add your sauce, cheese, and toppings, being careful not to overload the pizza, as this can result in uneven cooking and a soggy crust.
If you’re assembling on a pizza peel, make sure the dough is floured or dusted with cornmeal to ensure a smooth transfer to the oven.
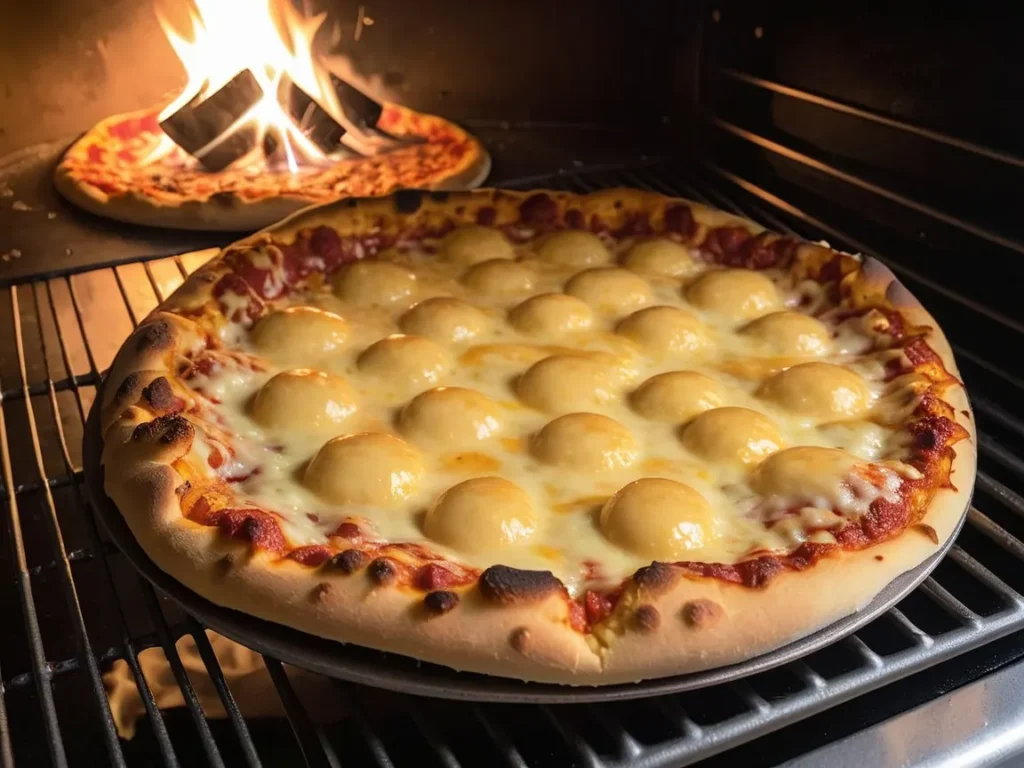
4. Bake the Pizza:
Position in the Oven: Transfer the pizza to your preheated stone, steel, or baking sheet. If using a stone, slide the pizza directly onto it with a pizza peel or parchment paper.
Cooking Time: Bake the pizza for 8–12 minutes, depending on the thickness of the crust, the type of toppings, and the oven temperature. Keep a close eye on the pizza as it bakes to prevent overcooking.
5. Monitor Progress:
Check the pizza halfway through baking to ensure even cooking. Rotate the pizza if your oven has hot spots.
Look for visual cues: the crust should be golden brown, the cheese should be melted and bubbling, and the toppings should be cooked through.
6. Remove and Rest:
Use a pizza peel or large spatula to carefully remove the pizza from the oven.
Let the pizza rest for 2–3 minutes before slicing. This allows the cheese to set slightly, making it easier to cut and serve.
—
Tips for Baking the Perfect Pizza
1. Use High-Quality Ingredients:
The high heat of baking brings out the best in fresh, flavorful ingredients. Opt for high-quality cheeses, fresh vegetables, and meats for the best results.
2. Preheat Properly:
A thoroughly preheated oven or pizza stone ensures the crust cooks evenly and achieves a crispy texture. Skipping this step can lead to an undercooked crust.
3. Avoid Overloading with Toppings:
Too many toppings can make your pizza heavy and prevent it from cooking properly. Aim for a balanced combination of sauce, cheese, and toppings.
4. Experiment with Rack Positions:
For a crispier crust, place the pizza on a lower rack.
For evenly melted cheese and toppings, use the middle rack.
If your oven has a broiler, you can use it during the last minute of baking to add a bubbly, golden finish to the cheese.
5. Par-Baking (Optional):
For thick crusts or heavily topped pizzas, consider par-baking the dough for 5–7 minutes before adding sauce and toppings. This ensures the crust is fully cooked without overcooking the toppings.
6. Use Parchment Paper for Easy Handling:
If you’re new to using a pizza stone, assembling and transferring your pizza on parchment paper can make the process easier and less messy.
—
Common Baking Mistakes to Avoid
1. Underpreheating the Oven:
Baking pizza in an oven that hasn’t reached its full temperature will result in a soggy, undercooked crust. Always preheat thoroughly.
2. Burning the Toppings:
High heat can cause toppings to burn if they’re too close to the broiler or left in the oven too long. Monitor the pizza closely as it bakes.
3. Skipping Rotation:
Ovens often have uneven heat distribution. Rotating the pizza halfway through baking ensures even cooking.
4. Using Cold Dough:
Dough that’s too cold can bake unevenly. Allow your dough to come to room temperature before stretching and baking.
—
Creative Variations for Baking Pizza
1. Grilled Pizza:
Take your pizza outdoors and cook it on a grill. Preheat the grill to high heat and cook the dough directly on the grates for 1–2 minutes per side before adding toppings. Finish cooking with the lid closed for a smoky flavor.
2. Cast Iron Skillet Pizza:
For a thick, pan-style crust, press your dough into a well-oiled cast iron skillet. Add toppings and bake in a 450°F (230°C) oven for 12–15 minutes, or until the crust is golden and crispy.
3. Sheet Pan Pizza:
Perfect for feeding a crowd, sheet pan pizzas are baked in a rectangular pan. Press the dough into the pan, add toppings, and bake at 425°F (220°C) for 15–20 minutes.
4. Air Fryer Pizza:
For a quick, small pizza, use an air fryer. Preheat the air fryer to 375°F (190°C), assemble your pizza on parchment paper, and cook for 6–8 minutes.
—
Conclusion
Baking pizza is an art that combines high heat, the right tools, and attention to detail. By preheating your oven, using a proper baking surface, and monitoring your pizza as it bakes, you’ll achieve a crust that’s crispy yet tender and toppings that are perfectly cooked. Whether you’re a fan of thin-crust, deep-dish, or pan-style pizza, mastering the baking process will ensure your homemade creations are nothing short of spectacular.
Pizza Peel Tips
A pizza peel is an essential tool for any home pizza maker. This flat, shovel-like tool helps you transfer your pizza to and from a hot baking surface like a pizza stone or steel without disturbing the toppings or deforming the dough. While it may seem simple, using a pizza peel properly can be tricky at first. Mastering its use is key to making the pizza preparation and baking process smooth and stress-free. This section covers everything you need to know about pizza peels, including how to choose one, use it effectively, and avoid common mistakes.
—
What is a Pizza Peel?
A pizza peel is a flat tool, often with a long handle, designed to slide pizzas into and out of an oven safely and efficiently. It’s especially useful when baking on a pizza stone or steel, which remains extremely hot during cooking.
Types of Pizza Peels:
1. Wooden Pizza Peels:
Traditional and visually appealing.
Great for transferring raw pizzas because dough sticks less to wood.
Less heat conductive, so they’re safer to handle.
2. Metal Pizza Peels:
Often made of aluminum or stainless steel.
Thinner and more durable than wooden peels, making them ideal for retrieving cooked pizzas.
Can be slippery, so raw dough may stick more easily.
3. Composite Pizza Peels:
Made from a combination of wood fibers and resin.
Non-stick and heat-resistant, combining the best of both wooden and metal peels.
—
How to Use a Pizza Peel
1. Prepare the Peel:
Dust the Surface: Before placing your pizza dough on the peel, sprinkle it with flour, cornmeal, or semolina to create a non-stick surface. This helps the dough slide off smoothly.
Spread Evenly: Don’t overdo the dusting. Too much flour or cornmeal can burn in the oven, leaving a bitter taste.
2. Assemble the Pizza:
Stretch or roll your dough and place it directly on the prepared peel.
Add your sauce, cheese, and toppings while keeping an eye on the dough to ensure it doesn’t stick. Work quickly to avoid moisture from the toppings soaking into the dough.
3. Slide the Pizza Onto the Stone or Steel:
Position the peel just above the stone or steel at a slight angle.
Give the peel a quick, confident back-and-forth shake to release the pizza onto the baking surface. The dusted flour or cornmeal will help the pizza slide off easily.
4. Retrieve the Cooked Pizza:
Use a metal peel or the same peel you started with to retrieve the pizza. Slide it under the crust and lift the pizza out of the oven.
Rotate the pizza halfway through baking if needed for even cooking, using the peel to reposition it.
—
Tips for Using a Pizza Peel Like a Pro
1. Keep the Dough Moving:
While assembling your pizza, give the peel a little shake every now and then to ensure the dough isn’t sticking. If it starts to stick, lift the dough slightly and sprinkle a bit more flour or cornmeal.
2. Don’t Overload the Pizza:
Too many toppings can make the pizza heavy and harder to slide off the peel. Stick to a moderate amount of ingredients for easier handling.
3. Work Quickly:
Avoid letting the raw dough sit on the peel for too long, as moisture from the sauce and toppings can make it stick.
4. Angle the Peel Properly:
When transferring the pizza to the oven, hold the peel at about a 20° angle to the stone. This helps the pizza slide off smoothly without folding or crumpling.
5. Use Parchment Paper (Optional):
For beginners, assembling the pizza on a sheet of parchment paper can make transferring it to the oven easier. Simply slide the pizza and parchment paper onto the stone, and remove the paper halfway through baking for a crisper crust.
6. Practice with a Test Run:
If you’re new to using a pizza peel, practice transferring an empty dough or even a piece of cardboard to get a feel for the motion.
—
Common Mistakes to Avoid
1. Using Too Little Dusting Material:
Without enough flour, cornmeal, or semolina, the dough will stick to the peel, making it nearly impossible to transfer smoothly.
2. Letting the Pizza Sit Too Long:
Assemble your pizza quickly. The longer the dough sits, the more likely it is to absorb moisture and stick.
3. Incorrect Sliding Technique:
Avoid jerky or timid movements when transferring the pizza to the oven. Use a quick, fluid motion to release the pizza.
4. Handling Cooked Pizza with a Wooden Peel:
Wooden peels are better for transferring raw dough, but they can burn or warp if exposed to prolonged heat. Use a metal peel for retrieving hot pizzas.
—
Maintaining Your Pizza Peel
1. Cleaning:
For wooden peels, wipe them clean with a damp cloth. Avoid soaking or using soap, as wood is porous and can absorb moisture or soap residues.
For metal peels, wash with warm soapy water and dry immediately to prevent rust.
2. Storing:
Store your pizza peel in a cool, dry place. Wooden peels should be kept away from heat and moisture to prevent warping.
3. Seasoning Wooden Peels:
Occasionally rub a small amount of mineral oil or food-grade oil into the wood to keep it in good condition and prevent cracking.
—
Why Invest in a Pizza Peel?
A pizza peel is not just a tool—it’s an investment in better homemade pizza. It simplifies the transfer process, keeps your hands safe from high oven temperatures, and ensures your pizzas cook evenly without losing their shape. Whether you’re a seasoned pizza maker or a beginner, a good peel is an indispensable addition to your kitchen.
By practicing these tips and techniques, you’ll master the art of using a pizza peel, making the process of baking pizza seamless and enjoyable. From sliding the raw dough into the oven to retrieving a perfectly baked pizza, your peel will become your trusted companion in creating pizzeria-quality pies at home.
Troubleshooting Common Pizza Making Problems
Too Thick or Thin Crust
When it comes to making pizza, the thickness of the crust plays a crucial role in the final texture, taste, and overall dining experience. While some people prefer a light, thin, and crispy crust, others enjoy a thicker, more substantial base. Striking the right balance in crust thickness ensures your pizza is not only visually appealing but also cooks evenly and supports your choice of toppings. In this section, we’ll dive into the challenges of too thick or too thin crusts, their potential pitfalls, and how to perfect your dough for the best results.
—
Problems with a Crust That’s Too Thick
1. Uneven Cooking:
Thick crusts often take longer to cook through, leading to a crust that’s undercooked or doughy in the center while the edges or toppings may burn.
The additional cooking time can cause toppings to overcook or dry out.
2. Overly Dense Texture:
If the dough isn’t properly proofed, a thick crust can feel heavy and chewy rather than airy and soft.
Excess flour or improper kneading can result in a tough, dense crust instead of a light, fluffy one.
3. Topping Balance:
Thick crusts can overpower the flavors of the sauce and toppings, making the pizza feel unbalanced.
If overloaded with toppings, the weight can cause the crust to sag or become soggy in the center.
—
Problems with a Crust That’s Too Thin
1. Fragility:
Thin crusts can tear easily during stretching, making it difficult to transfer or bake without losing toppings.
The crust may also collapse under the weight of heavier toppings, leading to a messy eating experience.
2. Overcooking:
A thin crust cooks much faster and can burn easily, especially at high temperatures. This can result in an overly crisp or brittle base.
3. Lack of Chewiness:
While some enjoy the snap of a thin crust, others may find it lacks the chewiness and texture of a more balanced dough.
4. Dryness:
Thin crusts can dry out quickly in the oven, leaving you with a cracker-like base rather than a pliable, flavorful crust.
—
How to Achieve the Right Crust Thickness
1. Proper Dough Preparation:
Use a dough recipe with the correct hydration level (water-to-flour ratio). A well-hydrated dough is easier to stretch and less likely to tear.
Knead the dough until it’s smooth and elastic. This develops the gluten network needed for structure and stretchability.
2. Resting and Proofing:
Allow the dough to rest and proof properly. Resting makes the dough easier to stretch, while proofing allows it to rise and develop air pockets for a light, airy texture.
For thick crusts, give the dough extra time to rise after shaping for a fluffier result.
3. Shaping and Stretching:
Use your hands to gently stretch the dough rather than a rolling pin. This preserves the air bubbles in the dough, giving it a better texture.
For a thicker crust, stop stretching when the dough is about ¼–½ inch thick.
For a thin crust, stretch the dough until it’s about ⅛ inch thick, being careful not to tear it.
4. Even Thickness:
Use your fingertips to gently press and stretch the dough outward in a circular motion to maintain an even thickness.
Avoid creating thin spots in the center or overly thick edges, as this can lead to uneven cooking.
—
Tips for Thick Crust Lovers
1. Double Proofing:
After shaping the dough, let it proof again on the baking sheet or peel. This extra rise ensures a fluffy, airy crust.
2. Par-Baking:
For very thick crusts, consider par-baking the dough for a few minutes before adding toppings. This ensures the interior cooks through without overcooking the toppings.
3. Choose Toppings Wisely:
Thick crusts can handle heavier toppings like meats, cheeses, and chunky vegetables. However, balance is still important to avoid overwhelming the dough.
4. Lower Oven Temperature:
Reduce the oven temperature slightly to allow the thicker crust to cook through without burning the top.
—
Tips for Thin Crust Lovers
1. Cold Dough:
Use dough that’s been refrigerated overnight. Cold dough is easier to roll or stretch thin without tearing.
2. Less Topping Weight:
Stick to lighter toppings, such as thinly sliced vegetables, fresh herbs, or minimal cheese, to prevent the crust from sagging or tearing.
3. Preheat the Oven:
Thin crusts benefit from very high heat (475°F–500°F or 245°C–260°C) to cook quickly and develop a crisp base without over-drying.
4. Use a Pizza Stone:
A preheated pizza stone or steel can help thin crusts cook evenly and develop a nice crunch without burning.
—
Finding Your Perfect Crust Style
Whether you prefer a thick or thin crust, the ideal pizza starts with understanding your preferences and adapting your technique accordingly. Experimenting with different dough recipes, shaping methods, and baking times will help you find the perfect balance of texture and flavor.
1. Thick Crust Favorites:
Ideal for pan pizzas, Chicago deep-dish, or Sicilian-style pizzas.
Great for those who love a bread-like base with a chewy, hearty texture.
2. Thin Crust Favorites:
Perfect for Neapolitan, Roman, or New York-style pizzas.
Best for those who enjoy a crispy, delicate crust that lets the toppings shine.
—
Conclusion
The thickness of your pizza crust can significantly impact the outcome of your pizza. While thick crusts are hearty and satisfying, thin crusts offer a crisp and light alternative. By following the tips outlined here, you can avoid common pitfalls and achieve the perfect crust thickness every time. Whether you’re a fan of pillowy dough or crunchy bases, mastering the art of crust preparation will elevate your homemade pizza to the next level.
Soggy Pizza
A soggy pizza can be one of the most frustrating outcomes when making homemade pizza. Instead of a crisp, golden crust that supports the toppings, you end up with a limp, waterlogged base that ruins the overall texture and eating experience. Understanding the common causes of soggy pizza and how to avoid them will ensure that your pizza comes out perfectly crisp and delicious every time. Let’s explore the reasons behind sogginess and how to fix or prevent it.
—
Common Causes of Soggy Pizza
1. Excess Moisture from Toppings:
Certain toppings, like fresh vegetables (tomatoes, mushrooms, or spinach), release a lot of water when cooked.
Watery sauces, fresh mozzarella, or thawed frozen ingredients can also add extra moisture to your pizza.
2. Undercooked Dough:
If the pizza isn’t baked long enough or at a high enough temperature, the crust may remain doughy and soggy instead of crisping up.
A thick crust or dense dough may take longer to cook through, especially in the center.
3. Overloading with Toppings:
Piling on too much sauce, cheese, or other toppings can weigh down the crust and prevent it from cooking properly.
Overloading can also trap steam, leading to a soggy base.
4. Improper Baking Surface:
Using a cold baking sheet or non-preheated surface (e.g., stone or steel) won’t provide the intense heat needed to crisp the bottom of the pizza.
Baking on a surface that isn’t conducive to heat retention, like a thin aluminum sheet, can result in an unevenly cooked crust.
5. Humidity or Wet Dough:
Dough that’s too wet or sticky can remain soggy even after baking.
High humidity in your kitchen can affect the dough’s hydration, making it harder to achieve a crisp crust.
6. Using Parchment Paper Excessively:
While parchment paper can make transferring pizza easier, it can also trap steam between the paper and the crust, resulting in a less crisp base.
—
How to Prevent Soggy Pizza
1. Preheat Your Baking Surface:
Use a pizza stone, steel, or heavy-duty baking sheet. Place it in the oven during preheating to ensure it’s hot enough to crisp the crust when the pizza is placed on it.
Preheat the oven to at least 475°F–500°F (245°C–260°C) for optimal results.
2. Control Moisture in Toppings:
Vegetables: Pat fresh vegetables dry with a paper towel to remove excess moisture. You can also sauté or roast them lightly before adding them to the pizza.
Cheese: If using fresh mozzarella, drain it and blot it with a paper towel to remove excess water. Shredded mozzarella tends to release less moisture during baking.
Sauce: Use a thicker sauce with minimal water content. Avoid adding too much sauce, as even small amounts can create excess liquid.
3. Don’t Overload the Pizza:
Use toppings sparingly and evenly distribute them across the pizza.
Aim for balance: a thin layer of sauce, moderate cheese, and a few well-chosen toppings.
4. Bake at the Right Temperature:
High heat is key to achieving a crispy crust. Baking at lower temperatures can leave the pizza undercooked and soggy.
If you’re making a thick-crust pizza, consider par-baking the dough for a few minutes before adding toppings to ensure the base is fully cooked.
5. Allow Dough to Rest Properly:
Proof the dough fully to allow air bubbles to form, which will create a lighter and less dense crust.
Stretch the dough evenly to avoid thick spots that might not cook through.
6. Avoid Steam Trapping:
If you’re using parchment paper, remove it halfway through baking to prevent steam buildup.
Don’t cover the pizza during baking, as this can trap moisture and soften the crust.
—
How to Fix Soggy Pizza
1. Crisping Up the Crust:
If your pizza turns out soggy, you can try reheating it on a hot skillet or griddle. Place the pizza on the skillet over medium heat for a few minutes to crisp the bottom.
Alternatively, place the pizza back in the oven directly on the oven rack or stone for a few more minutes.
2. Drain Excess Liquid:
If the toppings have released too much liquid, carefully blot the surface of the pizza with a paper towel.
For watery ingredients like fresh tomatoes, consider draining or patting them dry before reusing them on future pizzas.
3. Par-Bake the Dough:
If the center of the crust is consistently undercooked, try par-baking the dough for 5–7 minutes before adding sauce and toppings. This ensures the base is fully cooked before it’s loaded with ingredients.
—
Special Techniques for Crispier Crusts
1. Use Semolina or Cornmeal:
Dust your pizza peel or baking surface with semolina or cornmeal instead of flour. These grains create a barrier between the dough and the baking surface, helping to absorb moisture and create a crisp crust.
2. Air Fryer or Skillet Finish:
For an extra-crispy base, try finishing your pizza in an air fryer or a hot skillet after baking. This method is especially useful for reheating leftover pizza.
3. Ventilation:
Make sure your oven is properly ventilated during baking. Crack the oven door slightly during the last few minutes of cooking to allow steam to escape.
—
Conclusion
Soggy pizza is a common issue that can be easily avoided with the right techniques and attention to detail. From managing moisture in your toppings to ensuring your oven and baking surface are properly preheated, small adjustments can make a big difference in achieving a crisp, golden crust. With these tips, your homemade pizzas will consistently turn out perfectly cooked, delighting your taste buds and impressing your guests. Whether you prefer thin-crust or deep-dish pizza, mastering the art of avoiding sogginess will elevate your pizza-making skills to the next level.
Burnt Pizza
Burnt pizza is a common mishap that can occur when making pizza at home, especially when baking at high temperatures. While some charred spots on the crust or edges are desirable in styles like Neapolitan pizza, an overly burnt pizza can ruin the flavor and texture of your dish. Burnt pizza is often the result of a few preventable mistakes, such as incorrect oven settings, improper placement in the oven, or overcooking. In this section, we’ll explore the causes of burnt pizza, how to prevent it, and what to do if your pizza gets overcooked.
—
Common Causes of Burnt Pizza
1. Overly High Temperatures:
While pizza requires high heat for a crisp crust and quick cooking, baking at excessively high temperatures or for too long can lead to burnt edges or toppings.
2. Thin or Uneven Dough:
A crust that’s too thin in certain areas can burn faster than the rest of the pizza, leaving some parts overcooked and others underdone.
3. Prolonged Baking Time:
Leaving the pizza in the oven too long, even at the correct temperature, will result in overcooking or burning, especially on the edges or bottom.
4. Placement in the Oven:
Placing the pizza too close to the top or bottom heating elements can cause scorching.
A pizza stone or steel that is overheated can also cause the bottom to burn before the rest of the pizza is done.
5. Sugar in the Dough or Toppings:
Sugar in the pizza dough, tomato sauce, or toppings (like barbecue sauce or caramelized onions) can burn quickly when exposed to high heat.
6. Improper Use of a Pizza Stone:
If the pizza stone is not adequately preheated or is too close to the heating element, it can cause the bottom of the pizza to burn while the top remains undercooked.
—
How to Prevent Burnt Pizza
1. Adjust the Oven Temperature:
Stick to an oven temperature between 450°F and 500°F (230°C–260°C) for standard homemade pizza. For thinner crusts or pizzas prone to burning, consider reducing the heat slightly.
2. Monitor Baking Time:
Keep an eye on your pizza as it bakes, especially during the last few minutes. Most pizzas bake within 7–12 minutes, depending on the thickness and toppings.
3. Use Proper Oven Placement:
Place the pizza in the middle rack for even heat distribution. Avoid placing it too close to the top heating element (which can burn toppings) or too close to the bottom (which can scorch the crust).
4. Rotate the Pizza:
Rotate the pizza halfway through baking to ensure even cooking, especially if your oven has hot spots.
5. Preheat the Baking Surface Correctly:
If using a pizza stone or steel, make sure it’s properly preheated but not overheated. Preheat the stone for about 30 minutes at the oven’s target temperature.
6. Use Parchment Paper Sparingly:
If using parchment paper, ensure it’s cut to fit just under the pizza and not overhanging, as exposed paper can burn in the oven.
7. Avoid Excessive Sugar:
Use minimal sugar in your dough and sauce, as sugar caramelizes and burns quickly. If your dough or toppings contain sugar, keep a closer watch while baking.
8. Limit Direct Contact with Heat Sources:
Avoid placing the pizza directly under a broiler unless you’re actively monitoring it for quick browning.
If your oven has a convection fan, use it cautiously as it can intensify heat and cause burning.
—
Fixing Burnt Pizza During Baking
1. Check Early and Often:
If you notice the edges or toppings browning too quickly, cover the pizza loosely with aluminum foil. This will prevent further burning while the rest of the pizza cooks.
2. Move to a Higher Rack:
If the bottom crust is cooking too quickly, transfer the pizza to a higher rack or use a baking sheet to insulate the base.
3. Reduce the Heat:
Lower the oven temperature by 25°F–50°F (10°C–20°C) if the pizza is cooking unevenly or burning.
—
How to Save a Burnt Pizza
1. Trim the Burnt Parts:
If only the edges are burnt, use a knife or kitchen shears to cut away the charred portions. This salvages the rest of the pizza.
2. Scrape Off Burnt Toppings:
If the toppings are overcooked, gently scrape off the burnt layer and replace it with fresh ingredients before reheating.
3. Reheat Strategically:
Place the pizza in a low-heat oven or a skillet to warm it up after trimming or scraping. Avoid high heat to prevent further burning.
—
How to Achieve the Perfect Char
Some styles of pizza, like Neapolitan, are meant to have slight charring on the crust. This adds a smoky flavor and enhances the overall texture. To achieve the perfect char without burning:
1. Use a High-Quality Pizza Stone or Steel:
These tools provide the intense heat needed for charring while evenly distributing heat to avoid overcooking.
2. Broil with Caution:
For a charred finish, place the pizza under the broiler for 1–2 minutes after baking. Keep a close eye on it to prevent burning.
3. Experiment with Dough Hydration:
A slightly wetter dough (higher hydration level) will develop a softer crust while still allowing for charred spots during high-temperature baking.
—
Conclusion
Burnt pizza can be disappointing, but with the right techniques and attention to detail, it’s entirely preventable. By understanding the common causes of burning and how to adjust your baking process, you can ensure your pizzas turn out perfectly cooked every time. Whether you prefer a lightly golden crust or a slightly charred Neapolitan-style pizza, mastering the balance between heat, time, and placement in the oven is the key to success.
Conclusion
Making homemade pizza is a rewarding experience that allows you to customize every aspect, from the crust to the toppings. By understanding the key components of pizza-making—such as kneading the dough, preparing the sauce, layering toppings, and baking properly—you can create restaurant-quality pizza in the comfort of your own kitchen.
Avoid common pitfalls like soggy or burnt pizza by following the tips and techniques outlined in this guide. With practice, you’ll master the art of making pizza that’s perfectly crisp, flavorful, and balanced. Whether you’re a fan of thin, crispy crusts or thick, fluffy ones, the joy of creating your own pizza lies in experimenting with recipes and techniques to suit your taste.
So roll out that dough, heat up your oven, and get creative with your toppings. There’s nothing quite like the satisfaction of biting into a homemade pizza that’s been crafted with care. Your next pizza night is sure to be a success!