

Crepes are a versatile and delicious dish that originates from France, known for their thin, delicate texture. These light, thin pancakes can be served both sweet and savory, making them a favorite for any meal of the day. Traditionally enjoyed for breakfast or dessert, crepes are made from a simple batter of flour, eggs, milk, and butter, which, when cooked correctly, yields a soft yet slightly crispy edge. While crepes are often associated with French cuisine, they have gained worldwide popularity due to their ability to be filled or topped with a wide variety of ingredients—ranging from fresh fruit and Nutella to cheese and ham. Whether you’re a novice or an experienced cook, making perfect crepes at home is easier than it seems and a rewarding experience for food lovers of all ages.
The Essential Ingredients for Perfect Crepes
Flour: The Foundation of Perfect Crepes
Flour plays a crucial role in determining the texture and structure of your crepes. For the best results, it’s important to choose the right type of flour.
1. All-Purpose Flour vs. Cake Flour:
Most traditional crepe recipes use all-purpose flour, which provides the perfect balance of structure and tenderness. However, some recipes may call for cake flour, which has a lower protein content, resulting in a softer, more delicate crepe. Cake flour can create a lighter, airier texture, ideal for those who prefer super thin crepes.
2. Sifting the Flour:
Sifting your flour before mixing it into the batter is a step many overlook, but it’s essential for smooth crepes. Sifting removes any lumps in the flour, allowing it to incorporate more easily with the other ingredients. This ensures a lump-free batter and smooth, uniform crepes once cooked.
3. Flour to Liquid Ratio:
The amount of flour you use in relation to the liquid (milk and eggs) in your crepe batter is crucial for achieving the right consistency. If there’s too much flour, the batter will be too thick and create heavy, pancake-like crepes. If there’s too little flour, the batter will be too thin, resulting in crepes that might tear easily. The right ratio helps to create that perfect crepe texture—thin but sturdy enough to hold fillings without falling apart.
4. Specialty Flours:
For those looking to experiment, there are several variations of flour that can be used in crepe recipes. For a gluten-free option, you can use a gluten-free all-purpose flour blend, though the texture might vary slightly. Additionally, whole wheat flour can provide a slightly denser, nuttier flavor for savory crepes, but you may need to adjust the liquid amounts to get the desired batter consistency.
Choosing the right flour and ensuring it’s properly mixed is key to making crepes that are light, delicate, and have the perfect texture every time.
Eggs and Butter: Key Ingredients for Flavor and Texture
Eggs and butter are two essential ingredients that contribute significantly to the flavor, texture, and overall success of your crepes. Their role goes beyond simply being part of the batter—they help achieve the delicate, light texture and rich taste that makes crepes so irresistible.
1. Eggs: The Structure and Texture Makers
Eggs are the building blocks of crepe batter. They act as a binding agent, helping the flour and liquids come together smoothly. The proteins in eggs also provide structure to the crepes, ensuring that they hold together when cooked and don’t fall apart or become too fragile.
Texture: The more eggs you use, the firmer and slightly thicker the crepes will be. For lighter, thinner crepes, you can reduce the number of eggs or use only egg whites, although this may alter the flavor slightly.
Moisture: Eggs add moisture to the batter, contributing to a soft and tender texture. They also aid in the browning process when cooking, giving crepes that beautiful golden hue.
2. Butter: Richness and Flavor
Butter is another key player in the crepe-making process, adding both richness and flavor. It helps to create a soft, tender crepe with a slightly crispy edge. The fat in butter prevents the crepes from sticking to the pan, making the cooking process easier and more manageable.
Flavor: Butter imparts a subtle, rich flavor to the crepes. Whether you use unsalted or salted butter depends on your personal preference, but unsalted butter is generally preferred, as it allows you to control the seasoning of the batter more effectively.
Texture and Crispy Edges: The butter not only enhances the flavor but also contributes to the texture, especially around the edges of the crepe. When cooked, the fat helps form slightly crispy, golden-brown edges that contrast beautifully with the soft center.
3. The Right Balance:
The key to perfect crepes lies in the balance of eggs and butter. Too many eggs can result in a crepe that is too firm or rubbery, while too much butter may make the crepes greasy or cause them to become overly crispy. Typically, a balance of one egg for every 1/2 cup of flour and 2-3 tablespoons of butter works well, but you can experiment with these ratios depending on your desired outcome.
4. Melting Butter into the Batter:
To ensure a smooth and lump-free batter, it’s important to melt the butter before incorporating it into the crepe mixture. This helps distribute the fat evenly throughout the batter, preventing clumps of butter from forming and ensuring a smooth, consistent texture. Some recipes may even call for a bit of melted butter in the pan when cooking the crepes to enhance their texture and flavor further.
In summary, eggs and butter are integral in creating crepes with the perfect balance of flavor, tenderness, and structure. The eggs provide the necessary texture and moisture, while the butter contributes richness, smoothness, and crispy edges, making your crepes a delicious treat every time.
Milk: The Secret to a Smooth and Tender Crepe Batter
Milk is a crucial ingredient in crepe batter, acting as the liquid base that brings together the dry ingredients and helps achieve the perfect consistency. The type of milk you choose can impact the flavor, texture, and even the color of your crepes, so it’s important to understand its role in the recipe.
1. The Role of Milk in the Batter:
Milk is the liquid that helps thin out the batter, allowing it to spread easily and evenly in the pan. It dissolves the flour, allowing the batter to become smooth and homogeneous. The right amount of milk ensures the batter reaches a pourable, thin consistency that is essential for making delicate, paper-thin crepes.
Consistency: Milk thins out the batter, making it easy to swirl around in the pan to create those thin, delicate layers. Without enough milk, the batter will be too thick, and you’ll end up with more of a pancake-like texture.
Smoothness: A good balance of milk ensures a lump-free batter, which is essential for evenly cooked crepes. It also helps the dry ingredients—such as flour and eggs—blend together perfectly.
2. Whole Milk vs. Skim or Low-Fat Milk:
The type of milk you use can slightly alter the texture and richness of your crepes. Whole milk, with its higher fat content, creates a richer batter, resulting in crepes with a smooth, tender, and slightly richer texture. The fat from the whole milk contributes to the overall mouthfeel, making the crepes more flavorful and soft.
Whole Milk: The fat in whole milk helps to give the crepes a soft, delicate texture. It also enhances their flavor, making them slightly richer, which is ideal for both sweet and savory crepes.
Skim or Low-Fat Milk: While skim or low-fat milk will still produce acceptable results, the crepes may be a bit lighter in texture and flavor. If you’re looking for a healthier alternative, this could be a good option, though it may result in slightly firmer crepes.
3. Dairy-Free Milk Alternatives:
If you prefer a dairy-free or vegan option, there are several milk alternatives that work well in crepe recipes. Almond milk, oat milk, or soy milk are all great substitutes that mimic the consistency of cow’s milk, though they may impart a subtle flavor of their own.
Almond Milk: A great option for a lighter crepe, almond milk is mild in flavor and works well in both sweet and savory crepes. Be sure to choose an unsweetened variety to avoid altering the flavor.
Oat Milk: This alternative adds a creamy texture and slightly sweet flavor, making it a fantastic option for sweet crepes, especially when paired with fruit or Nutella.
Soy Milk: Soy milk is another good choice, offering a neutral flavor and creamy consistency, making it suitable for all types of crepes.
4. The Importance of Temperature:
When adding milk to your crepe batter, it’s best to use milk that is at room temperature. Cold milk can cause the butter to harden or clump in the batter, making it more difficult to mix smoothly. Room-temperature milk ensures that the batter comes together easily, yielding a smoother and more consistent result.
5. Flavor and Sweetness:
Milk can also add a subtle flavor to your crepes. Depending on your preferences, you can opt for flavored milks, such as vanilla almond milk, to add an extra layer of taste to sweet crepes. However, if you’re aiming for savory crepes, it’s best to stick with a more neutral milk or use unsweetened alternatives to keep the flavor balanced.
In conclusion, milk is a key ingredient that contributes to the texture, smoothness, and flavor of your crepes. Whether you choose whole milk, skim milk, or a dairy-free alternative, the right amount of milk ensures a perfectly pourable batter that yields soft, tender, and delicious crepes every time. The choice of milk and its temperature can significantly affect the final product, so experimenting with different options can help you find your perfect crepe formula.
Optional Add-ins: Customizing Your Crepe Batter for Unique Flavors
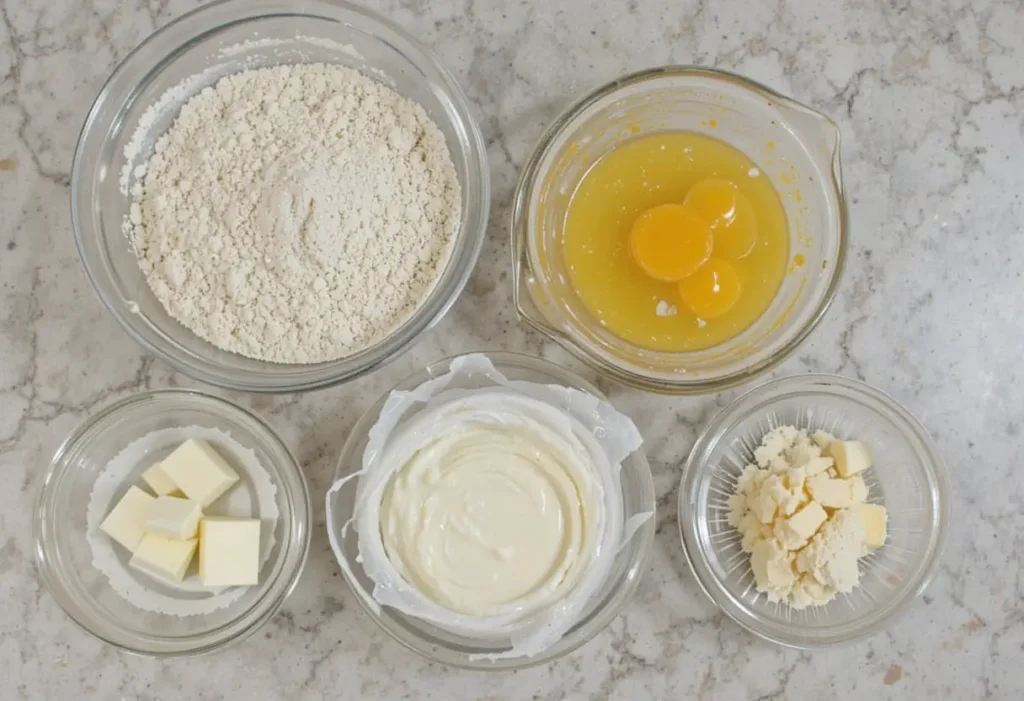
While the basic crepe batter consists of just a few key ingredients—flour, eggs, milk, and butter—adding optional ingredients can elevate your crepes and bring new flavors, textures, and depth to your dish. These add-ins allow you to get creative, whether you’re making a sweet dessert crepe, a savory meal, or something in between. Here are some optional ingredients that can be added to your batter to customize your crepes.
1. Vanilla Extract: For a Subtle Sweet Aroma
Vanilla extract is a popular addition to sweet crepes, adding a warm, aromatic flavor that enhances the overall taste without overpowering the other ingredients. A teaspoon of pure vanilla extract is enough to impart a subtle sweetness and depth, making your crepes ideal for filling with fresh fruit, chocolate, or whipped cream.
How it Enhances Flavor: Vanilla adds a fragrant sweetness that complements a wide variety of fillings, especially when paired with chocolate, berries, or even a sprinkle of powdered sugar.
Alternative Flavors: You can also experiment with other extracts, such as almond, hazelnut, or orange, to give your crepes a unique twist.
2. Sugar: A Light Sweetness for Dessert Crepes
A small amount of sugar (usually 1-2 tablespoons) can be added to the batter to sweeten the crepes. While this isn’t necessary for savory crepes, it’s essential if you’re making dessert crepes or if you plan to top them with sweet fillings.
How it Enhances Texture: Sugar can help to achieve a slight crispness on the edges of the crepes as they cook, contributing to a golden-brown finish.
Tip: If you plan to use a sweet filling like Nutella or fruit, you may want to reduce the amount of sugar in the batter to avoid overpowering the sweetness of the toppings.
3. Salt: Balancing Flavors in Savory Crepes
A pinch of salt in the batter helps to balance the sweetness of other ingredients and enhances the overall flavor of the crepes. Salt is especially important if you’re making savory crepes, as it brings out the taste of cheeses, meats, and vegetables that will be used as fillings.
Enhancing Savory Crepes: Salt is essential when making savory crepes, whether you’re using ham, cheese, or sautéed vegetables as fillings. The salt in the batter will complement these ingredients, making the crepes more flavorful and well-rounded.
Sweet and Savory Balance: If you’re making a hybrid sweet-savory crepe, like one with cheese and caramelized onions, a pinch of salt can help balance the dish.
4. Lemon Zest: A Fresh and Bright Flavor
Adding lemon zest to the crepe batter is a wonderful way to infuse a bright, citrusy note into your crepes, making them taste light and fresh. The zest adds a subtle, fragrant flavor that works especially well in combination with sweet fillings like berries, whipped cream, or chocolate.
Perfect for Sweet Crepes: Lemon zest pairs wonderfully with fillings like strawberries, raspberries, or even Nutella. The citrusy flavor cuts through the richness of the filling, creating a more balanced taste.
Savory Crepes: For savory versions, lemon zest can be used to add a refreshing contrast, especially in crepes filled with seafood, chicken, or fresh herbs.
5. Alcohol: Adding Flavor and Tenderness
In some traditional crepe recipes, a splash of alcohol is added to the batter, typically rum or brandy, which contributes both flavor and tenderness. Alcohol evaporates during the cooking process, leaving behind a subtle depth of flavor that enhances the taste of the crepes.
Rum or Brandy: These liquors are classic choices for adding a rich undertone, especially in dessert crepes like Crepes Suzette. They can also add a slight caramelized flavor when combined with ingredients like sugar or citrus.
How it Affects Texture: Alcohol can also help to tenderize the crepe batter slightly, contributing to a more delicate texture.
6. Cinnamon or Nutmeg: Warming Spices for Seasonal Flavors
Cinnamon, nutmeg, or even a combination of both can be added to the batter for a cozy, spiced flavor. These warm spices are especially popular for sweet crepes during the fall and winter months and pair well with fruits like apples, pears, or peaches.
Sweet Crepes: A sprinkle of cinnamon or nutmeg can complement ingredients like caramelized bananas, chocolate, or a dusting of powdered sugar.
Savory Crepes: These spices can also work in savory crepes, especially if you’re using squash, roasted root vegetables, or spiced meats as fillings.
7. Coconut Milk or Almond Milk: Dairy-Free Options
If you’re making a dairy-free version of crepes, substituting regular milk with coconut milk or almond milk can add interesting flavors. Coconut milk provides a rich, tropical taste, while almond milk offers a more neutral base with a slight nutty flavor.
Coconut Milk: Ideal for adding a slight coconut flavor, which works wonderfully with tropical fruits like pineapple, mango, or coconut flakes. Coconut milk also adds a bit more richness to the batter.
Almond Milk: A versatile option that provides a smooth consistency with a subtle nutty flavor, making it suitable for both sweet and savory fillings.
8. Baking Powder: For Slightly Fluffier Crepes
While traditional crepes are meant to be thin and delicate, adding a small amount of baking powder (around 1/4 teaspoon) can give them a slightly puffed, airy texture. This can be useful if you’re making crepes that need to hold heavier fillings, or if you prefer a fluffier bite.
When to Use: If you like your crepes to have a slightly thicker texture, perhaps for heartier fillings like scrambled eggs and bacon or a rich chocolate ganache, baking powder can provide that lift.
9. Herbs: For Savory Crepes with Extra Flavor
For savory crepes, fresh or dried herbs like thyme, rosemary, or parsley can be added to the batter to infuse extra flavor. This works especially well when the crepes are filled with savory fillings like sautéed vegetables, cheese, or smoked salmon.
Thyme or Rosemary: These herbs lend a fragrant, earthy flavor, making them ideal for Mediterranean-style crepes or crepes filled with chicken, spinach, and feta.
Parsley: A mild, fresh herb that complements many savory fillings, parsley can brighten the flavor of the crepes and enhance the taste of herbs and vegetables inside the crepes.
—
By incorporating these optional add-ins, you can easily tailor your crepes to suit your personal taste preferences, whether you’re looking to make them sweeter, more savory, or add a unique flavor twist. The key is to experiment and find combinations that complement your favorite fillings and create the perfect crepe experience.
Step-by-Step Instructions to Make Crepe Batter
Mixing the Ingredients: The Key to a Smooth, Lump-Free Crepe Batter
The process of mixing your crepe ingredients properly is essential to achieving a smooth, lump-free batter that yields light, delicate crepes. While it may seem simple, the way you combine the flour, eggs, milk, butter, and optional add-ins can affect the texture and consistency of your final product. Below is a detailed explanation of how to mix the ingredients effectively to achieve the perfect crepe batter.
1. Start with Dry Ingredients:
Before adding any liquid, it’s important to sift your dry ingredients—specifically the flour—into the mixing bowl. Sifting removes any clumps or impurities and ensures an even distribution of the flour throughout the batter. This is crucial for avoiding lumps in the final crepe mixture.
Why Sifting is Important: Sifting helps incorporate air into the flour, which makes the batter lighter. It also breaks up any clumps of flour that might form during storage, giving you a smoother batter once the wet ingredients are added.
Flour Measurement Tip: When measuring your flour, spoon it into your measuring cup and level it off with a knife to avoid packing too much flour into the cup, which could make your batter too thick.
2. Whisking the Eggs:
Crack the eggs into a separate bowl and whisk them lightly before adding them to the flour. Whisking the eggs first helps break them up and ensures they blend evenly into the dry ingredients.
Why Whisk First: If you add eggs directly to the flour without breaking them first, they may form small clumps that are difficult to dissolve into the batter later. Whisking them beforehand ensures a smoother, more uniform batter.
3. Gradual Incorporation of Liquid (Milk and Butter):
Once your eggs are incorporated with the dry ingredients, it’s time to add the milk and melted butter. Add the milk slowly, in small amounts, while continuously whisking to avoid the formation of lumps. Gradually incorporating the liquid gives the flour time to absorb the milk, creating a smooth and consistent batter.
Adding the Milk Gradually: If you add all the milk at once, the batter is more likely to clump, making it difficult to achieve a smooth texture. By adding the milk gradually and whisking constantly, you allow the flour to fully hydrate and incorporate into the liquid.
Melting the Butter: Melt the butter before adding it to the batter to ensure it mixes evenly. If you add cold butter directly into the batter, it can solidify, resulting in lumps. Once melted, let it cool slightly before adding to the batter so that it doesn’t alter the consistency.
4. Use of a Whisk or Blender:
While a whisk is the traditional tool for mixing crepe batter, using a blender or food processor can help you achieve an ultra-smooth, lump-free mixture. This method can be particularly helpful if you’re making a larger batch or want to avoid the hassle of constant whisking.
Whisking by Hand: If you prefer a more hands-on approach, a balloon whisk is ideal for this task. It helps break up the eggs and mix the ingredients efficiently.
Using a Blender: If you’re using a blender or immersion blender, simply add all the ingredients at once and blend on medium speed for about 15-20 seconds. This method guarantees a lump-free batter and saves time. However, be sure not to overmix, as you don’t want to incorporate too much air into the batter.
5. Achieving the Right Consistency:
The key to perfect crepes lies in the consistency of the batter. After mixing, the batter should be thin enough to easily spread in the pan but not so watery that it doesn’t hold together. A good crepe batter will have the consistency of heavy cream or a thin pancake batter.
Adjusting the Consistency: If the batter feels too thick, add a small amount of milk to thin it out. If it’s too runny, add a bit more flour to thicken it. The batter should be smooth, silky, and pourable without being overly watery.
6. Letting the Batter Rest:
Once your batter is well-mixed, it’s important to let it rest for at least 30 minutes (though longer resting times, such as an hour or overnight in the fridge, are even better). This resting period allows the flour to fully hydrate and the gluten to relax, resulting in a smoother batter and more tender crepes.
Why Resting is Important: Resting the batter helps improve the texture of the crepes by allowing the flour to absorb the liquid fully and reducing the chance of the crepes becoming rubbery. It also helps the batter thicken slightly, which makes it easier to spread in the pan.
7. Final Check for Lumps:
Before cooking your crepes, do a final check to ensure the batter is completely smooth. If you notice any lumps, simply whisk or blend the batter again for a few seconds to break them up. You can also use a fine-mesh sieve to strain the batter if you prefer an extra-smooth consistency.
—
By following these steps and properly mixing your ingredients, you’ll achieve a smooth, well-blended crepe batter that is free of lumps and the perfect consistency for cooking delicate, paper-thin crepes. Taking the time to mix carefully ensures your crepes will be light, tender, and golden brown every time.
Achieving the Right Consistency: The Secret to Perfect Crepes
Getting the consistency of your crepe batter just right is one of the most important steps in ensuring that your crepes turn out perfect every time. The right consistency ensures that the batter is easy to spread across the pan, cooks evenly, and results in tender, thin crepes with a smooth texture. If the batter is too thick or too thin, it can affect the cooking process and the texture of the finished crepes. Here’s a detailed look at how to achieve the ideal batter consistency.
1. Thin but Not Watery: The Ideal Crepe Batter Consistency
Crepe batter should be thin enough to easily spread across the pan but not so watery that it runs off or fails to hold together. When the batter is at the right consistency, it should resemble heavy cream or a thin pancake batter. It should flow easily but still have enough structure to create a thin, even layer on the pan without pooling excessively.
Test for Consistency: One way to test the batter’s consistency is to dip a spoon or spatula into it and observe how it falls off. The batter should coat the back of the spoon lightly but flow off in a steady stream without forming large drops. If it drips off too quickly or looks too watery, it might need a bit more flour. If it forms a thick blob or sticks heavily to the spoon, it may be too thick and need a little more liquid.
2. Adjusting the Consistency to Suit Your Preferences
While the general guideline for crepe batter is to make it thin, you may need to adjust the consistency based on your particular preferences and the type of crepes you’re making.
If the Batter is Too Thick: If you find the batter too thick, the crepes will be too dense and may not spread evenly across the pan. To thin it out, add small amounts of milk, a tablespoon at a time, until the batter reaches a smooth, pourable consistency. Keep in mind that adding too much liquid at once can make the batter too runny, so it’s better to gradually add the liquid and check the texture frequently.
If the Batter is Too Thin: On the flip side, if the batter is too thin, the crepes will be overly fragile and may tear or stick to the pan. To thicken the batter, simply add a small amount of flour (about a teaspoon at a time). After each addition, whisk the batter well to ensure the flour is fully incorporated and there are no lumps.
3. The Importance of Resting the Batter
After mixing, letting your crepe batter rest is essential for achieving the right consistency. Resting allows the flour to fully absorb the liquid, which can make the batter thicker and more cohesive. As the batter sits, the gluten relaxes, resulting in a smoother, more tender texture when cooked.
Resting Time: Ideally, let the batter rest for at least 30 minutes. If you have time, allowing it to rest for an hour or overnight in the fridge can enhance its texture even further. During this resting period, the starches in the flour hydrate fully, which helps the batter to thicken slightly and become more uniform.
Resting and Consistency: Resting the batter may cause it to thicken slightly. If it becomes too thick after resting, you can simply add a splash of milk to return it to the right consistency. Be sure to give it a quick stir before using.
4. Fine-Tuning Consistency for Specific Crepe Types
Different types of crepes may require slightly different consistencies. For example, if you’re making savory crepes that will hold heavier fillings, you may want the batter to be just a touch thicker to provide more structure. On the other hand, if you’re making sweet crepes that will be filled with lighter ingredients like whipped cream or fruit, you may prefer the batter to be slightly thinner.
Savory Crepes: If your crepes will be used to wrap fillings like cheese, vegetables, or meats, you may want a slightly thicker batter to ensure that the crepes hold up without tearing. In this case, adding just a bit more flour can create a sturdier crepe.
Sweet Crepes: For delicate dessert crepes, a thinner batter will help create the signature light and tender texture. Sweet crepes are often folded or rolled after cooking, and a thinner batter allows them to be easily manipulated without becoming too dense.
5. Visual Cues and Texture Checks
When trying to gauge whether the batter is at the right consistency, visual cues and texture checks can be extremely helpful. For example, you can test the batter’s viscosity by running your finger through a layer of batter on the back of a spoon. If the batter immediately fills the line, it’s likely too thin. If it holds the line for a moment before filling it, that’s a sign it’s the right consistency.
Spoon Test: Dip a spoon into the batter and let it drip back into the bowl. If the batter flows smoothly and evenly off the spoon in a thin stream, you’re on the right track. The batter should not form clumps or puddles.
Pan Test: Another way to check consistency is to test the batter on the pan. Pour a small amount of batter onto a preheated nonstick pan. If the batter spreads easily and forms a thin, even layer, it’s the perfect consistency. If it’s too thick, the batter may form clumps or won’t spread out evenly. If it’s too thin, the batter may run off the pan or cook too quickly.
6. How to Adjust Consistency During Cooking
While cooking, you may need to adjust the batter’s consistency, especially if you notice the crepes aren’t turning out as expected. If your crepes are sticking to the pan or cooking unevenly, it could be a sign that the batter is either too thick or too thin.
Too Thick: If the batter is too thick, you can thin it out by adding a small amount of milk. However, if you add too much liquid, you’ll need to let the batter rest again to fully incorporate the milk.
Too Thin: If the batter is running too quickly off the pan and you’re struggling to get the right thickness, adding just a tiny bit of flour can help thicken the batter. Mix well before continuing to cook.
—
Achieving the right crepe batter consistency is key to making perfect crepes. Whether you’re adjusting for thickness, experimenting with flavor, or resting the batter for the best texture, getting the consistency right ensures that your crepes are light, delicate, and easy to work with. By fine-tuning the batter’s texture and using visual cues, you’ll be able to make crepes that are just the right balance of thin, tender, and flavorful every time.
Letting the Batter Rest: A Crucial Step for Perfect Crepes
Resting your crepe batter is one of the most important steps in ensuring your crepes turn out tender, smooth, and easy to cook. Although it might seem like an optional step, giving your batter time to rest offers several key benefits that enhance both the texture and ease of cooking. Here’s a deeper look at why letting the batter rest is so important and how to do it properly.
1. Allows the Flour to Hydrate Fully
When you mix your flour with the wet ingredients, the flour absorbs the liquid to form the batter. However, not all of the flour hydrates immediately. Allowing the batter to rest gives the flour more time to fully absorb the milk, eggs, and butter, which helps create a smoother, more uniform texture.
Why This Matters: If you skip the resting period, the flour might not absorb all the liquid evenly, leading to a lumpy or uneven batter. A rested batter will have a more cohesive, silky texture, which ensures that the crepes cook evenly and have a delicate, tender bite.
2. Reduces Gluten Development
Crepe batter contains gluten, which is responsible for the elasticity and structure of doughs and batters. However, too much gluten development can make your crepes chewy and tough, which is the opposite of what you’re aiming for. By letting the batter rest, you allow the gluten to relax and “rest,” resulting in a more tender crepe.
How Resting Helps: During the resting period, the gluten strands in the flour soften and relax, reducing the elasticity and giving the batter a more fluid consistency. This makes it easier to spread the batter in the pan and results in a thinner, lighter crepe that is less likely to tear.
3. Enhances the Flavor
Resting the batter also allows the ingredients to meld and develop deeper flavors. The flour and milk have more time to interact, creating a more complex taste. Although the flavor of crepes is usually subtle, letting the batter rest for an extended period can improve the overall taste, especially if you’ve added flavorings like vanilla or spices.
Flavor Development: When flour absorbs liquid, it begins to break down some of its starches, which releases a mild sweetness and enhances the flavor of the batter. Resting overnight in the refrigerator can help the batter become more flavorful, resulting in crepes that taste richer and more balanced.
4. Helps with Consistency
When batter rests, it tends to thicken slightly. This allows you to fine-tune the consistency of your batter before cooking. As the batter sits, the flour continues to absorb the liquid, causing it to thicken up. If you find that the batter becomes too thick after resting, you can easily thin it out with a splash of milk before cooking.
Adjusting After Resting: Sometimes, the batter can be a bit thicker than desired after resting, especially if it was on the thinner side when mixed. If the batter is too thick, you can simply add a small amount of milk to loosen it back to the desired consistency. Be sure to stir it gently to avoid overworking the batter.
5. Easier to Cook with
Resting the batter not only improves the texture of the crepes but also makes the cooking process easier. When the batter has had time to rest, it spreads more easily across the pan, and you can achieve the signature thin, delicate crepe that’s ideal for rolling or folding.
Smoother Cooking: A rested batter spreads more evenly on the hot pan, resulting in consistent thickness across the crepe. Additionally, a well-rested batter will be less prone to forming air bubbles or uneven cooking spots, which can cause imperfections in your crepes.
6. How Long Should You Rest the Batter?
The ideal resting time for crepe batter can vary, but generally, resting it for at least 30 minutes is recommended. This allows the flour to absorb the liquid fully and gives the gluten time to relax. However, if you have more time, letting the batter rest for an hour or even overnight in the refrigerator will yield even better results.
Quick Rest (30 Minutes): If you’re in a hurry, resting the batter for just 30 minutes at room temperature can still provide decent results. It’s better than not resting at all, but the benefits are maximized with longer resting periods.
Extended Rest (1 Hour or Overnight): If you can plan ahead, letting the batter rest for an hour or overnight in the fridge allows the flour to absorb more liquid, relax the gluten fully, and develop deeper flavors. An overnight rest is especially useful if you want to prepare the batter ahead of time and make crepes the next morning.
7. Refrigerating the Batter
If you’re planning to rest the batter for more than 30 minutes, it’s best to refrigerate it. The cooler temperature slows down any potential bacterial growth, keeping the batter safe to use later. Additionally, chilling the batter helps thicken it slightly, making it easier to handle.
Storing the Batter: If you’re resting the batter overnight, cover the bowl with plastic wrap or a lid to prevent the batter from drying out. Before using it the next day, give it a quick stir to ensure everything is evenly mixed.
8. Don’t Over-Rest the Batter
While resting is important, it’s also essential not to let the batter sit for too long, as it can lead to separation or unwanted texture changes. If left for an extended period, especially at room temperature, the batter could separate, with the liquid settling at the bottom. If this happens, simply stir it gently before using, and be mindful of any separation during longer resting periods.
—
Letting your crepe batter rest is a simple but crucial step that significantly improves the texture, flavor, and ease of cooking. By allowing the flour to fully hydrate, relaxing the gluten, and enhancing the batter’s consistency, you ensure your crepes will have the perfect delicate texture. Whether you rest the batter for 30 minutes or overnight, this step helps you achieve tender, smooth, and perfectly cooked crepes that are ideal for any filling or topping you choose.
Tips for a Lump-Free Batter: The Key to Smooth, Silky Crepes
A smooth, lump-free crepe batter is essential for creating delicate, paper-thin crepes that cook evenly and have a tender texture. Lumps in the batter can lead to uneven cooking, uneven texture, and difficulty in spreading the batter thinly across the pan. Fortunately, there are several strategies you can employ to ensure your crepe batter remains smooth and lump-free, from the very first step to the final mix. Here’s a detailed look at how to achieve a perfectly smooth batter every time.
1. Sift the Dry Ingredients
One of the most important steps in preventing lumps is sifting the dry ingredients, especially the flour. Sifting removes clumps and impurities from the flour, ensuring that it is light and airy, which makes it easier to incorporate evenly into the batter.
Why Sifting Matters: When flour is packed or stored improperly, it can develop clumps or retain air pockets. Sifting helps break up these clumps and ensures that the flour is evenly distributed when mixed with the wet ingredients. This makes it less likely that you’ll end up with lumps in your batter.
How to Sift: Use a fine mesh sieve or a flour sifter to sift your flour into the bowl before mixing it with any wet ingredients. This step only takes a few seconds and makes a significant difference in the smoothness of your batter.
2. Whisk the Eggs Separately
Before adding eggs to your flour, it’s important to whisk them separately in a small bowl. This helps break up the eggs and ensures that they mix evenly with the other ingredients. If you add eggs directly to the flour without whisking them first, the eggs may form little clumps that can be difficult to dissolve.
Why Whisk First: Whisking the eggs separately allows the proteins to break up, resulting in a smoother, more consistent batter once the eggs are incorporated into the flour. This step prevents the batter from becoming lumpy when the eggs are mixed in.
Tip: If you’re in a hurry, you can use a fork to lightly whisk the eggs, but using a small hand whisk will provide a better result.
3. Gradually Add Wet Ingredients to Dry Ingredients
When combining wet and dry ingredients, adding the wet ingredients gradually is essential for avoiding lumps. If you pour all the liquid into the dry ingredients at once, the flour can form clumps, and it becomes difficult to break them up.
How to Do It: Begin by slowly pouring a small amount of milk (or other wet ingredients) into the flour mixture while whisking constantly. Once that small amount is incorporated, add more liquid and continue whisking. This gradual addition of liquid gives the flour time to absorb the moisture and prevents it from clumping together.
Avoiding Sudden Splashes: Pour the liquid in a steady, thin stream to allow for better absorption. This also prevents the liquid from forming large droplets that can cause clumps to form.
4. Use a Blender or Food Processor for Extra Smoothness
If you want to ensure that your batter is completely lump-free with minimal effort, using a blender or food processor can be an effective solution. A blender can quickly and efficiently mix all the ingredients together, resulting in a perfectly smooth, silky batter in just a few seconds.
How to Use a Blender: Simply add all your ingredients—flour, eggs, milk, butter, and any flavorings—into the blender and blend on medium speed for about 15 to 20 seconds. The blender’s high-speed blades will break up any flour clumps and create a perfectly smooth batter.
Using a Food Processor: A food processor can also work well for blending the batter. Just pulse the ingredients for a few seconds until everything is thoroughly mixed and smooth. Be careful not to over-blend, as it can introduce air into the batter.
5. Stir or Whisk the Batter Continuously
Once you’ve added all your ingredients and the batter is mostly mixed, it’s important to continue whisking or stirring the batter for a few minutes. This additional mixing ensures that any flour clumps are broken up and helps to fully incorporate all the ingredients.
Why Stirring Helps: As you stir or whisk, you’re breaking up any remaining pockets of flour or dry ingredients that may have stuck together. Be sure to scrape the sides and bottom of the bowl to catch any flour that has settled there.
Tip: If you prefer using a whisk, use a balloon whisk, as it has the ability to incorporate air and evenly mix the batter. A spoon or spatula can be used as well, but it may not mix as efficiently.
6. Strain the Batter
If you notice that there are still small lumps in the batter after mixing, you can use a fine mesh strainer or sieve to strain it. This will catch any remaining lumps and ensure that the batter is as smooth as possible before cooking.
How to Strain: Simply pour the batter through a fine mesh sieve into a clean bowl. Gently tap the side of the sieve to help the batter pass through. If there are any lumps, they will be left behind in the sieve, and you’ll be left with a perfectly smooth mixture.
Tip: Straining the batter is an excellent way to ensure that your crepes will cook evenly and have a silky texture without any unwanted lumps.
7. Rest the Batter
Letting your batter rest for at least 30 minutes before cooking allows the flour to fully hydrate, which can help smooth out any remaining lumps. When the batter rests, the flour absorbs the liquid, and the consistency becomes more uniform.
Why Resting Helps: During the resting period, the flour and liquid have more time to interact, leading to a smoother texture. Additionally, resting the batter allows the gluten to relax, resulting in a tender crepe that is easier to cook and flip.
Tip: If your batter thickens too much after resting, simply stir it gently or add a small amount of milk to loosen it before cooking.
8. Keep the Right Tools on Hand
Using the right tools, such as a balloon whisk or a handheld electric mixer, can help prevent lumps and create a smoother batter. These tools are designed to mix ingredients efficiently and prevent any pockets of dry flour from clumping together.
Whisking by Hand: A balloon whisk is an excellent tool for achieving a smooth batter by hand. Its wide, rounded shape helps incorporate air and break up lumps effectively.
Electric Mixer: If you prefer using an electric mixer, be sure to use the lowest setting to avoid over-beating the batter or introducing too much air.
—
By following these tips, you can ensure a perfectly lump-free crepe batter that will yield smooth, silky crepes every time. From sifting the flour to using a blender for a flawless texture, these simple steps will save you time and frustration in the kitchen while helping you create delicate, evenly cooked crepes. With a little attention to detail, you’ll be able to master the art of lump-free batter and enjoy the perfect crepes!
How to Cook Perfect Crepes (Using the Right Tools)
Choosing the Right Pan: The Secret to Perfect Crepes
Selecting the right pan is crucial for making the perfect crepes. The wrong pan can result in unevenly cooked crepes, difficulty flipping, or even sticking. A good crepe pan should provide an even heat distribution, be nonstick, and allow you to spread the batter thinly and evenly across the surface. Here’s a more detailed look at how to choose the best pan for making crepes and why the right choice matters.
1. The Ideal Size of the Pan
When it comes to crepe pans, size matters. A pan that’s too small will force you to make tiny, uneven crepes, while a pan that’s too large can make it difficult to control the batter and spread it thinly. The ideal pan size is typically between 8 and 10 inches in diameter, which allows you to make perfectly sized crepes that are easy to flip and handle.
Why Size Matters: A smaller pan (around 8 inches) is perfect if you prefer smaller crepes or want to make individual servings. A slightly larger pan (around 10 inches) offers a bit more space for spreading the batter and can give you slightly larger, restaurant-style crepes. Keep in mind that larger pans require more batter to coat the surface, which might take some practice to perfect.
Tip: If you’re making crepes for a crowd or a family, a 10-inch pan will allow you to create crepes quickly and easily. Smaller pans work well if you’re cooking for just one or two people or prefer thinner crepes.
2. Nonstick Surface for Easy Cooking and Flipping
A nonstick pan is a must for making crepes, as it ensures that the delicate batter won’t stick to the surface, which can be difficult to manage, especially when trying to flip or remove the crepe. A good nonstick coating allows you to cook the crepes without needing excessive butter or oil, ensuring a healthier result and minimizing the chance of the crepes breaking apart.
Why Nonstick is Important: Crepes are thin, delicate, and prone to sticking, especially if they’re left on the pan for too long. A nonstick pan helps the batter to glide easily, making it easier to spread evenly across the surface and flip. Additionally, it reduces the need for excessive oil or butter, which can affect the flavor and texture of the crepes.
Tip: While nonstick pans are ideal, it’s important to use utensils that won’t damage the coating, such as silicone spatulas or wooden spoons, to extend the life of the pan.
3. Even Heat Distribution for Perfect Cooking
The key to making perfectly cooked crepes is ensuring that the pan maintains an even heat distribution. A pan that heats unevenly can cause some parts of the crepe to cook faster than others, leading to an inconsistent texture and potentially burning some areas.
Why Even Heating is Crucial: Crepes need to cook quickly and evenly. Uneven heat can result in crepes with crispy edges and undercooked centers. A pan with good heat distribution allows the batter to cook evenly, giving you a uniform, golden-brown crepe every time.
How to Test for Even Heat: To check if your pan heats evenly, you can sprinkle a few drops of water onto the surface of the pan. If the water beads up and evaporates quickly, the pan is ready. If the water immediately evaporates unevenly or forms large droplets, the pan may have hot spots that can cause uneven cooking.
4. Material Matters: Cast Iron, Stainless Steel, or Aluminum
The material of the pan plays a significant role in how it retains and distributes heat. Different materials have their pros and cons, so understanding which one is best for crepes can help you choose the right pan for your needs.
Cast Iron: Cast iron pans are heavy and provide excellent heat retention, making them ideal for cooking crepes at a consistent temperature. However, cast iron pans can take longer to heat up and may require seasoning to maintain their nonstick properties. If you already own a well-seasoned cast iron skillet, it can work beautifully for crepes.
Stainless Steel: Stainless steel pans are durable and resistant to corrosion. They heat up quickly but may not offer the same even heat distribution as cast iron or nonstick pans. If you choose stainless steel, look for one with an aluminum core or copper bottom for better heat conduction.
Aluminum: Lightweight and affordable, aluminum pans heat up quickly and provide decent heat distribution. However, aluminum alone may not be as durable or effective at retaining heat as cast iron. Many nonstick aluminum pans are available, and they are a good option for beginners.
Tip: If you’re new to making crepes, a nonstick aluminum pan is a great option as it provides quick heating and easy cleanup. For those who prefer a traditional touch, a cast iron crepe pan can be a great investment, especially if you plan to make crepes frequently.
5. A Low, Even Edge for Easy Flipping
A crepe pan should have low sides or slightly sloped edges to make flipping easier. High-sided pans can make it difficult to maneuver the spatula under the crepe, leading to torn or misshaped crepes. Look for a pan with a low edge that still provides enough depth to contain the batter without overflowing.
Why Low Sides Help: The lower sides allow you to slide the spatula easily under the edge of the crepe, making flipping and removing the crepe much easier. A flat, wide surface is ideal for ensuring the crepe cooks evenly without needing constant adjustments.
Tip: If you’re using a traditional crepe pan, check that the edges are not too curved, which can make it harder to achieve the perfect flip.
6. The Right Handle for Control
The handle of your crepe pan should provide good control while you cook, especially when flipping crepes. A long handle is ideal for giving you the leverage you need to swirl the batter and flip it, while also keeping your hand away from the heat source.
Why Handle Length Matters: A longer handle gives you more control and allows you to easily tilt the pan to spread the batter evenly. It also makes flipping the crepes a lot easier, as you can gently lift and flip them without burning your hand.
Tip: Ensure the handle is heat-resistant and comfortable to hold. Some pans come with ergonomic handles that make them easier to grip and maneuver, which is especially helpful when you’re cooking multiple crepes in a row.
7. Preheating the Pan
Before pouring in the batter, it’s essential to preheat your pan. A properly heated pan ensures that the crepes cook quickly and evenly without sticking. Preheating is especially important if you’re using a nonstick or cast iron pan, as it helps achieve the perfect golden-brown color.
How to Preheat: Heat your pan on medium for about 2-3 minutes before adding the batter. Test the temperature by sprinkling a small drop of water onto the surface. If it sizzles and evaporates immediately, the pan is ready.
—
Choosing the right pan is a key factor in achieving perfect crepes. Whether you opt for a nonstick aluminum pan for quick cooking, a cast iron pan for excellent heat retention, or a simple, lightweight skillet, the right pan will ensure even cooking, easy flipping, and minimal mess. Pay attention to factors like pan size, material, and handle length to make crepe-making as easy and enjoyable as possible. With the right pan, you’ll be able to cook crepes like a pro every time!
Temperature Control: Ensuring Perfectly Cooked Crepes
Temperature control is one of the most critical factors in making flawless crepes. The right cooking temperature ensures that your crepes cook evenly, maintain a delicate texture, and develop a golden-brown, slightly crispy edge without becoming too dry or burnt. Achieving the ideal temperature may take a bit of practice, but once you master it, you’ll be able to consistently produce crepes that are both tender and beautifully cooked. Here’s how you can master temperature control when making crepes.
1. Preheating the Pan to the Right Temperature
Before you even start making crepes, you need to ensure that your pan is preheated to the right temperature. If the pan is too cold, the batter won’t cook properly and will spread unevenly. If it’s too hot, the crepes can cook too quickly on the outside while remaining raw in the center.
Why Preheating Matters: Preheating the pan allows it to heat evenly and ensures that the batter will cook immediately when it hits the surface. It also helps prevent sticking and creates a golden-brown crust on the crepe.
How to Preheat: Preheat the pan on medium heat for 2-3 minutes. To test if it’s the right temperature, sprinkle a small amount of water onto the pan. If the water sizzles and evaporates quickly, the pan is ready. If the water stays in droplets or doesn’t sizzle, the pan is too cold. If the water evaporates instantly with a lot of sizzling, the pan is too hot.
Tip: If you’re using a nonstick or cast iron pan, medium heat is usually the sweet spot. Cast iron pans, in particular, retain heat well, so it’s best not to crank up the heat too high.
2. Adjusting the Heat During Cooking
Once the pan is preheated, it’s important to adjust the heat as you cook each crepe. Cooking on the right temperature is an ongoing process, as the pan can change temperature slightly during cooking, especially if the pan cools down after each crepe. You’ll need to adjust the heat to ensure the crepes cook at a consistent pace.
Why Temperature Fluctuates: As you pour the batter onto the pan, it may cause the pan to lose heat temporarily. If this happens, the crepe will take longer to cook and may not develop the right texture. Conversely, if the pan remains too hot, the crepe can burn before it cooks through.
How to Adjust the Heat: Start by cooking the first crepe on medium heat. Once it’s cooked, adjust the heat slightly depending on how the first crepe turned out. If it cooked too quickly or burned, lower the heat slightly. If it took too long to cook or didn’t brown enough, increase the heat just a bit.
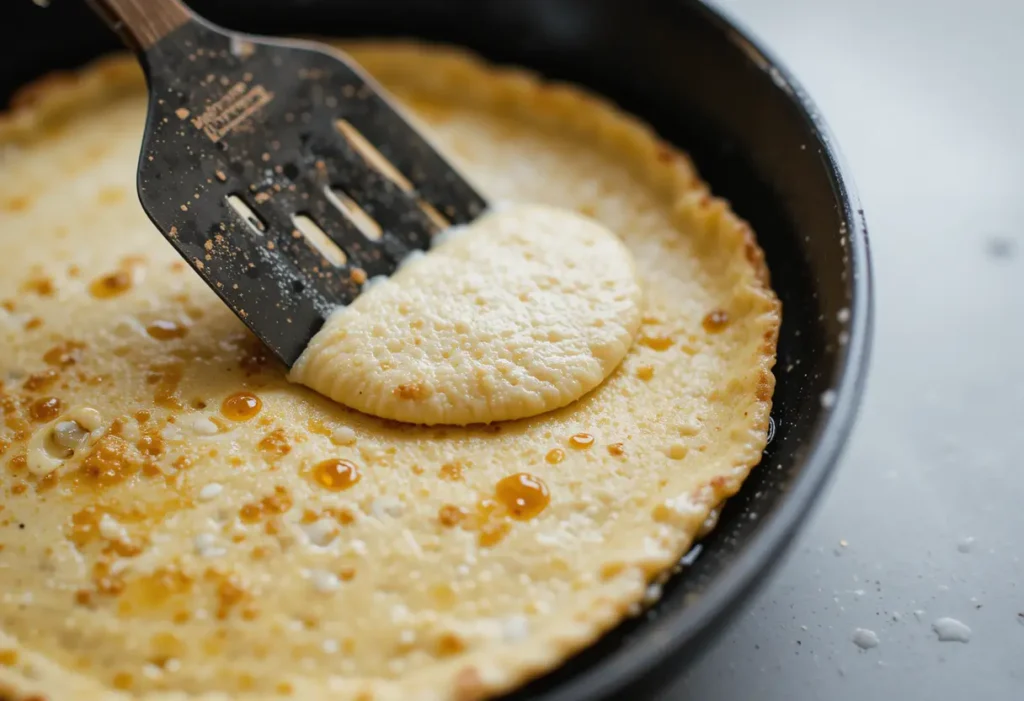
Tip: Crepes should cook for about 1-2 minutes per side. When the edges of the crepe begin to lift naturally from the pan and turn golden brown, it’s time to flip. If your crepes are browning too quickly, turn the heat down slightly; if they’re taking too long to cook, increase the heat just a touch.
3. Cooking the Crepes Over Medium Heat
For most home kitchens, medium heat is the ideal temperature for cooking crepes. This ensures that the crepes cook evenly without becoming overdone or undercooked. Cooking at too high a temperature can lead to uneven cooking, with crispy, overdone edges and a raw center.
Why Medium Heat Works: Medium heat allows the batter to spread evenly across the pan without scorching the edges, ensuring an even cook. It also gives you more time to spread the batter and flip the crepes before they become too crispy or dry.
How to Achieve Medium Heat: On most stovetops, medium heat usually falls between 3-5 on a scale of 1 to 10. If you have a gas stove, you can experiment with flame height to find the right balance. If you’re using an electric stove, the setting might be labeled as “medium” or “medium-low.”
Tip: If your crepes are browning too fast or becoming too crisp, lower the heat slightly. If the batter seems to be sitting in the pan without cooking, raise the temperature a bit.
4. The Importance of a Consistent Temperature
Once you’ve found the right temperature, it’s important to maintain it throughout the entire cooking process. Consistency in temperature is key to making a batch of crepes that all look and taste the same. Variations in temperature during cooking can cause uneven texture, resulting in some crepes being undercooked or burnt.
How to Maintain Temperature Consistency: Use a heat-resistant spatula or spoon to stir or adjust the batter in the pan. After cooking a few crepes, the pan will likely cool slightly, so you may need to adjust the heat to ensure the temperature remains steady.
Tip: If you notice that the pan is getting too hot after cooking several crepes, remove it from the heat for a moment to cool slightly. You can also use a damp cloth or towel to wipe the pan between batches to bring the temperature down.
5. The Right Time to Flip the Crepe
Flipping the crepe at the right moment requires good temperature control. If the pan is too hot, the crepe will cook too fast, making it difficult to flip without tearing. If the pan is too cold, the crepe will stick to the surface and might not release properly.
How to Know When to Flip: You’ll know your crepe is ready to flip when the edges begin to lift naturally from the pan, and the bottom is golden brown. The crepe should still look slightly moist on the top before you flip it—if you wait until it’s too dry, the crepe may tear when you try to turn it.
Tip: Gently slide a spatula under the crepe to loosen it from the pan. If it resists, it might not be cooked enough to flip. Wait a few more seconds before trying again.
6. Cooking Multiple Crepes: Managing Temperature
When cooking multiple crepes, it’s important to manage the temperature as the pan can heat up or cool down between each batch. Over time, as the pan retains heat, it may become too hot for the next crepe.
How to Manage Temperature When Cooking in Batches: After cooking a few crepes, it’s advisable to briefly remove the pan from the heat to let it cool slightly before adding more batter. This prevents your crepes from cooking too quickly and burning.
Tip: If you’re making a large batch of crepes, consider using two pans at once to keep up with demand without overheating one pan.
7. Adjusting for the Type of Stove You Have
Different stoves can affect how you control the temperature. Gas stoves tend to provide more precise temperature adjustments because you can quickly change the flame. Electric stoves, on the other hand, may take longer to adjust to temperature changes, so you’ll need to be a little more patient.
Gas Stoves: Gas stoves allow you to control the heat more quickly and with greater precision. You can easily adjust the flame to ensure a consistent cooking temperature for each crepe.
Electric Stoves: Electric stoves may require more time to adjust the heat up or down. When cooking on an electric stove, you might need to test the pan’s temperature more frequently.
—
Mastering temperature control is essential for cooking perfect crepes every time. From preheating the pan to adjusting the heat during cooking, maintaining the right temperature ensures even cooking, golden-brown crepes, and easy flipping. By following these tips, you’ll be able to control the temperature more effectively, leading to perfectly cooked crepes with a delicate texture and crisp edges. With practice, you’ll soon be able to make crepes just like a pro!
Flipping the Crepes: The Art of Turning Your Crepes Perfectly
Flipping the crepe might seem like a simple task, but it’s one of the most crucial steps in ensuring that your crepe turns out perfectly every time. The ability to flip a crepe without tearing it or making a mess comes with practice, but understanding the right technique and timing can make the process easier and more enjoyable. Here’s a detailed guide to help you master the art of flipping crepes.
1. Knowing When to Flip the Crepe
The key to a successful flip is knowing exactly when the crepe is ready to be turned. If you flip it too soon, it will tear or remain undercooked. If you wait too long, it may become too crispy or hard to flip without breaking.
How to Tell When to Flip:
Look for Golden Edges: The edges of the crepe should begin to lift from the pan and turn golden brown. This is a sign that the crepe is cooking evenly and is ready to be flipped.
Moist but Set Surface: The top of the crepe should still look slightly moist but set. If the top has completely dried out or formed a skin, it may be too late to flip without it tearing.
Timeframe: A crepe typically takes about 1-2 minutes to cook on the first side, depending on the heat and thickness of the batter. The second side usually takes much less time, around 30 seconds to 1 minute.
Tip: If the crepe edges are golden and lifting, but the center is still wet, you might want to wait a few more seconds for the moisture to evaporate before flipping. It should look like the top has started to set but is still soft and slightly shiny.
2. The Right Tools for Flipping
The right tools make flipping crepes much easier and help prevent them from tearing or getting stuck to the pan. You need a tool that can slide easily under the crepe without damaging it, such as a flexible spatula or crepe turner.
Spatulas: A flat, wide spatula is perfect for slipping under the crepe and lifting it gently. Wooden, silicone, or heat-resistant plastic spatulas are great choices, as they are gentle on the nonstick surface of the pan and can slide easily beneath the crepe. A crepe turner (which is a flat, long, and flexible tool) can also help with flipping, especially if you’re using a larger pan.
How to Use the Spatula:
Gently slide the spatula under the edge of the crepe, ensuring that it is fully under the crepe without disturbing the shape.
Lift the crepe carefully while supporting the middle with the spatula. Be sure to get under the entire crepe, as lifting from one side only can cause it to tear.
Tilt the pan slightly to help slide the spatula under the crepe, if necessary.
3. The Flip Technique
Once you’ve lifted the crepe with your spatula, it’s time to flip it. The motion you use should be smooth and controlled to avoid making a mess.
Flipping with Confidence: To flip the crepe, gently toss it into the air in a quick motion. Use your wrist to give a flick of the pan to help the crepe rotate. If you’re unsure about tossing it, you can always use the spatula to help you gently turn the crepe over.
For a Toss: Tilt the pan slightly while holding the handle, and with a quick flick of your wrist, launch the crepe into the air. It should rotate 180 degrees and land smoothly on the other side.
For a Manual Flip: If tossing isn’t comfortable, use the spatula to carefully turn the crepe over. Slide the spatula under the crepe, lift it up, and then gently flip it over in one smooth motion.
Tip: If you’re new to flipping crepes, start by flipping the crepe with the spatula first to build your confidence. Once you’ve perfected the spatula technique, you can try tossing it for that classic, effortless flip.
4. Avoiding Tears or Breaks
Crepes are delicate, and they can tear easily, especially when flipping. Here are a few tips to ensure that your crepe doesn’t break during the flip:
Don’t Overcook the Crepe: Overcooking a crepe can cause it to become too dry and fragile, increasing the likelihood of tearing when you flip it. Monitor your cooking time carefully to avoid this.
Use the Right Amount of Batter: If your crepe is too thick, it may not be flexible enough to flip without cracking. Ensure that you’re spreading a thin, even layer of batter to make sure the crepe remains tender and easy to handle.
Slow and Steady: When flipping, use a gentle hand and avoid rushing the process. Being too forceful can cause the crepe to tear or fold unevenly. A slow, controlled motion will give you better results.
Tip: If you notice a tear forming on the edges of your crepe during cooking, it’s okay! Simply fold the crepe over the tear when you serve it, or cook the torn part on the second side to crisp it up.
5. Cooking the Second Side
Once you’ve flipped the crepe, it will only need a few seconds to cook on the second side. The second side typically takes less time because it’s already partially cooked from the first side.
How to Cook the Second Side:
After flipping, let the crepe cook for about 30 seconds to 1 minute. You’ll know it’s done when the bottom is lightly browned and the crepe is fully cooked through.
If you’re making a larger batch or using a pan with a high heat retention, you may need to adjust the heat slightly to prevent the second side from overcooking while the crepe remains in the pan.
Tip: If you like your crepes a bit crisper, you can leave them on the second side for a few extra seconds to develop a slightly firmer texture.
6. Practice Makes Perfect
Flipping crepes is a skill that improves with practice. Don’t be discouraged if your first few attempts don’t result in perfect flips. As you cook more, you’ll become more comfortable with the process and develop a sense for the right timing and technique.
Tip: If you’re practicing, it’s a good idea to make a few extra crepes to experiment with flipping. This will give you a chance to fine-tune your technique without worrying too much about mistakes.
7. Serving the Crepes
After successfully flipping and cooking your crepes, it’s time to serve them! You can either stack them up or serve them individually. The crepes should be soft, slightly crisp on the edges, and golden brown.
Tip: If you’re making a lot of crepes, keep them warm by placing them in a low oven (around 200°F or 90°C) or covering them with a clean kitchen towel.
—
Flipping the crepes is a pivotal moment in the cooking process, and with the right timing, tools, and technique, you’ll be able to turn out beautiful, delicate crepes every time. Whether you choose to flip with a spatula or toss them in the air, confidence and practice will help you achieve that perfect, evenly cooked crepe with ease. With these tips in mind, you’re on your way to becoming a crepe-flipping pro!
Timing for Perfect Crepes: Getting the Perfect Cook Every Time
Timing plays a crucial role in making perfect crepes. Too little time on the pan can result in undercooked, soggy crepes, while too much time can make them too crispy or even burnt. Understanding how long to cook each crepe, both on the first and second sides, is essential for achieving the perfect texture, color, and taste. Here’s a detailed guide on how to time your crepes to perfection.
1. Cooking the First Side: Perfect Timing for a Golden Base
The first side of the crepe takes the longest to cook since it’s the side that comes into direct contact with the hot pan. This side needs a little more time to get fully cooked through, but you must be careful not to overcook it or let it burn.
How Long to Cook:
The first side of a crepe usually takes 1-2 minutes to cook. During this time, the batter will spread evenly across the pan, and the edges will start to lift as the crepe sets.
You’ll see the edges turning golden brown as the crepe cooks. The surface should still look slightly wet but should be starting to firm up.
Tip: You can use a spatula to gently lift the edge of the crepe to check the progress. If it’s golden brown and easily comes off the pan, it’s time to flip. If it’s still pale or sticking to the pan, give it a few more seconds.
What to Look For:
The key sign that the first side is ready to flip is when the crepe begins to lift naturally from the pan. The edges should be golden brown, and the top should look mostly set, though slightly shiny in places.
You may also see small bubbles or holes begin to form on the surface, indicating that the batter is cooking and firming up. This is a great sign to prepare for the flip.
2. Cooking the Second Side: Quick and Even
Once you flip the crepe, the second side usually cooks much faster. This is because the crepe is already partially cooked on the first side, and the pan has retained some of the heat.
How Long to Cook:
The second side generally needs only 30 seconds to 1 minute to cook. It will brown faster, and you’ll see the crepe firm up more quickly than the first side.
Because this side only requires minimal cooking time, you need to keep an eye on it to avoid overcooking. The crepe will quickly take on a golden brown hue and may crisp slightly, but you should still aim for a soft, flexible texture.
What to Look For:
The second side should be golden brown and have a slightly crisp edge but should still be soft enough to roll or fold without cracking. If you prefer your crepes with a little more texture or crunch, you can leave it for an additional 10-20 seconds.
Tip: If the crepe is cooking too quickly or getting too dark on the second side, reduce the heat slightly. You don’t want to burn the crepe or make it too crisp.
3. Adjusting Cooking Time for Crepe Thickness
The thickness of the batter can affect cooking time. Thicker crepes will naturally need more time to cook through, while thinner crepes cook faster.
Thin Crepes:
If your batter is very thin, your crepes will cook quickly. The first side will take only 1 minute or less to set, and the second side will cook in around 30 seconds. Thin crepes are delicate and need to be watched closely to prevent overcooking.
Thicker Crepes:
For thicker crepes, you’ll need to extend the cooking time slightly, especially on the first side. The first side might take closer to 2-3 minutes to cook, and the second side may need 1-2 minutes. These crepes will be more substantial and may take a bit longer to reach the desired texture.
4. Cooking Multiple Crepes: Maintaining Consistent Timing
When making multiple crepes, timing can become more challenging, as you need to maintain consistency with each one. It’s easy to let the pan get too hot, or the cooking time can vary between crepes if you don’t adjust for changes in heat.
Tip for Consistency:
After cooking each crepe, take a moment to check the temperature of the pan. If the pan is too hot after cooking a few crepes, the next batch will cook too quickly and could burn. Lower the heat slightly if necessary to maintain a consistent cooking time.
Rest the Crepes Between Batches: If you’re making a large batch, allow the crepes to rest for a minute or two between each one to ensure the pan cools slightly and maintains even heat.
Tip: If you find that your first crepe always cooks differently from the rest (for example, too dark or too light), adjust the heat during the first few batches. The pan may need a minute to heat up evenly.
5. Serving Timing: Keeping Crepes Warm
If you’re making a large batch of crepes and need to keep them warm until serving, timing can help maintain the perfect texture.
How to Keep Crepes Warm:
Stack the crepes on a plate and cover them loosely with a clean kitchen towel to keep the heat in. If you need to keep them warm for a longer time, place the plate in a warm oven (around 200°F or 90°C) while you finish cooking the rest. This will prevent them from cooling down and becoming too stiff.
Tip: Be cautious not to stack too many crepes without covering them, as the steam can make them soggy. If you’re serving immediately, you can also arrange the crepes in a circular stack and cover with foil to retain warmth and moisture.
6. Experiment with Cooking Time for Desired Texture
One of the great things about making crepes is that you can experiment with the cooking time to get your preferred texture. If you like your crepes soft and tender, you may want to cook them for a shorter time, leaving them slightly less browned. If you prefer them crispier, increase the cooking time slightly to give them a more golden, crunchy edge.
Crispier Crepes:
Cook the first side a little longer, and allow the second side to brown more. Don’t be afraid to leave the crepe on the pan for an extra few seconds to achieve that crisp edge.
Softer Crepes:
Reduce the cooking time slightly, especially on the second side. Softer crepes will be slightly more pliable and will have a lighter texture overall.
—
Perfect timing is essential for making crepes that have the ideal texture—tender, slightly crispy on the edges, and beautifully golden brown. By following these tips and understanding the key signs that indicate when to flip and remove your crepes from the pan, you’ll be able to consistently create delicious crepes every time. With a little practice, you’ll be able to adjust cooking times to suit your personal preferences, whether you like your crepes soft and tender or crisp and crunchy.
Sweet and Savory Crepe Filling Ideas
Sweet Crepe Fillings: Indulgent and Flavorful Ideas for Every Bite
Sweet crepes are a versatile dessert that can be customized with a variety of fillings, ranging from classic fruit combinations to decadent chocolate spreads. The beauty of sweet crepes lies in their ability to pair with almost any ingredient, creating endless possibilities for satisfying your sweet tooth. Whether you’re looking for something light and fresh or rich and indulgent, there’s a sweet crepe filling for every taste. Here’s an expanded guide to some of the most popular and delicious sweet crepe fillings.
1. Fresh Fruit Fillings: A Light and Refreshing Option
Fruit is one of the most popular fillings for sweet crepes, providing a natural sweetness and vibrant flavor that balances the richness of the crepe. Fresh fruit also adds a refreshing touch, making it a great choice for lighter crepes or a healthier treat.
Popular Fruit Choices:
Berries: Fresh strawberries, raspberries, blueberries, or blackberries can add a juicy, tangy sweetness to your crepes. They can be sliced and arranged inside the crepe, or you can create a berry compote by lightly cooking the berries with a little sugar and lemon juice.
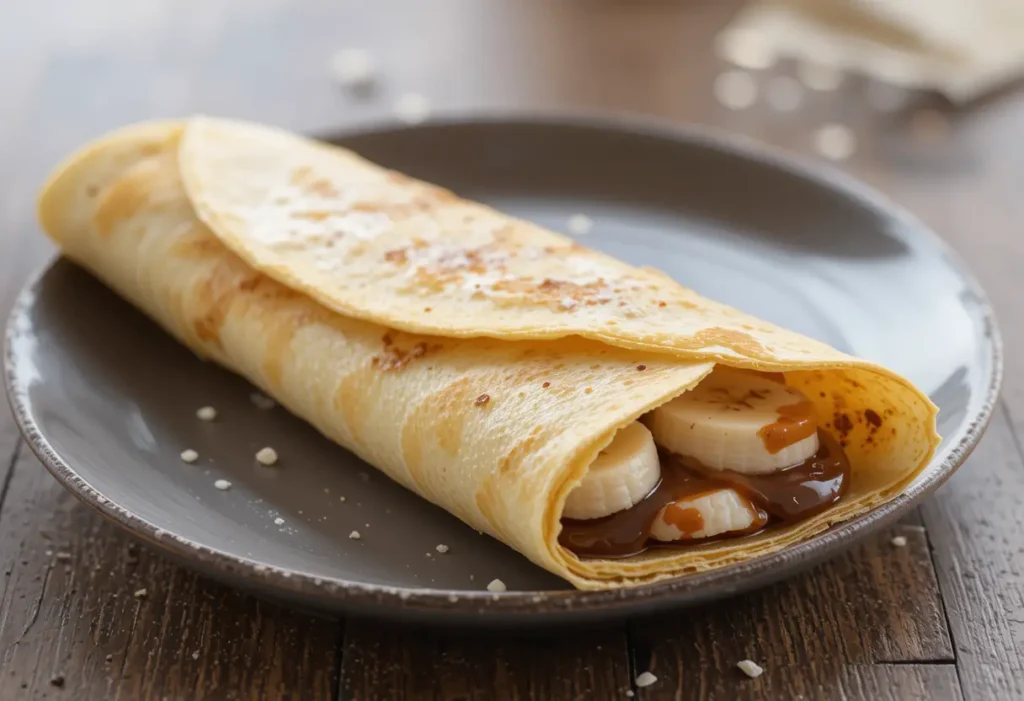
Bananas: Sliced bananas are a classic filling for sweet crepes. Their creamy texture and mild sweetness pair beautifully with the delicate crepes. You can also drizzle some honey or caramel over the top for added richness.
Apples or Pears: Thinly sliced apples or pears, sautéed in butter and cinnamon, create a warm and comforting filling. You can also add a sprinkle of brown sugar or a dash of vanilla for extra flavor.
Citrus Fruits: Fresh orange or grapefruit segments offer a bright, zesty contrast to the soft crepes. Adding a little zest to the filling enhances the citrus flavor, while a touch of honey or agave can mellow out the acidity.
Tip: If you want to enhance the flavor of your fruit filling, consider adding a sprinkle of cinnamon, nutmeg, or ginger. These spices pair especially well with apples, pears, and berries.
2. Chocolate and Nut Fillings: Rich and Decadent
For those with a craving for something indulgent, chocolate and nuts are a perfect combination. These rich fillings are sure to satisfy your sweet tooth and add a bit of luxury to your crepes.
Chocolate Sauce or Nutella:
Nutella: The iconic chocolate-hazelnut spread is one of the easiest and most popular fillings for crepes. Simply spread a generous layer of Nutella inside the crepe for a creamy, chocolaty treat. You can also add sliced bananas, strawberries, or whipped cream to complement the Nutella filling.
Chocolate Ganache: For a more decadent filling, prepare a rich chocolate ganache by melting chocolate and mixing it with heavy cream. This smooth, glossy filling pairs wonderfully with a variety of fruits and whipped cream.
Chocolate Chips or Chunks: Melted chocolate chips or chunks inside the crepe create a gooey, melty center that is perfect for chocolate lovers.
Nuts for Texture:
Chopped Hazelnuts, Almonds, or Walnuts: Add a crunchy texture to your crepes by sprinkling chopped nuts over the chocolate filling. Hazelnuts, in particular, complement the chocolate and are a classic pairing with Nutella.
Peanut Butter: If you prefer a nutty filling, spread some creamy or crunchy peanut butter inside your crepe before adding chocolate or fruit. Peanut butter pairs wonderfully with both chocolate and bananas for a rich, satisfying flavor.
Tip: For an extra indulgent touch, top your chocolate-filled crepes with whipped cream, a drizzle of chocolate syrup, or a dusting of powdered sugar. You can also try adding a scoop of vanilla ice cream for an over-the-top dessert.
3. Cream-Based Fillings: Light and Fluffy Additions
Creamy fillings add a luxurious texture and flavor to sweet crepes. These fillings can be simple or elaborate, ranging from fluffy whipped cream to smooth custards and rich mascarpone mixtures.
Whipped Cream:
Whipped cream is the classic, light, and airy filling for sweet crepes. You can flavor it with a hint of vanilla or cinnamon to complement the crepes’ flavor. A dollop of freshly whipped cream can be paired with fruit or chocolate for a simple yet satisfying dessert.
Mascarpone or Ricotta Cheese:
Mascarpone Filling: Mascarpone cheese is rich and creamy, making it an excellent filling for crepes. You can mix it with a bit of powdered sugar and vanilla extract for a sweet, velvety filling. This is a great option for those who prefer a slightly tangy creaminess over traditional whipped cream.
Ricotta Cheese: Similar to mascarpone, ricotta cheese has a slightly grainy texture that gives a nice contrast to the smoothness of the crepe. Mix it with honey, lemon zest, and a bit of vanilla extract for a balanced, light filling.
Custards and Puddings:
Pastry Cream: Pastry cream is a thick, custard-like filling made with eggs, sugar, milk, and cornstarch. It has a rich and creamy texture, often flavored with vanilla, and is the perfect filling for a more indulgent crepe experience.
Chocolate or Vanilla Pudding: Pudding, whether chocolate or vanilla, can be used as a creamy base to complement fruit or nuts. The smooth texture and sweetness are the perfect balance for a tender crepe.
Tip: If you prefer a lighter option, opt for a Greek yogurt filling, sweetened with honey and flavored with vanilla or almond extract. This makes for a healthy alternative to whipped cream while still delivering a creamy, smooth filling.
4. Sauces and Syrups: Adding Sweetness and Flavor
A drizzle of sauce or syrup can take your sweet crepes to the next level. Whether you go for a traditional syrup or something more decadent, the right sauce can elevate the flavor of your crepes.
Caramel Sauce:
A rich, buttery caramel sauce is a favorite topping for sweet crepes. You can drizzle it over fruit-filled crepes or pair it with chocolate for an indulgent dessert. For a bit of extra flavor, you can add a pinch of sea salt to create salted caramel sauce.
Maple Syrup:
Maple syrup is a classic and simple choice for crepes. Its sweetness and slightly earthy flavor pair well with almost any filling, particularly fruits like berries and bananas. You can warm it up slightly before pouring it over your crepes for an added touch.
Fruit Syrups or Compotes:
Berry Syrup: A berry compote made by cooking down berries with a little sugar creates a sweet and tangy syrup to drizzle over crepes. Blueberry, raspberry, or strawberry syrups can also be purchased if you want a quick and easy topping.
Orange Syrup: A syrup made with orange juice, sugar, and a splash of vanilla can offer a citrusy, refreshing contrast to heavier crepe fillings.
Tip: For a unique twist, try drizzling your crepes with a honey-lavender syrup or rosewater syrup to add floral notes that pair well with fruit and creamy fillings.
5. Ice Cream and Gelato: The Ultimate Sweet Touch
To make your crepes even more indulgent, add a scoop of ice cream or gelato to the filling. The cold, creamy texture complements the warm, soft crepes perfectly.
Ice Cream Options:
Vanilla: A scoop of classic vanilla ice cream can be paired with almost any filling, from fresh fruit to chocolate sauce.
Chocolate or Hazelnut: For a richer, more indulgent crepe, chocolate or hazelnut-flavored ice cream works beautifully, especially if you’re pairing it with Nutella or chocolate sauce.
Fruit Sorbet: For a lighter, more refreshing option, serve your crepes with a fruit sorbet like lemon, raspberry, or mango. These flavors pair wonderfully with fresh fruit fillings for a lighter, tangy finish.
Tip: If you want a more sophisticated dessert, try serving your crepes with homemade gelato or frozen yogurt in unique flavors like pistachio or salted caramel.
—
With so many delicious sweet crepe fillings to choose from, the possibilities are endless. Whether you opt for fresh fruit, decadent chocolate, creamy mascarpone, or even a scoop of ice cream, there’s a sweet filling to suit every occasion and taste. Get creative with your combinations, and enjoy the process of experimenting with flavors and textures to make your perfect crepe. Happy crepe-making!
Savory Crepe Fillings: Savory and Satisfying Ideas for Every Meal
Savory crepes are a wonderful twist on the traditional sweet version and make for an incredible meal option. These versatile crepes can be filled with a variety of ingredients that range from light, vegetable-based fillings to rich, protein-packed options. Whether you’re looking to create a brunch dish, a savory lunch, or even a light dinner, savory crepes are the perfect base for a wide variety of delicious and satisfying fillings. Here’s an expanded guide to some of the most popular and tasty savory crepe fillings that will make your taste buds sing.
1. Cheese and Ham: The Classic French Combination
Cheese and ham are among the most popular savory fillings for crepes and are an essential part of the traditional French dish, Crêpes Jambon Fromage. This simple yet delicious combination is easy to prepare and always satisfies.
Cheese Choices:
Gruyère: Gruyère cheese is a Swiss cheese known for its nutty and slightly sweet flavor. It melts beautifully and provides a creamy texture that pairs wonderfully with ham.
Cheddar: Cheddar cheese, particularly sharp cheddar, can add a bit of tang and richness to your crepes. It complements the saltiness of the ham and enhances the overall flavor.
Swiss or Emmental: These cheeses have a mild, slightly nutty taste that pairs wonderfully with ham. Their smooth melt makes them an excellent choice for savory crepes.
Goat Cheese: If you prefer a tangier flavor, goat cheese is an excellent option. It adds a creamy and slightly tart kick to the rich, savory ham.
Ham Options:
Traditional Ham: Thinly sliced, cooked ham works perfectly in crepes. Its saltiness contrasts beautifully with the creamy cheese.
Prosciutto or Serrano Ham: For a more sophisticated flavor, try using prosciutto or serrano ham. These cured hams have a delicate, savory taste that adds depth to the crepes.
Smoked Ham: Smoked ham adds a richer, heartier flavor that can pair well with more robust cheeses, like cheddar or Gruyère.
Tip: For added flavor, you can drizzle a bit of Dijon mustard or béchamel sauce inside the crepe, enhancing the creamy texture and adding a bit of tang.
2. Vegetables: Fresh, Light, and Flavorful
If you’re looking for a lighter, vegetarian option, vegetable-based fillings are the way to go. Savory crepes filled with sautéed or roasted vegetables make for a satisfying, healthy meal that can be packed with flavors and textures.
Popular Vegetables to Use:
Spinach: Sautéed spinach makes a great savory crepe filling. It’s full of nutrients and pairs wonderfully with cheeses like feta or ricotta. You can also add garlic or onions for extra depth of flavor.
Mushrooms: Mushrooms are earthy and savory, making them a great filling for crepes. You can sauté them with garlic, onions, and thyme for a delicious and fragrant filling. Try using a mix of different mushrooms, like cremini, shiitake, or portobello, for added complexity.
Zucchini: Sautéed or grilled zucchini adds a mild sweetness and tender texture to crepes. Pair it with goat cheese or mozzarella for a refreshing, savory combination.
Bell Peppers: Colorful bell peppers sautéed with onions, garlic, and a touch of chili flakes make a delicious and vibrant filling. The sweet, slightly tangy flavor of the peppers works beautifully with feta or cheddar cheese.
Asparagus: Lightly steamed or roasted asparagus can add a fresh, slightly grassy flavor to your crepes. It pairs well with a creamy cheese like ricotta or mascarpone.
Tip: To enhance the flavor of your vegetable fillings, consider adding herbs and spices such as thyme, rosemary, basil, oregano, or a sprinkle of smoked paprika. A dash of balsamic vinegar can also bring out the sweetness of vegetables like bell peppers or zucchini.
3. Chicken and Turkey: Protein-Packed and Flavorful
For a heartier savory crepe, protein-rich fillings like chicken and turkey work wonderfully. These lean meats are versatile and can be paired with a variety of sauces, cheeses, and vegetables to create a satisfying meal.
Grilled or Roasted Chicken:
Grilled or roasted chicken is an ideal filling for savory crepes. You can shred the chicken and combine it with sautéed onions, garlic, and fresh herbs like thyme or rosemary for added flavor. Add cheese like Swiss or Gruyère for a creamy touch.
Chicken Alfredo: For a rich and indulgent filling, use chicken and Alfredo sauce in your crepes. The creamy, cheesy sauce makes for a luxurious combination that pairs well with sautéed mushrooms or spinach.
Turkey:
Turkey with Cranberry Sauce: A Thanksgiving-inspired filling of turkey and cranberry sauce is perfect for savory crepes, bringing a combination of savory and sweet flavors.
Smoked Turkey and Cheese: If you prefer something a bit smokier, smoked turkey can be paired with sharp cheeses like Gruyère or Swiss, as well as fresh herbs, for a flavorful filling.
Tip: If you want to add a bit of crunch and texture, toss in some toasted pine nuts or chopped almonds along with the chicken or turkey.
4. Seafood: Elegant and Flavorful
Seafood-filled crepes offer a light yet elegant option that’s perfect for special occasions or a sophisticated meal. The delicate flavors of seafood pair wonderfully with light sauces and creamy cheeses.
Shrimp:
Shrimp sautéed in butter, garlic, and lemon is a quick and easy way to make a flavorful seafood filling for crepes. Add fresh herbs like parsley or dill for added flavor. You can also pair shrimp with a creamy garlic sauce or a light béchamel for extra richness.
Shrimp and Spinach: Combine shrimp with fresh spinach for a healthy and flavorful filling. A dash of white wine and lemon juice will brighten up the taste.
Salmon:
Smoked Salmon: Smoked salmon is another excellent choice for savory crepes. Pair it with cream cheese, fresh dill, and a squeeze of lemon juice for a luxurious and fresh combination. You can also add sliced cucumbers and red onions for extra crunch and flavor.
Grilled Salmon: Grilled salmon, flaked and combined with sautéed onions, mushrooms, and a light mustard sauce, makes a flavorful and hearty filling.
Tip: For a richer seafood option, consider making a creamy seafood sauce with shellfish like crab, lobster, or scallops, and pairing it with a bit of white wine and garlic.
5. Egg and Cheese: A Savory Breakfast Delight
Savory crepes can also be a fantastic option for breakfast or brunch. Filling your crepes with scrambled eggs and cheese is a quick and easy way to create a satisfying morning meal.
Scrambled Eggs and Cheese:
Scrambled eggs paired with your choice of cheese create a simple yet delicious filling. Try adding shredded cheddar, feta, or goat cheese for extra flavor. For a richer filling, add a bit of cream cheese or mascarpone to the scrambled eggs.
Breakfast Burrito-Inspired Crepes:
For a breakfast twist, fill your crepes with scrambled eggs, crispy bacon or sausage, and melted cheese. You can also add a little salsa or avocado for extra flavor.
Tip: You can make your scrambled eggs more flavorful by adding fresh herbs like chives, cilantro, or parsley. For a spicy kick, add a sprinkle of chili flakes or hot sauce.
—
Savory crepes are the perfect canvas for a variety of delicious and satisfying fillings, whether you’re craving something light and fresh, hearty and comforting, or indulgent and rich. From classic cheese and ham combinations to more adventurous fillings like seafood or roasted vegetables, the possibilities are endless. Get creative with your fillings, experiment with different ingredients, and enjoy the savory goodness of crepes for breakfast, lunch, dinner, or even a special occasion.
Crepes Suzette: A Classic French Dessert with a Dramatic Flair
Crepes Suzette is one of the most iconic and glamorous French desserts, known for its combination of delicate crepes, a rich, buttery orange sauce, and a stunning presentation often involving flambéing at the table. The origins of this dish are steeped in legend, making it not only a delicious treat but also a part of culinary history. This dish is a true showstopper, perfect for impressing guests or treating yourself to something extraordinary.
1. The Origin Story of Crepes Suzette
The story behind Crepes Suzette is as dramatic as the dish itself. The most popular legend involves a young French chef named Henri Charpentier, who is said to have accidentally created the dish while serving the Prince of Wales (later King Edward VII) in the late 19th century. The tale goes that while preparing crepes for the prince and his guest, a young woman named Suzette, Henri accidentally set the sauce on fire, but rather than ruining the dish, the flambéing process enhanced the flavor. The Prince, impressed with the dish, named it after Suzette, and thus Crepes Suzette was born.
While this is a charming and romantic story, the exact origins of the dish are debated, and there are many variations of how Crepes Suzette came to be. However, the essence of this dessert has remained the same: delicate crepes paired with a buttery orange sauce and a flambéed finish.
2. Key Components of Crepes Suzette
Crepes Suzette consists of two main components: the crepes themselves and the rich, zesty sauce that gives the dish its signature flavor.
The Crepes:
The base of Crepes Suzette is a classic thin French crepe, made with flour, eggs, milk, and butter. These crepes are traditionally made fresh and are the perfect canvas for the flavorful orange sauce. The crepes are typically folded into quarters or rolled up before being placed in the sauce.
The Orange Sauce:
The sauce for Crepes Suzette is what truly makes this dish stand out. It is a combination of orange juice, orange zest, butter, sugar, and orange liqueur (usually Grand Marnier or Cointreau). The sauce is cooked until it thickens into a syrupy consistency and is infused with the bright, citrusy flavors of orange. The addition of butter gives the sauce a rich, luxurious texture that coats the crepes perfectly.
3. The Flambéing Process: A Dramatic Touch
One of the most exciting aspects of Crepes Suzette is the flambéing technique, where the sauce is set alight just before serving. This not only adds a dramatic flair to the presentation but also intensifies the flavors, as the alcohol in the liqueur burns off while leaving behind the delicious citrus notes.
Here’s how it typically works:
The crepes are folded and placed in the pan with the orange sauce.
A generous amount of orange liqueur (such as Grand Marnier) is added to the pan.
The liqueur is then carefully ignited with a long lighter or match. The flames quickly burn off the alcohol, leaving behind a rich, concentrated flavor.
The crepes are then served immediately after the flambéing process, often with a flourish at the table to impress diners.
Flambéing can be a delicate process and should be done with care, but when done correctly, it adds an unforgettable touch to the dish.
4. Variations of Crepes Suzette
While the classic recipe for Crepes Suzette remains beloved, there are several variations that chefs and home cooks have experimented with over the years:
Alcohol Substitutes: While Grand Marnier and Cointreau are the traditional choices for the orange liqueur, some variations use other liquors like orange curaçao, triple sec, or even a splash of rum. The choice of alcohol can subtly affect the flavor profile of the dish.
Adding Different Citrus: Some versions of Crepes Suzette incorporate other citrus fruits such as lemon, lime, or grapefruit, either as an additional flavor in the sauce or as a garnish. This can add a layer of complexity to the sauce and enhance the citrusy freshness.
Non-Alcoholic Version: For those who prefer to avoid alcohol, a non-alcoholic version of Crepes Suzette can be made by omitting the liqueur and instead using a mix of fruit juices (like orange juice with a dash of lemon) and zest. This version still offers the bright citrus flavors but without the flambéing process.
5. Serving Crepes Suzette
Crepes Suzette is typically served as a dessert, but it can also be enjoyed as a special breakfast or brunch treat. When serving, the crepes are often arranged on a plate and topped with the warm, syrupy orange sauce. Some chefs may garnish the dish with additional zest or a dusting of powdered sugar for extra elegance.
Plating:
The crepes are often folded into neat quarters or rolled up before being placed on a plate, which allows the sauce to coat them evenly. In more traditional presentations, the crepes are flambéed in the pan and served directly from there, with the waiter or cook igniting the alcohol right before serving at the table.
Accompaniments:
Crepes Suzette is delicious on its own, but it can also be served with a scoop of vanilla ice cream or a dollop of whipped cream to add a creamy contrast to the citrusy sauce. For added texture, you might serve the dish with crushed nuts, like pistachios or almonds, for a bit of crunch.
6. Crepes Suzette Today: A Timeless Classic
Despite being a centuries-old dish, Crepes Suzette remains a symbol of French culinary finesse and continues to be served in fine-dining establishments around the world. Its elegance, rich flavors, and dramatic presentation make it a favorite for special occasions, celebrations, or whenever you want to impress guests with a show-stopping dessert.
The process of preparing Crepes Suzette may require some practice, especially when it comes to getting the flambéing just right. However, once mastered, it’s a memorable dish that combines the art of crepe-making with the thrill of culinary theatrics. Whether you stick to the classic version or try your own twists, Crepes Suzette is sure to leave a lasting impression.
—
Crepes Suzette is a dish that is not only delicious but also a spectacle of culinary skill and tradition. Its iconic sauce, dramatic presentation, and history make it one of the most glamorous French desserts, perfect for making any meal feel like an occasion. If you want to bring a bit of French elegance to your kitchen, this is the dessert that will certainly impress!
Customizing Your Crepes: Endless Possibilities for Personalization
Crepes are incredibly versatile, allowing for endless customization both in terms of the batter and the fillings. Whether you prefer sweet or savory, simple or indulgent, the beauty of crepes lies in their ability to adapt to your tastes and dietary preferences. Here’s a deeper look at how you can personalize your crepes to suit any occasion, craving, or dietary need.
1. Customizing the Crepe Batter
While the classic crepe batter is made with flour, eggs, milk, and butter, there are several ways to customize it based on your dietary preferences, flavor preferences, or the occasion. Here are a few variations to consider:
Gluten-Free Crepes:
For those who follow a gluten-free diet or have a gluten intolerance, you can substitute traditional all-purpose flour with gluten-free flour blends. There are various gluten-free flours available, such as rice flour, sorghum flour, or almond flour. Keep in mind that you may need to adjust the liquid content in the batter to achieve the perfect consistency.
Vegan Crepes:
Vegan crepes can be made by replacing the eggs and dairy with plant-based alternatives. For eggs, try using flax eggs (a mixture of ground flaxseed and water), chia seeds, or even a mashed banana. For the milk, opt for almond milk, soy milk, oat milk, or coconut milk. You can also substitute vegan butter or coconut oil for the traditional butter in the batter. The result is a delicious vegan crepe that’s just as thin and flexible as the classic version.
Whole Wheat Crepes:
If you’re looking for a slightly healthier option, whole wheat flour can be used in place of all-purpose flour. Whole wheat crepes will have a nuttier, heartier flavor and a slightly denser texture, but they still make a perfect base for both sweet and savory fillings.
Flavored Crepes:
To give your crepes a unique twist, try adding flavorings directly into the batter. A teaspoon of vanilla extract or almond extract can add a lovely fragrance to sweet crepes. For savory crepes, you can add a pinch of salt, a dash of herbs like rosemary, thyme, or oregano, or even some grated Parmesan cheese into the batter for extra flavor.
2. Creative Sweet Crepe Fillings
Sweet crepes are a classic favorite and offer endless possibilities for fillings. You can get creative with flavors, textures, and combinations to make each crepe a delightful treat.
Fruits:
Fresh fruits like strawberries, bananas, raspberries, blueberries, or even tropical fruits like mango or kiwi make great fillings. You can use them whole, sliced, or even cooked down into a compote or sauce to complement the crepe. For extra indulgence, you could also add a drizzle of honey or a dusting of powdered sugar over the fruit.
Chocolate:
For chocolate lovers, there’s no limit to how chocolate can be incorporated into your crepes. You can spread a layer of Nutella or melted chocolate inside your crepes or use chocolate chips that melt as the crepes warm up. For an even richer treat, a chocolate sauce or ganache can be drizzled over the crepes before serving.
Sweet Creams and Custards:
A dollop of whipped cream, mascarpone cheese, or sweetened ricotta cheese adds a creamy richness to your sweet crepes. You can also fill them with a rich custard or pastry cream, which works wonderfully with fruits like strawberries or peaches. Sweetened ricotta with lemon zest makes a tangy and indulgent filling.
Nuts and Caramel:
If you like a little crunch in your sweet crepes, try adding nuts like crushed almonds, pecans, or hazelnuts. These pair beautifully with a drizzle of caramel sauce or a sprinkle of cinnamon. Toasted coconut can also provide a tropical flair. The sweet caramel contrasts nicely with the nuttiness, making each bite more exciting.
Ice Cream or Sorbet:
For an indulgent dessert option, serve your crepes with a scoop of your favorite ice cream or sorbet. Classic vanilla, chocolate, or pistachio ice cream are always great options, but fruit-flavored sorbets like lemon, raspberry, or mango can add a refreshing twist.
3. Savory Crepe Fillings: Bold and Flavorful
Savory crepes are a wonderful meal option, perfect for breakfast, lunch, or dinner. The possibilities for savory fillings are only limited by your imagination, allowing for both hearty and light meals.
Cheese and Meat:
For a filling meal, start with a base of cheese and meats. Combinations like ham and cheese (such as Gruyère or Swiss) are classics, but you can also try prosciutto, salami, or smoked salmon. Pair your meats with cheese like brie, goat cheese, or mozzarella for a rich and savory filling.
Eggs and Vegetables:
Savory crepes can easily become a delicious, healthy meal by adding scrambled or poached eggs, sautéed vegetables like spinach, mushrooms, bell peppers, or zucchini. For a lighter option, try adding just a sprinkle of fresh herbs like chives, parsley, or basil for a fresh, aromatic filling.
Seafood:
For a touch of elegance, seafood fillings can elevate your crepes. Shrimp, lobster, or crab meat combined with a creamy sauce make for a rich and sophisticated option. You can mix seafood with vegetables like asparagus or artichokes for a well-rounded savory filling.
Sauces:
For added flavor, don’t forget about sauces. Savory crepes can be complemented by rich sauces like béchamel, hollandaise, or a tangy mustard vinaigrette. For a more Mediterranean touch, you could also try a drizzle of tzatziki or pesto.
4. Healthier Customizations
If you’re looking to make your crepes lighter or more health-conscious, there are many ways to swap ingredients without sacrificing flavor.
Low-Calorie Fillings:
Opt for lighter fillings such as non-fat Greek yogurt, low-fat cheeses, or fresh vegetables. For a refreshing twist, top your crepes with a light fruit compote or a spoonful of low-sugar jam. You can also use less sugar in the batter to create a lighter base.
Adding Superfoods:
You can sneak some superfoods into your crepes for an extra nutritional boost. Try adding a handful of spinach, kale, or avocado to your savory fillings, or sprinkle your sweet crepes with chia seeds, flaxseeds, or hemp seeds for added fiber and omega-3 fatty acids.
Protein-Rich Fillings:
If you’re looking to make your crepes more filling or balanced in terms of protein, consider adding ingredients like grilled chicken, turkey, tofu, or legumes. These protein-rich options will help keep you satisfied longer and make your crepes more substantial.
5. Decorating Your Crepes
Once your crepes are filled, the fun doesn’t have to stop there! You can decorate the top of your crepes to enhance both their appearance and flavor.
Garnishes:
Fresh herbs, microgreens, or a sprinkle of chopped nuts or toasted coconut can add a pop of color and texture to your crepes. Fresh mint, parsley, or thyme works well with both sweet and savory fillings.
Sauces and Drizzles:
A drizzle of chocolate syrup, caramel, or fruit coulis can elevate the look and flavor of your sweet crepes. For savory crepes, a light drizzle of olive oil, balsamic glaze, or aioli can add a final touch that complements the filling.
Edible Flowers or Fruit:
For an elegant, Instagram-worthy presentation, consider garnishing your crepes with edible flowers like pansies, violets, or nasturtiums. Alternatively, fresh fruit slices such as strawberries, kiwi, or oranges can bring a vibrant and refreshing touch to sweet crepes.
—
The beauty of crepes lies in their endless customization options, whether you’re looking to create a simple, classic dish or experiment with bold new flavors. With a few adjustments to the batter and a world of filling possibilities, crepes can be personalized to suit any taste, dietary preference, or occasion. From sweet to savory, healthy to indulgent, crepes can easily be tailored to reflect your personal preferences and creativity. So don’t be afraid to get inventive and make the dish your own!
Troubleshooting Common Crepe-Making Mistakes
Batter Too Thick or Thin: How to Adjust for Perfect Crepes Every Time
One of the keys to making perfect crepes is achieving the right batter consistency. The batter should be thin and pourable, but not so runny that it doesn’t hold together or so thick that it becomes difficult to spread in the pan. If your crepe batter turns out too thick or too thin, it can affect the texture and flexibility of your crepes. Let’s dive into how to troubleshoot and adjust the batter to ensure the best crepes.
1. Signs Your Batter is Too Thick
If your batter is too thick, it will have a consistency closer to pancake batter or even dough, making it difficult to spread evenly in the pan. Thick batter can result in crepes that are dense, chewy, and not as delicate as you want them to be.
Signs that your batter is too thick:
The batter doesn’t pour easily from the mixing bowl and drips off the whisk or spoon in clumps.
It’s difficult to spread the batter evenly in the pan, resulting in uneven crepes.
The crepes come out dense and heavy instead of light and crispy.
2. How to Fix Thick Batter
If you find that your batter is too thick, there are a few simple adjustments you can make to thin it out and restore the ideal consistency.
Add More Liquid:
The simplest solution to thinning out a thick batter is to add more liquid—usually milk or water. Add a small amount (about a tablespoon at a time) and whisk the batter thoroughly to incorporate the liquid. Continue until you reach a thin, pourable consistency. Be cautious not to add too much at once, as you don’t want the batter to become too runny.
Use the Right Type of Liquid:
Depending on the type of crepe you’re making (sweet or savory), you can adjust the type of liquid you use. For example, using water instead of milk will make the batter lighter, which can be especially helpful for savory crepes. If you’re making sweet crepes, stick with milk for a creamier texture.
Let the Batter Rest:
If the batter is too thick right after mixing, sometimes allowing it to rest for 15-30 minutes can help loosen up the consistency. During this resting period, the flour will absorb the liquid more fully, which may help to reduce the thickness naturally. If after resting, the batter is still too thick, you can adjust it with a bit more liquid.
3. Signs Your Batter is Too Thin
On the flip side, if your batter is too thin, it will spread too quickly in the pan and may be difficult to control. When the batter is too runny, it often results in crepes that are too delicate, prone to tearing, or that don’t hold up well when flipping.
Signs that your batter is too thin:
The batter runs off the spoon or whisk too quickly, almost like water.
When poured into the pan, the batter spreads too much and becomes thin, causing holes or an uneven texture.
The crepes turn out too fragile, often breaking or becoming limp.
4. How to Fix Thin Batter
If your batter is too thin, you can easily thicken it up to achieve a better consistency.
Add More Flour:
If the batter is too runny, the solution is to add a little more flour. Begin with a tablespoon or two, depending on how thin the batter is, and whisk it in thoroughly. Be sure to add the flour gradually to avoid creating lumps. After adding the flour, check the consistency again, and if needed, add a small amount of liquid to maintain the right balance.
Use Less Liquid:
If you think the batter is still too thin after adding more flour, you may have used too much liquid to begin with. If you adjust the flour but the batter remains too runny, you can compensate by reducing the amount of milk or water in the recipe. This helps to create a batter that is slightly thicker but still smooth and pourable.
Rest the Batter Longer:
Sometimes, allowing the batter to rest for a longer period (up to 1 hour) helps the flour absorb more of the liquid and results in a slightly thicker batter. This can be a simple fix to allow the batter to firm up naturally. Just be sure to check the consistency before you start cooking.
5. Achieving the Right Consistency
To ensure your crepe batter is perfect, you’re aiming for a consistency that is thin enough to spread evenly in the pan but thick enough to hold together without becoming too fragile.
Test the Consistency:
The best way to test your batter is by dipping a spoon or whisk into the batter and lifting it out. The batter should slowly drip off, leaving a thin stream, and it should spread slightly but not immediately disappear. It should coat the back of a spoon or whisk lightly. You can also use the “coating the spoon” method to check the batter: the batter should coat the back of a spoon with a thin, even layer without dripping off too quickly.
Final Tip:
If you’re ever unsure, err on the side of slightly thinner batter. It’s easier to fix by adding more flour than it is to fix a batter that’s too thick. Thinner batter will allow you to make a lighter, more delicate crepe with the perfect texture.
6. Adjusting During Cooking
It’s also worth noting that even if your batter starts out at the right consistency, it may thicken slightly during cooking, as the flour continues to absorb moisture. If you notice the batter getting thicker as you make crepes, add a small splash of liquid to restore the proper texture. Similarly, if you find the batter thinning out too much during cooking, you can add a little more flour to thicken it back up.
—
In conclusion, achieving the perfect batter consistency is crucial for making crepes that are light, delicate, and easy to cook. Whether your batter is too thick or too thin, it’s simple to adjust with the right techniques. By adding flour to thicken or liquid to thin, and by testing the batter’s consistency regularly, you can ensure that your crepes come out just right every time.
Crepes Sticking to the Pan: How to Prevent It and Ensure Easy Flipping
One of the most common challenges when making crepes is dealing with them sticking to the pan. When crepes stick, they can tear or become difficult to flip, leading to a frustrating cooking experience. Fortunately, there are several strategies you can use to prevent this issue and ensure that your crepes come out perfectly every time.
1. Choosing the Right Pan: Nonstick is Key
The pan you use can have a big impact on whether your crepes stick. A nonstick skillet is ideal for making crepes because it prevents the batter from adhering to the surface. The smooth surface ensures that the crepes can easily slide off when it’s time to flip them, and it also allows for more even cooking.
Flat Surface:
A flat, smooth surface is important for crepe-making. If your pan has raised edges or hot spots, it may cause uneven cooking and sticking. Ensure that your pan is as flat as possible, which will help the batter cook evenly and slide off without sticking.
Size Matters:
Opt for a medium-sized pan that’s not too large or too small. A pan that’s around 8 to 10 inches in diameter is ideal for making crepes. A pan that’s too large will make it difficult to manage the batter, while a small pan may not allow enough space for the batter to spread out evenly.
2. Properly Greasing the Pan
Even if you’re using a nonstick pan, it’s still essential to grease the pan lightly to prevent sticking. However, it’s important not to overdo it, as too much oil can make your crepes greasy and affect their texture.
Use the Right Fat:
The best fats for greasing your crepe pan are butter or oil. Butter adds a nice flavor to the crepes, while oil provides a more neutral taste and works well for those looking to keep things lighter. Vegetable oil, canola oil, or melted butter are all good choices. You can also use a spray oil for an even, thin coating.
How to Grease the Pan:
Use a paper towel or a brush to lightly coat the pan with oil or butter. After applying the fat, let the pan heat up for a moment before adding the batter. This ensures that the fat will create a nonstick barrier and won’t burn when the batter touches the hot pan.
Re-grease Between Crepes:
If you’re making multiple crepes, you may need to re-grease the pan in between batches. However, only a light application is necessary; over-greasing can make the crepes too greasy and affect their crispness. You can wipe the pan clean with a paper towel between crepes to remove excess fat and add a small amount of butter or oil before each new batch.
3. Preheating the Pan
One of the keys to preventing crepes from sticking is making sure your pan is properly preheated before adding the batter. If the pan is too cold, the batter may stick, and the crepes may become unevenly cooked. If the pan is too hot, the batter will cook too quickly, making it difficult to spread and potentially causing it to stick.
Preheat on Medium Heat:
Set your stove to medium heat and allow the pan to warm up for about 1-2 minutes before adding the batter. To test the temperature, sprinkle a drop of water on the pan—if it dances and sizzles, the pan is ready. You should feel some heat radiating from the pan, but not so much that it causes the fat to smoke.
Adjust Heat as You Go:
As you cook, you may need to adjust the heat slightly. If the crepes are cooking too quickly and turning brown too fast, lower the heat to avoid burning. If they’re cooking too slowly or sticking, increase the heat just a little. A steady, medium heat is ideal for crepe-making.
4. Using the Right Amount of Batter
Overloading the pan with too much batter can make it difficult to spread and can also cause the crepes to stick. The key is to use just enough batter to form a thin layer.
Pouring the Batter:
Use a small ladle or a measuring cup to pour the batter into the pan. Immediately after pouring, tilt the pan in a circular motion to spread the batter into a thin, even layer across the bottom. If you have too much batter, it will take longer to cook and may stick. If you don’t have enough batter, the crepe will be too thin and may tear when you try to flip it.
Thin Crepes Are Easier to Flip:
Crepes are supposed to be thin, delicate pancakes. The thinner the crepe, the less likely it is to stick. If the batter is too thick and you pour too much in, the crepes will be heavier and more prone to sticking. A thin batter will spread easily and create a flexible crepe that’s easier to flip without sticking.
5. Flipping the Crepes Carefully
Once the crepe is cooked on one side, flipping it without sticking or tearing is key to successful crepe-making. Here’s how to flip your crepes with ease:
Wait for the Right Moment:
The best time to flip the crepe is when the edges start to lift away from the pan and the bottom is golden brown. If the crepe is sticking, give it a few extra seconds to cook. Once it’s ready, use a thin, flexible spatula to gently lift the edge of the crepe. Slide the spatula under the crepe and give it a gentle flip.
Use Your Hands (If You’re Brave):
If you’re feeling confident, you can also try flipping the crepe with your hands. Hold the crepe gently at the edges and quickly flip it over. Be cautious, as the pan and crepe will be hot, but this method can give you more control over the flip.
6. Fixing Stuck Crepes: What to Do If They Stick
Even with all the right precautions, sometimes crepes can still stick. If this happens, don’t panic—there are a few ways to salvage the situation:
Loosen the Crepe:
If the crepe sticks to the pan, use a spatula to gently loosen it from the edges. Be patient and work your way around the crepe before trying to flip it. If necessary, you can also add a small amount of extra fat (butter or oil) around the edges to help release the crepe.
Check Your Pan and Temperature:
If your crepes consistently stick, check whether your pan is too hot or too cold. A pan that’s too hot can cause the batter to set too quickly, while a pan that’s too cool can cause the batter to stick and not cook evenly. Adjust the heat and greasing as necessary.
—
In conclusion, preventing crepes from sticking to the pan is all about using the right pan, greasing it properly, and ensuring the right temperature. Preheating the pan, using the right amount of batter, and flipping the crepes carefully all play a role in making sure your crepes slide right off the pan without any issues. With these techniques, you can enjoy the perfect crepe every time without the hassle of sticking.
Uneven Cooking: How to Ensure Perfectly Cooked Crepes Every Time
One of the most frustrating issues when making crepes is uneven cooking, which can result in crepes that are too crispy in some areas and undercooked in others. Achieving a perfectly cooked crepe requires attention to detail and some basic techniques that ensure even heat distribution, smooth batter consistency, and proper cooking time. Here’s a guide on how to avoid uneven cooking and make flawless crepes every time.
1. Proper Heat Distribution: Preheat and Maintain the Right Temperature
The temperature of the pan plays a crucial role in ensuring even cooking. If the pan is too hot in some areas or too cold in others, the batter won’t cook evenly, resulting in some parts of the crepe being overcooked while others remain raw or undercooked.
Preheating the Pan Properly:
Always preheat your pan before pouring in the batter. This helps to create an even cooking surface. Set the heat to medium—too high, and the batter will cook too quickly on the edges, leaving the center raw; too low, and the crepes will cook too slowly, which can lead to uneven texture. To test the temperature, sprinkle a drop of water onto the pan. If it sizzles immediately and evaporates quickly, the pan is ready.
Adjusting Heat During Cooking:
Once the pan is hot and you’ve added the batter, it’s important to maintain the right cooking temperature. If you notice that the crepes are browning too quickly on the edges but remain uncooked in the center, lower the heat slightly. On the other hand, if the crepes seem to be taking too long to cook, you may need to increase the heat slightly.
Avoid Hot Spots:
Not all pans heat evenly. If your pan has hot spots (areas that heat up more quickly than others), these can cause uneven cooking. Nonstick pans are particularly good at preventing hot spots because they provide an even cooking surface. However, if you’re using a cast iron or other type of pan, you can mitigate the effect of hot spots by moving the pan around or rotating it occasionally to spread the heat more evenly.
2. Spreading the Batter Evenly
An essential part of ensuring even cooking is getting the batter spread evenly across the pan. If the batter is not spread out smoothly, the crepes will cook unevenly, with thicker areas remaining undercooked and thinner areas becoming overly crispy.
How to Spread the Batter:
After pouring the batter into the pan, tilt the pan in a circular motion to spread the batter across the bottom of the pan. This technique helps create a uniform, thin layer of batter that will cook evenly. If you find the batter is too thick to spread easily, you can thin it out with a little more liquid before cooking.
Using the Right Amount of Batter:
Adding too much batter will cause the crepe to be thick in certain spots, which means some parts will be cooked well, while others will be undercooked or soggy. Conversely, using too little batter may lead to fragile, overcooked crepes. Aim for a thin, even layer that covers the entire bottom of the pan without excess batter pooling in the middle.
3. Cooking Time and Monitoring the Edges
If you cook the crepe for too long or not long enough, you risk uneven cooking, where one side is overcooked while the other side is undercooked. Cooking the crepes for the right amount of time and paying attention to the edges will ensure a perfectly cooked result.
Watching for Signs of Doneness:
Crepes typically cook quickly, often in about 1-2 minutes per side. You’ll know the crepe is ready to flip when the edges begin to lift away from the pan and the top of the crepe appears dry and set. If the center is still wet, give it a little more time to cook, but be careful not to leave it in the pan too long or it could become overcooked.
Flipping at the Right Moment:
Flip the crepe when it’s golden brown on the underside and the edges have started to lift. Don’t wait too long, as this can lead to one side becoming too crispy while the other side remains uncooked. Flipping too early can also result in an undercooked, soggy center.
4. Avoiding Overcrowding the Pan
It might be tempting to cook several crepes at once, but overcrowding the pan can lead to uneven cooking. When there’s not enough room in the pan, the crepes may not cook properly, especially around the edges where the pan is hotter. It’s better to cook one or two crepes at a time, depending on the size of your pan.
Give Each Crepe Space:
Leave a little room between each crepe to ensure the heat can circulate evenly around them. If you try to make too many crepes at once, they may stick together or cook unevenly, resulting in an unsatisfactory texture.
Use the Right Pan Size:
Make sure you’re using a pan that’s large enough to allow the batter to spread evenly. A pan that’s too small will make it difficult to cook the crepes properly, while a larger pan gives you more control over the cooking process. A 10-inch pan is a good size for making individual crepes.
5. Managing the Batter Consistency
Uneven cooking can sometimes occur when the batter is not well mixed, leading to clumps or inconsistencies in the mixture. If the batter is too thick or uneven, it may result in parts of the crepe being thicker, which could lead to undercooked areas.
Check for Consistency Before Cooking:
Before pouring the batter into the pan, give it a quick stir to make sure that it’s smooth and well-mixed. If the batter has separated or is too thick, whisk it again and add a little more liquid to thin it out. A consistent batter will help the crepes cook evenly.
Rest the Batter:
Allowing the batter to rest for at least 15-30 minutes helps the flour fully hydrate and prevents air bubbles from forming, which can lead to uneven texture. Resting the batter also allows for better gluten development, which can improve the crepes’ texture and prevent issues during cooking.
6. Checking the Pan’s Surface Regularly
After cooking several crepes, the surface of the pan may change slightly due to the heat and the buildup of any residual batter. This can lead to uneven cooking on subsequent crepes.
Clean the Pan Between Crepes:
If you notice that the surface of the pan has become uneven or that the crepes are sticking, wipe the pan with a paper towel between batches to remove any residual bits of batter. This helps maintain an even cooking surface and ensures the crepes cook evenly on each side.
Adjust Pan Temperature:
As you continue cooking, the pan’s temperature may fluctuate. If the pan gets too hot, lower the heat slightly to maintain an even cooking temperature. Conversely, if the pan is cooling down, raise the heat to bring it back to the ideal temperature.
—
In conclusion, achieving even cooking when making crepes involves ensuring proper heat distribution, using the right amount of batter, and managing the temperature carefully. By preheating the pan, spreading the batter evenly, cooking for the right amount of time, and avoiding overcrowding, you can prevent uneven cooking and create crepes that are golden brown and perfectly cooked every time. With these tips, your crepes will be delicious and flawlessly cooked, whether you’re serving them for breakfast, lunch, or dinner.
Tearing or Breaking: How to Prevent It and Keep Your Crepes Intact
Tearing or breaking a crepe while cooking or flipping is a common problem, especially for beginner cooks. Crepes are delicate by nature, and their thin texture makes them more prone to tearing if not handled properly. Fortunately, there are several techniques and tips to avoid this issue and ensure your crepes come out perfectly intact, soft, and beautiful every time.
1. Correct Batter Consistency
The consistency of your batter is key to making smooth, flexible crepes that don’t tear during cooking. If your batter is too thick or lumpy, it will be more difficult to spread evenly across the pan, resulting in crepes that are uneven in thickness and more likely to tear.
Thin and Smooth Batter:
For crepes to cook evenly and be easy to handle, your batter should be thin and smooth. The consistency should resemble heavy cream or a thin pancake batter. If the batter is too thick, it will create a crepe that’s harder to flip and more prone to tearing when you try to handle it.
Rest the Batter:
Allowing the batter to rest for at least 15-30 minutes before cooking helps to relax the gluten in the flour. This makes the batter more elastic, which reduces the chances of tearing. Resting the batter also allows air bubbles to escape, resulting in a smoother texture and more pliable crepes.
2. Evenly Spread Batter on the Pan
Unevenly spread batter can create areas that are thicker or thinner, making some parts of the crepe more fragile than others. If the batter is too thick in certain areas, those spots are more likely to break when you try to flip or move the crepe.
Tilt and Swirl the Pan:
After pouring the batter into the pan, quickly tilt and swirl the pan in a circular motion. This allows the batter to spread evenly over the entire surface of the pan, ensuring a uniform thickness. An even layer of batter ensures that the crepe cooks uniformly and remains flexible, making it less likely to tear.
Use the Right Amount of Batter:
It’s important to use the right amount of batter for each crepe. Too much batter will make the crepe thick and heavy, leading to difficulty when flipping, while too little batter will make the crepe too thin and fragile. The ideal amount of batter is just enough to form a thin, even layer that doesn’t pool in the center or run off the edges of the pan.
3. Proper Pan Temperature
Cooking the crepes at the right temperature is crucial for preventing them from tearing. If the pan is too hot, the crepe will cook too quickly, leading to uneven texture and possible breakage. Conversely, if the pan is too cold, the crepe will cook too slowly, which could cause it to stick to the pan and tear when flipped.
Preheat the Pan Properly:
Preheat your pan to medium heat before adding the batter. You can test the temperature by sprinkling a small amount of water on the pan—if it sizzles and evaporates quickly, it’s ready. A pan that’s too hot can cause the crepe to cook too quickly and dry out, while a pan that’s too cool can result in a crepe that doesn’t hold together properly.
Maintain Steady Heat:
Once the crepes begin cooking, keep the heat steady. If the pan is too hot, lower the temperature slightly to prevent burning and cracking. If the pan is too cool, raise the temperature to allow for quicker cooking. A medium heat will ensure the crepes cook at the right pace and prevent tearing due to overcooking or undercooking.
4. Flipping with Care
Flipping the crepe is often the most delicate part of the process. If not done properly, the crepe can tear or break apart when you try to lift or flip it. To avoid this, you need to be gentle and precise when handling the crepe.
Wait for the Right Moment:
Wait until the edges of the crepe begin to lift away from the pan and the underside is golden brown before attempting to flip. If the crepe is still too soft or the edges are stuck, it’s more likely to tear during the flip. A well-cooked underside helps the crepe hold together and makes flipping easier.
Use a Thin, Flexible Spatula:
To prevent breaking, always use a thin, flexible spatula to lift the crepe from the pan. A wide spatula can provide more support and prevent the crepe from folding or tearing as you flip it. Gently slide the spatula under the crepe to lift it, and then flip it quickly but carefully to avoid damage.
Hand-Flipping (Optional):
If you’re feeling confident, you can try flipping the crepe by hand. Using your fingers, gently lift the crepe by its edges, hold it for a moment to ensure it’s fully cooked, and flip it over quickly. Be careful to handle the crepe gently to prevent it from tearing.
5. Don’t Overcrowd the Pan
When making multiple crepes, avoid overcrowding the pan. If the pan is too full, the batter can spill over the edges, causing crepes to stick together or break when you attempt to flip them.
Cook One or Two Crepes at a Time:
Give each crepe plenty of space to spread evenly. Cooking too many crepes at once can cause uneven heat distribution and make it harder to handle each crepe individually. A crowded pan may also make it more difficult to flip the crepes without them sticking together or breaking apart.
6. Using the Right Pan
The type of pan you use can also affect the texture and handling of your crepes. A nonstick skillet is ideal because it prevents the crepes from sticking, allowing you to flip them easily without tearing. However, the surface of the pan must be smooth and flat to ensure even heat distribution.
Nonstick Pans:
Nonstick pans are great for making crepes because they reduce the risk of sticking, making it easier to flip and handle the crepes without causing tears. Look for a pan with a flat, smooth surface, and avoid using pans with ridges or raised edges.
Cast Iron or Stainless Steel Pans:
If you’re using a cast iron or stainless steel pan, make sure it is well-seasoned or properly greased to prevent sticking. These pans take longer to heat up but can provide even heat distribution once they’re hot. Be extra cautious when flipping to avoid damage to the delicate crepes.
7. Rest the Crepes
Once cooked, allow your crepes to rest on a plate lined with parchment paper or a clean kitchen towel. Resting the crepes for a minute or two helps them maintain their shape and prevents them from sticking to each other.
Stacking with Parchment Paper:
If you’re making multiple crepes, stack them with a layer of parchment paper between each crepe. This prevents them from sticking together and keeps them intact. It also helps preserve their softness, making them easier to handle.
—
In conclusion, preventing tearing or breaking of crepes involves using the right batter consistency, spreading the batter evenly, managing the pan temperature, and flipping the crepes carefully. By paying attention to these details and using the correct equipment, you can make smooth, beautiful crepes that don’t tear or break, ensuring a perfect result every time. With practice and patience, your crepes will come out just the way you want them—flexible, intact, and ready to be filled with delicious fillings!
Conclusion: Mastering the Art of Perfect Crepes
Making perfect crepes may seem challenging at first, but with the right technique and a bit of practice, anyone can create delicious, smooth, and perfectly cooked crepes every time. From choosing the right ingredients to achieving the ideal batter consistency and cooking at the perfect temperature, each step is important in ensuring your crepes turn out just right.
Remember to pay attention to key factors like allowing the batter to rest, using a nonstick pan, and flipping with care. Avoiding common pitfalls like uneven cooking, batter that’s too thick or thin, and crepes that stick to the pan will help you create crepes that are golden, tender, and easy to handle.
Whether you’re making sweet or savory crepes, or even trying a classic like Crepes Suzette, the possibilities for delicious variations are endless. Customizing your crepes with different fillings or adding your own personal twist can make each batch uniquely yours.
So, don’t be discouraged by the occasional tear or break—it’s all part of the learning process! With the tips and techniques outlined in this guide, you’ll soon be able to make flawless crepes every time, impressing friends and family with your culinary skills and creativity. Happy cooking, and enjoy your perfect crepes!