
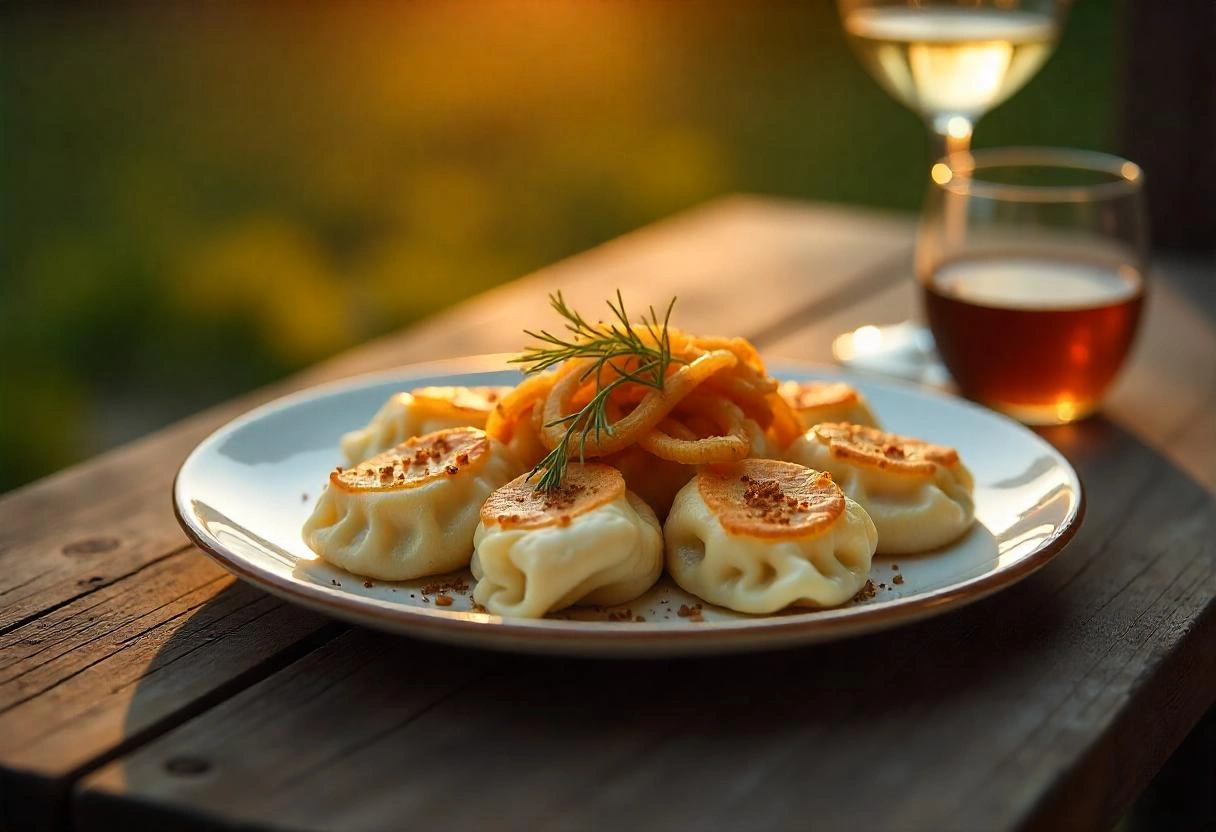
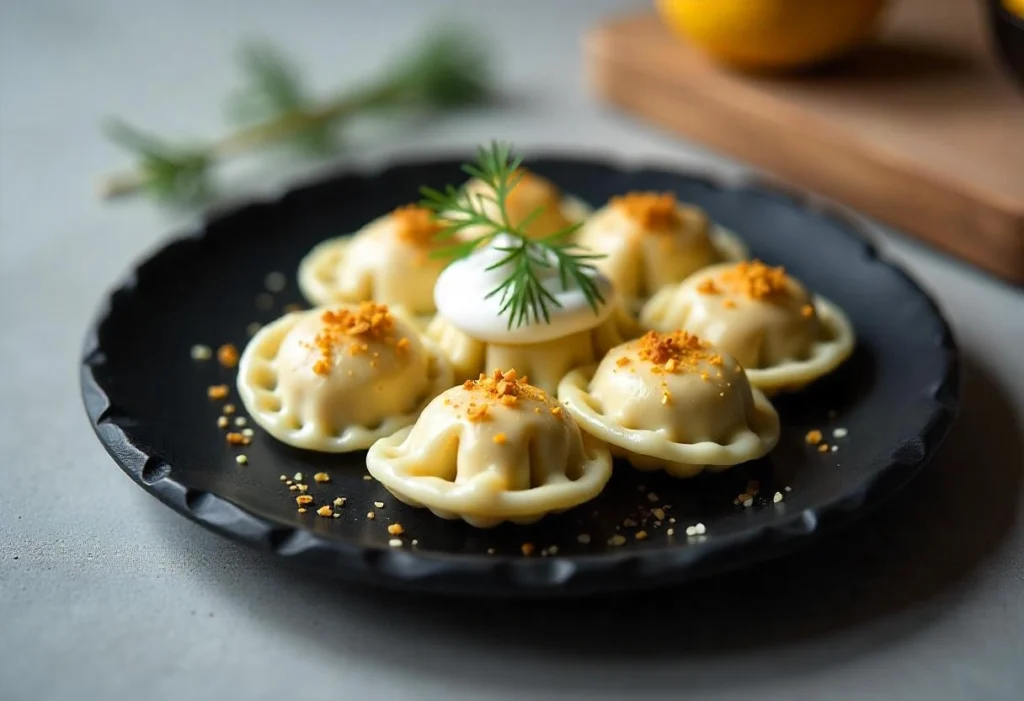
Pierogi are one of the most beloved dishes in Eastern European cuisine, known for their soft, pillowy dough and endless filling possibilities. Whether you prefer them stuffed with potatoes and cheese, meat, or sweet fillings, the secret to perfect pierogi starts with the right dough.
A good pierogi dough should be soft, tender, and easy to work with, making it effortless to roll, shape, and seal. The right balance of flour, eggs, water, and fat determines the dough’s elasticity and texture, ensuring that it holds up well during cooking—whether you’re boiling, pan-frying, or freezing your pierogi for later.
In this guide, you’ll learn:
The key ingredients for perfect homemade pierogi dough.
Step-by-step instructions for making and rolling the dough.
Common mistakes and how to fix them.
The best fillings and cooking methods for pierogi.
By the end, you’ll be ready to make authentic, homemade pierogi with ease. Let’s get started!
What Makes the Best Pierogi Dough?
Texture Matters: The Secret to Perfect Pierogi Dough
The texture of pierogi dough plays a crucial role in making delicious, tender dumplings. The ideal dough should be soft, elastic, and easy to roll out, ensuring that it holds its shape while remaining delicate when cooked. Here’s what makes texture so important and how to achieve the best results:
1. Soft and Tender, Not Tough
A common mistake when making pierogi dough is over-kneading, which can lead to tough, chewy dumplings instead of soft, pillowy ones. To prevent this:
Use the right ratio of ingredients – Too much flour can make the dough dense, while too much liquid can make it sticky.
Let the dough rest – Allowing the dough to rest for at least 30 minutes helps relax the gluten, making it easier to roll and shape.
2. Elastic and Easy to Work With
For pierogi dough to be pliable and easy to shape, it needs the right balance of elasticity and tenderness. If the dough is too stiff, it will be difficult to roll out and seal properly. To achieve the perfect texture:
Knead gently – Kneading for 5–7 minutes is enough to develop structure without overworking the gluten.
Add a fat source – Ingredients like butter, sour cream, or oil can improve the texture, making the dough softer and more flexible.
3. Thin Enough for Delicate Dumplings, Thick Enough to Hold Fillings
Getting the right thickness is essential for pierogi that hold up during cooking but remain tender when eaten. Aim for a dough thickness of about ⅛ inch (3mm) when rolling it out.
If the dough is too thick, the pierogi may feel doughy and take longer to cook.
If it’s too thin, they may tear or break when filled and boiled.
By paying attention to texture, you’ll create a pierogi dough that’s easy to handle, deliciously soft, and perfect for sealing in your favorite fillings.
Key Ingredients: What Makes the Best Pierogi Dough?
The perfect pierogi dough relies on a few simple yet essential ingredients, each playing a crucial role in achieving the right texture, elasticity, and flavor. While the basic recipe consists of flour, water, and eggs, small adjustments—such as adding butter or sour cream—can make a significant difference. Let’s break down each ingredient and its function in creating soft, tender, and easy-to-work-with dough.
—
1. Flour: The Foundation of Pierogi Dough
Flour is the main structural component of pierogi dough, providing the necessary gluten formation for elasticity and stretch. The type of flour you use affects the dough’s texture:
All-Purpose Flour – The best choice for classic pierogi dough, as it has a balanced protein content that provides just the right amount of structure without making the dough too tough.
Bread Flour – Higher in protein, which can result in a chewier dough. If using, reduce kneading time to prevent excessive gluten development.
Pastry Flour – Lower in protein, making for a softer dough, but it may be too delicate to hold fillings well.
Tip: For the softest dough, always sift the flour before mixing to aerate it and prevent lumps.
—
2. Eggs: Binding and Structure
Eggs are traditionally used in Polish pierogi dough to add structure and elasticity. However, their presence can slightly firm up the dough.
With Eggs: Adds richness and a firmer texture, making the dough easier to handle.
Without Eggs: Results in a softer, more delicate dough, but it may be trickier to roll and shape.
If you prefer eggless pierogi dough, you can substitute a bit of sour cream or oil to maintain elasticity.
—
3. Liquid: Water vs. Milk for Dough Hydration
The liquid component hydrates the flour, helping the dough come together. The choice between water and milk affects the dough’s softness:
Warm Water: The most common choice, making the dough pliable and easy to roll.
Milk: Adds a bit of richness and tenderness but can make the dough slightly heavier.
Tip: Using warm liquid (not hot or cold) helps the dough come together smoothly without making it too stiff or sticky.
—
4. Fat: Butter, Oil, or Sour Cream?
Adding fat to pierogi dough makes it softer and more flavorful while preventing it from drying out. Different fats bring slightly different results:
Butter: Enhances flavor and creates a more delicate, tender dough.
Oil: Helps keep the dough moist and pliable, making it easier to roll out.
Sour Cream: A traditional addition that makes the dough extra soft and slightly tangy.
Tip: If you’re making eggless pierogi dough, sour cream can help improve its elasticity and richness.
—
5. Salt: Enhancing Flavor
Salt is a small but essential ingredient in pierogi dough, bringing out the natural flavors of the other ingredients. Without it, the dough can taste bland.
Use fine sea salt or kosher salt for even distribution.
Avoid adding too much, as it can tighten the gluten and make the dough tougher.
Tip: Dissolve the salt in warm water before adding it to the dough to ensure even seasoning.
—
Final Thoughts
Each ingredient in pierogi dough plays a vital role in achieving the perfect soft, tender, and elastic texture. By balancing flour, eggs, liquid, fat, and salt, you can create a dough that is easy to roll, seals well, and holds up beautifully when cooked. Whether you prefer traditional or eggless pierogi dough, small adjustments can help you customize the recipe to your preference.
Traditional vs. Modern Variations: Choosing the Right Pierogi Dough
Pierogi have been a staple of Eastern European cuisine for centuries, with each region and family having its own take on the perfect dough. While traditional recipes stick to a few simple ingredients, modern variations have introduced different techniques and ingredients to enhance texture, flavor, and ease of preparation. Let’s explore the differences between traditional and modern pierogi dough and how you can choose the best version for your needs.
—
1. Traditional Pierogi Dough: Simple and Authentic
The most authentic pierogi dough is made with just a few essential ingredients:
Flour (usually all-purpose)
Warm water (to help bind the dough)
Eggs (for structure and elasticity)
Salt (for flavor)
This type of dough is firm yet pliable, making it easy to roll and shape. It holds its form well during boiling and pan-frying, making it ideal for traditional pierogi recipes like potato and cheese pierogi (Pierogi Ruskie), meat-filled pierogi, or sauerkraut pierogi.
Pros of Traditional Pierogi Dough:
✔ Simple and authentic recipe, used for generations.
✔ Easy to roll out and work with.
✔ Holds up well during boiling and frying.
Cons of Traditional Pierogi Dough:
✘ Can be slightly firmer, requiring more effort to roll out.
✘ May dry out quickly if not covered while resting.
Best For: Those who want to stick to authentic Polish pierogi with a firm, easy-to-handle dough.
—
2. Modern Pierogi Dough: Softer and More Flexible
Over time, variations of the classic pierogi dough have emerged, incorporating different ingredients to make the dough softer, richer, and more pliable. Some modern versions include:
Sour Cream Pierogi Dough
Adding sour cream to the dough makes it tender, slightly tangy, and easy to roll out.
This variation is great for delicate pierogi that won’t be overfilled.
Tip: Reduce water slightly when using sour cream to maintain the right dough consistency.
Butter or Oil-Enriched Dough
Some recipes use butter or vegetable oil to create a more elastic and richer dough.
Fat makes the dough easier to roll out and prevents it from drying too quickly.
Tip: If using butter, melt it and mix it with warm water before adding it to the flour.
Eggless Pierogi Dough
Some modern variations omit eggs, resulting in a softer, more delicate dough.
The lack of eggs makes the dough slightly more fragile but extra tender when cooked.
Best for: Sweet pierogi, like fruit-filled dumplings, or those who prefer a vegan-friendly option.
Pros of Modern Pierogi Dough:
✔ Softer and easier to roll out, requiring less effort.
✔ More elastic and tender, reducing the risk of breaking.
✔ Offers customization (butter, sour cream, or eggless options).
Cons of Modern Pierogi Dough:
✘ Some versions (like eggless dough) may be more fragile when boiling.
✘ Dough may tear more easily if not handled carefully.
Best For: Those looking for a softer, richer dough or trying different variations for texture and flexibility.
—
3. Which Pierogi Dough Should You Choose?
The best pierogi dough depends on your preference and the type of pierogi you’re making:
For authentic, easy-to-handle dough: Stick with traditional flour, eggs, water, and salt.
For a softer, richer dough: Try adding sour cream or butter.
For delicate or vegan-friendly dough: Go for an eggless version with a touch of oil or sour cream.
—
Final Thoughts
Whether you prefer the traditional firm dough or a modern, tender variation, there’s no right or wrong choice—just the one that works best for your filling, cooking method, and personal taste. Experimenting with different doughs can help you find the perfect balance of texture and flavor for your homemade pierogi.
Step-by-Step Guide to Making Homemade Pierogi Dough
Mixing the Dough: How to Achieve the Perfect Consistency
Mixing the dough is a crucial step in making pierogi, as it determines the texture, elasticity, and workability of the final product. The goal is to create a dough that is soft, smooth, and easy to roll out, while also being strong enough to hold the filling without tearing. Whether you mix the dough by hand or with a stand mixer, following the right technique will ensure perfect pierogi every time.
—
1. Choosing the Right Mixing Method
There are two main ways to mix pierogi dough:
A. Mixing by Hand (Traditional Method)
This method requires minimal equipment and allows for better control over the dough’s consistency.
Steps:
1. Make a well in the flour: On a clean surface or in a large mixing bowl, pile the flour and create a well in the center.
2. Add wet ingredients: Pour in the warm water (or milk), beaten eggs (if using), and melted butter or oil.
3. Gradually incorporate the flour: Using a fork or your fingers, slowly mix the flour into the liquid, starting from the center and working outward.
4. Form a shaggy dough: Once the mixture starts to come together, use your hands to bring the dough into a rough ball.
5. Transfer to a work surface: Lightly flour your countertop and begin kneading.
✅ Pros:
✔ More control over dough texture.
✔ No special equipment needed.
✔ Traditional, authentic method.
❌ Cons:
✘ Can be more time-consuming.
✘ Requires some effort for kneading.
—
B. Mixing with a Stand Mixer (Modern Method)
If you prefer a quicker and less messy approach, a stand mixer can save time and effort.
Steps:
1. Combine dry ingredients: Add flour and salt to the stand mixer bowl.
2. Add wet ingredients: Pour in warm water (or milk), eggs, and melted butter or oil.
3. Mix on low speed: Use the dough hook attachment and mix on low speed until the dough starts to form.
4. Increase to medium speed: Let the mixer knead the dough for about 5–7 minutes until smooth and elastic.
5. Adjust as needed: If the dough is too dry, add a teaspoon of warm water; if it’s too sticky, sprinkle in more flour.
✅ Pros:
✔ Faster and easier, especially for large batches.
✔ Ensures even mixing without overworking the dough.
✔ Less hand strain compared to kneading by hand.
❌ Cons:
✘ Requires a stand mixer with a dough hook.
✘ Can be harder to judge dough texture without hand-mixing experience.
—
2. How to Know When the Dough is Properly Mixed
A well-mixed pierogi dough should have the following characteristics:
Smooth and elastic – The surface should be soft, with no dry spots.
Slightly tacky but not sticky – The dough should not cling excessively to your hands.
Easy to stretch and roll out – It should have some flexibility without breaking apart.
If the dough feels too dry or crumbly, add a few drops of warm water and knead gently until it becomes soft. If it’s too wet and sticky, dust it with a little flour while kneading.
—
3. Resting the Dough: A Crucial Step
Once mixed, the dough needs to rest before rolling out to allow the gluten to relax.
Cover the dough with plastic wrap or a damp towel to prevent it from drying out.
Let it rest at room temperature for at least 30 minutes, or up to an hour for the best results.
This resting period makes the dough more pliable and easier to roll out, preventing it from shrinking when shaping the pierogi.
✅ Skipping the resting step can lead to:
Dough that is too elastic, making it hard to roll out.
Pierogi that shrink or burst open when cooking.
—
Final Thoughts
Whether you choose to mix by hand or with a stand mixer, taking the time to properly combine and knead the dough will result in tender, easy-to-handle pierogi. By paying attention to texture, hydration, and resting time, you’ll achieve the perfect dough that’s strong enough to hold fillings but soft enough for a delicate bite.
Kneading Tips: How to Get the Perfect Pierogi Dough Texture
Kneading is one of the most important steps in making pierogi dough. It helps develop gluten, which gives the dough its stretchy, elastic quality while keeping it soft and easy to roll out. However, over-kneading or under-kneading can result in tough or crumbly dough, making it difficult to shape and seal your pierogi properly. Follow these tips to achieve the perfect dough consistency every time.
—
1. How Long Should You Knead Pierogi Dough?
Unlike bread dough, which requires extensive kneading to develop strong gluten, pierogi dough needs a gentler approach. The goal is to knead just enough to make the dough smooth and elastic but still tender.
By Hand: About 8–10 minutes of kneading.
By Stand Mixer: About 5–7 minutes on low speed using a dough hook.
If you knead too little, the dough will be crumbly and difficult to roll out. If you knead too much, the dough will become too tight, making it hard to shape the pierogi and preventing a soft texture after cooking.
✅ How to Know When the Dough is Ready:
✔ The dough should be smooth, soft, and slightly tacky to the touch.
✔ It should bounce back slowly when pressed with a finger.
✔ When stretched, it should have a bit of elasticity but not be too tight.
—
2. Best Kneading Techniques for Soft and Elastic Dough
To knead the dough properly, use these simple techniques:
A. The Push-and-Fold Method (Hand Kneading)
1. Lightly flour your work surface to prevent sticking.
2. Flatten the dough slightly, then push it away with the heel of your hand.
3. Fold it back over itself and rotate it slightly.
4. Repeat this process, pushing and folding, until the dough becomes smooth and elastic.
✅ Tip: If the dough sticks to your hands, sprinkle a little flour—but don’t add too much, or the dough will become dry.
B. Stretch-and-Twist Technique (For Extra Elasticity)
1. Stretch the dough slightly outward with both hands.
2. Fold it back onto itself and give it a slight twist.
3. Press down gently and continue kneading.
✅ Why This Works: This method evenly distributes gluten throughout the dough, making it stretchy but not tough.
C. Using a Stand Mixer (Effortless Kneading)
1. Use the dough hook attachment on low speed.
2. Mix until the dough pulls away from the sides of the bowl but still sticks slightly at the bottom.
3. If the dough is too sticky, add a small amount of flour (1 teaspoon at a time).
4. If the dough is too dry, add a few drops of warm water or milk and continue mixing.
✅ Tip: Stop kneading once the dough is smooth and elastic—over-kneading in a stand mixer can make the dough too tight.
—
3. Common Kneading Problems and How to Fix Them
Even experienced cooks sometimes run into issues while kneading. Here’s how to troubleshoot common dough problems:
—
4. Resting After Kneading: Why It’s Important
Once the dough is kneaded to the perfect consistency, it’s crucial to let it rest before rolling it out. This allows the gluten to relax, making the dough easier to roll and shape without bouncing back.
Cover the dough with plastic wrap or a damp towel to prevent it from drying out.
Rest for at least 30 minutes at room temperature for best results.
Optional: If you’re making pierogi later, you can refrigerate the dough for up to 24 hours.
✅ Skipping the resting step can result in:
✘ Dough that is too elastic, making it hard to roll out.
✘ Pierogi that shrink or burst open while cooking.
—
Final Thoughts
Mastering kneading is the key to making soft, pliable, and easy-to-work-with pierogi dough. By following these tips, you’ll achieve a dough that is smooth, elastic, and perfect for shaping and sealing your homemade pierogi.
Resting the Dough: Why It’s Essential for Perfect Pierogi
Resting the dough is a crucial step in making pierogi, yet it’s often overlooked. After mixing and kneading, the dough needs time to relax, hydrate, and develop its texture before rolling out. Skipping this step can result in tough, hard-to-roll dough that shrinks or tears when shaping.
Let’s explore why resting is important, how long to rest the dough, and best practices for ensuring the perfect consistency.
—
1. Why Does Pierogi Dough Need to Rest?
Resting the dough allows several key processes to take place:
✔️ Gluten Relaxation:
Kneading develops gluten, which gives the dough elasticity.
Without rest, the dough springs back when rolled out, making it difficult to work with.
Resting loosens the gluten, making the dough softer and easier to roll.
✔️ Hydration of Ingredients:
Flour absorbs liquid slowly; resting ensures even moisture distribution.
This results in a smoother, more pliable dough that’s easier to shape.
✔️ Prevention of Dough Tearing:
If the dough isn’t properly rested, it can crack or tear when stretched.
A well-rested dough is more stretchable and durable, preventing breakage when sealing the pierogi.
—
2. How Long Should You Rest Pierogi Dough?
The minimum resting time depends on your method and ingredients:
✅ Tip: If refrigerating, let the dough sit at room temperature for 15–20 minutes before rolling, as cold dough can be stiff.
—
3. Best Practices for Resting Pierogi Dough
To get the best results, follow these simple resting techniques:
A. Cover the Dough to Prevent Drying
Wrap the dough tightly in plastic wrap or place it in a bowl covered with a damp kitchen towel.
This prevents the dough from forming a crust, which can make it difficult to roll out.
B. Rest at Room Temperature
Dough should be left at room temperature (around 20-25°C or 68-77°F).
Resting in a warm place (like near a stove) can over-soften the dough, making it sticky.
C. Refrigerating for Later Use
If not using the dough immediately, refrigerate it for up to 24 hours.
For even longer storage, the dough can be frozen for up to a month—just let it thaw in the fridge before using.
✅ Tip: If your dough feels too tight or elastic after resting, knead it lightly for 30 seconds before rolling to soften it up.
—
4. What Happens If You Don’t Rest the Dough?
If you skip the resting step, you might encounter these common issues:
❌ Dough Springs Back: Difficult to roll out, keeps shrinking.
❌ Tough Texture: Finished pierogi may be chewier instead of soft and tender.
❌ Dough Tears Easily: Not enough hydration, leading to cracks when shaping.
Taking the time to rest your dough properly ensures a smooth rolling process, easy sealing, and a soft, delicate texture in your pierogi.
—
Final Thoughts
Resting the dough might seem like an extra step, but it’s essential for getting the perfect pierogi texture. A well-rested dough is softer, easier to roll, and more durable, ensuring that your homemade pierogi turn out tender, delicious, and beautifully shaped.
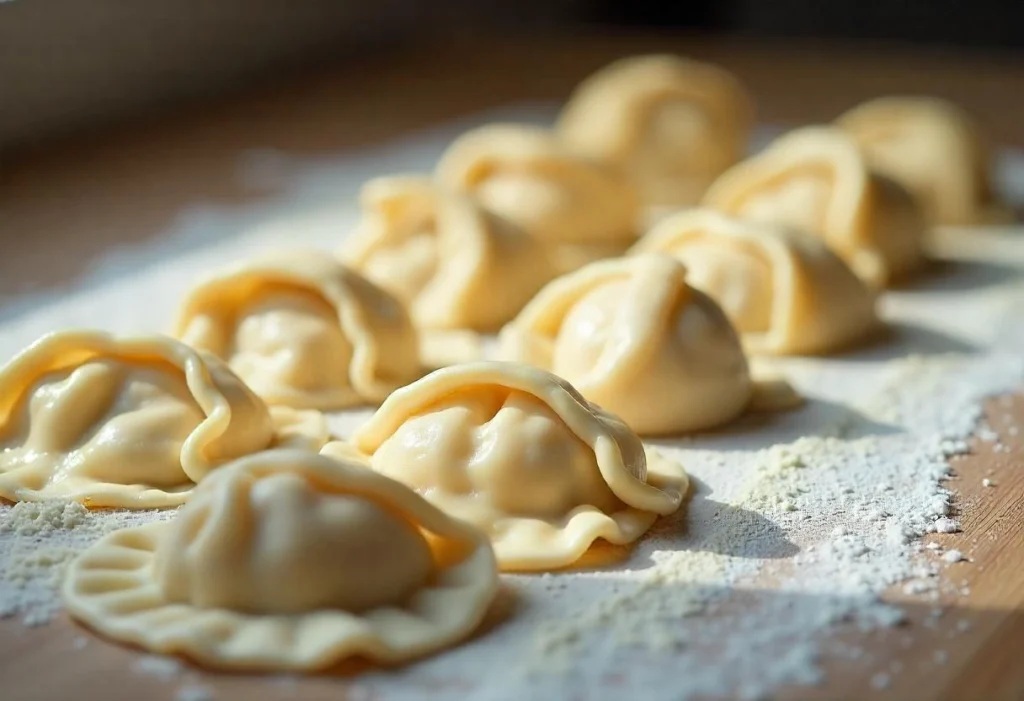
Rolling the Dough: Achieving the Perfect Thickness for Pierogi
Rolling out the dough is a crucial step in making pierogi. The dough should be thin enough to be tender but thick enough to hold the filling without tearing. If rolled too thick, the pierogi can be doughy and chewy; if too thin, they may break apart during cooking.
This section covers how to roll the dough properly, ideal thickness, common mistakes, and useful tips for a smooth and even dough.
—
1. Preparing the Dough for Rolling
Before you start rolling, make sure the dough is in optimal condition:
✔ Well-rested dough: Allows gluten to relax, making rolling easier.
✔ Lightly floured surface: Prevents sticking, but too much flour can make the dough dry.
✔ Divide the dough into portions: Working with smaller pieces prevents it from drying out and makes rolling easier.
✅ Tip: If the dough is too cold from refrigeration, let it sit for 15–20 minutes at room temperature to soften before rolling.
—
2. Choosing the Right Rolling Tool
The tool you use can impact the final texture:
✔ Traditional Wooden Rolling Pin – Provides better control and prevents over-rolling.
✔ French Rolling Pin (Tapered Ends) – Great for stretching dough evenly.
✔ Adjustable Rolling Pin with Thickness Rings – Ensures consistent thickness throughout.
✔ Pasta Machine (Optional) – Helps create ultra-thin, even sheets, but requires careful handling.
✅ Tip: Avoid using a heavy rolling pin that could press out too much air, making the dough dense.
—
3. The Perfect Thickness for Pierogi Dough
Pierogi dough should be rolled to about 1.5–2 mm (1/16 inch) thick—thin enough to cook quickly but thick enough to hold the filling.
✅ Test Tip: Hold the rolled-out dough up to the light—you should see a faint shadow of your hand behind it, but it shouldn’t be transparent.
—
4. Rolling Technique for Even Thickness
Follow these steps for smooth, even rolling:
A. Rolling the Dough Evenly
1. Start from the Center: Place your rolling pin in the middle and roll outward.
2. Rotate the Dough: Turn it 90 degrees after every few rolls to maintain an even shape.
3. Apply Gentle Pressure: Avoid pressing too hard, which can make the dough too thin in some areas.
4. Check Thickness Consistently: Use a ruler or thickness guide to ensure even rolling.
✅ Tip: If the dough keeps shrinking back, let it rest for another 5–10 minutes to relax the gluten.
B. Rolling in Batches
Instead of rolling out the entire dough at once, work in smaller batches:
Cut off a portion of dough while keeping the rest covered with a damp towel.
Roll one piece at a time to prevent drying out.
If necessary, dust lightly with flour to prevent sticking.
—
5. Common Mistakes & How to Avoid Them
✅ Pro Tip: If you accidentally roll the dough too thin, fold it over and re-roll gently to thicken it back up.
—
6. Cutting Out Perfect Circles for Pierogi
Once your dough is evenly rolled, it’s time to cut out circles for the pierogi:
✔ Use a round cutter (7–9 cm / 2.5–3.5 inches) – Cookie cutters, drinking glasses, or specialized pierogi cutters work well.
✔ Press firmly and lift – Avoid twisting the cutter, as this can seal the edges and prevent proper sealing later.
✔ Re-roll scraps carefully – Gather the leftover dough, knead briefly, let it rest for a few minutes, and roll again.
✅ Tip: If making large batches, roll out one portion at a time and keep the cut circles covered with a towel to prevent drying.
—
Final Thoughts
Rolling the dough properly ensures tender, easy-to-fill, and perfectly shaped pierogi. By following these techniques, you’ll get a consistent thickness, making the cooking process smoother and the final dish more delicious.
Common Pierogi Dough Mistakes and How to Fix Them
Dough Too Sticky? Add a Little Flour Gradually
Sticky pierogi dough can be frustrating to work with, making it difficult to roll out, cut, and shape properly. However, adding too much flour too quickly can lead to a dough that’s too tough and dry, resulting in chewy or hard pierogi. The key is to adjust the consistency gradually while maintaining the dough’s soft and tender texture.
In this section, we’ll explore why pierogi dough can become sticky, how to fix it properly, and common mistakes to avoid.
—
1. Why Is My Pierogi Dough Sticky?
Several factors can cause pierogi dough to feel too sticky:
✔ Too Much Moisture: If you added slightly more water, milk, or eggs than needed, the dough may become overly sticky.
✔ Flour Absorption Differences: Different brands and types of flour absorb liquid differently. Some require more flour to reach the right consistency.
✔ Humidity in the Kitchen: A humid environment can introduce extra moisture into the dough, making it stickier than usual.
✔ Not Enough Kneading: When dough hasn’t been kneaded enough, the flour hasn’t had time to fully absorb the liquid, leaving it feeling sticky.
✔ Resting Time Not Long Enough: If the dough hasn’t rested properly, it may still feel sticky because the gluten and moisture haven’t settled.
—
2. How to Fix Sticky Dough Without Over-Flouring
If your dough feels too sticky to handle, don’t panic! Instead of dumping in large amounts of flour, follow these steps:
A. Dust Your Hands & Work Surface Lightly
Before adding flour to the dough itself, try dusting your hands and work surface first.
This can often be enough to prevent sticking without altering the dough’s moisture balance.
✅ Tip: If the dough sticks to your rolling pin, dust it lightly with flour or use a non-stick rolling pin.
B. Add Flour Gradually (1 Tablespoon at a Time)
If the dough is still too sticky, sprinkle in one tablespoon of flour at a time and knead it gently.
Check the texture after each addition—the dough should feel soft, slightly tacky, but not wet.
Avoid adding too much flour, as over-correcting can make the dough dry and stiff.
C. Knead for a Few More Minutes
Sometimes, a sticky dough just needs a little extra kneading to help the flour absorb the moisture.
If the dough is still sticky after kneading for a few minutes, then add a little more flour.
✅ Test: Press a clean, dry finger into the dough. If it sticks excessively, add a bit more flour. If it feels soft but doesn’t stick, the dough is ready!
—
3. Common Mistakes to Avoid
✅ Pro Tip: If your dough becomes too dry after adding flour, knead in a teaspoon of water or milk to restore moisture.
—
4. When to Stop Adding Flour?
You’ve added just the right amount of flour when the dough:
✔ Feels soft and smooth, not wet or sticky.
✔ Is easy to handle without clinging to your fingers.
✔ Rolls out without tearing or sticking to the surface.
✔ Stretches slightly without snapping back too much.
—
Final Thoughts
Sticky pierogi dough is easy to fix, but the key is to add flour gradually and knead gently. A well-balanced dough should be soft, pliable, and slightly tacky—but never wet or unmanageable. By using the right techniques, you’ll achieve a perfect dough that’s easy to roll and shape, resulting in tender and delicious pierogi.
Dough Too Tough? Let It Rest Longer for Gluten to Relax
One of the most common challenges when making pierogi dough is dealing with tough, elastic dough that resists rolling. If your dough keeps shrinking back, feels hard to stretch, or is too chewy after cooking, the culprit is usually gluten overdevelopment. Fortunately, the solution is simple: let the dough rest longer.
This section will explain why tough dough happens, how resting helps, and practical tips to achieve a soft, easy-to-roll dough.
—
1. Why Does Pierogi Dough Become Tough?
Pierogi dough is made with flour, water, eggs (optional), and sometimes milk or butter. The key factor affecting texture is gluten, the protein in flour that gives dough its structure and elasticity.
Here’s why your dough might feel too tough or elastic:
✔ Over-kneading – If you knead too much, the gluten develops excessively, making the dough tight and resistant to rolling.
✔ Not Enough Resting Time – Gluten needs time to relax; otherwise, the dough shrinks back when rolled.
✔ Too Much Flour – Adding too much flour can dry out the dough, making it stiff and difficult to work with.
✔ Cold Dough – If the dough is too cold (e.g., from refrigeration), it may feel firm and unyielding when rolling.
✔ Using High-Protein Flour – Some flours (like bread flour) have higher gluten content, making the dough tougher than necessary.
—
2. How Resting Helps Soften the Dough
Resting the dough is essential for achieving a soft, pliable texture. When the dough rests:
✔ Gluten Relaxes – This makes the dough more stretchable and easier to roll without snapping back.
✔ Hydration Evens Out – The flour absorbs moisture uniformly, improving texture.
✔ Dough Softens Naturally – The stiffness reduces over time, making kneading and shaping much easier.
—
3. How Long Should You Let the Dough Rest?
The resting time can vary depending on the dough’s stiffness and how long you kneaded it. Here’s a general guide:
✅ Tip: Always keep the dough covered with a damp cloth or plastic wrap while resting to prevent drying out.
—
4. What to Do If Dough Is Still Tough After Resting?
If your dough still feels too firm or elastic, try these fixes:
✔ Let it rest longer – If 30 minutes isn’t enough, extend the resting time to 1 hour.
✔ Massage the dough gently – Press and stretch it slightly before rolling to loosen up the gluten.
✔ Warm it up slightly – If the dough is cold, let it sit at room temperature for 15–20 minutes before rolling.
✔ Add a little moisture – If the dough seems too dry, knead in 1 teaspoon of water or milk to soften it.
✅ Test: Press a finger into the dough—if it bounces back immediately, it needs more resting. If it leaves a slight indentation, it’s ready to roll!
—
5. Common Mistakes & How to Avoid Them
✅ Pro Tip: If you’re in a hurry, wrap the dough in plastic wrap and let it rest at room temperature for 30–40 minutes—this helps gluten relax faster.
—
Final Thoughts
A well-rested pierogi dough is soft, easy to roll, and cooks up tender. If your dough feels tough or bounces back, don’t rush—just give it more time to relax. By following these tips, you’ll get perfect, pliable dough that makes shaping and sealing your pierogi a breeze!
Pierogi Falling Apart? Avoid Overfilling and Seal Properly
There’s nothing more disappointing than carefully crafting homemade pierogi, only to have them burst open while boiling or frying. If your pierogi are falling apart, leaking filling, or separating at the edges, the most likely reasons are overfilling or improper sealing.
In this section, we’ll cover why pierogi fall apart, how to avoid common mistakes, and the best techniques for sealing them properly.
—
1. Why Do Pierogi Fall Apart?
If your pierogi are breaking open, one or more of these factors might be to blame:
✔ Overfilling – Adding too much filling stretches the dough too thin, making it prone to tearing and leaking.
✔ Poorly Sealed Edges – If the edges aren’t pinched and sealed properly, they may open up during cooking.
✔ Dough Too Dry – Dry dough won’t stick well when sealing, increasing the risk of separation.
✔ Rolling Dough Too Thin – Ultra-thin dough (especially under 2mm thick) can tear easily when handling or boiling.
✔ Cooking Too Vigorously – A rolling boil can knock pierogi against each other, causing weak seals to burst open.
—
2. How to Avoid Overfilling Pierogi
While it’s tempting to stuff pierogi generously, too much filling stresses the dough and prevents proper sealing. Follow these tips for the perfect balance:
A. Use the Right Amount of Filling
For standard-sized pierogi (3-inch circles), use about 1 to 1.5 teaspoons of filling.
If using a larger cutter (4 inches or more), you can add up to 2 teaspoons of filling.
✅ Test: Try closing the pierogi—if you struggle to pinch the edges together, you’ve added too much filling.
B. Keep Filling Thick, Not Runny
Avoid watery fillings (like mashed potatoes with excess milk or juicy fruit fillings).
If filling is too wet, stir in a bit of breadcrumbs, flour, or grated cheese to thicken it.
Chilling the filling slightly before assembling pierogi makes it easier to handle.
—
3. How to Seal Pierogi Properly
A well-sealed pierogi will hold its shape and stay intact during cooking. Follow these steps to ensure a perfect seal:
A. Moisten the Edges for a Stronger Seal
If your dough is slightly dry, brush the edges lightly with a little water or beaten egg before sealing.
This acts as a glue and helps prevent the pierogi from opening.
B. Pinch and Press Firmly
Place the filling in the center, fold the dough over, and press the edges firmly together with your fingers.
Start at one end and work toward the other, pushing out any trapped air inside.
The dough should stick easily—if it doesn’t, it might be too dry (see moisture tips above).
✅ Test: Lightly tug at the sealed edges—if they start to separate, press them together again.
C. Use a Fork or Crimping Tool for Extra Security
If you want an extra-strong seal, press the edges with a fork or use a pierogi press.
This creates a ridged edge, reinforcing the seal while adding a decorative touch.
✅ Tip: Avoid pressing too hard—over-crimping can make the edges too thin and fragile, leading to breakage.
—
4. Cooking Tips to Prevent Pierogi from Breaking Apart
Even well-sealed pierogi can fall apart if cooked incorrectly. Follow these steps to protect their delicate structure:
✔ Use Gently Boiling Water – Avoid a vigorous boil, which can cause pierogi to bump into each other and split open.
✔ Stir Immediately After Adding to Water – This prevents them from sticking to the bottom of the pot and tearing.
✔ Don’t Overcook – Fresh pierogi only need 2-3 minutes in boiling water (they’re ready when they float).
✔ Drain Well Before Frying – If pan-frying after boiling, let pierogi dry slightly to avoid excess steam weakening the dough.
✅ Tip: If you’re frying pierogi directly (without boiling first), cook them over medium heat—high heat can make them crisp up too quickly and break open.
—
5. Troubleshooting: Fixing Common Pierogi Sealing Problems
—
Final Thoughts
Making perfectly sealed pierogi takes practice, but avoiding overfilling and using the right sealing techniques will keep your dumplings intact. By ensuring a strong seal and handling them gently during cooking, you’ll enjoy soft, delicious pierogi with no leaks or breakage!
Best Fillings and Cooking Methods for Pierogi
Popular Fillings for Pierogi
Pierogi are incredibly versatile, with countless filling options ranging from traditional Eastern European recipes to modern, creative variations. Whether you prefer savory or sweet, there’s a pierogi filling for every taste. In this section, we’ll explore some of the most popular pierogi fillings, including classic favorites, regional specialties, and unique modern twists.
—
1. Traditional Savory Fillings
Classic savory pierogi are deeply rooted in Polish and Eastern European cuisine. These fillings often use simple, wholesome ingredients that provide a satisfying and hearty meal.
✔ Potato and Cheese (Pierogi Ruskie) – One of the most famous fillings, made with mashed potatoes, farmer’s cheese (or ricotta), and sautéed onions. It’s creamy, slightly tangy, and incredibly comforting.
✔ Sauerkraut and Mushroom – A tangy and earthy combination, often enjoyed during Christmas in Poland. The fermented sauerkraut gives it a slightly sour taste, balanced by the richness of sautéed mushrooms and onions.
✔ Ground Meat (Beef, Pork, or Chicken) – Minced or ground meat, seasoned with salt, pepper, and sometimes garlic, makes for a protein-packed filling. Some variations include bacon or caramelized onions for added depth of flavor.
✔ Cabbage and Onion – A milder, slightly sweet alternative to sauerkraut-filled pierogi, using braised cabbage and onions for a softer texture.
✅ Serving Tip: Savory pierogi pair well with sour cream, crispy bacon bits, or a drizzle of melted butter.
—
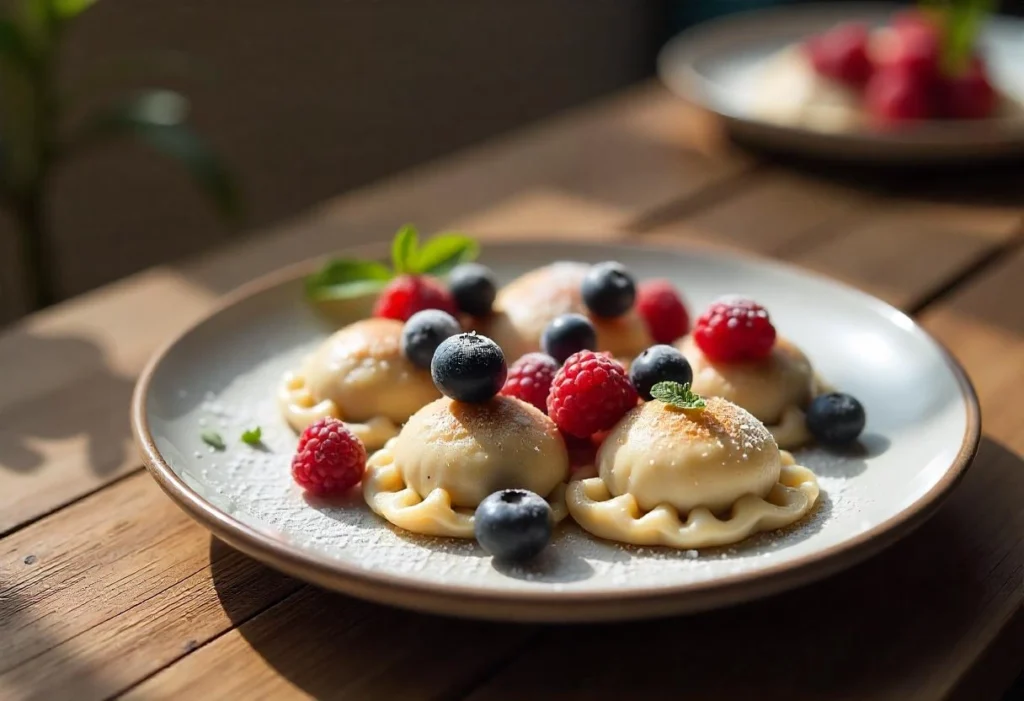
2. Sweet Pierogi Fillings
Pierogi aren’t just for savory dishes—they also make a delicious dessert! Sweet pierogi are typically filled with fruits, sweet cheese, or chocolate, making them a fantastic treat when dusted with powdered sugar or served with a dollop of whipped cream.
✔ Sweet Cheese (Twaróg or Ricotta-based) – A creamy blend of farmer’s cheese, sugar, and vanilla, sometimes mixed with egg yolks for extra richness.
✔ Blueberry (Jagody) – A popular summer filling in Poland, made with fresh or frozen blueberries mixed with a little sugar and starch to prevent leaking.
✔ Strawberry, Raspberry, or Cherry – These juicy, tart berries make fantastic fillings, often complemented with a sprinkle of sugar and a touch of cinnamon.
✔ Apple and Cinnamon – Finely chopped or grated apples, mixed with sugar and cinnamon, create a warm, comforting filling similar to an apple pie.
✔ Plum or Apricot – These fruits can be used whole or chopped, offering a juicy, tangy bite wrapped inside soft dough.
✅ Serving Tip: Sweet pierogi taste amazing when topped with sweetened sour cream, fruit sauce, or honey.
—
3. Regional and Unique Fillings
Different parts of the world have their own take on pierogi, incorporating local ingredients and flavors. Here are some interesting variations:
✔ Spinach and Feta (Mediterranean-Inspired) – A modern twist using sautéed spinach, feta cheese, and garlic, giving the pierogi a slightly salty and tangy kick.
✔ Mushroom and Truffle (Gourmet Variation) – A rich, umami-packed filling using a mix of wild mushrooms and truffle oil for a sophisticated flavor.
✔ Pumpkin and Ricotta (Fall-Inspired) – A seasonal favorite, blending roasted pumpkin, ricotta, nutmeg, and a touch of honey for a creamy, slightly sweet filling.
✔ Buffalo Chicken (American Fusion) – A spicy and cheesy option, made with shredded chicken, hot sauce, and blue cheese or ranch dressing.
✔ Chocolate and Hazelnut (Dessert Pierogi) – A decadent treat filled with chocolate ganache or Nutella, perfect for chocolate lovers.
✅ Pro Tip: If using wet or juicy fillings, dust them lightly with cornstarch before sealing to prevent soggy dough.
—
4. Creative Vegan and Vegetarian Fillings
For those who follow a plant-based diet, there are plenty of delicious options for vegan and vegetarian pierogi fillings.
✔ Lentils and Caramelized Onions – A hearty, protein-rich option using cooked lentils mixed with sweet caramelized onions.
✔ Mushroom and Tofu – A meatless take on the classic mushroom filling, enhanced with mashed tofu for a creamy texture.
✔ Sweet Potato and Coconut – A unique filling blending mashed sweet potatoes with coconut milk and a hint of cinnamon.
✔ Vegan Cheese and Spinach – A dairy-free version of the spinach and cheese pierogi, using cashew-based cheese or nutritional yeast for a cheesy flavor.
✅ Vegan Serving Tip: Instead of butter, drizzle cooked pierogi with olive oil or dairy-free margarine for a plant-based finish.
—
5. How to Experiment with Your Own Fillings
If you love getting creative in the kitchen, why not try making your own signature pierogi filling? Here are a few tips:
✔ Balance textures – Combine something creamy (cheese, mashed potatoes, or ricotta) with something chunky or firm (mushrooms, fruit, or nuts) for a well-rounded bite.
✔ Season properly – A little salt, pepper, garlic, or herbs can make a huge difference, especially in savory fillings.
✔ Avoid overly wet fillings – If your filling is too runny, mix in breadcrumbs, cornstarch, or a mashed starch (like potatoes) to thicken it.
✔ Use seasonal ingredients – Fresh berries in summer, pumpkin in fall, and root vegetables in winter make for delicious, seasonal pierogi.
—
Final Thoughts
Pierogi are incredibly versatile, and their fillings can be as traditional or creative as you like. Whether you stick to classic potato and cheese, try a sweet berry-filled dessert pierogi, or experiment with modern gourmet flavors, the possibilities are endless.
Cooking Techniques for Pierogi
Once you’ve prepared your perfect pierogi dough and filled them with your chosen ingredients, it’s time to cook them! Pierogi can be boiled, pan-fried, deep-fried, or even baked, depending on your preference. Each cooking method affects the texture and flavor of the pierogi, so choosing the right technique can help you achieve the perfect bite.
—
1. Boiling – The Classic Method
Boiling is the traditional and most common way to cook fresh pierogi. It ensures that the dough becomes soft and tender while fully cooking the filling.
✔ How to Boil Pierogi Properly:
1. Bring a large pot of salted water to a rolling boil.
2. Gently drop the pierogi in, stirring immediately to prevent sticking.
3. Cook until the pierogi float to the surface—this usually takes 3 to 5 minutes for fresh pierogi and 5 to 7 minutes for frozen ones.
4. Use a slotted spoon to remove them and let any excess water drain off.
✔ Pro Tips:
Don’t overcrowd the pot; boil in batches to prevent pierogi from sticking together.
If the dough feels too chewy, you may have overcooked them—keep an eye on them once they float!
✅ Best for: Traditional pierogi, especially if you plan to sauté them afterward.
—
2. Pan-Frying – Crispy and Golden
Pan-frying pierogi after boiling gives them a crispy, golden-brown exterior while keeping the inside soft and flavorful. This method is popular in Poland and other Eastern European countries.
✔ How to Pan-Fry Pierogi:
1. Heat butter or oil (or a combination of both) in a pan over medium heat.
2. Place the boiled pierogi in the pan and cook for 2-3 minutes per side until golden and slightly crispy.
3. Remove and serve with sour cream, fried onions, or crispy bacon bits.
✔ Pro Tips:
Use clarified butter or ghee for a rich, nutty flavor.
If your pierogi are fresh, consider boiling them first before frying to prevent them from being too dry.
✅ Best for: Potato and cheese pierogi, meat-filled pierogi, or any filling that benefits from a crispy exterior.
—
3. Deep-Frying – Extra Crunchy
Deep-frying is a less traditional but delicious way to prepare pierogi. It results in a super crispy, crunchy texture, similar to fried dumplings or empanadas.
✔ How to Deep-Fry Pierogi:
1. Heat oil to 350°F (175°C) in a deep pot or fryer.
2. Carefully add pierogi in small batches and fry for 3-5 minutes, until golden brown and crispy.
3. Use a slotted spoon to remove them and place on a paper towel to absorb excess oil.
✔ Pro Tips:
Make sure the oil is hot enough to prevent pierogi from absorbing too much grease.
For extra flavor, try frying them in duck fat or flavored oil.
✅ Best for: Sweet pierogi (like those filled with fruit or sweet cheese) or those intended for a crunchy appetizer.
—
4. Baking – A Hands-Off Approach
Baking is a great alternative if you want to cook many pierogi at once without the hassle of boiling or frying. While less common, it creates a slightly chewy texture with a lightly crisp exterior.
✔ How to Bake Pierogi:
1. Preheat oven to 375°F (190°C).
2. Arrange pierogi on a greased baking sheet.
3. Brush lightly with butter or oil for a crispier crust.
4. Bake for 15-20 minutes, flipping halfway through, until golden.
✔ Pro Tips:
If baking frozen pierogi, allow them to thaw slightly before baking for even cooking.
Serve baked pierogi with melted butter, garlic sauce, or a dollop of sour cream.
✅ Best for: Cheese or potato pierogi, or pierogi that will be served as a side dish.
—
5. Steaming – A Delicate Option
Steaming is a gentle cooking method that preserves the soft texture of pierogi while keeping them moist. It’s less common but useful for delicate fillings like mushrooms or ricotta.
✔ How to Steam Pierogi:
1. Bring a pot of water to a simmer and place pierogi in a steamer basket.
2. Cover and steam for 8-10 minutes until the dough is soft and slightly translucent.
3. Serve warm with melted butter or a drizzle of olive oil.
✔ Pro Tips:
Don’t overcrowd the steamer—give each pierogi enough space to prevent sticking.
Lightly oil the steamer basket or line it with parchment paper to avoid tearing the dough.
✅ Best for: Soft, delicate pierogi, especially those with cheese or vegetable-based fillings.
—
Final Thoughts: Choosing the Right Cooking Method
Each cooking technique brings out a different texture and flavor in pierogi. Here’s a quick guide to help you choose the best method:
✔ For traditional soft pierogi: Boil them and serve with butter or sour cream.
✔ For crispy, golden pierogi: Pan-fry them after boiling.
✔ For an extra crunchy bite: Deep-fry them for a crispy shell.
✔ For an easy, hands-off approach: Bake them in the oven.
✔ For a light, delicate texture: Steam them instead of boiling.
Experiment with different cooking techniques based on your pierogi fillings and preferences to find your perfect combination!
Storage Tips: Keeping Pierogi Fresh and Delicious
Proper storage is key to maintaining the freshness, texture, and flavor of your pierogi, whether they are raw or cooked. By following the right storage methods, you can prepare pierogi in advance and enjoy them later without compromising quality. Here’s how to store pierogi properly in the fridge or freezer.
—
1. Storing Uncooked (Raw) Pierogi
If you’re not cooking your pierogi immediately after making them, it’s important to store them properly to prevent them from sticking together or drying out.
✔ Short-Term Storage (Refrigeration):
Place uncooked pierogi on a floured baking sheet or parchment-lined tray, ensuring they don’t touch each other.
Cover with a damp kitchen towel or plastic wrap to prevent drying.
Store in the fridge for up to 24 hours before cooking.
✔ Long-Term Storage (Freezing):
Arrange pierogi in a single layer on a parchment-lined baking sheet and freeze for 1-2 hours until solid.
Once frozen, transfer them to a ziplock bag or airtight container, removing as much air as possible.
Label with the date and use within 2-3 months for the best taste and texture.
⚠️ Important:
Never store raw, filled pierogi in a sealed container in the fridge for too long, as the moisture from the filling can make the dough soggy. If storing for more than 24 hours, freezing is the best option.
—
2. Storing Cooked Pierogi
If you have leftover boiled, pan-fried, or baked pierogi, you can refrigerate or freeze them to enjoy later.
✔ Refrigerating Cooked Pierogi:
Let the pierogi cool completely before storing.
Place them in an airtight container or a ziplock bag.
Refrigerate for up to 3 days.
✔ Freezing Cooked Pierogi:
Arrange cooled pierogi on a parchment-lined baking sheet and freeze until solid.
Transfer to a ziplock bag or airtight container, separating layers with parchment paper.
Store for up to 3 months.
—
3. Preventing Pierogi from Sticking Together
One common issue when storing pierogi—especially uncooked ones—is that they tend to stick together. Here’s how to avoid this:
✔ Use Flour or Cornstarch: Lightly dust pierogi with flour or cornstarch before storing to prevent sticking.
✔ Single-Layer Freezing: Always freeze in a single layer first before transferring to a storage bag.
✔ Separate with Parchment Paper: If stacking in a container, place parchment paper between layers.
—
4. Best Way to Reheat Stored Pierogi
Whether your pierogi are refrigerated or frozen, reheating them the right way helps maintain their original texture and flavor.
✔ For Refrigerated Pierogi:
Boil: Bring a pot of salted water to a boil and simmer pierogi for 1-2 minutes.
Pan-Fry: Heat butter or oil in a pan and sauté over medium heat until crispy.
Microwave: Place pierogi in a microwave-safe dish, cover with a damp paper towel, and heat for 30-60 seconds (not recommended for crispy pierogi).
✔ For Frozen Pierogi:
Boil Directly from Frozen: Drop frozen pierogi into boiling salted water and cook for 5-7 minutes.
Pan-Fry from Frozen: Sauté in butter or oil over low heat, covering with a lid to ensure they heat through evenly.
Bake: Arrange frozen pierogi on a baking sheet, brush with oil, and bake at 375°F (190°C) for 15-20 minutes.
⚠️ Avoid:
Microwaving frozen pierogi directly, as it can make them rubbery or unevenly heated.
Refreezing thawed pierogi, as it can alter the texture and make them mushy.
—
Final Thoughts: Smart Storage for Pierogi
By following these storage tips, you can prepare pierogi in advance and enjoy them later without losing quality. Whether you’re making a large batch for a special occasion or meal-prepping for the week, proper storage ensures your pierogi remain fresh, tender, and delicious.
Final Tips for Perfect Pierogi Dough Every Time
Choosing the Right Flour: The Foundation of Perfect Pierogi Dough
The type of flour you use plays a crucial role in determining the texture, elasticity, and ease of handling of your pierogi dough. Choosing the right flour ensures that your dough is soft, tender, and easy to roll out, making it less likely to tear or become too tough. Let’s explore the best flour options and how they affect the final result.
—
1. The Best Flour for Pierogi Dough
✔ All-Purpose Flour (The Classic Choice)
The most commonly used flour for pierogi dough.
Has a moderate protein content (about 9-12%), providing the right balance of softness and elasticity.
Works well for both boiled and pan-fried pierogi.
✔ Bread Flour (More Elastic Dough)
Contains more protein (12-14%), which increases gluten development.
Results in a stronger, chewier dough, which may be slightly harder to roll but holds fillings well.
Ideal for pierogi that need to withstand long boiling times.
✔ Pastry or Cake Flour (Delicate and Soft Dough)
Lower protein content (7-9%), making the dough more tender and delicate.
Best for pierogi with dessert fillings (e.g., sweet cheese, fruit, or chocolate).
Less gluten development means it may be harder to stretch without tearing.
✔ 00 Flour (For Extra Smooth Dough)
A finely milled Italian flour often used in pasta and pizza dough.
Creates an ultra-smooth, soft texture that is easy to roll out.
Works well if you want a more refined, delicate pierogi texture.
—
2. Can You Use Alternative Flours? (Gluten-Free & Whole Wheat Options)
For those looking for alternatives to traditional white flour, here are some options:
✔ Whole Wheat Flour (Healthier but Denser Dough)
Higher fiber content makes it more nutritious.
However, it absorbs more moisture, making the dough denser and harder to roll out.
Best when mixed with all-purpose flour (e.g., 50-50 ratio) for better handling.
✔ Gluten-Free Flour (For Gluten-Free Pierogi Dough)
A blend of rice flour, tapioca starch, and xanthan gum works best.
Lacks natural gluten, so the dough may be more fragile.
Best when using eggs or a binder (like psyllium husk) to improve elasticity.
✔ Semolina Flour (For a Chewier Texture)
High-protein flour that adds a slightly chewy, pasta-like texture to pierogi dough.
Often used in Italian pasta, but can be blended with all-purpose flour for extra structure.
—
3. How to Measure Flour Correctly for the Best Dough
Even the best flour won’t work well if it’s measured incorrectly. Here are some tips:
✔ Use the “Spoon and Level” Method: Instead of scooping flour directly with a measuring cup (which can pack in too much), spoon the flour into the cup and level it off with a knife.
✔ Weigh Your Flour for Accuracy: If possible, use a kitchen scale. Most pierogi dough recipes call for about 250g to 300g of flour per batch.
✔ Adjust Based on Dough Consistency: The flour amount may need slight adjustments depending on humidity, egg size, and water temperature.
—
4. Final Tips for Choosing and Handling Flour
✔ Sift the flour before mixing to remove lumps and aerate it for a lighter dough.
✔ Mix different flours (e.g., all-purpose + whole wheat) for a customized texture.
✔ Flour your work surface lightly when rolling out the dough, but avoid using too much as it can make the dough dry.
—
Final Thoughts: The Right Flour Makes a Difference
The best flour for pierogi dough depends on the texture you’re aiming for—whether it’s soft and tender, chewy and elastic, or delicate and refined. All-purpose flour is the safest and most versatile choice, but experimenting with different flours can help you create the perfect dough for your favorite pierogi recipe.
Adding Sour Cream or Butter: Enhancing Pierogi Dough for the Perfect Texture
The secret to soft, tender, and flavorful pierogi dough often lies in two key ingredients: sour cream and butter. These ingredients not only affect the texture and elasticity of the dough but also contribute to its taste and overall workability. While some traditional recipes stick to flour, water, and eggs, incorporating sour cream or butter can take your pierogi to the next level.
—
1. The Role of Sour Cream in Pierogi Dough
Sour cream is an optional but highly beneficial ingredient in pierogi dough. It provides richness, moisture, and a slight tang, making the dough more pliable and tender.
✔ Why Add Sour Cream?
Softens the dough, making it easier to roll out without tearing.
Adds richness and slight acidity, which helps relax gluten and prevents toughness.
Enhances the flavor, giving the dough a subtle tang that complements both sweet and savory fillings.
Keeps pierogi tender even after boiling, preventing them from becoming too chewy.
✔ How to Incorporate Sour Cream
Replace some of the water in your recipe with sour cream.
For extra tenderness, mix sour cream and butter together before adding them to the flour.
Use about ¼ to ½ cup of sour cream per batch of dough, depending on the size of your recipe.
—
2. The Role of Butter in Pierogi Dough
Butter is another fantastic addition to pierogi dough. It makes the dough smoother, more elastic, and easier to roll out while adding a rich, buttery flavor.
✔ Why Add Butter?
Improves elasticity, making it easier to work with and shape.
Enhances the flavor, giving the dough a subtle, buttery taste.
Prevents drying out, especially if you plan to store or freeze the pierogi.
Creates a silkier texture, making the dough softer and more pleasant to eat.
✔ How to Incorporate Butter
Use melted butter for even distribution throughout the dough.
Mix it directly into the wet ingredients or knead it into the dough after mixing.
A good starting point is about 2 to 3 tablespoons of melted butter per batch.
—
3. Can You Use Both Sour Cream and Butter?
Yes! Many pierogi dough recipes include both sour cream and butter to achieve the best texture and flavor. Sour cream adds moisture and tenderness, while butter contributes richness and elasticity. If you’re looking for the ultimate pierogi dough, using both in moderation can give you soft, delicious results.
✔ Balanced Pierogi Dough Formula:
Flour: The base structure
Eggs: Adds structure and elasticity
Water/Milk: Hydrates the dough
Sour Cream: Softens and adds a slight tang
Butter: Adds richness and prevents dryness
—
4. When to Skip These Ingredients
While sour cream and butter can improve pierogi dough, there are times when you might want to skip them:
❌ If you prefer a very traditional pierogi dough, stick to just flour, eggs, water, and salt.
❌ If you’re making vegan pierogi, replace butter with vegetable oil and sour cream with coconut cream or dairy-free yogurt.
❌ If you want chewier dough, use less fat (fat softens gluten, which can reduce chewiness).
—
Final Thoughts: Elevating Your Pierogi Dough
Adding sour cream and butter to pierogi dough can improve texture, flavor, and workability. Whether you use just one or a combination of both, these ingredients help create a rich, soft, and easy-to-roll dough that holds up well during cooking.
Making Dough in Advance: How to Prepare and Store Pierogi Dough for Later Use
If you want to save time or plan ahead, making pierogi dough in advance is a great option. Properly prepared and stored, the dough remains soft, pliable, and easy to work with, ensuring you get perfect pierogi every time. Here’s how to make, store, and use pierogi dough efficiently while maintaining its texture and quality.
—
1. Why Make Pierogi Dough in Advance?
✔ Saves Time: Preparing the dough ahead of time means you can focus on filling and assembling your pierogi when you’re ready to cook.
✔ Enhances Texture: Resting the dough for an extended period allows the gluten to relax, making the dough softer and easier to roll out.
✔ More Convenient for Large Batches: If you’re making pierogi for a family gathering or holiday meal, having the dough ready ahead of time speeds up the process.
—
2. How to Store Pierogi Dough Properly
There are three main ways to store pierogi dough, depending on how far in advance you plan to use it:
✔ Short-Term Storage (Up to 24 Hours) – Refrigeration
If you’re making pierogi dough a few hours or a day ahead:
Wrap the dough tightly in plastic wrap to prevent drying out.
Place it in an airtight container or a resealable bag.
Store it in the refrigerator for up to 24 hours.
Let the dough come to room temperature for 15–30 minutes before rolling it out to prevent cracking.
✔ Medium-Term Storage (Up to 1 Week) – Refrigeration with Extra Hydration
If you want to store pierogi dough for several days:
Follow the same wrapping method as above.
Since refrigeration can dry out the dough over time, brush the dough lightly with oil before wrapping to retain moisture.
Knead the dough briefly before rolling to restore its elasticity.
✔ Long-Term Storage (Up to 3 Months) – Freezing
For long-term storage:
Divide the dough into small portions (this helps thaw only what you need).
Wrap each portion tightly in plastic wrap, then place in a freezer-safe bag.
Label the bag with the date so you can track freshness.
To use, thaw the dough overnight in the fridge, then let it sit at room temperature for 30 minutes before rolling.
—
3. Tips for Using Stored Dough
✔ Check for Dryness: If refrigerated dough feels dry, knead it with a few drops of water or a little melted butter before rolling.
✔ Prevent Overworking: Knead just enough to restore elasticity; over-kneading can make the dough tough.
✔ Flour Lightly: If dough becomes sticky after thawing, dust with a little flour—but not too much, or it may become tough.
—
4. Can You Store Fully Assembled Pierogi Instead?
Yes! If you prefer, you can assemble and store filled pierogi rather than just the dough. Here’s how:
Refrigerate: Lay the pierogi on a tray, cover them, and store them for up to 24 hours before cooking.
Freeze: Place pierogi on a baking sheet in a single layer, freeze for 1-2 hours, then transfer to a freezer bag for up to 3 months.
—
Final Thoughts: A Smart Way to Prepare Pierogi Dough
Making pierogi dough in advance is a great time-saver and can even improve the dough’s texture. Whether refrigerating for a day or freezing for months, proper storage ensures your dough stays soft, easy to roll, and perfect for making delicious pierogi whenever you’re ready.
Conclusion: Perfecting Your Pierogi Dough for Every Occasion
Making pierogi dough may seem simple, but small details make a big difference in achieving the perfect texture—soft, tender, and easy to work with. Whether you prefer a traditional recipe or want to enhance it with sour cream or butter, the key is to balance the ingredients and handle the dough properly.
By following the right techniques—mixing, kneading, resting, and rolling the dough correctly—you ensure your pierogi hold their shape and have that delightful, pillowy texture. If you run into issues, simple fixes like adjusting flour, resting longer, or sealing properly can make all the difference.
Making pierogi is not just about following a recipe—it’s about embracing tradition, experimenting with fillings, and enjoying the process. Whether you’re making a batch for a cozy family dinner or preparing ahead for a festive gathering, this guide will help you create perfect pierogi every time.
Ready to try it? Gather your ingredients, roll out your dough, and start making delicious homemade pierogi today! Would you like a step-by-step printable recipe to follow along?
1 thought on “How to Make Pierogi Dough – Soft, Tender, and Easy to Work With”