
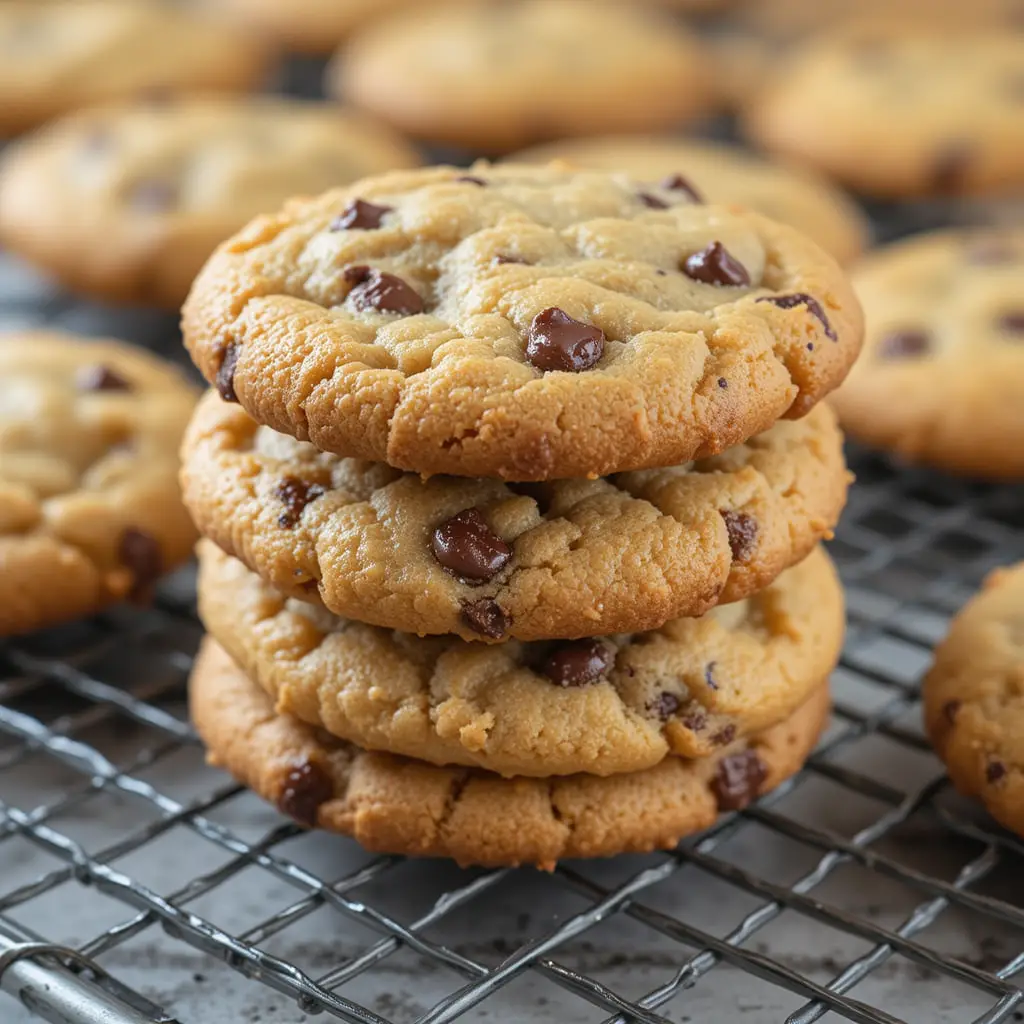
Chocolate chip cookies are a timeless treat loved by people of all ages. Whether you’re baking them for a special occasion, as an after-school snack, or simply to satisfy a sweet craving, nothing beats the comfort of a warm, freshly baked chocolate chip cookie. What makes them even better is the satisfaction of baking them from scratch, where you have full control over the ingredients, texture, and flavor.
In this post, we’ll guide you step by step on how to make the best chocolate chip cookies every time. Whether you prefer them chewy or crispy, soft or crunchy, you’ll learn the key tips and tricks to perfect your cookie game. Get ready to discover the secret ingredients and techniques that will have everyone asking for more!
The Key Ingredients for Perfect Chocolate Chip Cookies
Butter vs. Margarine: Why Butter Makes a Difference in Flavor and Texture
When it comes to baking chocolate chip cookies, one of the first choices you’ll make is whether to use butter or margarine. This decision can significantly impact the flavor, texture, and overall quality of your cookies. Here’s why butter often comes out on top:
1. Flavor
Butter is known for its rich, creamy, and slightly sweet flavor, which enhances the taste of your chocolate chip cookies. This natural, authentic flavor is one of the main reasons why butter is the preferred choice for many bakers. On the other hand, margarine often has a more neutral or artificial taste due to its processed nature. While some margarine products are designed to mimic butter, they generally fall short in delivering that same depth of flavor that butter provides.
2. Texture
The fat content in butter plays a critical role in the texture of your cookies. Butter contains about 80% fat, while margarine typically contains about 60-80% fat depending on the type. The higher fat content in butter helps create a softer, more tender cookie with a slightly chewy center. It also contributes to a crisp, golden edge, which is the hallmark of the perfect chocolate chip cookie.
Margarine, however, has a different consistency due to its higher water content. This can lead to cookies that spread too much during baking or end up with a denser texture. While margarine can still produce a decent cookie, it often lacks the perfect balance of chewy and crisp that butter achieves.
3. Baking Chemistry
Butter’s natural fat content also plays a role in how it interacts with other ingredients in your cookie dough. When mixed with sugar, butter helps to create a fluffy, aerated dough. This contributes to the light, tender texture of the finished cookie. The water content in margarine can disrupt this process, leading to a heavier dough and a different final product.
In addition, butter tends to firm up as it cools, which helps give cookies structure without sacrificing their softness. Margarine doesn’t always provide the same support, and cookies baked with margarine can sometimes end up too soft or spread too thin.
4. Health Considerations
While butter has earned a reputation for being less healthy than margarine, especially due to its saturated fat content, it’s important to note that margarine can contain unhealthy trans fats, which are more detrimental to heart health. For those conscious about their health, choosing butter made from grass-fed cows or a high-quality, unsalted butter option may offer a better alternative for flavor without compromising the quality of your cookies.
—
In conclusion, while margarine can be a substitute in a pinch, using butter in your chocolate chip cookies will give you the best results in terms of both flavor and texture. It provides that rich, indulgent taste and creates a perfect balance of chewiness and crispness that will make your cookies a hit every time.
Choosing the Right Chocolate Chips: How to Enhance the Flavor and Texture of Your Cookies
The chocolate chips you choose for your cookies are not just a decorative element – they are the heart of the flavor profile. The right chocolate can elevate your cookie recipe, creating a deep, rich taste that contrasts beautifully with the sweetness of the dough. Here’s a deeper dive into how to choose the perfect chocolate chips for your batch of cookies:
1. Type of Chocolate: Dark, Milk, or Semi-Sweet?
Chocolate chips come in several varieties, with dark chocolate, milk chocolate, and semi-sweet being the most common options for cookies. The type of chocolate you select has a significant impact on the overall taste of your cookies.
Dark Chocolate: Dark chocolate chips are made with a higher percentage of cocoa, typically 60-70%, and less sugar. This gives them a rich, slightly bitter taste that contrasts well with the sweetness of the dough. If you’re a fan of more complex, less sugary cookies, dark chocolate chips are an excellent choice.
Milk Chocolate: Milk chocolate chips are sweeter and creamier than their dark chocolate counterparts, thanks to the addition of milk powder and a higher sugar content. These chips offer a smooth, melt-in-your-mouth texture, ideal if you prefer a sweeter, more indulgent cookie.
Semi-Sweet Chocolate: Semi-sweet chocolate chips fall in between dark and milk chocolate in terms of sweetness. They are the most commonly used in chocolate chip cookies and are a great choice for balancing the sweetness of the dough while still giving a satisfying, rich chocolate flavor.
2. Quality Matters: Premium vs. Regular Chocolate Chips
While it’s tempting to grab a bag of regular, mass-market chocolate chips, investing in high-quality chocolate can make a noticeable difference in your cookies. Premium brands, such as Ghirardelli, Valrhona, and Guittard, use better-quality cocoa beans and fewer additives. This results in a smoother, more flavorful chocolate that melts beautifully and adds depth to the cookie’s taste.
Regular chocolate chips, on the other hand, are often designed to maintain their shape during baking, making them ideal for cookies that require a more structured texture. However, they may lack the same richness in flavor and smoothness.
3. The Size of the Chips
Chocolate chips come in different sizes, from miniature chips to large chunks, and the size you choose affects the overall texture and chocolate-to-dough ratio in each cookie.
Miniature Chocolate Chips: These tiny chips distribute more evenly throughout the dough, ensuring a consistent burst of chocolate in every bite. They’re perfect if you want a more subtle chocolate presence in your cookies.
Regular or Large Chips: Larger chips create pockets of gooey chocolate, which can make for a more indulgent bite. If you’re a fan of thick, fudgy cookies with visible, melted pockets of chocolate, go for regular or even jumbo-sized chips.
Chocolate Chunks: Some bakers prefer to use chopped chocolate instead of chips. This gives you more control over the size and shape of the chocolate pieces, and it often results in a more rustic, uneven distribution of chocolate throughout the cookie. Chocolate chunks also tend to melt better, creating pools of gooey chocolate.
4. Other Flavor Considerations: Flavored Chips
While traditional chocolate chips are delicious on their own, experimenting with different flavors can add a unique twist to your cookies. Many brands offer flavored chocolate chips, such as:
Peanut Butter Chips: These provide a sweet and savory contrast to the chocolate.
White Chocolate Chips: For a sweeter, creamier flavor with a distinct contrast to dark chocolate chips.
Butterscotch Chips: Offering a rich, caramelized flavor that pairs wonderfully with chocolate.
Mint Chips: A refreshing twist for those who love a mint-chocolate combo.
Mixing flavored chips into your dough can create a signature cookie recipe that stands out from the usual chocolate chip cookie.
5. The Best Chocolate for Melting and Texture
While chips are designed to hold their shape during baking, using chocolate that melts smoothly can enhance the texture of your cookies. If you want your cookies to have that melt-in-your-mouth chocolate experience, you can opt for chopping up a high-quality chocolate bar into chunks instead of using pre-made chips. This method can result in irregularly shaped chocolate pieces that melt more evenly, giving your cookies that irresistible, gooey texture.
—
In conclusion, the right chocolate chips can make all the difference in your chocolate chip cookies. Whether you prefer the deep, rich flavor of dark chocolate, the sweetness of milk chocolate, or a combination of both, the quality, size, and variety of chocolate you choose will affect the overall taste and texture of your cookies. So, take your time in selecting the perfect chocolate, and your cookies will be all the better for it!
Flour & Sugar: The Key to the Perfect Cookie Texture
Flour and sugar are two of the most essential ingredients in any chocolate chip cookie recipe. They not only contribute to the structure and sweetness of the cookies but also influence the texture, chewiness, and spread during baking. Understanding the role of different types of flour and sugar can help you create the perfect batch of cookies, tailored to your preferences. Here’s a closer look at how these ingredients work together to make your cookies irresistible.
1. The Role of Flour: Creating Structure and Texture
Flour provides the foundation for cookie dough, acting as the structure that holds everything together. The type of flour you use and how you measure it can significantly impact the texture of your cookies.
All-Purpose Flour: Most chocolate chip cookie recipes call for all-purpose flour. This type of flour strikes a balance between strength and tenderness, making it ideal for creating cookies with a soft yet sturdy texture. It contains a moderate amount of gluten, which gives the cookies structure but still allows them to remain chewy and tender.
Cake Flour: Cake flour has a lower protein content than all-purpose flour, which results in a softer, more delicate texture. If you’re aiming for an ultra-soft, melt-in-your-mouth cookie, using a small amount of cake flour in combination with all-purpose flour can give your cookies a lighter, more tender bite.
Bread Flour: With its higher gluten content, bread flour creates cookies that are more chewy and dense. While it’s not typically used in chocolate chip cookies, it can be a great option if you’re seeking a firmer, chewier texture. Be cautious, though, as using too much bread flour can lead to cookies that are too tough or dry.
Measuring Flour: The way you measure flour is also crucial to the texture of your cookies. If you scoop flour directly from the container, you may end up with too much flour, resulting in dry or dense cookies. Instead, spoon the flour into your measuring cup and level it off for an accurate measurement. Alternatively, using a kitchen scale for precision is the best way to ensure you’re using the right amount of flour.
2. The Role of Sugar: Sweetness and Spread
Sugar not only adds sweetness to your cookies but also affects their texture and spread during baking. The type of sugar you use, as well as its ratio in the dough, will influence how the cookies turn out.
Granulated Sugar: Granulated sugar contributes to the crispness of your cookies. It helps the dough spread more during baking, resulting in thinner, crunchier edges. If you prefer a crisp cookie with a slight snap, granulated sugar is your go-to choice.
Brown Sugar: Brown sugar is made by adding molasses to granulated sugar, and it plays a vital role in creating a chewy, moist texture in your cookies. The molasses in brown sugar adds richness and depth of flavor, while its higher moisture content helps keep the cookies soft and chewy. Most classic chocolate chip cookie recipes call for a combination of both brown and granulated sugar to strike the perfect balance between chewy and crisp textures.
Light vs. Dark Brown Sugar: Light brown sugar has a smaller amount of molasses, giving it a milder flavor, while dark brown sugar has a more pronounced, caramel-like taste due to its higher molasses content. Depending on your flavor preferences, you can experiment with using more of one type of brown sugar for a deeper, richer taste.
Sugar Ratios: The ratio of granulated sugar to brown sugar in your recipe also affects the final texture. More brown sugar will result in a chewier, softer cookie, while more granulated sugar will produce a crispier, thinner cookie. A classic chocolate chip cookie recipe often calls for a 1:1 ratio of brown to granulated sugar, but you can adjust this based on your preference for chewiness or crunch.
3. The Impact of Sugar and Flour on Cookie Spread
The flour and sugar combination also plays a critical role in how much your cookies spread while baking. Too much sugar or too little flour can cause your cookies to spread too thin and become overly crisp. On the other hand, too much flour can result in cookies that don’t spread enough, making them dry and dense.
Chilling the Dough: If you find that your cookies are spreading too much, chilling the dough before baking can help control the spread. The cold dough will hold its shape better in the oven, preventing the cookies from becoming too thin or greasy.
Baking Soda and Baking Powder: The presence of baking soda (or sometimes baking powder) in your recipe also affects how much the cookies spread. Baking soda encourages the dough to spread and results in a slightly puffed-up texture, while baking powder can make cookies thicker and less likely to spread. Make sure you’re using the correct leavening agent for your desired texture.
4. The Role of Salt
Though not always discussed in the context of flour and sugar, salt is an essential ingredient in chocolate chip cookies. A pinch of salt helps balance the sweetness from the sugar and enhances the overall flavor of the cookies. It also strengthens the dough, helping to prevent over-spreading and giving the cookies more structure.
—
In conclusion, the right combination of flour and sugar is key to achieving the perfect chocolate chip cookie. By carefully selecting the type of flour, adjusting the ratio of granulated to brown sugar, and measuring your ingredients accurately, you can control the texture, sweetness, and spread of your cookies. Whether you prefer chewy, soft cookies or crisp, golden ones, flour and sugar are the foundation that makes it all possible.
Eggs: The Binding and Leavening Agent in Your Cookies
Eggs are a fundamental ingredient in chocolate chip cookies, serving multiple purposes that contribute to the dough’s structure, texture, and flavor. Their impact goes beyond just adding moisture; eggs help bind the ingredients together, provide leavening for a lighter texture, and contribute to the overall richness of the cookies. Here’s a deeper look at the role eggs play in cookie baking:
1. Binding Ingredients Together
Eggs act as a natural binder in your cookie dough, helping to hold all the ingredients together. This is particularly important in chocolate chip cookies, where you have a mixture of dry ingredients (like flour and sugar) and wet ingredients (like butter). The proteins in eggs help connect these ingredients, preventing your dough from falling apart or being too crumbly. This binding effect ensures that the dough holds its shape as it bakes, giving you cookies that are firm enough to handle but soft in the middle.
2. Leavening and Texture
Eggs also play a crucial role in the leavening process. When beaten, eggs trap air and help the dough rise slightly during baking, resulting in a lighter, fluffier cookie texture. This air incorporation helps the cookies expand and rise in the oven, creating a softer, more tender crumb. Without eggs, your cookies would be dense and flat, lacking the desirable soft and chewy texture that most people love.
Egg Whites: The egg whites, specifically, are responsible for some of this leavening action. When whipped, egg whites can create a light, airy texture. This contributes to the cookies’ overall puffiness. If you want a slightly lighter, airier cookie, using extra egg whites or even slightly beating the egg whites before adding them to the dough can help.
Egg Yolks: The yolks of eggs provide richness and moisture to the dough. Yolks are also responsible for adding a soft, tender texture to the cookies. The fat content in the yolk creates a smooth dough and helps prevent the cookies from becoming too dry or crumbly. This makes the cookies chewy rather than crisp.
3. Moisture and Richness
Eggs add a significant amount of moisture to your cookie dough. This moisture is vital for achieving the right texture. Without enough moisture, your cookies would turn out dry and crumbly. The fats in the yolks also contribute to the richness of the dough, giving the cookies that melt-in-your-mouth feeling. This helps balance the sweetness of the sugar and the richness of the butter.
4. Color and Shine
Eggs also affect the color and appearance of your cookies. The proteins in the egg whites help the cookies set and firm up as they bake, leading to a golden-brown exterior. The fat in the egg yolks helps give the cookies a beautiful golden color and a slight sheen on top, especially around the edges. This makes your chocolate chip cookies look as good as they taste.
5. Adjusting the Number of Eggs for Different Textures
The number of eggs in your cookie dough can be adjusted depending on the texture you’re aiming for:
One Egg: Most standard chocolate chip cookie recipes use one egg, which helps create a balanced texture—chewy on the inside with a slightly crisp exterior.
Two Eggs: Adding an extra egg will increase the moisture content in the dough, resulting in cookies that are even softer and thicker. However, too many eggs can make the cookies cakier, so it’s important to find the right balance.
No Eggs: If you’re making vegan or egg-free cookies, you can substitute the eggs with alternatives like applesauce, flaxseed meal, or aquafaba (the liquid from canned chickpeas). These substitutes provide the moisture and binding action that eggs would normally offer. However, the texture may vary slightly, so it’s essential to test and adjust the recipe accordingly.
6. Room Temperature Eggs
For the best results, it’s recommended to use eggs that are at room temperature when baking. Room temperature eggs blend more easily into the dough, resulting in a smoother texture and better incorporation of the ingredients. Cold eggs can cause the dough to firm up too quickly, making it harder to mix the ingredients evenly.
—
Egg Substitutes and Adjustments
If you have dietary restrictions or simply don’t have eggs on hand, there are several egg substitutes you can use in chocolate chip cookies, each offering different results:
Flaxseed Meal: Mix 1 tablespoon of flaxseed meal with 3 tablespoons of water and let it sit for a few minutes to thicken. This mixture works well as a binding agent and can help create chewy cookies.
Applesauce: Use ¼ cup of applesauce for each egg you’re replacing. This adds moisture to the dough but may make the cookies slightly softer and less chewy.
Aquafaba: The liquid from canned chickpeas can be used as a replacement for eggs. Three tablespoons of aquafaba equals one egg and can help with binding and leavening.
Yogurt or Buttermilk: These dairy products can also serve as moisture and binding agents, though they may slightly change the flavor and texture of the cookies.
—
In conclusion, eggs are a critical component in chocolate chip cookies. They help bind the dough, provide leavening for a soft texture, add moisture and richness, and contribute to the beautiful color and sheen of your cookies. Understanding how eggs work in your recipe can help you adjust the texture and consistency of your cookies to achieve your perfect bake. Whether you’re using one egg or experimenting with egg substitutes, the right egg-related choices will make all the difference in your cookies’ success.
Essential Baking Tips for Soft and Chewy Cookies
Room Temperature Ingredients: The Secret to Smooth, Even Dough
When baking chocolate chip cookies (or any baked goods, for that matter), the temperature of your ingredients can significantly affect the final texture and consistency of the dough. While it may seem like a minor detail, using ingredients at room temperature, particularly butter, eggs, and other liquids, can make a world of difference in achieving that perfect cookie. Here’s why room temperature ingredients matter and how they impact your cookies.
1. Butter: Ensuring a Creamy, Fluffy Dough
Butter is one of the most crucial ingredients in chocolate chip cookies, and its temperature is especially important. When butter is too cold, it’s difficult to cream with sugar, which can lead to dense, uneven dough. Cold butter doesn’t blend as smoothly, and it may create a lumpy texture. On the other hand, if butter is too warm or melted, it will not provide the same airy, fluffy texture and can result in cookies that spread too much during baking, often leading to thin, greasy cookies.
Room temperature butter (about 65-70°F or 18-21°C) is soft enough to cream easily with sugar but firm enough to retain its structure in the dough. This helps trap air in the dough, contributing to a light, tender texture. Properly softened butter ensures that the fat is evenly distributed throughout the dough, which leads to better texture and even spreading when baking.
To bring butter to room temperature quickly, you can cut it into smaller pieces to speed up the softening process, or you can leave it out for 30-60 minutes before starting your recipe. Avoid microwaving the butter, as it can become too soft or even start to melt, which will affect the texture of your cookies.
2. Eggs: A Smooth Blend for Even Consistency
Eggs are another critical ingredient that should be at room temperature before being incorporated into the cookie dough. Cold eggs can cause the butter to firm up again, which can lead to clumps of butter in the dough, resulting in uneven texture or a greasy dough that doesn’t hold together well. Room temperature eggs mix more uniformly into the dough, ensuring that the fat (butter) and liquid (eggs) emulsify properly.
Eggs at room temperature also help the dough come together more smoothly, resulting in a more consistent and even batter. This helps produce a uniform texture in the cookies as they bake.
To quickly bring eggs to room temperature, place them in a bowl of warm water for about 5-10 minutes before using them in your recipe.
3. Liquids (Milk, Vanilla, etc.): Better Mixing and Even Flavor
Any liquids you add to the dough, such as milk, vanilla extract, or any other flavorings, should also be at room temperature. Cold liquids can cause the fat in the dough (like butter) to solidify, disrupting the smooth consistency of the dough. This can cause uneven mixing and an undesirable texture in the final cookies.
Room temperature liquids, on the other hand, blend easily with the butter and eggs, creating a smooth, homogenous dough that will bake evenly. Additionally, allowing the vanilla extract or any other flavorings to come to room temperature ensures that the flavors meld seamlessly with the rest of the dough, resulting in a well-balanced taste in every bite.
4. Dry Ingredients: How They Interact with Room Temperature Ingredients
While dry ingredients like flour, baking soda, and salt don’t necessarily need to be at room temperature, they will mix more evenly with the rest of the dough when they are combined with room temperature wet ingredients. Cold flour or other dry ingredients can cause clumping or an uneven distribution of ingredients in the dough, which can affect the consistency of your cookies.
By using room temperature wet ingredients and mixing them evenly with the dry ingredients, you ensure a smoother dough that bakes more uniformly.
5. The Role of Consistency: Even Dough Equals Even Baking
Room temperature ingredients allow for better incorporation of each ingredient, resulting in a more uniform dough. Even dough leads to evenly baked cookies with consistent texture. Cold ingredients can cause pockets of flour or butter to form, which can lead to uneven spreading and uneven texture in your finished cookies. Room temperature ingredients promote uniform dough, giving you the perfect balance of chewy, crisp, and soft cookies.
6. The Impact on Cookie Spread
Room temperature ingredients also affect the way your cookies spread while baking. If your dough is too cold (due to using chilled butter or eggs), the cookies may not spread enough in the oven, leading to thick, puffy cookies. On the other hand, if your ingredients are too warm, the cookies may spread too much, resulting in overly flat, crispy cookies. Room temperature ingredients help the dough maintain a good balance, allowing for controlled spreading during baking and resulting in the ideal cookie texture—chewy in the center with crisp, golden edges.
—
How to Control Room Temperature in Your Kitchen
If you’re in a hurry or your kitchen is particularly cold, you can speed up the process of bringing ingredients to room temperature:
Butter: If you forgot to take out your butter in advance, slice it into smaller pieces to soften it faster. Alternatively, you can grate it (using a box grater) to speed up softening.
Eggs: To quickly bring eggs to room temperature, place them in a bowl of warm water for 5-10 minutes before adding them to your dough.
Liquids: For liquids like milk or vanilla extract, simply place them in a warm (but not hot) bowl for a few minutes before mixing them into your dough.
—
In conclusion, using room temperature ingredients is a small but important step in ensuring your chocolate chip cookies turn out perfectly. Softened butter, room temperature eggs, and other liquids that are at the right temperature allow the dough to come together smoothly, resulting in a more even texture, better flavor distribution, and an optimal cookie spread. Whether you’re aiming for chewy, crispy, or soft cookies, starting with room temperature ingredients will give you the best chance for cookie success.
Don’t Overmix the Dough: Achieving the Perfect Cookie Texture
One of the most common mistakes when baking chocolate chip cookies is overmixing the dough. While it’s important to thoroughly combine the ingredients, overmixing can lead to tough, dense, or overly airy cookies that miss the mark in terms of texture. The key to the perfect cookie is knowing when to stop mixing. Here’s why overmixing the dough is problematic and how to avoid it to ensure you achieve the ideal balance of chewy, soft, and slightly crisp cookies.
1. The Role of Gluten Development
When you mix cookie dough, you are activating gluten, a protein found in flour. Gluten is responsible for giving structure and elasticity to baked goods. While some gluten development is necessary to hold the dough together, too much gluten can make your cookies tough and dense. This happens when the dough is mixed excessively, which encourages more gluten to form and results in a firmer, chewier texture that might not be desirable for chocolate chip cookies.
Light Mixing: You want to mix your dough just enough to combine all the ingredients thoroughly. This will ensure that the flour is incorporated without creating excess gluten, allowing the cookies to maintain their softness and tenderness.
Overmixing: If the dough is mixed for too long, the flour continues to hydrate, which results in more gluten development. This can make the cookies dense and heavy, with a less-than-ideal texture. To avoid this, mix the dough only until the ingredients are incorporated, and no dry flour is visible.
2. The Effect on Cookie Spread
Another consequence of overmixing the dough is how it impacts cookie spread. Overmixing encourages the dough to hold onto its structure too firmly, resulting in cookies that are thick and do not spread properly when baked. This could cause the cookies to bake up dry or undercooked in the center.
Proper Mixing: By stopping before the dough becomes overly stiff or sticky, you allow the cookies to spread slightly as they bake, creating that classic chocolate chip cookie shape—round and slightly flattened with a chewy middle and crisp edges.
Overmixed Dough: Dough that is mixed too much will be too compact, causing the cookies to maintain their shape and not spread out enough. This will result in thick, cake-like cookies or dense, undercooked centers.
3. The Impact on Airiness
In addition to gluten development, overmixing can affect the airiness of your cookies. When making cookie dough, you want to create pockets of air that expand during baking, contributing to a light, tender texture. However, if you overmix the dough, you can deflate the air pockets, resulting in cookies that are flat, dense, and lacking that melt-in-your-mouth quality.
Proper Mixing for Air Pockets: To ensure the cookies have the right level of airiness, mix only until the dough comes together, then stop. This preserves the delicate air pockets created during the creaming process and ensures a lighter texture.
Flat Cookies from Overmixing: Overmixing deflates these air pockets, resulting in denser cookies with less lift. While you might still get a chewy texture, the cookies will likely lack the softness that makes them desirable.
4. Mixing Chocolate Chips In
One of the easiest ways to overmix cookie dough is during the final step of adding the chocolate chips. If you mix the dough too vigorously once the chocolate chips are added, you can break up the chips and cause them to melt into the dough. This can result in a less-than-ideal texture, as well as an uneven distribution of chocolate throughout the dough.
Gentle Mixing for Chocolate Chips: When incorporating chocolate chips (or other mix-ins like nuts or dried fruit), stir the dough gently until the chips are evenly distributed. Avoid stirring too forcefully or for too long to ensure the chips remain intact and evenly dispersed in each cookie.
5. The Visual Cue: Stop When Combined
The best way to avoid overmixing is to watch the dough closely and stop mixing once all the ingredients are just incorporated. The dough should look uniform, but not overly smooth or shiny. If you notice that the dough appears too sticky or has become too smooth, it’s a sign that you may have mixed it for too long.
Signs of Overmixing: Overmixed dough can appear overly smooth or even a bit greasy due to the butter and sugar blending too thoroughly. If this happens, you may end up with cookies that are too spread out or lack the desired texture.
Proper Dough Consistency: The dough should be slightly lumpy, with visible streaks of butter and flour throughout. It should hold together but still feel soft and pliable.
—
How to Mix Your Dough Without Overdoing It
1. Cream Butter and Sugar Just Until Light and Fluffy: When creaming the butter and sugar together at the beginning of the recipe, beat just until the mixture becomes light and fluffy. This incorporates air into the dough, which contributes to a tender, airy texture. Don’t overdo it—if you beat the butter and sugar for too long, the air pockets could collapse, resulting in dense cookies.
2. Add Dry Ingredients Gradually: When adding flour to the dough, do so in increments and mix slowly. Overmixing will happen more easily if you dump all the flour in at once and mix quickly. Gradually adding the dry ingredients ensures the dough comes together without being overworked.
3. Mix Only Until Incorporated: As you add the eggs and dry ingredients, mix just until everything is combined. The dough should come together without any dry pockets of flour remaining. It should be slightly sticky but not overly smooth or tough.
4. Mix in Add-ins Gently: When it’s time to fold in the chocolate chips or any other add-ins, do so gently. A rubber spatula or wooden spoon is ideal for folding the dough without overmixing. Stir just enough to evenly distribute the chips, but stop once they’re incorporated.
—
In conclusion, avoiding overmixing is crucial for creating the perfect chocolate chip cookies. Overmixing can result in tough, dense cookies that lack the chewy texture we all love. By mixing gently and stopping once the dough is just combined, you’ll achieve a softer, more tender texture with the ideal amount of spread and airiness. Keep an eye on your dough, mix carefully, and your cookies will turn out perfectly every time.
Chilling the Dough: The Secret to Better Texture and Flavor
Chilling cookie dough might seem like an extra step, but it’s a game-changer when it comes to achieving the perfect chocolate chip cookies. While it’s not strictly necessary, refrigerating the dough allows time for the ingredients to meld together and provides several benefits that improve both the texture and flavor of your cookies. Let’s dive into why chilling the dough is so important and how it can enhance your baking results.
1. Improved Flavor Development
One of the biggest reasons to chill cookie dough is to enhance the flavor. When you let the dough sit in the fridge, the ingredients have more time to mingle and develop deeper, more complex flavors. The flour absorbs the moisture from the butter and eggs, and the sugars begin to dissolve more completely. This process can also allow the vanilla and other flavorings to integrate more thoroughly into the dough.
Resting Time for Better Flavor: Chilling the dough for at least 30 minutes allows the sugars to dissolve and hydrate the flour. This hydration leads to a more even texture and a richer, more developed flavor profile in the finished cookies. If you can chill the dough for 24-48 hours, you’ll notice even more improvement in flavor, as the dough continues to ferment and the flavors become more pronounced.
Less Spreading: When you bake cookies made from room-temperature dough, the fat in the dough melts too quickly, causing the cookies to spread more than you want. Chilled dough, however, will hold its shape better, allowing the cookies to bake with a thicker, more controlled spread. This results in thicker, chewier cookies with better texture.
2. Enhanced Texture and Structure
Chilling cookie dough before baking has a significant impact on the final texture of your cookies. One of the key elements that chilling affects is the fat in the dough—usually butter or margarine. When dough is chilled, the fat solidifies, which helps the dough maintain its shape during baking.
Reduced Spreading: When warm dough hits the oven, the butter begins to melt immediately, causing the dough to spread quickly. By chilling the dough, the butter stays firmer for longer, resulting in cookies that spread less and hold their shape better. This is particularly important if you want thick, chewy cookies with a soft center and crisp edges.
Chewier Cookies: Chilling also allows the dough to firm up slightly, making it easier to scoop and shape into uniform balls. The solidified fat prevents the cookies from spreading too thin in the oven, resulting in a chewy and slightly dense texture, which is often preferred for chocolate chip cookies. The chilled dough will also yield cookies with a crisp outer edge and a soft, chewy center.
Even Baking: Chilled dough bakes more evenly. Since the dough has had time to relax and the ingredients have fully incorporated, the cookies will bake more uniformly, ensuring consistent texture in each cookie. This results in a more predictable outcome, with all the cookies coming out of the oven with the same texture and appearance.
3. Better Control Over Cookie Shape
Chilling the dough gives you more control over the shape of your cookies. After scooping the dough into balls, you can chill the dough balls, ensuring that they remain firm and hold their shape when baked. This step is especially useful if you want uniform-sized cookies that all bake at the same rate. If you skip chilling, the dough balls may flatten or spread too much in the oven, resulting in uneven cookies.
Shaping the Dough: After chilling, the dough will be firmer and easier to shape. You can roll the dough into perfectly round balls, which will bake evenly and maintain a nice shape. For extra uniformity, use a cookie scoop or spoon to portion the dough before chilling.
4. Chilling for Aesthetic Appeal
Chilled dough can help your cookies achieve a bakery-style look, with a slightly thicker appearance and a perfect, uniform round shape. If you prefer that slightly domed, thick cookie with a defined edge, chilling is the way to go. The dough will hold its shape better and result in cookies that have a beautiful, well-defined structure.
Avoiding Flat, Pancake-Like Cookies: Without chilling, your cookies may spread too much and end up flat. The edges can be thin, and the cookies may appear overbaked or crispy. Chilled dough ensures a thicker cookie that stays soft in the middle, with a nice contrast of crispness around the edges.
5. The Science Behind Chilling the Dough
Chilling the dough is more than just a way to improve flavor and texture—it’s also a scientific process. When dough is chilled, the fat (usually butter) firms up, and the dough becomes stiffer. As the dough bakes, the fat begins to melt, but the firm, chilled dough spreads less, resulting in thicker cookies. Additionally, the resting process helps the flour fully hydrate, leading to a smoother, more cohesive dough that bakes into a uniform texture.
Crystallization of Sugar: Chilling the dough also slows the rate at which sugar dissolves, which can result in a better balance of sweetness and moisture in your cookies.
Hydration of Flour: When dough is chilled, the flour has more time to absorb the moisture from the eggs and butter. This ensures that the cookies are less likely to turn out dry or crumbly and have a tender, chewy texture.
6. How Long Should You Chill Cookie Dough?
The recommended chilling time depends on how much time you have, but even 30 minutes of chilling can improve the texture and reduce spreading. Here are some general guidelines:
Quick Chill (30 Minutes): If you’re short on time, chill the dough for at least 30 minutes. This will help prevent excessive spreading and improve the flavor slightly.
Optimal Chill (1-2 Hours): For the best results, chill the dough for 1-2 hours. This allows the flavors to develop and ensures the dough firms up enough to create thick, chewy cookies with minimal spreading.
Longer Chill (Overnight): For the best flavor and texture, chill the dough for up to 24-48 hours. The longer the dough rests, the more the flavors will develop, and the cookies will have a richer taste. Additionally, the dough will be firmer and easier to shape.
7. Can You Skip the Chilling Step?
Technically, you can skip chilling the dough, but the results won’t be as favorable. Without chilling, your cookies may spread more and lack the depth of flavor and chewy texture that comes with resting. If you’re in a rush, it’s better to chill the dough for at least 30 minutes than not at all.
Quick Fix for Skipping Chilling: If you’re short on time and can’t wait for the dough to chill, you can place the dough balls on a baking sheet and put them in the freezer for about 10-15 minutes before baking. This will help firm up the dough and prevent excessive spreading, although it’s not as effective as full chilling in the fridge.
—
In Conclusion
Chilling cookie dough is a simple step that makes a big difference in both flavor and texture. It enhances the flavor by giving the ingredients time to meld together, improves the texture by reducing spreading and promoting chewiness, and ensures a more uniform, attractive cookie shape. Whether you chill for 30 minutes or overnight, taking the time to rest your dough will reward you with better, more flavorful chocolate chip cookies. So, next time you bake, don’t skip this step—it’s worth the wait!
Cookie Dough Consistency: The Key to Perfect Cookies
The consistency of your cookie dough is a crucial factor that determines how your chocolate chip cookies will turn out. Achieving the right dough consistency helps ensure that your cookies have the perfect texture—chewy, soft, or crisp, depending on your preference. Too soft or too stiff dough can lead to cookies that are overly flat, dry, or even too thick. By understanding the signs of the right consistency and how to achieve it, you can perfect your chocolate chip cookies every time.
1. How Should Cookie Dough Look and Feel?
Cookie dough should be thick, soft, and slightly sticky, but it should also be able to hold its shape when scooped or rolled into a ball. The dough should not be runny or liquid, and it shouldn’t be too dry or crumbly either. Achieving the right dough consistency allows your cookies to hold their shape during baking while still spreading just enough to achieve a soft, chewy texture with a crisp edge.
Ideal Consistency: The dough should be thick enough to hold its shape when dropped from a spoon or cookie scoop. It should not be so stiff that it feels hard to mix or scoop, nor should it be so soft that it starts to spread too much before going in the oven. When you scoop the dough, it should hold together without running or oozing.
Signs of the Right Consistency: The dough should feel slightly sticky but not wet. If you roll it between your palms to form dough balls, it should hold together without falling apart or feeling too dry. It should also have a smooth appearance, with no visible dry flour or excess clumps of butter or sugar.
2. Factors That Affect Cookie Dough Consistency
Several factors can influence the consistency of your cookie dough. Here are the main ones to watch out for:
Butter Temperature: The temperature of the butter plays a significant role in determining the consistency of the dough. If the butter is too soft or melted, the dough may be too runny and spread excessively. If the butter is too cold, the dough may be too stiff and hard to mix. Use softened butter at room temperature to achieve the perfect consistency.
Flour Amount: The amount of flour you add can make or break the consistency. Too much flour will result in dough that’s dry and crumbly, while too little flour will make the dough too sticky. Always measure your flour properly by spooning it into your measuring cup and leveling it off to avoid adding too much.
Sugar Ratios: The ratio of brown sugar to granulated sugar also affects the dough’s consistency. Brown sugar contains more moisture than white sugar, which helps to keep the dough soft and chewy. A higher ratio of white sugar can result in drier, crumblier dough.
Eggs: Eggs contribute to the structure of the dough and affect how it holds together. If you add too many eggs, the dough might become too loose and runny. On the other hand, too few eggs can result in a dough that’s too dry and difficult to work with.
3. Adjusting Dough Consistency
If your dough isn’t quite right, there are a few simple adjustments you can make to get it back on track:
Too Dry or Crumbly: If your dough feels too dry and crumbly, it might be missing some moisture. The best way to fix this is to add a tablespoon of milk or water at a time and gently mix until the dough comes together. You can also add an extra egg if the dough seems too stiff, as eggs help bind the ingredients together and add moisture.
Too Wet or Sticky: If your dough is too wet or sticky to handle, it’s likely that you’ve added too much butter, sugar, or eggs. Try adding a little more flour, a tablespoon at a time, until the dough firms up. Be careful not to overdo it, as too much flour can lead to dry cookies. You can also chill the dough for 30 minutes to allow it to firm up before scooping and baking.
Too Soft or Spread Too Much: If your dough is too soft and spreads too much while baking, it’s often due to melted or overly-soft butter. In this case, refrigerate the dough for at least 30 minutes to help solidify the fat and prevent excessive spreading. If the dough is still too soft, you can try adding a little more flour to stiffen it up.
4. The Role of Mixing in Dough Consistency
The way you mix your cookie dough also affects its consistency. Overmixing the dough can lead to excess gluten development, making the dough too firm and resulting in dense cookies. Conversely, undermixing the dough can leave pockets of dry flour, which leads to uneven texture in the final cookies.
Mixing the Wet Ingredients: When you cream the butter and sugar, aim for a light and fluffy texture. Overbeating the butter and sugar can make the dough too airy, and it might result in cookies that are too thin or crispy. Once you add the eggs and vanilla, mix just enough to combine, avoiding overmixing to keep the dough from becoming too stiff.
Incorporating Dry Ingredients: When adding the dry ingredients to the wet mixture, mix gently and only until combined. The goal is to incorporate the flour without overworking it. Overmixing the dry ingredients can create a tough, dense dough that leads to heavy cookies.
5. Why Consistency Matters for Baking
The right cookie dough consistency ensures that the dough bakes evenly and results in cookies with the desired texture. Dough that is too thick may result in cookies that are undercooked in the center, while dough that is too thin may spread too much, causing the cookies to become too flat or crispy.
Baking Evenly: Consistent dough ensures that each cookie bakes at the same rate, providing uniform texture and appearance. If the dough is too thick, the cookies may not spread enough, leading to a dense, underbaked center. If the dough is too soft, the cookies may spread too much, leading to thin, overly crispy cookies.
Texture Control: The dough’s consistency affects whether your cookies are soft and chewy, crisp, or cakey. For chewy cookies, you need a dough that is thick enough to maintain its shape but soft enough to spread just slightly during baking. For crispy cookies, the dough should be thinner and able to spread more, leading to a crisp, thin cookie.
6. Visual and Textural Cues for Consistency
You can often tell if your dough has the right consistency by its appearance and texture:
Too Dry: The dough may appear crumbly or cracked and will not hold together when you try to roll it into a ball.
Too Wet: The dough will stick to your hands or mixing tools, and it might be hard to shape into balls without it oozing or spreading out.
Just Right: The dough should look smooth, slightly sticky, and hold its shape when scooped or rolled. It should not be too firm or too runny, but rather soft enough to mix and shape while still being able to hold its structure during baking.
—
In Conclusion
Cookie dough consistency is an essential factor in determining how your cookies will turn out. The right consistency ensures your cookies are easy to shape, spread correctly, and have the perfect texture. By understanding how to achieve and adjust the ideal dough consistency, you can create chocolate chip cookies that are consistently perfect every time—whether you’re aiming for chewy, crisp, or soft cookies. Pay attention to the ingredients, mixing process, and adjustments based on dough feel, and you’ll be well on your way to mastering the art of cookie baking!
How to Achieve the Perfect Cookie Texture (Chewy vs. Crispy)
Chewy Chocolate Chip Cookies: The Perfect Balance of Soft and Firm
Chewy chocolate chip cookies are often the most sought-after kind of cookie. They boast a soft, pillowy texture with just the right amount of bite and a slightly crisp edge. Achieving that perfect chewy cookie requires a delicate balance of ingredients, technique, and baking time. Let’s explore how to make the best chewy chocolate chip cookies that will leave everyone craving more.
1. The Secret to Chewy Texture
The key to achieving chewy chocolate chip cookies lies in understanding the role of ingredients and their interaction during baking. Several factors contribute to the chewy texture, and getting them right is the first step to perfecting your cookies.
Brown Sugar vs. White Sugar: One of the most important factors in making chewy cookies is the sugar ratio. Brown sugar is the key ingredient that adds moisture to the dough. This moisture contributes to the chewy texture of the cookie. Brown sugar contains molasses, which not only helps the dough retain moisture but also gives the cookies a rich, slightly caramelized flavor. Using more brown sugar than white sugar will result in a chewier texture. White sugar, on the other hand, tends to make cookies crisper.
Butter vs. Margarine: The type of fat you use plays a crucial role in the texture of your cookies. Butter, with its higher water content, adds moisture to the dough and helps create a chewy texture. However, using margarine can also work, especially if it has a higher fat content than butter. Just make sure not to use too much fat, as this can lead to overly greasy or flat cookies.
Egg Yolk vs. Whole Egg: The egg yolk is rich in fat, which helps create a soft, chewy texture. Many recipes for chewy cookies call for an extra egg yolk, as it contributes to the dough’s moisture and tenderness. An additional egg yolk, compared to using just the whole egg, can improve the texture, making the cookies rich and chewy without being overly cakey.
2. The Role of Flour in Chewy Cookies
The type and amount of flour you use will significantly affect the texture of your cookies. The right flour gives your dough structure while maintaining its chewiness.
All-Purpose Flour: Most chocolate chip cookie recipes call for all-purpose flour, which provides the right balance of gluten to give your cookies structure without making them too tough. If you use too much flour, your cookies will be dry and cakey, while too little flour will make the dough too runny, preventing the cookies from holding their shape.
Measuring Flour Correctly: Be mindful of how you measure your flour. Fluff the flour in its container before spooning it into your measuring cup and leveling it off. This prevents packing too much flour into the cup, which can make your dough too stiff and dry. Too much flour can lead to a dense cookie rather than a soft and chewy one.
3. Mixing and Handling the Dough
The way you mix and handle your dough also affects the final texture of your cookies. Overmixing or under-mixing the dough can change the outcome dramatically.
Avoid Overmixing: When you combine the wet and dry ingredients, mix only until the flour is incorporated. Overmixing can develop too much gluten in the dough, which will lead to a tough cookie instead of a chewy one. The more you mix, the firmer and denser the cookies will become, so it’s important to mix just enough.
Chilling the Dough: Chilling the dough is a vital step in making chewy chocolate chip cookies. Allowing the dough to rest in the refrigerator for at least 30 minutes (or up to 24-48 hours) helps the flour hydrate fully and prevents excessive spreading during baking. This results in thicker, chewier cookies. Cold dough also helps preserve the moisture in the dough, making the cookies less likely to spread too thin and become crisp.
Don’t Overwork the Dough: Once the flour is incorporated, handle the dough as little as possible to avoid overworking it. Kneading or pressing the dough too much can lead to dense cookies that lack the desired chewy texture.
4. Baking Tips for Chewy Cookies
The way you bake your chocolate chip cookies is just as important as the dough consistency in achieving the perfect chewy texture.
Oven Temperature: Bake your cookies at 350°F (175°C), as this temperature allows the cookies to bake through without getting too crispy on the edges. If the oven is too hot, the edges will brown too quickly, and the center will remain raw. A moderate temperature helps the cookies bake evenly, creating a chewy texture without sacrificing structure.
Watch the Time: Overbaking is one of the easiest ways to ruin chewy cookies. As soon as the edges of the cookies begin to turn golden brown, remove them from the oven. The cookies will continue to cook slightly on the baking sheet even after they’re taken out of the oven, resulting in a soft, chewy center. They may seem a little undercooked when you first remove them from the oven, but this is exactly what you want for chewy cookies. As they cool, they’ll firm up without becoming dry.
Parchment Paper or Silicone Mats: For the best results, line your baking sheets with parchment paper or silicone baking mats. These help distribute heat evenly, preventing the cookies from burning or spreading too quickly on the baking sheet.
5. Other Tips for Chewy Chocolate Chip Cookies
To take your chewy chocolate chip cookies to the next level, consider the following tips:
Use a Higher Ratio of Chocolate Chips: To maintain chewiness and flavor, increase the amount of chocolate chips in your recipe. The additional fat and moisture from the chocolate chips can contribute to the chewy texture.
Add a Touch of Cornstarch: Adding just a teaspoon of cornstarch to the dry ingredients can help create a softer, more tender cookie. Cornstarch can also help prevent the dough from spreading too much, ensuring that your cookies remain thick and chewy.
Consider the Cookie Size: Larger cookies tend to be chewier than smaller ones because they retain more moisture in the center. If you like thick, chewy cookies, scoop larger portions of dough and bake them accordingly. Just make sure to increase the baking time slightly to ensure they bake through.
6. The Importance of Resting the Dough
Allowing your cookie dough to rest for an extended period (preferably 24-48 hours) in the refrigerator can greatly improve the flavor and texture of your cookies. This resting time allows the flour to fully hydrate, and the dough to firm up. The result? A dough that’s easier to scoop, and cookies with a more developed, chewy texture. The longer the dough rests, the more the flavors meld and mature, leading to a richer, more complex cookie.
Flavor Development: During the resting period, the dough undergoes slight fermentation, allowing the sugars and flour to interact in ways that deepen the flavor. This results in a richer, more satisfying taste in every bite of the cookie.
—
In Conclusion
Chewy chocolate chip cookies are the ultimate treat for those who crave a soft, satisfying texture with just the right amount of chew. By using a higher ratio of brown sugar, choosing the right flour, and mixing the dough carefully, you can achieve the perfect chewy cookie every time. Don’t forget to chill the dough and bake your cookies just until the edges are golden, and you’ll be rewarded with soft, chewy, and delicious chocolate chip cookies that are sure to be a hit. With these tips, you’ll have the perfect balance of soft, chewy goodness in every batch!
Crispy Chocolate Chip Cookies: Perfectly Thin and Crunchy
Crispy chocolate chip cookies are ideal for those who love a cookie with a satisfying crunch and a light, crisp texture. Unlike chewy cookies, which are thick and soft in the center, crispy cookies are thin and crisp all the way through. Achieving the perfect crispy texture requires careful attention to the ingredients, mixing method, and baking technique. Here’s how to make the best crispy chocolate chip cookies that will deliver the perfect snap and crunch.
1. The Science Behind Crispy Texture
To get that signature crunch in your chocolate chip cookies, it’s important to understand how the texture is influenced by the ingredients and baking method. The key is reducing moisture and promoting spreading, which leads to a thin, crisp cookie.
Less Moisture: One of the primary factors for crispy cookies is using less moisture in the dough. This is achieved by reducing the amount of brown sugar (which contains moisture) and increasing the amount of white sugar. White sugar helps to create a crisp texture as it caramelizes during baking, adding a crisp crunch to the cookie. Less brown sugar also reduces the amount of moisture in the dough, allowing the cookies to spread more and bake into thin, crispy discs.
Butter and Fat Content: Butter is a crucial ingredient for crispy cookies, but it needs to be used in the right proportions. While butter provides flavor and helps the cookies spread, too much butter can cause the cookies to become greasy and overly soft. A balance is necessary, where enough butter is used to spread the dough into thin cookies, but not so much that it turns into a greasy mess. Additionally, using a room-temperature or slightly softened butter ensures it mixes evenly with the other ingredients.
Granulated Sugar vs. Brown Sugar: As mentioned earlier, white granulated sugar contributes to crispiness. The lack of moisture in white sugar encourages the dough to spread more and form thin, crispy cookies. Brown sugar, with its molasses content, adds moisture, which results in a chewier, softer texture. Therefore, for crispy cookies, a higher ratio of white sugar to brown sugar is key.
2. The Role of Flour and Other Dry Ingredients
The type and amount of flour you use also influence how crispy your cookies will turn out. The goal is to use enough flour to provide structure while not making the dough too thick or dry.
All-Purpose Flour: All-purpose flour is typically the best choice for crispy cookies, as it provides the right balance of structure and spread. If you use too much flour, the dough can become too thick, and the cookies will not spread enough, resulting in a cakey or dense texture. On the other hand, using too little flour can cause the cookies to spread too much and become too thin and fragile. The key is to measure your flour correctly to maintain the right consistency.
Cornstarch: Some bakers add a small amount of cornstarch to the dough to help tenderize the cookies and ensure they remain crisp. The cornstarch can prevent the cookies from spreading too quickly and help them hold their shape while still creating a delicate, crisp texture.
Baking Soda vs. Baking Powder: Baking soda is often the preferred leavening agent for crispy cookies because it encourages the dough to spread more, creating thin, crisp edges. Baking powder, on the other hand, is typically used in recipes for fluffier cookies, and can cause the cookies to rise rather than spread. Using baking soda in your recipe will promote the desired thinness and crispiness of the cookies.
3. The Mixing Method
The way you mix your cookie dough is another factor that determines the texture of the cookies. Proper mixing ensures that the dough comes together in a way that encourages spreading and crispness.
Cream the Butter and Sugar Properly: When creaming the butter and sugar together, aim for a smooth, even texture. Overbeating the butter and sugar can incorporate too much air into the dough, which will lead to puffier cookies. For crispy cookies, you want to avoid adding too much air into the dough, so mix until the butter and sugar are just well combined, with a smooth, slightly fluffy texture.
Add the Flour Gradually: When mixing in the dry ingredients, add the flour in gradually and mix until just combined. Overmixing the dough once the flour is added can create excess gluten, making the cookies tougher and less crispy. You want to keep the dough as smooth and even as possible without developing too much gluten.
4. Shaping and Chilling the Dough
The way you shape the dough and how long you let it rest before baking can impact how crispy your cookies turn out. Proper dough handling ensures even spreading and crispiness during baking.
Shape the Dough into Thin Balls: For crispy cookies, you’ll want to scoop the dough into smaller, thinner balls than you might for chewy cookies. This allows the dough to spread more during baking, resulting in thinner cookies with a crisp texture. Gently flatten each ball of dough slightly with your fingers or the back of a spoon to help them spread evenly as they bake.
Chill the Dough: Although chilling the dough is more often associated with chewy cookies, it’s also an essential step for crispy cookies. Resting the dough in the fridge for at least 30 minutes helps to firm it up, making it easier to handle and ensuring that the cookies bake evenly. Chilling the dough also prevents the cookies from spreading too much, which could lead to overly thin, burnt cookies. For the perfect balance of crispiness and structure, chilling the dough helps control the spread without compromising the desired texture.
5. Baking Tips for Crispy Cookies
Baking your chocolate chip cookies correctly is critical to ensuring they turn out crispy and golden. A few baking tips can make all the difference in achieving the perfect crisp texture.
Baking Time: For crispy cookies, you’ll want to bake them just a bit longer than you would for chewy cookies. Keep a close eye on the edges of the cookies—once they turn golden brown and crisp, remove them from the oven. The cookies should be golden all over, with no soft centers. If you want them extra crispy, leave them in the oven for an additional 1-2 minutes, but be careful not to burn them.
Oven Temperature: Bake your cookies at a slightly higher temperature, typically around 375°F (190°C), as this helps them spread quickly and crisp up on the edges. A higher temperature promotes the caramelization of the sugars, giving the cookies a crunchy texture while allowing them to bake evenly.
Use Parchment Paper or Silicone Mats: Lining your baking sheet with parchment paper or a silicone baking mat ensures even heat distribution, preventing the cookies from burning on the bottom while still allowing them to crisp up perfectly. These surfaces also help the cookies to release more easily after baking, keeping their crisp texture intact.
6. Additional Tips for Crispy Cookies
If you want to take your crispy chocolate chip cookies to the next level, consider these additional tips:
Add More Chips: Adding a higher amount of chocolate chips to your cookie dough can make the cookies crisper and provide a pleasant contrast in texture. The chocolate chips melt and spread throughout the dough, helping to form a more evenly baked, crispy cookie.
Reduce the Salt: Using less salt in your cookie dough can help create a slightly sweeter and more delicate cookie, which may complement the crispiness better. A little salt is important for flavor balance, but reducing the amount slightly can help keep the focus on the crunchy texture.
Try a Higher-Protein Flour: For even crispier cookies, you can experiment with using bread flour or a flour blend with a higher protein content. Higher-protein flours can help develop more gluten, which gives the dough more structure and leads to a crispier cookie.
—
In Conclusion
Crispy chocolate chip cookies are a delightful treat for those who prefer a thin, crunchy texture with a satisfying snap. Achieving the perfect crispy cookie requires reducing moisture, using the right sugar ratios, and carefully handling the dough. By mixing the ingredients properly, shaping the dough into thin discs, and baking at the right temperature, you can create golden, crispy cookies that will satisfy your craving for crunch. With these tips, you’ll be able to perfect the art of crispy chocolate chip cookies every time.
The Right Oven Temperature: Ensuring Perfectly Baked Chocolate Chip Cookies
Baking chocolate chip cookies may seem straightforward, but the oven temperature plays a crucial role in determining the texture, spread, and overall success of your cookies. Whether you’re aiming for chewy, crispy, or somewhere in between, the right oven temperature is essential to getting the perfect cookie every time. Let’s explore how oven temperature affects the baking process and how you can use it to your advantage for perfectly baked chocolate chip cookies.
1. The Impact of Temperature on Cookie Texture
The temperature of your oven directly affects how your cookies spread and bake. Higher or lower temperatures can result in very different textures, so understanding the science behind it is important.
High Temperature (375°F/190°C): A slightly higher temperature, such as 375°F, promotes quick spreading and crisping, making it ideal for creating thinner, crispier cookies. At this temperature, the sugar in the dough caramelizes quickly, giving the cookies a golden color and crispy edges. However, if your cookies are too thick, baking at this high temperature might cause them to brown too much on the outside while leaving the center undercooked. Therefore, high temperatures are best suited for thinner cookie dough that is already well-spread on the baking sheet.
Moderate Temperature (350°F/175°C): The most common temperature for baking chocolate chip cookies is 350°F. This moderate heat is ideal for producing a balance between chewy and crisp textures. At this temperature, cookies spread evenly and bake at a steady rate, ensuring a consistent golden-brown color with soft centers and slightly crispy edges. This temperature works well for most standard cookie recipes, allowing the dough to cook through without drying out or becoming overly crisp.
Lower Temperature (325°F/165°C): Baking at a lower temperature, such as 325°F, is ideal for creating thicker, softer cookies. This gentle heat allows the dough to cook slowly, helping the cookies retain more moisture and resulting in a chewy, tender texture. However, baking at this temperature can cause the cookies to spread less, leading to thicker cookies. If you prefer a chewier texture and thicker cookies, a lower oven temperature is a great choice.
2. How Oven Temperature Affects Cookie Spread
The spread of your cookies during baking is a key indicator of how well the dough is interacting with the heat in the oven. The right temperature will ensure that the dough spreads evenly without becoming too flat or too thick.
High Heat (375°F): When baking at a higher temperature, the dough spreads quickly as the fats in the dough (such as butter) melt faster. This rapid melting encourages more spread, leading to thinner, crispier cookies. If the dough is too cold or firm before baking, the cookies may not spread properly, resulting in dense or thick cookies that aren’t as crisp.
Moderate Heat (350°F): At 350°F, the dough spreads gradually, giving the cookies enough time to cook evenly while allowing the edges to crisp up without overbaking. This moderate temperature allows the sugar and fat in the dough to melt at a more controlled rate, leading to cookies that are spread out evenly with soft centers and slightly crisp edges.
Low Heat (325°F): A lower temperature can slow down the spreading process, helping to create cookies that are thicker and more substantial. The dough has more time to set and retain its shape before the baking process fully takes hold, which can help you achieve a chewy texture and a thicker cookie.
3. Using an Oven Thermometer
Oven temperatures can vary greatly from one oven to another, even if the temperature setting is the same. Many home ovens have inconsistencies in temperature, which can lead to uneven baking results. To ensure the most accurate baking experience, it’s a good idea to use an oven thermometer.
Why Use an Oven Thermometer: Oven thermometers are inexpensive and easy to use, and they allow you to monitor your oven’s actual temperature more accurately. Even if your oven has a built-in thermostat, it may not be accurate, especially over time. A thermometer can confirm that your oven is heating to the correct temperature, which is essential for baking chocolate chip cookies to perfection.
Adjusting for Temperature Variations: If you find that your oven runs hot (for example, 350°F may actually be 375°F in your oven), you may want to lower your temperature slightly or shorten your baking time. Similarly, if your oven runs cool, you may need to increase the temperature or extend your baking time slightly.
4. How Temperature Affects Cookie Time
Baking at different temperatures not only affects the texture but also the time it takes to bake your cookies. It’s important to understand how temperature and time are related in order to avoid overbaking or underbaking your cookies.
Baking at 375°F (190°C): Cookies baked at a higher temperature typically bake faster. At 375°F, most cookies take about 8-10 minutes to bake, depending on the thickness and size of the dough balls. You’ll want to keep an eye on the cookies after about 7 minutes, as they can brown quickly.
Baking at 350°F (175°C): Baking at this temperature is slower, and most cookies will take around 10-12 minutes to bake. The edges will turn golden brown while the center remains soft, and the cookies will firm up as they cool. This is the best temperature for a well-rounded cookie that is both chewy and crispy.
Baking at 325°F (165°C): If you’re baking at a lower temperature, the cookies will take longer to bake, usually 12-15 minutes or more. The slower heat allows the dough to cook more evenly without burning the edges, which helps achieve a chewy texture with a thicker, softer consistency.
5. Consistency of Heat Distribution
To ensure the best results, it’s important to maintain even heat distribution in your oven. Poor heat circulation can lead to unevenly baked cookies, with some parts overdone while others are undercooked. Here are some tips to improve heat distribution:
Positioning the Oven Rack: Most recipes suggest placing your baking sheet in the center of the oven to promote even heat distribution. The center rack ensures that the cookies bake evenly on all sides. If you place the rack too high or too low, your cookies might brown unevenly, with some parts crispier than others.
Avoid Overcrowding the Oven: When baking multiple batches of cookies, avoid overcrowding the oven. Placing too many trays at once can block the airflow and result in uneven baking. If you’re baking multiple sheets of cookies, rotate them halfway through baking to ensure they bake evenly.
Preheating the Oven: Always preheat your oven to the desired temperature before placing your cookies inside. This ensures that the cookies start baking immediately upon contact with the heat, leading to more consistent and controlled results. If you don’t preheat your oven, the cookies may not bake evenly and could end up too flat or too thick.
6. Adjusting for Different Cookie Sizes
If you’re making larger or smaller cookies than the recipe calls for, you may need to adjust your oven temperature or baking time slightly.
Larger Cookies: If you’re making large, thick cookies, consider lowering the oven temperature slightly (to about 325°F) and increasing the baking time. This ensures the center bakes through without the edges overcooking or burning.
Smaller Cookies: For smaller cookies, you may want to bake at a higher temperature (375°F) for a shorter time. Smaller cookies bake faster and will spread more evenly, resulting in a thinner, crispier texture.
—
In Conclusion
The right oven temperature is essential to getting the perfect batch of chocolate chip cookies, whether you’re aiming for chewy, crispy, or soft and tender cookies. By understanding how oven temperature influences the baking process, you can adjust your approach to achieve the exact texture you desire. From using an oven thermometer to experimenting with different baking temperatures, you can perfect your cookies every time. Just remember: the right temperature not only affects how your cookies spread but also how they taste, so always keep an eye on your oven’s accuracy and adjust accordingly.
Baking Sheet and Parchment Paper: Key Tools for Perfect Chocolate Chip Cookies
When it comes to baking chocolate chip cookies, the right tools can make all the difference. The choice of baking sheet and whether or not you use parchment paper can impact how evenly your cookies bake, how easy they are to remove from the pan, and the overall texture of your cookies. Let’s dive deeper into why these tools are essential and how they contribute to the perfect cookie.
1. The Right Baking Sheet for Even Baking
A good-quality baking sheet is a fundamental tool for successful cookie baking. The material, size, and quality of your baking sheet can significantly affect the results.
Material Matters: Baking sheets are typically made from materials like aluminum, stainless steel, or non-stick coated metal. Each material has its own advantages:
Aluminum Baking Sheets: These are the most common and are excellent for even heat distribution. Aluminum sheets allow for consistent baking and help your cookies brown evenly. However, they can sometimes warp in high heat, so it’s important to choose a sturdy, thick aluminum sheet.
Non-Stick Baking Sheets: Non-stick sheets are coated with a layer that makes them easier to clean and prevents cookies from sticking. However, they tend to absorb heat differently from aluminum sheets, which could cause the cookies to bake unevenly. If you’re using a non-stick baking sheet, make sure it is of good quality to prevent these issues.
Stainless Steel Sheets: These are durable and resistant to warping, but they don’t conduct heat as well as aluminum. Stainless steel can cause your cookies to bake slower or unevenly if not preheated properly.
Thickness of the Baking Sheet: Thicker baking sheets generally provide more even heat distribution, reducing the likelihood of burnt edges and underbaked centers. Thin, flimsy sheets tend to heat up too quickly, leading to cookies that bake unevenly. Investing in a heavy-duty baking sheet ensures your cookies bake consistently.
Size of the Baking Sheet: Make sure your baking sheet is large enough to allow for proper cookie spread without overcrowding. Overcrowding can lead to uneven baking, as the cookies will end up baking closer together and may stick to each other. Depending on the size of your cookies, choose a sheet that allows adequate space between each dough ball.
2. The Role of Parchment Paper in Baking
Parchment paper is an essential tool for many bakers because it provides several benefits when baking chocolate chip cookies. While some people may skip this step and opt for greasing the pan or using a non-stick sheet, parchment paper offers distinct advantages that make it the preferred choice for many bakers.
Prevents Sticking: Parchment paper provides a non-stick surface, ensuring that cookies don’t stick to the baking sheet, even if you’re not using a non-stick pan. This is particularly helpful for cookies with a high sugar content or those that are delicate. When cookies are easy to remove, they hold their shape better and retain a beautiful texture.
Easy Cleanup: Using parchment paper helps make cleanup much easier. Instead of scraping off stubborn cookie bits from the baking sheet or worrying about grease stains, you can simply discard the parchment paper after baking, leaving your baking sheet clean. This is particularly helpful when baking multiple batches of cookies.
Even Baking: Parchment paper can also help create a more even baking environment. It provides a layer between the cookie dough and the baking sheet, preventing the cookies from getting too much direct contact with the pan. This can help control the spread of the dough, especially if you’re baking at a higher temperature. The paper helps cookies bake more evenly, ensuring that they don’t burn on the bottom before the top has fully cooked.
Crispier Edges: For crispy chocolate chip cookies, parchment paper can help achieve the desired texture. Since the paper reduces direct contact with the hot baking sheet, it helps cookies crisp up evenly without the bottom overbaking or becoming too brown. The even heat distribution ensures that the cookies develop crispy edges while keeping the center from becoming too dry.
Preventing Overbaking: If you’re baking cookies at a higher temperature, parchment paper can help prevent overbaking by providing an additional layer of protection. This can reduce the chances of the cookies getting too hard, especially at the edges, which can occur when they come into direct contact with a very hot pan.
3. Tips for Using Parchment Paper Effectively
While parchment paper is a simple tool, there are a few best practices to ensure it works to its full potential:
Size It Right: Make sure the parchment paper is large enough to cover the entire surface of the baking sheet. The paper should extend slightly beyond the edges of the pan to avoid cookies coming into contact with the hot metal. If the paper is too small, it won’t provide full coverage, and your cookies might stick to the pan.
Secure the Paper: Sometimes, parchment paper can slide around on the baking sheet, making it hard to place the cookie dough. To prevent this, lightly crumple the paper before placing it on the baking sheet, then smooth it out. The crumpled paper sticks better to the sheet and is less likely to move around. You can also lightly grease the corners of the sheet before adding the parchment paper to help keep it in place.
Avoid Reusing Parchment Paper: While parchment paper is durable, it’s best to use it only once per baking session. Reusing parchment paper can lead to uneven baking, as the paper may have absorbed moisture, grease, or leftover cookie crumbs. It’s best to start with a fresh sheet for each new batch of cookies to ensure the best results.
Adjusting for Different Cookie Recipes: If you’re baking a recipe that calls for a specific amount of dough per cookie (e.g., tablespoon-sized scoops), be sure to space your dough balls far enough apart on the parchment paper to allow for proper spreading. Parchment paper can help the cookies maintain their shape as they spread, so if you’ve spaced them well, they won’t stick together or become misshapen.
4. Alternatives to Parchment Paper
While parchment paper is a go-to for many bakers, there are a few alternatives you can use depending on your preference or available supplies.
Silicone Baking Mats: Silicone baking mats (like Silpat) are a reusable alternative to parchment paper. These mats provide a non-stick surface and promote even heat distribution. They are great for people who want to reduce waste by avoiding single-use products. However, silicone mats can be more expensive than parchment paper and may not give the same crispness to the cookies as parchment paper does.
Non-Stick Spray or Greasing the Pan: Some bakers opt to grease their baking sheet with butter, oil, or non-stick spray. While this works for many cookies, it can be messier and may not guarantee easy removal. It also doesn’t provide the same non-stick benefits as parchment paper, particularly for delicate cookies that are prone to sticking.
Aluminum Foil: Aluminum foil can be used as an alternative, but it’s less ideal than parchment paper because it doesn’t provide a completely non-stick surface. You may still need to grease the foil to prevent sticking. Foil can also cause cookies to brown faster on the bottom, so it requires closer attention during baking.
—
In Conclusion
Choosing the right baking sheet and using parchment paper are two simple yet crucial steps to ensure your chocolate chip cookies bake perfectly. A good-quality baking sheet ensures even heat distribution and consistent baking, while parchment paper prevents sticking, promotes even cooking, and makes cleanup a breeze. By using these tools effectively, you can achieve the perfect batch of cookies every time, whether you’re going for a chewy, crispy, or classic texture. Consider your baking tools carefully, and your cookies will turn out better, with minimal hassle.
Easy Variations to Take Your Cookies to the Next Level
Add-ins and Mix-ins: Elevating Your Chocolate Chip Cookies
While classic chocolate chip cookies are delicious on their own, adding different mix-ins and add-ins can take your cookies to the next level. These ingredients not only bring new flavors and textures but also allow you to get creative with your cookies. From nuts and dried fruit to candies and spices, the possibilities are endless. Let’s explore how different add-ins and mix-ins can enhance your chocolate chip cookies, as well as tips for incorporating them into your dough.
1. Popular Add-ins and Mix-ins for Chocolate Chip Cookies
There are numerous ingredients you can add to your chocolate chip cookie dough to create a more complex and exciting flavor profile. Here are some popular options to consider:
Nuts: Nuts are a classic addition to chocolate chip cookies and provide a nice contrast to the softness of the dough. They add crunch and a rich, earthy flavor that complements the sweetness of the chocolate chips. Some popular nuts to add include:
Walnuts: Their slightly bitter flavor and crunchy texture pair perfectly with the sweetness of the chocolate chips.
Pecans: These nuts have a buttery flavor and a softer texture, which can add a mild sweetness to the cookies.
Almonds: If you want a more delicate, slightly nutty flavor, sliced or chopped almonds work beautifully in cookies.
Macadamia Nuts: For a rich, buttery taste, macadamia nuts are a luxurious addition, particularly when paired with white chocolate chips.
Dried Fruits: Dried fruits add natural sweetness and chewiness to your cookies. The fruity flavor pairs wonderfully with chocolate chips and gives your cookies a more complex taste. Common dried fruits to consider include:
Raisins: These are a classic choice that offers a sweet and tangy contrast to the chocolate chips.
Cranberries: Dried cranberries are tart and slightly sweet, providing a nice balance to the richness of chocolate.
Cherries: Dried cherries offer a slightly tart flavor that pairs well with both milk and dark chocolate.
Apricots or Figs: Chopped dried apricots or figs add a chewy texture and sweet, honey-like flavor that works well with nutty and chocolatey combinations.
Candies: If you want to make your cookies extra fun and indulgent, consider adding candies to the dough. These sweet treats can add bursts of flavor, texture, and even a bit of crunch. Some popular candy mix-ins include:
M&M’s: These colorful candy-coated chocolates add a playful touch and a candy crunch that’s perfect for those who love a bit of extra sweetness in their cookies.
Reese’s Pieces: For a peanut butter and chocolate combination, Reese’s Pieces are a delicious addition that adds flavor and texture.
Toffee Bits: Toffee bits or chunks bring a rich, buttery flavor with a slight caramelized crunch, creating a decadent contrast to the chocolate chips.
Peanut Butter Cups: Chopped-up mini peanut butter cups add a creamy, rich peanut butter flavor that pairs beautifully with the chocolate.
Spices and Extracts: For a subtle twist on your classic cookie dough, consider adding a bit of spice or flavoring to infuse new tastes into your cookies. Here are some ideas:
Cinnamon: A pinch of cinnamon in the dough will add warmth and a cozy flavor that complements the chocolate chips, especially for fall or winter cookies.
Nutmeg: Nutmeg adds a sweet, slightly spicy flavor that pairs well with the chocolate and can elevate your cookie’s flavor profile.
Vanilla Extract: While vanilla is a staple in chocolate chip cookies, adding extra vanilla extract or even experimenting with other extracts, like almond or hazelnut, can create a unique flavor.
Espresso Powder: For a coffee-infused flavor, a small amount of espresso powder or instant coffee can intensify the chocolate flavor and create a deep, rich taste in your cookies.
Other Fun Mix-ins: Get creative with mix-ins that add both flavor and texture, such as:
Shredded Coconut: Adding shredded coconut will give your cookies a tropical flair and a chewy texture.
Pretzels: Crushed pretzels bring a salty, crunchy element that creates the perfect balance with the sweet chocolate chips.
Oats: Adding rolled oats to the dough gives your cookies a chewy texture and a heartier, more rustic feel.
Potato Chips: For a sweet-and-salty combination, crushed potato chips add a unique crunch and salty flavor to your cookies.
2. How to Add Mix-ins to Your Cookie Dough
Incorporating mix-ins into your cookie dough requires a bit of care to ensure even distribution without overworking the dough. Here are some tips for incorporating add-ins successfully:
Fold Gently: When adding mix-ins to your dough, gently fold them in using a spatula or wooden spoon. Avoid overmixing, as this can lead to dense cookies. Gently folding helps ensure the add-ins are evenly distributed throughout the dough without overworking the gluten, which can affect the texture of the cookies.
Size of Add-ins: Consider the size and texture of the mix-ins you’re adding. For instance, if you’re adding nuts, be sure to chop them into smaller pieces to ensure they bake evenly. Similarly, for larger candies or dried fruits, chop them into manageable pieces so they distribute well in the dough without overwhelming each bite.
Proportions: If you’re using a lot of add-ins, be cautious not to overwhelm the dough. A good guideline is to keep the mix-ins to about 1 to 1.5 cups per batch of dough. If you add too many mix-ins, it can disrupt the balance of ingredients and cause your cookies to spread unevenly or bake inconsistently.
Chill the Dough: If you’re adding a lot of mix-ins, especially larger ones, chilling the dough for at least 30 minutes before baking can help prevent the cookies from spreading too much. Chilled dough holds its shape better, ensuring that the mix-ins stay in place during baking.
3. Creative Combinations and Flavor Pairings
Mixing and matching different add-ins can lead to unique and exciting flavor combinations. Here are some creative pairings that will give your chocolate chip cookies an unexpected twist:
Peanut Butter + Chocolate Chips + Pretzels: The saltiness of the pretzels pairs perfectly with the creamy peanut butter and rich chocolate, creating a sweet and salty combination that is irresistible.
Cranberries + White Chocolate Chips + Macadamia Nuts: This combination brings together the tartness of cranberries, the sweetness of white chocolate, and the buttery flavor of macadamia nuts for a balanced, flavorful cookie.
Toffee + Pecans + Dark Chocolate Chips: For a more sophisticated flavor, combine crunchy toffee bits, toasted pecans, and deep, rich dark chocolate chips. This will give your cookies a caramelized, nutty, and slightly bitter flavor profile.
Oats + Coconut + Chocolate Chips: This combination results in a chewy, hearty cookie with a tropical twist from the coconut and an added texture from the oats.
Reese’s Pieces + M&M’s + Chocolate Chips: For a cookie that’s packed with candy goodness, combine these three treats for a colorful, crunchy, and sweet dessert.
4. Healthier Add-ins
If you’re looking to make a healthier version of chocolate chip cookies, there are several nutritious options for add-ins that still pack flavor and texture without compromising on taste:
Chopped Dark Chocolate: Instead of milk chocolate chips, opt for chunks of dark chocolate with a higher cacao percentage. Dark chocolate has less sugar and provides antioxidant benefits.
Chia Seeds or Flax Seeds: These seeds are packed with omega-3 fatty acids, fiber, and protein, and they add a crunchy texture to your cookies.
Almond Butter: Instead of regular butter, almond butter or other nut butters can provide a healthier fat option while adding rich flavor to your cookies.
Dried Fruits with No Added Sugar: Choose unsweetened dried fruits like raisins, apricots, or cranberries to avoid excess sugar while still adding a chewy, natural sweetness.
5. How Add-ins Affect Baking Time
Different add-ins can affect the way your cookies bake, especially when they contain moisture or fats. Be mindful of the impact of certain ingredients:
Moisture-rich Add-ins: Ingredients like dried fruits or nut butters can add moisture to the dough, which might cause the cookies to bake more slowly. Be sure to monitor the cookies closely and adjust the baking time if needed.
High-fat Add-ins: Nuts, toffee, and candies can increase the fat content of the cookies, which may cause them to spread more. You may need to chill the dough or reduce the amount of butter in the recipe if you’re adding lots of fat-heavy mix-ins.
—
In Conclusion
Add-ins and mix-ins are a great way to make your chocolate chip cookies uniquely yours. By selecting the right mix-ins and following proper incorporation techniques, you can create cookies with exciting flavors, textures, and plenty of variety. Whether you prefer classic combinations like nuts and chocolate or more inventive options like pretzels and coconut, the possibilities are endless. Play around with different mix-ins and get creative with your cookies to keep things fresh and flavorful every time you bake!

Flavored Chocolate Chips: A Creative Twist on Classic Chocolate Chip Cookies
Chocolate chips are the star ingredient in a traditional chocolate chip cookie recipe, but did you know you can elevate the flavor profile of your cookies by experimenting with flavored chocolate chips? From rich dark chocolate to sweet white chocolate and even more exotic flavors, flavored chocolate chips add a new dimension to your cookies, allowing you to customize them to suit your preferences or try something entirely new. Here’s a deeper look at different types of flavored chocolate chips and how they can enhance your cookie experience.
1. Types of Flavored Chocolate Chips
Flavored chocolate chips come in a variety of options, each offering a distinct taste that can complement or contrast with the other ingredients in your cookie dough. Here are some of the most popular types of flavored chocolate chips you can try in your chocolate chip cookies:
Dark Chocolate Chips: Dark chocolate chips are made from a higher percentage of cocoa solids, giving them a deep, bittersweet flavor. They have a less sugary taste than milk chocolate chips and provide a more intense chocolate experience. Dark chocolate chips are perfect for those who prefer a richer, more sophisticated flavor. They also pair well with ingredients like nuts, dried fruit, or a touch of espresso powder for added depth.
Milk Chocolate Chips: These are the classic chocolate chip choice for many bakers. They offer a creamy, sweet flavor that balances well with the slight saltiness and texture of the cookie dough. Milk chocolate chips melt into the dough, creating pockets of smooth, melty chocolate in each bite. If you love sweet treats, milk chocolate is your go-to chip.
White Chocolate Chips: White chocolate chips bring a sweet, creamy flavor that is less intense than milk or dark chocolate. Their smooth texture and subtle sweetness make them a popular choice for those who enjoy a milder, more buttery taste. White chocolate chips pair especially well with citrus zest (such as orange or lemon), macadamia nuts, or dried cranberries for a refreshing twist.
Butterscotch Chips: These chips offer a rich, buttery, and caramel-like flavor that works wonderfully in cookie recipes. They add a slight crunch and a sweet, deep flavor that complements the chocolate without overpowering it. Butterscotch chips are especially good when paired with pecans or walnuts, which enhance their nutty, caramelized taste.
Peanut Butter Chips: Peanut butter chips add a savory-sweet element to chocolate chip cookies. Their creamy, nutty flavor pairs beautifully with chocolate chips and offers a fun combination of textures. Peanut butter chips are a great choice for anyone who loves the combination of chocolate and peanut butter. You can also mix them with chopped peanuts, oats, or even pretzels for a sweet and salty cookie.
Mint Chocolate Chips: Mint chocolate chips combine the refreshing flavor of mint with the richness of chocolate, creating a cool and indulgent treat. These chips are ideal for anyone who enjoys a minty bite alongside their chocolate. Mint chocolate chip cookies are perfect for holiday baking, as mint brings a festive, wintery feel. Pair them with dark chocolate for a balanced taste or mix them with crushed peppermint candies for extra crunch and a burst of minty flavor.
Caramel Chips: Caramel chips melt into gooey pockets of sweetness when baked. They bring a soft, buttery sweetness that contrasts with the more intense chocolate chips, creating a unique flavor combination. Caramel chips work well with both milk and dark chocolate chips, and their smooth texture makes them an excellent addition to chewy cookies.
Coffee-Flavored Chips: For coffee lovers, coffee-flavored chocolate chips are a must-try. These chips have a slightly bitter, roasted coffee flavor that pairs beautifully with chocolate. The rich coffee undertones enhance the chocolate chips, creating a mocha-inspired cookie. These chips work particularly well in dark chocolate cookies, or you can pair them with nuts like hazelnuts or walnuts for a more complex flavor.
Hazelnut Chips: Hazelnut chocolate chips offer a nutty, slightly sweet flavor with a hint of earthiness. These chips pair perfectly with both milk and dark chocolate, bringing a crunchy texture and rich flavor to the cookies. Hazelnut chips are also a great complement to toffee or caramel bits, enhancing the cookie’s overall nutty profile.
Coconut Flavored Chips: Coconut chocolate chips bring a tropical, slightly sweet flavor to your cookies. The coconut taste adds a chewy texture and a hint of nuttiness, which works beautifully in both chocolate chip and oatmeal cookies. These chips are ideal for creating a vacation-inspired cookie, especially when paired with dark chocolate and macadamia nuts for a cookie reminiscent of a tropical island.
2. How to Incorporate Flavored Chocolate Chips into Your Cookie Dough
Using flavored chocolate chips in your cookies is fairly simple, but there are a few tips to help you achieve the best results:
Balance the Flavors: Because flavored chocolate chips are often sweeter or more intense than regular chocolate chips, it’s important to balance the other ingredients in your dough. For example, if you’re using very sweet white chocolate chips or butterscotch chips, you might want to slightly reduce the amount of sugar in your dough to avoid an overly sweet cookie. Similarly, if you’re using dark chocolate chips or coffee-flavored chips, you might want to increase the sweetness of the dough to balance the bitterness of these chips.
Use Flavored Chips in Moderation: While flavored chips can be a great addition, they tend to be stronger in flavor than regular chocolate chips. To avoid overpowering your cookies, use no more than 1 to 1.5 cups of flavored chocolate chips per batch of dough. This allows the flavored chips to enhance the cookie without dominating the flavor.
Experiment with Combinations: Flavored chocolate chips can be mixed with regular chocolate chips or other types of flavored chips to create a more complex and layered flavor. For instance, you can mix mint chocolate chips with milk chocolate chips, or combine peanut butter chips with dark chocolate chips for a sweet-and-savory treat. Try pairing chips with complementary add-ins, like nuts, dried fruit, or candy pieces, to elevate the flavor and texture of your cookies.
Chill Your Dough: Some flavored chocolate chips, especially those with caramel or peanut butter fillings, can melt quickly and spread more during baking. To prevent your cookies from spreading too much, it’s a good idea to chill your dough before baking. This will help your cookies maintain their shape and keep the chips in place, preventing them from melting away into the dough too quickly.
3. Creative Flavor Combinations with Flavored Chocolate Chips
To get even more creative with your cookies, try pairing flavored chocolate chips with other ingredients that complement their unique flavors. Here are some fun flavor combinations to experiment with:
Dark Chocolate Chips + Mint Chips + Crushed Andes Mints: A triple mint-chocolate combo that’s perfect for mint lovers. The addition of crushed Andes Mints adds extra minty freshness and a smooth chocolate layer.
Peanut Butter Chips + Chocolate Chips + Pretzels: This combination gives you a perfect sweet-and-salty cookie with crunchy pretzels and creamy peanut butter flavor, balanced with rich chocolate.
White Chocolate Chips + Cranberries + Pistachios: A festive and refreshing combination, the tartness of cranberries complements the sweetness of white chocolate chips, while the pistachios add a crunchy, nutty texture.
Caramel Chips + Chocolate Chips + Sea Salt: A combination of sweet and salty flavors, the caramel chips bring a buttery richness, while the sea salt sprinkled on top intensifies the sweetness of the chocolate.
Hazelnut Chips + Dark Chocolate Chips + Espresso Powder: For a more indulgent cookie, the rich flavor of hazelnuts and dark chocolate pairs beautifully with the depth of espresso, creating a cookie reminiscent of a mocha.
4. Healthier Flavored Chocolate Chips
If you’re looking for a slightly healthier alternative to traditional chocolate chips, some brands offer flavored chips made with better-for-you ingredients. For example, dark chocolate chips are a healthier choice than milk chocolate because they have less sugar and contain antioxidants from the cocoa. You can also find chips made with organic or fair-trade chocolate, which may have a more intense flavor and fewer added sugars. Additionally, many companies offer dairy-free or gluten-free flavored chips to accommodate dietary restrictions.
—
In Conclusion
Flavored chocolate chips provide an exciting way to experiment with new cookie flavors and add an extra layer of indulgence to your classic chocolate chip cookies. Whether you’re adding creamy peanut butter chips, refreshing mint chips, or rich caramel chips, these variations allow you to customize your cookies to suit any taste. Don’t be afraid to mix different types of chips or pair them with complementary add-ins to create a truly unique cookie. With so many delicious options available, the possibilities for flavored chocolate chip cookies are endless!
Making the Cookies Bigger or Smaller: Adjusting Cookie Size for Different Results
The size of your chocolate chip cookies plays a significant role in their texture, appearance, and baking time. Whether you prefer large, bakery-style cookies or small, bite-sized treats, adjusting the size of your cookies can help you achieve the perfect cookie for any occasion. In this section, we’ll explore the pros and cons of making your cookies bigger or smaller, how to adjust the dough and baking time accordingly, and how size affects the overall texture of your cookies.
1. Making Cookies Bigger: The Bakery-Style Cookie
Bigger cookies are often associated with the iconic, bakery-style treats we all know and love. These cookies tend to have a chewy, soft center and a slightly crisp edge, with big pockets of melted chocolate in every bite. If you want to create larger-than-life chocolate chip cookies, here are some things to consider:
Portioning the Dough: To make larger cookies, you’ll need to use a larger amount of dough for each cookie. Typically, for a standard cookie, you might scoop about 1.5 tablespoons of dough. For larger cookies, increase the amount of dough to about 3 tablespoons to ¼ cup per cookie. You can use a large cookie scoop or an ice cream scoop to ensure consistent sizing. If you don’t have a scoop, simply use a tablespoon or a small cup to portion the dough.
Spacing the Cookies: When baking large cookies, it’s essential to give them enough space on the baking sheet. Larger cookies spread more during baking, so make sure to space them about 3 inches apart to prevent them from merging together. If they touch while baking, they may end up baking into one large cookie instead of individual ones.
Baking Time: Because larger cookies require more dough and take longer to bake through, you’ll need to adjust the baking time. Start by increasing the baking time by a few minutes compared to the usual recipe. Typically, larger cookies will need 12 to 16 minutes to bake, depending on their size and the temperature of your oven. Keep a close eye on them, and check for a golden edge and a slightly soft center.
Texture and Appearance: Larger cookies often have a slightly thicker texture and chewier consistency. The edges can become crisp and slightly caramelized, while the center remains gooey and soft. The larger surface area means more space for melted chocolate to pool, creating deliciously melty chocolate pockets. For an extra touch, consider adding sea salt on top of the cookie dough before baking for a sweet-salty contrast.
Bigger Cookies for Special Occasions: Bakery-style, oversized cookies are great for impressing guests or making a treat to share. They’re perfect for celebrations, dessert platters, or gifts. You can even turn them into “cookie cakes” by baking the dough in a large, round pan and decorating them like a cake.
2. Making Cookies Smaller: Bite-Sized and Perfect for Sharing
Smaller cookies are perfect for those who prefer a more snackable, shareable treat. These mini cookies tend to have a crispier texture and are more suited for parties, cookie platters, or just when you want to enjoy a bite-sized treat without the guilt. Here’s how to make your cookies smaller and what you can expect from them:
Portioning the Dough: For smaller cookies, you’ll need to reduce the amount of dough you scoop for each cookie. Use about 1 teaspoon or 1 tablespoon of dough per cookie, depending on how small you want them. You can use a small cookie scoop or your hands to form the dough into tiny balls.
Spacing the Cookies: Smaller cookies spread less than larger ones, so you can place them closer together on the baking sheet. However, you still need to leave a little space—about 1.5 to 2 inches apart—to allow for slight spreading during baking.
Baking Time: Smaller cookies bake more quickly than larger ones, so you’ll need to reduce the baking time. Generally, mini cookies will bake in about 6 to 8 minutes, but start checking them a few minutes before the expected time. Look for lightly golden edges and a firm center to ensure they’re done without being overbaked.
Texture and Appearance: Mini cookies tend to be crispier and more uniform in texture. Because they bake faster, they’re likely to have a more consistent texture throughout, with less of the soft, chewy interior that larger cookies offer. These bite-sized cookies are perfect for those who enjoy a crunchier cookie and want a quick snack. They also have the advantage of being easier to pack and ship for care packages or cookie exchanges.
Smaller Cookies for Convenience: If you want to serve a variety of cookies at a gathering, smaller cookies are the way to go. They allow guests to sample multiple types of cookies without committing to a large portion. Smaller cookies are also great for those who like to have a few treats at once without feeling overwhelmed by a big cookie. Plus, you can package them up into cute little bags or jars for gift-giving.
3. How Cookie Size Affects the Dough and Ingredients
When you change the size of your cookies, the balance of dough-to-chocolate chip ratio also changes. Here’s how the size of the cookie can impact the final result:
For Larger Cookies: Larger cookies will have a thicker dough-to-chip ratio. This means there might be fewer chocolate chips relative to the dough itself, which could result in a doughier, less chocolate-heavy cookie. To compensate for this, you can add a few more chocolate chips to the dough to maintain that perfect chocolate-to-cookie ratio. You can also consider adding other mix-ins, such as nuts, to complement the larger size.
For Smaller Cookies: With smaller cookies, the dough will be thinner in proportion to the chocolate chips. This means the cookies are likely to have more chocolate chips packed into each bite, resulting in a chocolate-packed cookie experience. You might also find that the texture of the dough becomes a bit crisper when baked in smaller portions, especially if you’re using a higher ratio of chocolate chips to dough.
Adjustment in Leavening: Larger cookies may require slight adjustments in the leavening agents (baking soda or baking powder). A larger cookie needs a bit more time to rise and spread, so you may need to adjust the leavening agents to achieve the right texture. For smaller cookies, the leavening agents tend to spread more evenly, but you still need to watch the baking time to avoid spreading too thin or burning the cookies.
4. Tips for Perfect Cookie Size Every Time
Consistency is Key: Whether you’re making large or small cookies, it’s important to be consistent with the portion size. This ensures that all cookies bake evenly and have a uniform appearance. A cookie scoop is a great tool for portioning dough into consistent-sized balls.
Experiment with Size: Don’t be afraid to experiment with different cookie sizes to see what you like best. You can make a batch with both large and small cookies to cater to different preferences. Larger cookies will take longer to bake, while smaller ones will cook faster, so keep an eye on the oven and adjust baking times accordingly.
Adjust for Uniformity: For large cookies, if you’re baking multiple trays, rotate the trays halfway through the baking time to ensure even cooking. Similarly, for smaller cookies, you might need to swap the trays from top to bottom in the oven to ensure they bake evenly.
—
In Conclusion
Whether you opt for larger, bakery-style cookies or smaller, bite-sized treats, adjusting the size of your chocolate chip cookies gives you the flexibility to create different textures, appearances, and flavors. Larger cookies are ideal for indulgent treats, while smaller cookies are perfect for sharing and snacking. By paying attention to the portion size, baking time, and dough-to-chip ratio, you can achieve the perfect chocolate chip cookie for any occasion. So go ahead and experiment with cookie size to find your perfect balance of chewy, crispy, and chocolate-filled goodness!
Seasonal Flavors: Infusing Your Chocolate Chip Cookies with Festive Tastes
Chocolate chip cookies are beloved year-round, but they can be even more special when you infuse them with seasonal flavors that align with different holidays and times of the year. Seasonal flavors offer a unique twist on the classic chocolate chip cookie, making them perfect for holiday baking or simply adding variety to your cookie repertoire. In this section, we’ll explore how to incorporate seasonal flavors into your chocolate chip cookies and offer ideas for flavors that evoke the spirit of each season.
1. Autumn Flavors: Warm and Cozy Spices
As the leaves turn and the temperatures drop, autumn offers the perfect opportunity to experiment with warm, comforting flavors. These flavors evoke the coziness of fall, with hints of spice and earthiness that pair wonderfully with chocolate chip cookies.
Pumpkin Spice: Pumpkin spice is a fall favorite and is often associated with cozy, autumnal treats. Add pumpkin puree and a blend of cinnamon, nutmeg, ginger, and cloves to your chocolate chip cookie dough for a festive twist. The pumpkin provides a moist, soft texture, while the spices add a warm, aromatic flavor. These cookies pair perfectly with dark or milk chocolate chips. You can also incorporate a little bit of brown sugar to enhance the caramelized flavor.
Apple Cinnamon: Apple cinnamon cookies bring a fresh, fruity twist to the traditional chocolate chip cookie. Add finely diced apples, a touch of cinnamon, and a bit of brown sugar to your dough. The apples provide natural sweetness and moisture, while the cinnamon adds a warm, spiced kick. If you want to give them an extra autumn touch, consider adding chopped walnuts or pecans for crunch.
Maple: Maple syrup brings a rich, slightly smoky sweetness that’s perfect for fall baking. Add pure maple syrup or maple extract to your cookie dough for a deep, caramel-like flavor that complements the chocolate chips. You can also mix in a small amount of ground cinnamon to enhance the maple flavor and bring out the seasonal warmth.
Chai Spice: The exotic spices of chai (cinnamon, cardamom, ginger, and cloves) pair beautifully with chocolate chips, creating a warm and comforting cookie. Use chai tea concentrate or ground chai spices in your dough to infuse your cookies with a fragrant, spiced flavor that’s perfect for crisp autumn days.
2. Winter Flavors: Rich and Festive Treats
Winter holidays bring with them a host of rich and indulgent flavors that can make your chocolate chip cookies even more special. Whether you’re baking for Christmas, Hanukkah, or just a cozy winter night, these flavors will give your cookies a seasonal flair.
Peppermint: Peppermint is synonymous with winter holidays, and it pairs wonderfully with chocolate. Add crushed candy canes or peppermint extract to your chocolate chip cookies for a refreshing, minty flavor. The mint complements the sweetness of the chocolate and adds a cool contrast to the warmth of the cookie dough. You can also try dipping the baked cookies in melted chocolate and sprinkling extra crushed candy canes for a festive touch.
Gingerbread: Gingerbread is a quintessential holiday flavor that brings spicy, molasses sweetness to your cookies. Incorporating ginger, cinnamon, cloves, and molasses into your chocolate chip cookie dough can create a delightful gingerbread-inspired version of the classic. You can add in small pieces of crystallized ginger for extra flavor or mix it with dark chocolate chips for a more intense flavor contrast.
Eggnog: Eggnog is a rich, creamy holiday drink that can be infused into cookies for a festive twist. Add eggnog extract or use real eggnog in place of some of the wet ingredients in your chocolate chip cookie recipe. A hint of nutmeg and cinnamon can also enhance the eggnog flavor, while a sprinkle of powdered sugar on top of the cookies adds a wintry touch.
Tangerine or Orange: Citrus fruits like tangerines or oranges bring brightness to the often rich and heavy flavors of winter baking. Add zest from tangerines or oranges to your dough for a burst of fresh citrus that complements the richness of the chocolate. You can also drizzle the cookies with a simple glaze made from orange juice and powdered sugar for an extra touch of flavor.
3. Spring Flavors: Fresh and Light
As the weather warms and flowers bloom, spring is a great time to experiment with fresh, light flavors that bring out the brightness of the season. Spring-inspired chocolate chip cookies often feature fruity, floral, or herbal flavors that add a refreshing twist to traditional recipes.
Lemon: The tangy, refreshing flavor of lemon is perfect for spring. Add fresh lemon zest and a bit of lemon juice to your cookie dough to infuse the cookies with a citrusy brightness. Lemon and chocolate may seem like an unusual pairing, but the balance between the tart lemon and the sweet chocolate is irresistible. For added flair, you can top the cookies with a light lemon glaze.
Lavender: Lavender brings a floral, aromatic quality to your chocolate chip cookies. When used sparingly, it adds a unique, sophisticated touch that pairs beautifully with white or milk chocolate chips. You can infuse the flavor into the dough by using culinary-grade dried lavender buds or lavender extract. Be careful not to overdo it, as lavender can be overpowering if used in excess.
Strawberry: Fresh, juicy strawberries are a hallmark of spring, and their natural sweetness complements the richness of chocolate. You can add freeze-dried strawberry powder or finely chopped fresh strawberries to your chocolate chip cookie dough for a fruity twist. The tanginess of strawberries pairs wonderfully with both dark and milk chocolate chips, creating a vibrant, spring-inspired cookie.
Raspberry: Raspberry is another berry that’s perfect for spring. Add freeze-dried raspberries to your dough, or mix in raspberry jam for a fruity swirl throughout your cookies. The tartness of the raspberries balances the sweetness of the chocolate, creating a delicious contrast of flavors. You can also try pairing the raspberry cookies with white chocolate chips for a complementary flavor combination.
4. Summer Flavors: Light and Refreshing
Summer is all about fresh, vibrant flavors that are light and fun. When it comes to summer-inspired chocolate chip cookies, think about flavors that are refreshing and tropical, perfect for warm days and outdoor gatherings.
Coconut: Coconut is a tropical flavor that brings a chewy texture and sweet, nutty flavor to your cookies. Add shredded coconut to your chocolate chip dough, or opt for coconut flakes for extra texture. Coconut pairs wonderfully with both milk and dark chocolate chips. For an even more tropical touch, consider adding macadamia nuts to your cookies for a Hawaiian-inspired treat.
Pineapple: Pineapple offers a sweet, tangy burst of flavor that’s perfect for summer. You can add dried pineapple bits to your chocolate chip cookie dough, or even try mixing in some pineapple juice for a subtle tropical undertone. Pineapple and coconut are a natural pairing, so combining the two flavors will transport you to a tropical paradise. These cookies are especially fun when paired with white chocolate chips.
Peach: Peaches bring a juicy sweetness to summer cookies, adding a soft, fruity flavor that pairs well with chocolate. Add diced fresh or canned peaches to your dough, and enjoy the bursts of sweetness that complement the chocolate chips. You can also try infusing the dough with a little peach extract or pairing peach with almond-flavored chocolate chips for a sophisticated twist.
Watermelon: While not commonly associated with cookies, watermelon flavor can be incorporated into summer baking through watermelon-flavored chips or natural watermelon extract. These cookies will offer a refreshing, sweet taste with a bit of whimsy. If you’re feeling creative, consider mixing in chopped fresh watermelon or watermelon preserves for an unexpected treat.
5. How to Incorporate Seasonal Flavors into Your Cookies
When adding seasonal flavors to your chocolate chip cookies, here are some tips to make sure they turn out perfectly:
Balance the Flavor: Seasonal flavors can sometimes be overpowering, so it’s important to use them in moderation. Start with a small amount and taste-test the dough to ensure that the seasonal flavor doesn’t overwhelm the cookie.
Consider Texture and Moisture: Some seasonal ingredients, like fruits and vegetables (pumpkin, apples, etc.), can add moisture to your dough. This can affect the texture of your cookies, making them softer or cakier. If you’re using wet ingredients, you might need to adjust the amount of flour or chilling time to achieve the right consistency.
Use Complementary Flavors: Pair seasonal flavors with ingredients that enhance their taste. For example, cinnamon and nutmeg work beautifully with pumpkin or apple, while vanilla and almond extracts can elevate lemon or raspberry flavors. Choose add-ins (like nuts, dried fruit, or chips) that complement the seasonal flavor you’re working with.
Top with Seasonal Garnishes: Adding a finishing touch to your cookies can enhance the seasonal feel. Consider sprinkling sugar, cinnamon, or sea salt on top of the dough before baking, or drizzle the cookies with a flavored glaze after baking.
—
In Conclusion
Seasonal flavors are a fun and creative way to customize your chocolate chip cookies for any time of year. Whether you’re baking pumpkin spice cookies for fall, peppermint treats for the holidays, or coconut cookies for summer, seasonal ingredients allow you to experiment with different flavors and textures that suit each season’s mood. With just a few adjustments, you can elevate your classic chocolate chip cookie recipe and enjoy a deliciously festive twist on this timeless treat!
Troubleshooting Common Cookie Baking Issues
Flat Cookies: Understanding the Causes and How to Fix Them
Flat cookies are a common issue in baking, but don’t worry—they can often be easily corrected with a few adjustments. While some people love a thin, crispy cookie, others prefer a thicker, chewier one. If your cookies are turning out too flat and you’re aiming for a different texture, there are several factors that might be contributing to this outcome. In this section, we’ll explore the causes of flat cookies and provide tips on how to fix them to achieve the perfect cookie texture.
1. Causes of Flat Cookies
Several factors can lead to cookies that spread too much during baking, resulting in a flat, thin texture. Understanding the causes will help you make the right adjustments to your recipe and technique.
Too Much Butter: One of the most common causes of flat cookies is using too much butter. Butter is a key ingredient in cookies, but it also causes the dough to spread as it melts in the oven. If your cookie dough contains more butter than the recipe suggests, it can cause the dough to spread excessively and flatten. The best way to avoid this is to measure your ingredients carefully and use room-temperature butter as called for in the recipe.
Overmixing the Dough: While it’s important to combine the ingredients thoroughly, overmixing the cookie dough can lead to the development of excess gluten, which can cause the cookies to spread too much during baking. Overmixing also leads to a less tender texture, which could result in cookies that are flatter and crunchier. Mix the dough just until the ingredients are combined to avoid this issue.
Too Much Sugar: Sugar plays a crucial role in the texture and spread of your cookies. If you add too much sugar, it can cause your cookies to flatten as the sugar melts and encourages the dough to spread. This is especially true if you use granulated sugar instead of brown sugar, which adds moisture and creates a slightly thicker texture. Stick to the measurements in your recipe and avoid adding extra sugar unless the recipe specifies it.
Incorrect Oven Temperature: If your oven is too hot, the cookies will spread rapidly before they have a chance to set properly, resulting in flat, thin cookies. Conversely, if the oven is too cold, the cookies may not spread at all, creating thick, doughy cookies. It’s essential to preheat your oven and use an oven thermometer to ensure it’s at the correct temperature. Most chocolate chip cookies bake best at 350°F (175°C), but be sure to follow your recipe’s recommendations for the best results.
Chilled Dough Is Not Chilled Enough: Chilling the dough helps prevent cookies from spreading too much in the oven. If the dough isn’t chilled long enough, the cookies may spread too much and become flat. It’s best to chill the dough for at least 30 minutes to 1 hour, but if you want to achieve thicker cookies, you can chill the dough for longer, even overnight.
Overcrowding the Baking Sheet: When you place too many cookies on the same baking sheet, they don’t have enough room to spread evenly. This causes the cookies to bake unevenly, and they may end up thinner in certain areas. Be sure to leave at least 2 inches of space between each cookie to allow them to spread properly without merging into one big cookie.
2. How to Fix Flat Cookies: Tips and Tricks
If you’ve experienced flat cookies and want to remedy the situation, here are some helpful tips and adjustments you can make to get the desired texture:
Reduce the Butter: If your cookies are too flat, try reducing the amount of butter in your dough. You can experiment by cutting back on the butter by a tablespoon or two to see if it helps prevent excess spreading. Additionally, try using a combination of butter and shortening (which has a higher melting point) to achieve a thicker dough that spreads less.
Use the Right Flour: Different types of flour have different levels of protein, which affect the structure and texture of your cookies. If you’re using all-purpose flour and your cookies are spreading too much, consider using a higher-protein flour (like bread flour) for a sturdier dough. Alternatively, you can add a small amount of cornstarch to the flour to make the dough thicker and less likely to spread.
Chill the Dough Longer: If your cookies are flattening too much, chilling the dough for a longer period can help. The cold dough holds its shape better in the oven, giving the cookies time to bake and set before they spread too much. Try chilling your dough for at least 1 hour, or even overnight, to achieve thicker, chewier cookies. You can also scoop the dough onto the baking sheet and chill the individual dough balls before baking them.
Use a Cookie Scoop: A cookie scoop ensures that all of your cookies are the same size and shape, which promotes even spreading. If your cookies are spreading too much, you can use a smaller scoop to make smaller dough balls, which will result in thicker cookies. You can also try slightly packing the dough into the scoop to create denser dough balls that are less likely to spread.
Increase the Flour: If your cookie dough seems too soft or wet, it may not have enough flour to hold its shape. Adding a little extra flour can help thicken the dough and prevent excessive spreading. Start by adding an extra tablespoon or two of flour and see how the dough changes. Be careful not to add too much, as it can alter the texture of your cookies.
Check Your Baking Temperature: Make sure your oven is preheated to the correct temperature. If the oven is too hot, the dough may spread too quickly and cause the cookies to flatten. If you notice that your cookies are browning too quickly on the edges but still look raw in the center, it could be a sign that your oven is too hot. Use an oven thermometer to ensure the temperature is accurate and adjust accordingly.
Consider Using Parchment Paper: Sometimes, cookies spread unevenly or stick to the baking sheet, leading to flat, misshapen cookies. Using parchment paper or a silicone baking mat can help cookies maintain their shape by providing a non-stick surface. This also helps prevent over-spreading and ensures even baking.
Avoid Overmixing the Dough: As mentioned earlier, overmixing can cause cookies to spread too much. When mixing the dough, aim to combine the ingredients until just incorporated. Overmixing activates the gluten in the flour, which can result in flatter, tougher cookies. By gently folding in the ingredients, you’ll ensure a tender, less spread-out cookie.
3. Types of Cookies That Are Naturally Flat
It’s also important to note that some types of cookies are naturally flatter than others, and this is a result of their ingredients or the method of preparation. These cookies are intentionally designed to have a thin, crispy texture, and there’s no need to make adjustments to the dough if this is the desired outcome.
Thin and Crispy Cookies: Some cookie recipes, such as those for thin butter cookies or lace cookies, are intended to be very thin and crispy. These cookies often use a high amount of butter, sugar, and a small amount of flour, which naturally causes them to spread significantly during baking. If you’re specifically looking to make thin cookies, there’s no need to worry about them spreading; they’re supposed to be flat!
Crispy Chocolate Chip Cookies: If you’re aiming for a crispy chocolate chip cookie, allowing the dough to spread and bake thinner can actually result in the perfect texture. For these cookies, reduce the moisture content by using less butter or increasing the flour slightly, which can promote a crispy, crunchy result.
4. The Balance Between Flat and Thick Cookies
While flat cookies are a common issue, there’s also the option of embracing the thin cookie for those who enjoy a crisp, delicate treat. If you want a balanced outcome, aim for a cookie that is neither too flat nor too thick—just the right amount of spread for a chewy yet slightly crisp edge. This can be achieved by making small tweaks to your recipe, such as adjusting the butter, chilling the dough longer, or carefully controlling the oven temperature.
—
In Conclusion
Flat cookies can be the result of several factors, but with a little knowledge and a few simple adjustments, you can control how much your cookies spread during baking. Whether you’re looking for a thick, chewy cookie or a thin, crispy one, understanding the causes of flat cookies and how to fix them can help you achieve the perfect texture every time. With the right technique and ingredients, you can bake cookies that are just the right thickness, ensuring a delicious and satisfying treat!
Cookies Too Hard or Too Soft: Finding the Perfect Balance
One of the most common challenges in cookie baking is achieving the perfect texture—whether it’s a chewy, soft cookie or a crisp, crunchy one. However, if your cookies are turning out too hard or too soft, it could be due to a number of factors in your recipe and baking process. In this section, we’ll explore the causes of both hard and soft cookies, and provide solutions to help you get the perfect texture every time.
1. Why Are My Cookies Too Hard?
Hard cookies, while sometimes desired for specific recipes (such as biscotti), are usually the result of a few common mistakes. Here’s why your cookies might be turning out too hard and what you can do to fix it:
Overbaking: One of the main reasons cookies turn out too hard is that they’ve been baked for too long. Overbaking causes the moisture in the cookies to evaporate, leaving them dry and tough. If your cookies are hard, it’s likely that they spent too much time in the oven. To avoid this, always keep an eye on your cookies toward the end of the suggested baking time. The edges should be golden, and the centers should still look a little soft and underbaked, as they’ll continue to cook slightly on the baking sheet once removed from the oven.
Too Much Flour: Adding too much flour can result in a dry dough, which leads to dense, hard cookies. Be sure to measure your flour correctly by spooning it into the measuring cup and leveling it off. Flour that’s packed into the cup will lead to more flour in the dough, making it too dry and causing the cookies to become hard. Alternatively, you can try using less flour or replacing a small portion with cornstarch to create a softer texture.
Overmixing the Dough: Overmixing the dough can cause the development of too much gluten, which leads to a tougher cookie. Gluten helps provide structure to baked goods, but when it’s overdeveloped, the cookies can turn out tough and hard. To avoid overmixing, mix the dough only until the ingredients are just combined. You should stop mixing as soon as the flour is incorporated into the dough.
Using the Wrong Sugar: Sugar affects the texture of cookies, so using the wrong type can lead to hard cookies. For instance, using only granulated sugar can lead to a crisp, dry texture. To achieve a softer, more tender cookie, use a mix of granulated sugar and brown sugar. Brown sugar adds moisture due to its molasses content, creating a softer, chewier texture.
Not Enough Fat: Fat (usually butter or oil) plays a key role in creating a soft, tender cookie. If your recipe uses too little fat, or if the fat is too cold, the cookies can turn out dry and hard. Make sure your butter is at room temperature for optimal mixing, or try adding a bit more fat to the dough if the texture is too dry.
Baking at Too High a Temperature: Baking cookies at too high of a temperature can cause the outside to crisp up too quickly, leaving the inside undercooked. This results in cookies that are hard on the outside and raw or gooey on the inside. Baking at a moderate temperature (around 350°F/175°C) ensures that the cookies cook evenly, allowing the texture to remain soft and chewy.
2. Why Are My Cookies Too Soft?
On the other hand, cookies that are too soft might be underbaked or contain too much moisture. If you prefer a firm, chewy texture but your cookies turn out too soft, here’s why it might be happening and how to fix it:
Underbaking: If your cookies are too soft, they may not have been baked long enough. Underbaking can result in a cookie that’s doughy in the center and too soft to hold its shape. To fix this, make sure the edges of your cookies are lightly golden and that they’re firm to the touch when you take them out of the oven. The center can still be slightly soft, but it will firm up as the cookies cool on the baking sheet.
Too Much Liquid: Excess moisture from ingredients like eggs, butter, or other liquid-based additions can lead to a soft, overly moist dough. If you’re using a recipe that calls for a lot of wet ingredients, you may want to reduce the amount slightly or increase the flour to balance the moisture levels. Alternatively, ensure that your wet ingredients are at the proper temperature, as cold butter can add moisture to the dough, while too much egg can make it too soft.
Chilling the Dough Is Not Enough: Chilling the cookie dough before baking helps to solidify the fat (usually butter), which in turn helps the dough maintain its shape and prevents it from spreading too much during baking. If you skip chilling the dough or don’t chill it for long enough, your cookies may spread too much and end up soft and thin. To avoid this, chill your dough for at least 30 minutes to an hour, or even overnight if you have time.
Overcrowding the Baking Sheet: When cookies are placed too close together on the baking sheet, they don’t have enough space to spread and bake evenly. As a result, they can become soft and doughy in the center. Always leave enough room between each cookie (usually around 2 inches) so they can spread properly and bake evenly.
Too Much Baking Powder or Baking Soda: The leavening agents in your cookies, such as baking soda or baking powder, cause the dough to rise and spread as the cookies bake. Using too much of these agents can cause the cookies to puff up too much, leading to a soft and sometimes cakey texture. Follow the recipe’s measurements closely, and avoid adding extra leavening agents unless specified in the recipe.
3. How to Fix Cookies That Are Too Hard or Too Soft
If you’re struggling to find the balance between too hard and too soft cookies, here are some adjustments you can make to get the perfect texture:
Adjust the Baking Time: If your cookies are too hard, try reducing the baking time slightly. If they’re too soft, make sure they’re fully baked and allow them to firm up on the baking sheet for a few minutes after removing them from the oven.
Modify the Fat Content: If your cookies are too hard, add a little more butter or fat to make them softer. Conversely, if they’re too soft, reduce the amount of butter or other fats to help the dough set up better during baking.
Use the Right Sugar: For soft, chewy cookies, use a mix of granulated sugar and brown sugar. Brown sugar adds moisture to the dough, making the cookies softer. If your cookies are too soft, using more granulated sugar or adjusting the proportions of sugar can help.
Use Room Temperature Ingredients: When mixing your cookie dough, ensure that your butter, eggs, and other ingredients are at room temperature. This helps create a smooth dough that incorporates air evenly, leading to the perfect texture.
Chill the Dough Properly: If your cookies are too soft, try chilling the dough for a longer period. Chilling helps firm up the fat and gives the dough the right consistency to prevent spreading too much and becoming soft.
Measure Your Ingredients Accurately: Always measure your ingredients properly, especially flour, butter, and sugar. Too much flour or sugar can lead to hard cookies, while too much liquid can lead to soft ones.
4. The Texture You Want: Soft and Chewy vs. Crispy and Crunchy
There’s no one-size-fits-all when it comes to the ideal cookie texture. Some people prefer a soft, chewy chocolate chip cookie, while others love a crisp, crunchy bite. Here’s a quick guide to getting the texture you want:
For Soft, Chewy Cookies: Use brown sugar, ensure enough fat in the dough, and don’t overbake the cookies. You can also under-mix the dough slightly to keep the texture tender.
For Crispy, Crunchy Cookies: Use more granulated sugar, bake the cookies a little longer, and ensure the dough is properly chilled. Reducing the amount of fat in the dough can also help achieve a crispier texture.
—
In Conclusion
Getting the right texture for your cookies—whether soft, chewy, hard, or crispy—comes down to understanding the factors that influence how they bake. By adjusting your ingredients, baking times, and techniques, you can correct cookies that are too hard or too soft and achieve the perfect texture. With a little practice and attention to detail, you’ll be able to bake cookies that are exactly how you want them every time!
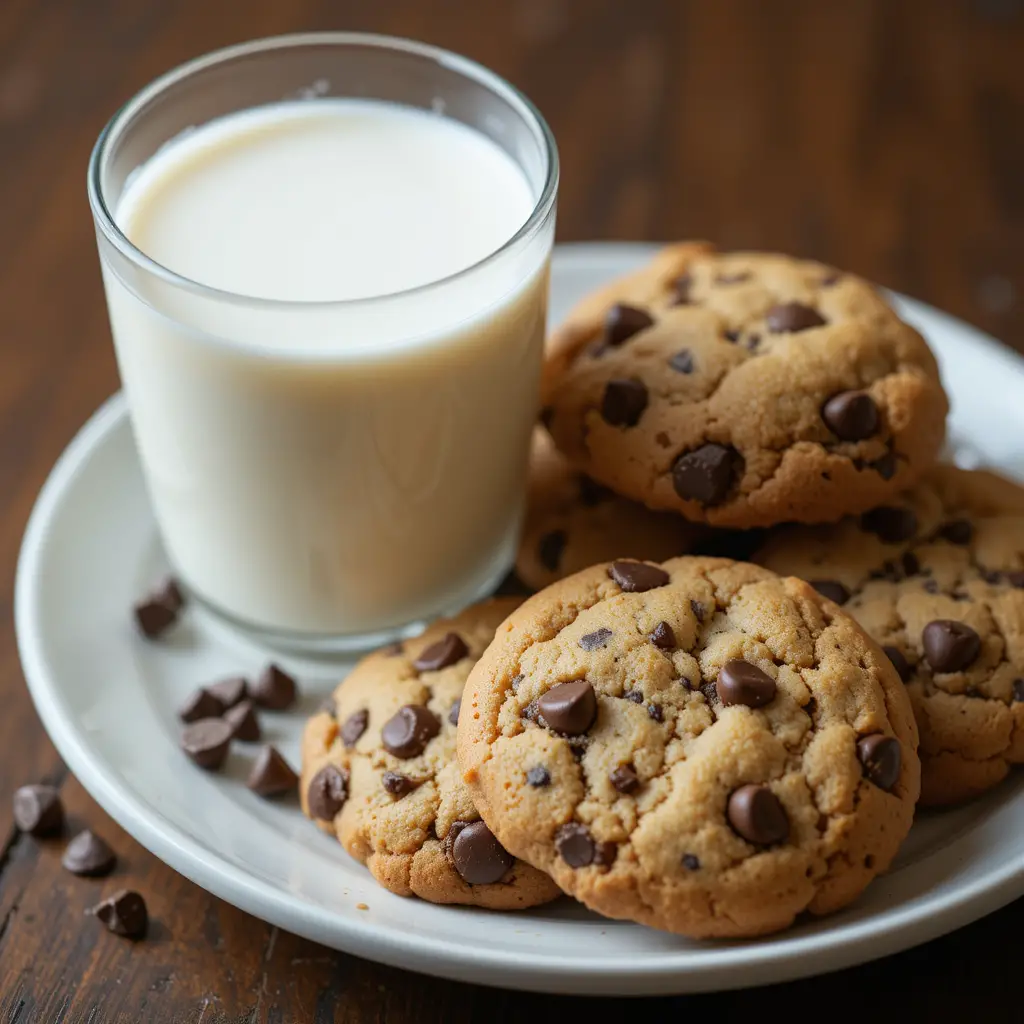
Burnt Bottoms: Why It Happens and How to Fix It
Burnt bottoms are a common issue when baking cookies, and they can be frustrating when the rest of the cookie looks perfect. While a golden-brown edge and soft center are the desired outcome for most cookie recipes, a burnt bottom can ruin the texture and flavor of your cookies. This problem typically arises from uneven heat distribution, improper baking methods, or the wrong type of baking sheet. In this section, we’ll explore why burnt bottoms happen and offer tips to help you avoid this issue for perfectly baked cookies.
1. Causes of Burnt Bottoms
Several factors can contribute to burnt bottoms, leading to an uneven or unpleasant result. Here’s a breakdown of the most common causes:
Baking at Too High of a Temperature: One of the most common reasons for burnt bottoms is baking at a temperature that is too high. If the oven is too hot, the bottom of the cookies may overcook before the tops have a chance to bake properly. This happens because the heat from the oven is too intense at the bottom of the baking sheet, causing the sugars and fats to burn quickly. To avoid this, always make sure your oven temperature is accurate. If your oven runs hot, reduce the temperature slightly (for example, baking at 325°F/160°C instead of 350°F/175°C) and keep an eye on the cookies.
Baking Directly on a Dark or Thin Baking Sheet: The type of baking sheet you use can affect how your cookies bake. Dark-colored baking sheets tend to absorb more heat, which can cause the bottoms of the cookies to cook too quickly and burn. Additionally, thin baking sheets don’t distribute heat evenly, leading to hot spots that can result in uneven baking. To fix this, opt for a light-colored or shiny baking sheet, as these reflect heat more evenly, preventing excessive heat buildup at the bottom. If using dark sheets, reduce the baking temperature slightly to compensate.
Placing Cookies Too Close to the Oven Heating Element: If your cookies are placed too close to the heating element at the bottom of the oven, the direct heat can cause the bottoms to burn while the rest of the cookie remains undercooked. This is particularly a problem when using a conventional oven that lacks an even heat distribution system. To avoid this, always place the baking sheet on the center rack of the oven to ensure more even heat circulation. This helps the cookies bake from all sides, reducing the risk of burnt bottoms.
Baking for Too Long: Overbaking is another reason for burnt bottoms. When cookies are left in the oven for too long, the heat continues to work its way through the dough, causing the bottoms to burn. This can happen even if the tops of the cookies appear golden and cooked. If your cookies are consistently burning on the bottom, check the baking times recommended in the recipe and start checking the cookies a minute or two earlier than suggested. The cookies should look just set at the edges but still slightly soft in the center when you take them out of the oven. They will continue cooking on the baking sheet after removal.
Overcrowding the Baking Sheet: When too many cookies are placed on the same baking sheet, they may not bake evenly, which can result in some cookies having burnt bottoms while others are underbaked. Overcrowding can also cause the cookies to bake slower or unevenly due to restricted airflow. Be sure to leave enough space between each cookie (typically 2 inches apart) to allow for even heat distribution during baking.
2. How to Prevent Burnt Bottoms
Now that we’ve explored the common causes of burnt bottoms, let’s go over some practical solutions to ensure your cookies bake evenly and avoid any unwanted charring.
Use a Lighter-Colored Baking Sheet: As mentioned earlier, the color of your baking sheet plays a significant role in how your cookies bake. Light-colored or shiny baking sheets reflect heat, helping to ensure that the cookies bake evenly. If you only have dark baking sheets, try lowering the oven temperature by 10–15°F (about 5–10°C) to prevent excessive heat absorption.
Place Your Rack in the Center: Position the baking sheet in the center of the oven, where the heat is most evenly distributed. Avoid placing the cookies too close to the bottom or top heating elements, as this will cause uneven baking and burnt bottoms. The middle rack allows the cookies to bake from all sides, giving you the perfect golden-brown cookie without burnt edges.
Check the Oven Temperature: Oven temperatures can vary, and sometimes your oven may not be as accurate as it seems. Use an oven thermometer to check the actual temperature inside the oven and ensure that it matches the temperature set on the dial. If your oven tends to run hot, lower the temperature by 10-15°F to avoid burning the bottoms.
Line Your Baking Sheet: Always line your baking sheet with parchment paper or use a silicone baking mat. These materials provide a protective layer between the cookies and the baking sheet, helping to prevent the bottoms from getting too crispy or burnt. Parchment paper also promotes even heat distribution and makes it easier to remove the cookies once they’re done.
Use a Thick Baking Sheet: Thick, heavy-duty baking sheets distribute heat more evenly than thin ones. This helps to prevent hot spots that could burn the bottoms of your cookies. If you’re using a thin baking sheet and experiencing burnt bottoms, consider switching to a heavier sheet for a more even bake.
Rotate the Baking Sheet: If you’re baking multiple trays of cookies at once or if you have an uneven oven, it can be helpful to rotate the baking sheet halfway through the baking time. This ensures that the cookies on all sides receive equal exposure to heat and that none of them burn on the bottom while others are still undercooked.
Monitor the Baking Time: Keep a close eye on your cookies during the last few minutes of baking. Every oven is different, so your cookies might bake a little faster or slower than the recipe suggests. Check for signs that they are almost done: the edges should be golden, and the centers should look slightly puffed but still soft. If the bottoms are already browning, take the cookies out immediately.
Use a Cooling Rack: After baking, transfer the cookies to a wire cooling rack rather than leaving them on the baking sheet. This prevents the heat from continuing to cook the bottoms and allows the cookies to cool evenly. If you leave the cookies on the hot baking sheet, the residual heat can cause the bottoms to burn further.
3. Fixing Burnt Bottoms After Baking
If you’ve already baked your cookies and the bottoms are burnt, there are a few things you can do to salvage them:
Trim the Burnt Bottoms: If the bottoms are slightly burnt but the cookies are still salvageable, you can carefully trim the burnt edges with a sharp knife or kitchen scissors. This will give the cookies a neater appearance and remove the bitter taste from the burnt parts.
Repurpose the Cookies: If the bottoms of your cookies are too burnt to eat on their own, consider using them in other recipes. Crumbled-up cookies can be turned into cookie crumbs for pie crusts, ice cream toppings, or layered desserts like trifles.
Turn Them Into Ice Cream Sandwiches: If your cookies are too hard or burnt on the bottom but still have a decent texture, you can turn them into ice cream sandwiches. The ice cream will mask the burnt flavor, and the cookies will still be enjoyable in a new form.
—
In Conclusion
Burnt bottoms are a common cookie-baking issue, but with a little attention to detail, you can prevent them and achieve perfectly baked cookies every time. By ensuring that your oven temperature is accurate, using the right baking sheets, and watching your cookies carefully during baking, you’ll avoid this issue and be able to enjoy beautifully golden cookies with no burnt bottoms. Keep these tips in mind, and you’ll be on your way to perfect cookies with an even bake!
Uneven Baking: How to Achieve Consistent Results Every Time
Uneven baking is another common problem when baking cookies. If you’ve ever pulled a batch of cookies out of the oven and noticed that some are perfectly golden while others are underbaked or overdone, you’ve experienced uneven baking. Unevenly baked cookies can result in inconsistent textures, with some being too raw in the middle and others too crispy or burnt on the edges. In this section, we’ll explore the reasons for uneven baking and offer tips to help you bake a uniform batch of cookies with perfect results.
1. Causes of Uneven Baking
Uneven baking can be caused by several factors, including oven issues, baking sheet arrangement, and even how the dough is prepared. Let’s break down the most common causes of uneven baking:
Inaccurate Oven Temperature: One of the primary causes of uneven baking is an oven that’s not heating evenly or running at an incorrect temperature. Many home ovens have hot spots, areas that are hotter than others, which can result in cookies baking unevenly. Additionally, an oven that is too hot or too cold will cause the cookies to bake unevenly. For instance, if the temperature is too low, the cookies may spread too much and end up undercooked in the center, while if it’s too high, the edges may bake too quickly while the center remains raw.
Uneven Heat Distribution: Conventional ovens, especially older models, may have poor heat distribution. This can lead to cookies baking unevenly, with some parts of the baking sheet getting more heat than others. For example, the back of the oven is often hotter than the front, causing cookies at the back of the tray to bake faster than those at the front. As a result, you might see uneven browning, with some cookies being perfectly baked and others underbaked or overbaked.
Baking Sheet Placement: The position of your baking sheet inside the oven can significantly impact how your cookies bake. If the baking sheet is placed too close to the oven’s heating element—whether at the top or bottom—your cookies may bake unevenly. The closer they are to the element, the faster the bottoms may bake, leaving the tops undercooked. Placing the baking sheet on the lower rack can cause the cookies to burn on the bottom before the tops are done.
Overcrowding the Baking Sheet: Overcrowding the baking sheet can prevent proper airflow around the cookies, leading to uneven baking. If cookies are placed too close together, they may not spread or bake evenly, causing some cookies to bake more quickly than others. In this case, the cookies on the outside edges may bake faster and become overdone, while the ones in the middle may remain undercooked.
Incorrect Dough Consistency: Uneven dough consistency can also contribute to uneven baking. If the dough is not mixed properly or if it contains clumps of dry ingredients, the cookies may bake unevenly. For example, large clumps of flour or sugar can create areas of dough that are drier and harder, while other parts may remain too moist, resulting in inconsistent baking.
Oven Door Opening Frequently: Opening the oven door frequently can cause temperature fluctuations, which can lead to uneven baking. Every time the oven door is opened, hot air escapes, and the oven temperature drops. This can cause some cookies to bake faster than others, depending on when they’re in the oven when the temperature change occurs.
2. How to Prevent Uneven Baking
Now that we’ve identified the causes of uneven baking, let’s look at how to prevent this issue and bake perfectly even cookies every time.
Use an Oven Thermometer: The first step to ensuring even baking is to check the accuracy of your oven temperature. Many home ovens have temperature fluctuations, so the temperature setting on your oven may not always match the actual temperature inside. An oven thermometer is a simple tool that can give you an accurate reading of your oven’s temperature. If your oven is running hotter or cooler than the setting, adjust accordingly. For instance, if your oven is running hot, lower the temperature by 10–15°F (5–8°C). This will help prevent uneven baking and ensure your cookies bake evenly.
Preheat the Oven Properly: Make sure to preheat the oven fully before putting your cookies in. If you add cookies to an oven that hasn’t reached the desired temperature, they may bake unevenly, with the bottoms becoming overcooked or undercooked before the tops get a chance to bake. Allow the oven to preheat for 10–15 minutes and ensure it’s at the proper temperature before putting your cookies in.
Use an Even Baking Sheet: A good-quality, heavy-duty baking sheet helps distribute heat more evenly than thin or flimsy sheets. Light-colored baking sheets reflect heat, helping your cookies bake more evenly. Additionally, opt for a flat, sturdy baking sheet that doesn’t warp when heated. Warped baking sheets can cause cookies to bake unevenly, with some areas receiving more heat than others. If you notice your baking sheet warping, consider investing in a higher-quality one for better heat distribution.
Space Cookies Properly: To ensure even baking, always space your cookies about 2 inches apart on the baking sheet. This allows the cookies enough room to spread evenly while baking. If cookies are placed too close together, they may crowd each other and bake unevenly, resulting in some cookies being overcooked and others underbaked.
Rotate the Baking Sheet: If your oven tends to bake unevenly, rotating the baking sheet halfway through the baking time can help ensure uniform baking. This is especially helpful if your oven has hot spots. Just be sure to rotate the baking sheet carefully to avoid disturbing the shape of the cookies.
Avoid Overcrowding the Oven: If you’re baking multiple trays of cookies, bake them one at a time or rotate them between racks to ensure even baking. If you place too many trays in the oven at once, the cookies may not bake evenly, especially if they are too close to each other or the oven’s heating element. If you have to bake multiple trays, rotate the racks and switch the trays around halfway through the baking time.
Use Parchment Paper or Silicone Mats: Lining your baking sheet with parchment paper or a silicone baking mat helps to evenly distribute heat across the bottom of the cookies. This prevents direct contact with the hot metal, which can sometimes lead to uneven baking. Both parchment paper and silicone mats also promote easy removal of the cookies after baking and prevent sticking.
Place the Baking Sheet on the Center Rack: Always place the baking sheet on the center rack of the oven to ensure that the cookies bake evenly. The center rack allows for better heat circulation around the cookies, preventing hot spots at the top or bottom of the oven from causing uneven baking. Avoid placing the baking sheet too close to the top or bottom heating elements, as this can cause the cookies to bake unevenly.
Don’t Open the Oven Door Too Often: Avoid opening the oven door repeatedly while baking, as this can cause temperature fluctuations and lead to uneven baking. Only open the oven door when necessary to check the progress of the cookies, and do so quickly to minimize heat loss.
3. How to Fix Cookies That Are Unevenly Baked
If you pull your cookies from the oven and find that some are overbaked while others are underbaked, there are a few things you can do to salvage the situation:
Finish Baking the Undercooked Cookies: If you notice that some of your cookies are underbaked, return the baking sheet to the oven for a few more minutes. This will allow the cookies to cook fully without overbaking the already done ones. Be sure to monitor them closely to avoid burning.
Trim Overbaked Cookies: If some of your cookies have become too crispy or burnt on the edges, you can trim the burnt parts off with a knife or kitchen shears. The remaining cookies should still be perfectly fine, and you can enjoy them with a slightly neater appearance.
Repurpose the Cookies: If the uneven baking has caused a significant texture difference between the cookies, you can repurpose the underbaked ones into another recipe. For example, crumble them up and add them to ice cream, yogurt, or use them as a topping for cakes or pies.
—
In Conclusion
Uneven baking is a common issue that can cause frustration when baking cookies, but by understanding the causes and applying these simple tips, you can bake perfectly even cookies every time. With accurate oven temperatures, proper baking sheet placement, and a few adjustments to your baking method, you can achieve the perfect batch of cookies with consistent results throughout. Keep these tips in mind, and your cookies will bake beautifully from edge to edge!
Conclusion: Mastering the Art of Perfect Chocolate Chip Cookies
Baking the perfect batch of chocolate chip cookies requires attention to detail, from the ingredients you choose to the techniques you use. By understanding the importance of each component—such as butter versus margarine, the role of flour and sugar, and the choice of chocolate chips—you can tailor your cookies to achieve the perfect texture and flavor every time. Additionally, small but significant tips like not overmixing the dough, chilling it before baking, and using proper baking sheets can make all the difference in your final product.
It’s also essential to pay attention to the temperature of your oven, how you space your cookies, and the timing of your bake. With these adjustments, you can avoid common issues like burnt bottoms, uneven baking, or cookies that are too soft or too hard. By experimenting with different add-ins and mix-ins, you can personalize your cookies to fit any occasion, from seasonal flavors to unique twists on the classic chocolate chip cookie.
Remember, baking is as much about enjoying the process as it is about savoring the result. Whether you prefer chewy or crispy cookies, perfecting your method and being mindful of every detail will lead to consistently delicious outcomes. Happy baking, and may your kitchen always be filled with the sweet scent of fresh-baked chocolate chip cookies!