
There’s nothing quite as comforting as a perfectly made grilled cheese sandwich. With its crispy, golden-brown bread and gooey, melty cheese, this classic dish is a favorite for all ages. But what makes the best grilled cheese sandwich? It’s all about the right combination of ingredients, technique, and a few pro tips to get that perfect crunch and stretch.
In this guide, I’ll walk you through everything you need to know—from choosing the best cheese and bread to cooking it just right for a crispy, buttery exterior and a gooey, irresistible center. Whether you’re a beginner or a grilled cheese enthusiast, you’ll learn how to make the ultimate version of this beloved sandwich. Let’s get started!
Choosing the Best Ingredients for Grilled Cheese
Best Cheese for Melting
The cheese you choose can make or break your grilled cheese sandwich. The goal is to achieve that perfect gooey, stretchy, and creamy melt that makes each bite satisfying. Not all cheeses melt the same way, so here are some of the best options to use:
1. Classic Cheddar – Sharp & Flavorful
Cheddar cheese is one of the most popular choices for a grilled cheese sandwich. It melts beautifully and provides a sharp, tangy flavor that pairs well with almost any type of bread. For the best melt, go for medium or sharp cheddar, as extra sharp varieties may not be as smooth when melted.
2. American Cheese – Ultimate Creaminess
If you’re looking for that iconic, diner-style grilled cheese, American cheese is the way to go. It has a super creamy, smooth melt and a mild flavor that’s perfect for a simple, nostalgic sandwich. While it may not be as gourmet as other cheeses, its melting ability is unmatched.
3. Mozzarella – Stretchy & Mild
Mozzarella is a fantastic option if you love a cheese pull in your sandwich. It’s mild in flavor, so it pairs well with stronger cheeses like cheddar or gouda. Fresh mozzarella melts well but can release moisture, so low-moisture mozzarella is the best choice for a crispier result.
4. Gouda – Buttery & Nutty
Gouda adds a rich, buttery, and slightly nutty taste to your grilled cheese. It melts well, especially when using young gouda, which is softer and creamier than aged gouda. This cheese pairs wonderfully with caramelized onions or bacon for a gourmet twist.
5. Gruyère – Rich & Slightly Sweet
A staple in French-style grilled cheese (Croque Monsieur), Gruyère melts into a smooth, velvety texture with a slightly sweet and nutty taste. It’s a great option for an elevated grilled cheese experience and works well with sourdough bread and Dijon mustard.
6. Monterey Jack – Smooth & Mild
If you prefer a mild, creamy cheese that melts effortlessly, Monterey Jack is a great choice. It’s similar to mozzarella in texture but has a slightly richer flavor. Pepper Jack, a spicy variation, is perfect for adding a little heat to your sandwich.
Pro Tip: Blend Your Cheeses for the Best Flavor
For an extra gooey and flavorful grilled cheese, try combining different cheeses. A great blend could be:
Cheddar + American Cheese for sharpness and creaminess
Mozzarella + Gruyère for a perfect melt and a hint of nuttiness
Gouda + Monterey Jack for a rich, smooth bite
No matter which cheese you choose, make sure to use freshly sliced or grated cheese, as pre-shredded cheese often contains anti-caking agents that can affect melting quality.
Want to experiment? Try mixing cheeses to create your own signature grilled cheese masterpiece!
Bread Choices: The Foundation of a Perfect Grilled Cheese
The bread you choose plays a crucial role in the texture, crispiness, and overall taste of your grilled cheese sandwich. While almost any bread can technically work, some options deliver a far superior crunch, structure, and flavor than others. Let’s explore the best bread types for making the ultimate grilled cheese.
1. Sourdough – Crispy, Tangy, and Hearty
Sourdough is a top choice for grilled cheese because of its firm structure and tangy flavor. The slightly chewy crust crisps up beautifully, while the soft interior creates the perfect balance with melted cheese. It pairs particularly well with stronger cheeses like sharp cheddar, gruyère, or gouda.
Best for: A rustic, artisan-style grilled cheese with complex flavors.
2. Brioche – Buttery and Soft
If you love a rich, slightly sweet, and buttery grilled cheese, brioche is the way to go. This soft, slightly sweet bread creates a golden-brown, melt-in-your-mouth texture when toasted with butter or mayo. Because it’s naturally soft, it works best with creamy cheeses like mozzarella, Monterey Jack, or American cheese.
Best for: A decadent, dessert-like grilled cheese experience.
3. Classic White Bread – The Nostalgic Choice
For a traditional, childhood-favorite grilled cheese, nothing beats simple white sandwich bread. It’s soft, neutral in flavor, and crisps up well when grilled. This is the go-to choice for a classic cheddar or American cheese sandwich. While it doesn’t have the complexity of sourdough or brioche, it’s perfect for a quick and easy grilled cheese fix.
Best for: A diner-style, no-fuss grilled cheese that’s all about comfort.
4. Whole Wheat Bread – Nutty and Wholesome
If you’re looking for a healthier alternative, whole wheat bread provides a nutty, slightly earthy flavor that complements cheeses like gouda, Swiss, or provolone. It’s higher in fiber and has a denser texture, which gives your grilled cheese a chewier bite.
Best for: A heartier, slightly healthier grilled cheese with added texture.
5. Rye Bread – Bold and Flavorful
For those who love a more distinct, robust flavor, rye bread adds a slightly earthy and malty taste to your grilled cheese. It pairs exceptionally well with Swiss cheese, gouda, or sharp cheddar. This is the go-to bread for a Reuben-style grilled cheese with corned beef or pastrami.
Best for: A gourmet-style grilled cheese with bold flavors.
6. Texas Toast – Thick and Crispy
Texas toast is simply extra-thick slices of white bread, and it’s perfect for making a super crispy, buttery grilled cheese. Because of its thickness, it holds up well to a lot of cheese and additional fillings, making it a great option for a stuffed or layered grilled cheese.
Best for: Extra indulgent, over-the-top grilled cheese sandwiches.
Pro Tip: Use Day-Old or Slightly Stale Bread
For an extra crispy and golden-brown crust, use day-old or slightly stale bread. Fresh, soft bread can sometimes become too soggy when buttered and grilled. Letting it sit out for a few hours before making your sandwich will help it crisp up better!
Final Thoughts: Choose the Right Bread for Your Style
For a classic grilled cheese: White bread or Texas toast with cheddar or American cheese.
For a gourmet touch: Sourdough or rye with gruyère, gouda, or Swiss cheese.
For a rich and buttery sandwich: Brioche with mozzarella or Monterey Jack.
For a healthier option: Whole wheat with gouda or provolone.
No matter which bread you choose, the secret to a perfect grilled cheese is toasting it properly—low and slow for the ultimate crispy, golden-brown crust!
Butter vs. Mayonnaise: Which One Makes the Best Grilled Cheese?
One of the key decisions when making a grilled cheese sandwich is choosing whether to spread butter or mayonnaise on the bread before grilling. Both options add richness and crispiness, but they create slightly different results. Let’s break down the pros and cons of each and find out which one works best for your grilled cheese style.
—
1. Butter – Classic and Rich
Butter has long been the traditional choice for making grilled cheese. It adds a rich, creamy, and slightly sweet flavor while creating a golden-brown, crispy crust.
Pros of Using Butter:
✅ Rich flavor – Butter adds a classic, slightly nutty taste that pairs beautifully with cheese.
✅ Deep golden-brown crust – Butter helps the bread develop a crispy and evenly browned surface.
✅ Natural ingredients – If you prefer a more natural option, real butter contains no additives.
Cons of Using Butter:
❌ Hard to spread when cold – If your butter is not softened, it can tear the bread while spreading.
❌ Burns faster – Butter has a lower smoke point than mayo, so it can burn if the heat is too high.
Best Way to Use Butter for Grilled Cheese:
Use softened butter for easier spreading. You can leave it at room temperature for about 30 minutes before making your sandwich.
Melt the butter in the pan instead of spreading it on the bread for an even coating and better crispiness.
Use clarified butter (ghee) if you want a more intense butter flavor and a higher smoke point to avoid burning.
—
2. Mayonnaise – Crispier and Foolproof
Mayonnaise is a secret ingredient that many chefs swear by for making the perfect grilled cheese. Since mayo is made with oil and egg yolks, it provides a higher smoke point, making it harder to burn the sandwich.
Pros of Using Mayonnaise:
✅ Easier to spread – Unlike butter, mayo is smooth and spreads evenly straight from the fridge.
✅ Creates a crispier crust – Because of its oil content, mayo produces a perfectly crispy, evenly browned exterior.
✅ Doesn’t burn easily – With a higher smoke point, mayo allows for slow and even browning without burning.
Cons of Using Mayonnaise:
❌ Less traditional flavor – Some people prefer the taste of butter over mayo for its classic richness.
❌ Can have a slight tang – Depending on the brand, mayo can add a hint of tanginess, which may not be desirable for everyone.
Best Way to Use Mayonnaise for Grilled Cheese:
Spread a thin, even layer on the outside of the bread before grilling.
Use a blend of mayo and butter to get the best of both worlds—mayo’s crispiness with butter’s flavor.
Try flavored mayo (like garlic mayo or chipotle mayo) for a creative twist on your grilled cheese.
—
3. Butter vs. Mayonnaise: Which One Wins?
Both butter and mayonnaise have their unique advantages, so the choice depends on what you’re looking for in your grilled cheese.
✅ Choose butter if you love a classic, rich taste and don’t mind a little extra effort in spreading.
✅ Choose mayonnaise if you want a foolproof, extra crispy sandwich with even browning.
✅ Use a mix of both for the ultimate balance of flavor and crispiness.
No matter which one you use, the key to perfecting your grilled cheese is cooking it low and slow—this ensures the bread crisps up beautifully while the cheese inside melts to perfection!
Step-by-Step Guide to Making the Perfect Grilled Cheese
Prepping Your Bread and Cheese: The Key to the Perfect Grilled Cheese
A great grilled cheese sandwich starts with proper preparation. How you handle your bread and cheese before grilling directly impacts the texture, crispiness, and meltiness of the final sandwich. Let’s dive into the essential steps to ensure you get a golden-brown crust and perfectly gooey center every time.
—
1. Preparing Your Bread: The Secret to a Crispy, Golden Crust
The bread is the foundation of your sandwich, so prepping it correctly makes all the difference. Here’s how to get it right:
a) Choose the Right Bread
Use day-old or slightly stale bread – Fresh bread can be too soft and may not crisp up as well when grilled. Slightly stale bread helps create a better crunch.
Go for medium-thickness slices – Too thin, and your sandwich won’t hold enough cheese; too thick, and the cheese may not melt properly before the bread burns.
b) Spread Your Butter or Mayonnaise Evenly
Apply a thin, even layer of butter or mayonnaise on the outside of both slices to create a perfect golden-brown crust.
Make sure the spread reaches all the way to the edges—this ensures an evenly crisped sandwich without dry, uncoated spots.
c) Preheat the Bread for Extra Crispiness (Optional)
For an extra crunchy exterior, lightly toast the bread in the pan before adding the cheese. This helps remove excess moisture and speeds up the grilling process, preventing soggy spots.
—
2. Preparing Your Cheese: The Secret to a Perfect Melt
Using the right cheese type, amount, and preparation method ensures that your grilled cheese is perfectly gooey inside.
a) Use the Right Cheese for Melting
Opt for soft, melty cheeses like cheddar, American, gouda, Swiss, or mozzarella.
Avoid hard, dry cheeses (like parmesan) unless mixed with a more melty cheese.
b) Grate or Slice Your Cheese for Even Melting
Grated cheese melts faster and more evenly than slices, reducing the risk of burning the bread before the cheese melts.
If using slices, cut them thinly and layer them evenly to avoid thick spots that take longer to melt.
c) Combine Cheese for the Best Flavor and Texture
Mixing different cheeses can enhance flavor and meltability. Try combinations like:
Sharp cheddar + Monterey Jack (for a rich, creamy taste)
Swiss + Gruyère (for a nutty, slightly sweet flavor)
Mozzarella + Provolone (for an ultra-stretchy cheese pull)
d) Use the Right Amount of Cheese
Too little cheese = Not enough gooey goodness.
Too much cheese = It may ooze out before fully melting.
A good rule of thumb is about ½ to ¾ cup of grated cheese per sandwich or 2-3 thin slices.
—
3. Assembling Your Sandwich: Layering Matters
Now that your bread and cheese are prepped, it’s time to assemble your sandwich correctly:
✅ Step 1: Place one slice of bread, buttered/mayo side down, on a preheated skillet.
✅ Step 2: Add your cheese (grated or sliced), ensuring even coverage.
✅ Step 3: Top with the second slice of bread, buttered/mayo side up.
✅ Step 4: Press lightly to ensure even contact with the pan, which helps create a perfectly crisp crust.
—
Final Tips for the Best Prepping Technique
✔ Room temperature cheese melts faster, so let it sit out for 10-15 minutes before using.
✔ Use a pan with a lid – Covering the pan for a minute or two helps trap heat, allowing the cheese to melt thoroughly before the bread gets too brown.
✔ Low and slow is key – Cooking at medium-low heat ensures a crispy crust and gooey cheese without burning the bread.
By following these bread and cheese prepping tips, you’ll achieve a crispy, golden crust with a perfectly melted, cheesy center—the ultimate grilled cheese experience!
Using the Right Pan: Achieve the Perfect Grilled Cheese Every Time
The pan you choose plays a crucial role in how your grilled cheese turns out. The right pan ensures even heat distribution, crispiness, and proper cheese melting, while the wrong pan can lead to uneven browning, burnt bread, or cheese that doesn’t fully melt. Let’s explore the best pan options and techniques for cooking the perfect grilled cheese sandwich.
—
1. The Best Types of Pans for Grilled Cheese
Not all pans are created equal when it comes to making the ultimate grilled cheese. Here are the best choices and why they work so well:
a) Cast Iron Skillet – The Top Choice
A cast iron skillet is the best pan for making grilled cheese because it retains and distributes heat evenly, ensuring a consistent golden-brown crust.
✅ Pros:
Provides even heat distribution, preventing burnt spots.
Retains heat well, allowing for a crispy crust.
Naturally non-stick when well-seasoned.
❌ Cons:
Can be heavy and harder to maneuver.
Requires proper maintenance to prevent rusting.
Best for: Classic, perfectly crispy grilled cheese sandwiches.
—
b) Non-Stick Skillet – Easy and Foolproof
A non-stick pan is a great option if you want an easy cleanup and minimal effort. It allows the sandwich to cook without sticking, even if you use less butter or mayo.
✅ Pros:
Prevents sticking, making it easy to flip the sandwich.
Requires less butter or mayo for crispiness.
Lightweight and easy to handle.
❌ Cons:
Doesn’t retain heat as well as cast iron.
Some non-stick coatings wear down over time.
Best for: Quick and easy grilled cheese with minimal mess.
—
c) Stainless Steel Pan – For a Golden, Restaurant-Style Crust
A stainless steel pan can also work well for grilled cheese, but it requires a bit more technique. Since stainless steel doesn’t have a natural non-stick surface, you need to use enough butter or mayo to prevent sticking.
✅ Pros:
Produces a deep golden-brown crust.
Durable and long-lasting.
Works well with medium to low heat cooking.
❌ Cons:
Food can stick if not preheated properly.
Requires more butter or oil to prevent sticking.
Best for: Those who want a professional-style crispy crust with a little more effort.
—
d) Griddle – The Best for Cooking Multiple Sandwiches
If you’re making more than one grilled cheese at a time, a flat-top griddle is a fantastic choice. It provides a large cooking surface and maintains even heat across multiple sandwiches.
✅ Pros:
Can cook several sandwiches at once.
Provides a flat, even cooking surface.
Great for parties or family meals.
❌ Cons:
Takes up more space in the kitchen.
Usually requires an external heat source (stovetop or electric).
Best for: Cooking multiple grilled cheese sandwiches at once.
—
2. Heat Control: Why Low and Slow Wins
Regardless of the pan you use, heat control is key to making the perfect grilled cheese.
🔥 Low to Medium Heat (Best Choice)
Cooking over medium-low to medium heat ensures the bread crisps up gradually while allowing the cheese to melt fully.
A slower cooking process prevents burning and ensures a gooey, evenly melted cheese center.
🔥 High Heat (Not Recommended)
High heat will brown the bread too quickly while leaving the cheese unmelted inside.
You’ll likely end up with burnt bread and cold cheese, which ruins the sandwich.
—
3. Preheating the Pan: A Crucial Step
No matter which pan you choose, preheating it before adding the sandwich helps achieve an even, golden crust.
✅ How to Preheat the Pan Properly:
1. Set your stove to medium-low or medium heat.
2. Let the pan warm up for 1-2 minutes before adding the sandwich.
3. If using butter, melt it in the pan before placing the sandwich down for extra crispiness.
—
Final Tips for Using the Right Pan
✔ Use a lid to trap heat – Covering the pan for a minute or two helps melt the cheese faster without overcooking the bread.
✔ Flip carefully – Use a spatula to gently turn the sandwich only once to keep it intact.
✔ Adjust heat as needed – If your bread is browning too fast, lower the heat to avoid burning before the cheese melts.
By choosing the right pan and controlling the heat, you’ll achieve a crispy, golden crust with perfectly melted cheese—every time!
Cooking Tips for a Golden, Crispy Finish
Achieving the perfect grilled cheese is all about technique. A golden-brown crust with a crispy texture and a gooey, melted center requires controlled heat, the right amount of fat, and proper flipping techniques. Below are some pro tips to ensure your grilled cheese turns out crispy, delicious, and evenly cooked every time.
—
1. Use the Right Amount of Butter or Mayonnaise
One of the secrets to achieving a crispy, golden-brown crust is using the right amount of fat on the outer surface of the bread.
a) Butter for a Rich, Classic Flavor
Use softened butter to ensure even spreading on the bread.
Salted butter enhances flavor, while unsalted butter allows for more control over seasoning.
Melt butter in the pan before placing the sandwich for an extra crispy bottom layer.
b) Mayonnaise for an Extra Crispy Finish
Mayonnaise has a higher smoke point than butter, meaning it allows for a slower, more even browning without burning.
Spreading a thin, even layer ensures crispiness without making the sandwich greasy.
Some people prefer using half butter, half mayonnaise for the best of both worlds—richness from the butter and crispiness from the mayo.
✅ Pro Tip: Always spread your fat all the way to the edges of the bread to ensure every bite is crispy!
—
2. Control the Heat for Even Browning
The biggest mistake people make when cooking grilled cheese is using heat that’s too high. This causes the bread to brown too quickly before the cheese melts.
a) Cook on Medium-Low to Medium Heat
Cooking at medium-low to medium heat allows the bread to toast slowly, giving the cheese enough time to melt.
This prevents the dreaded burnt bread, unmelted cheese situation.
b) Preheat the Pan Before Adding the Sandwich
A preheated pan ensures even cooking and prevents sticking.
To test if the pan is ready, sprinkle a drop of water—if it sizzles lightly and evaporates, it’s at the right temperature.
✅ Pro Tip: If the bread is browning too fast but the cheese isn’t melted, lower the heat and cover the pan with a lid for 30-60 seconds to trap heat and help the cheese melt.
—
3. Use a Heavy Pan and Gentle Pressure
The type of pan you use and how you press your sandwich can make a big difference in the crispiness.
a) Use a Heavy Skillet (Like Cast Iron) for the Best Results
Cast iron skillets hold heat well and ensure even browning.
A non-stick pan is also a good option if you prefer easy flipping and cleaning.
b) Press Lightly for Extra Crispiness
Use a spatula to gently press down on the sandwich while it cooks.
If you want an even thinner, ultra-crispy sandwich, you can place another heavy pan or a sandwich press on top while cooking.
✅ Pro Tip: If using a press, don’t smash the sandwich too hard, or the cheese may ooze out before it melts properly!
—
4. Flip Only Once for an Even Toast
Flipping too often can disturb the even browning and cause the sandwich to fall apart.
a) When to Flip
Wait until the first side is golden brown (about 3-4 minutes on medium heat) before flipping.
The bread should feel firm and crisp before you attempt to turn it over.
b) How to Flip Without Messing It Up
Use a wide spatula to slide under the sandwich smoothly.
Flip gently and in one motion to prevent the cheese from shifting.
✅ Pro Tip: If the sandwich is too delicate to flip easily, you can slide it onto a plate and then invert it back into the pan!
—
5. Let the Sandwich Rest Before Cutting
Once the sandwich is done cooking, it’s tempting to slice right into it—but letting it rest for a minute makes a huge difference!
a) Why Resting Matters
Resting for 30-60 seconds allows the cheese to set slightly, preventing it from oozing out immediately.
It also lets the flavors settle, making for a better texture and taste.
b) How to Cut Without Squishing the Sandwich
Use a sharp serrated knife or a chef’s knife to cut cleanly through the crispy bread.
Slice diagonally for the classic grilled cheese look and the perfect cheese pull.
✅ Pro Tip: Wipe the knife clean between cuts to avoid dragging cheese across the bread!
—
Final Tips for the Ultimate Golden, Crispy Grilled Cheese
✔ Use thick-cut bread for a satisfying crunch without getting too soggy.
✔ Cover the pan briefly to help the cheese melt faster without overcooking the bread.
✔ Don’t overload the sandwich with cheese—too much can cause uneven melting and spills.
✔ Experiment with different fats—try olive oil, duck fat, or even garlic butter for unique flavors.
By following these expert cooking tips, you’ll achieve a grilled cheese sandwich that’s crispy, golden, and gooey every time!
Grilled Cheese Variations to Try
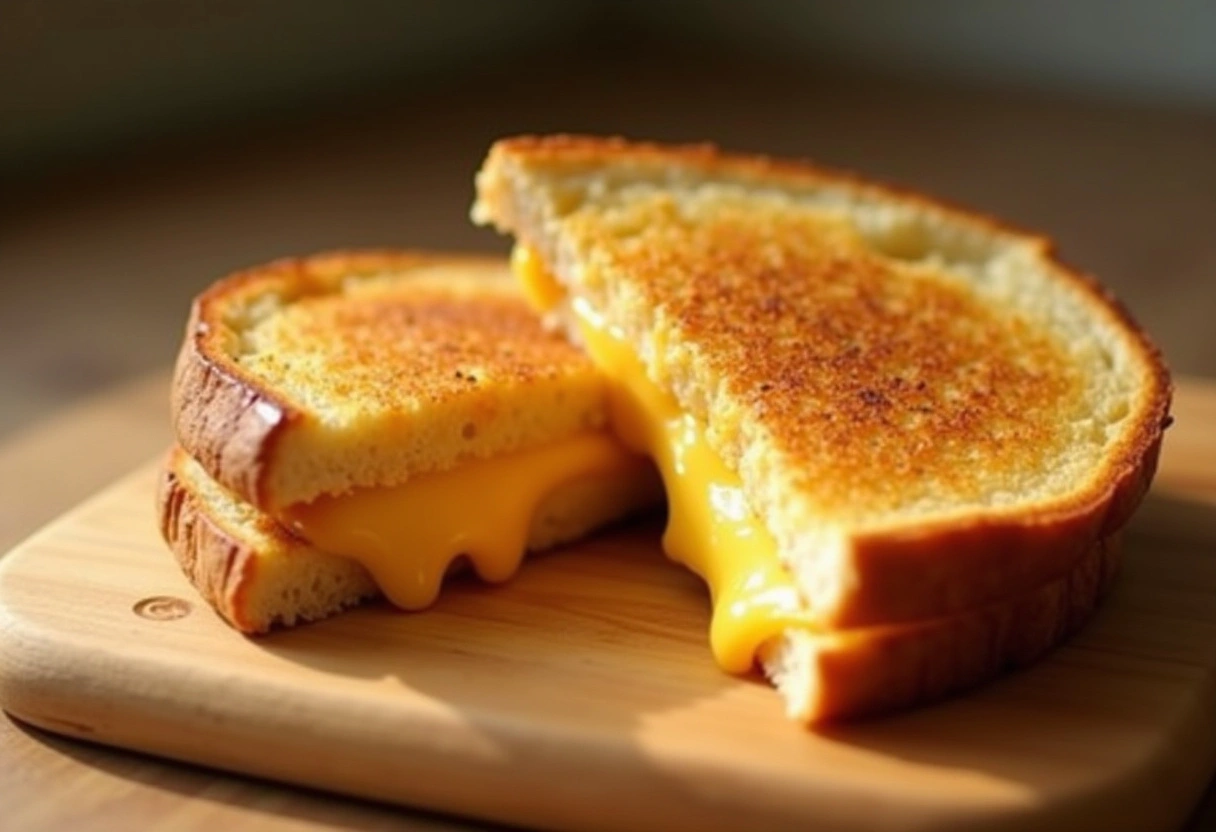
Classic American Grilled Cheese
The Classic American Grilled Cheese is the ultimate comfort food, loved for its crispy golden crust and gooey melted cheese. It’s simple, delicious, and nostalgic, evoking childhood memories of quick, satisfying meals. But while it may seem basic, getting it just right requires attention to detail—from the type of bread and cheese to the cooking technique.
Here’s everything you need to know to make the perfect Classic American Grilled Cheese at home!
—
1. The Traditional Ingredients
A true American grilled cheese keeps things simple with just a few key ingredients:
White sandwich bread – Soft, slightly sweet, and toasts beautifully to a golden brown.
American cheese – Known for its superior melting ability, smooth texture, and mild, creamy flavor.
Butter or mayonnaise – Ensures a crispy, golden exterior while adding rich flavor.
These three components come together to create a sandwich that’s both crispy and gooey, simple yet satisfying.
✅ Pro Tip: While classic grilled cheese is made with white bread and American cheese, you can experiment with different bread types and cheeses while keeping the same cooking method for a more personalized take!
—
2. Why American Cheese is the Best Choice
American cheese is iconic in a classic grilled cheese because of its exceptional meltability and creamy texture. Unlike aged cheeses, American cheese:
Melts quickly and evenly, creating that perfect, gooey cheese pull.
Has a mild, buttery flavor that pairs well with crispy bread.
Doesn’t release excess oil, so your sandwich stays creamy rather than greasy.
If you want the authentic classic experience, American cheese is the way to go. However, you can mix in a slice of cheddar or Monterey Jack for a bit more depth of flavor.
✅ Pro Tip: For the best melt, use two slices of cheese per sandwich—one slice isn’t quite enough, and three might make the sandwich too gooey!
—
3. Cooking Method for the Perfect Classic Grilled Cheese
Cooking a perfectly golden and crispy grilled cheese requires the right heat, fat, and patience. Here’s a foolproof method:
a) Spread the Butter (or Mayonnaise) Evenly
Use softened butter and spread a thin, even layer on the outside of each bread slice.
Alternatively, use mayonnaise for an extra crispy exterior and a tangy kick.
b) Preheat the Pan to Medium-Low Heat
A cast iron skillet or non-stick pan is ideal for even cooking.
Too much heat will burn the bread before the cheese melts, so medium-low is the way to go.
c) Assemble and Cook the Sandwich
Place a slice of bread (buttered side down) in the pan.
Add two slices of American cheese, then top with the second slice of bread (buttered side up).
Cook for 3-4 minutes on each side, flipping once, until the bread is golden brown and crispy.
✅ Pro Tip: If the bread is browning too quickly but the cheese isn’t melting, lower the heat and cover the pan for 30 seconds to trap heat and speed up melting.
—
4. The Best Side Dishes for a Classic American Grilled Cheese
A grilled cheese sandwich is fantastic on its own, but pairing it with the right side takes it to another level. Here are some classic pairings:
Tomato Soup – The rich, tangy flavor of tomato soup complements the buttery, cheesy sandwich perfectly.
Pickles – The acidity of pickles cuts through the richness of the cheese and butter.
Potato Chips – Adds a fun, crunchy contrast to the soft, gooey sandwich.
Coleslaw – A fresh, slightly sweet coleslaw balances out the richness.
✅ Pro Tip: If dipping your sandwich in tomato soup, toast it extra crispy so it doesn’t get soggy too quickly!
—
5. Customizing Your Classic Grilled Cheese
While American cheese and white bread define the classic version, there are fun ways to customize it while keeping the nostalgic feel:
Add an extra cheese – Try mixing in a slice of cheddar for a slightly sharper taste.
Use Texas toast – Thicker bread adds extra crunch and holds more cheese.
Add a crispy element – A few potato chips or bacon slices inside the sandwich add a delightful crunch.
Spice it up – A light sprinkle of paprika, garlic powder, or red pepper flakes enhances the flavor.
✅ Pro Tip: Keep add-ins minimal so they don’t overpower the simplicity of a classic grilled cheese!
—
Final Thoughts: The Timeless Appeal of Classic Grilled Cheese
A Classic American Grilled Cheese is beloved for its simplicity, nostalgic flavors, and comforting warmth. With golden, crispy bread and perfectly melted cheese, it’s the ultimate quick and satisfying meal. Whether you enjoy it plain, dipped in tomato soup, or with a crunchy side, mastering the classic technique will guarantee a perfect grilled cheese every time!
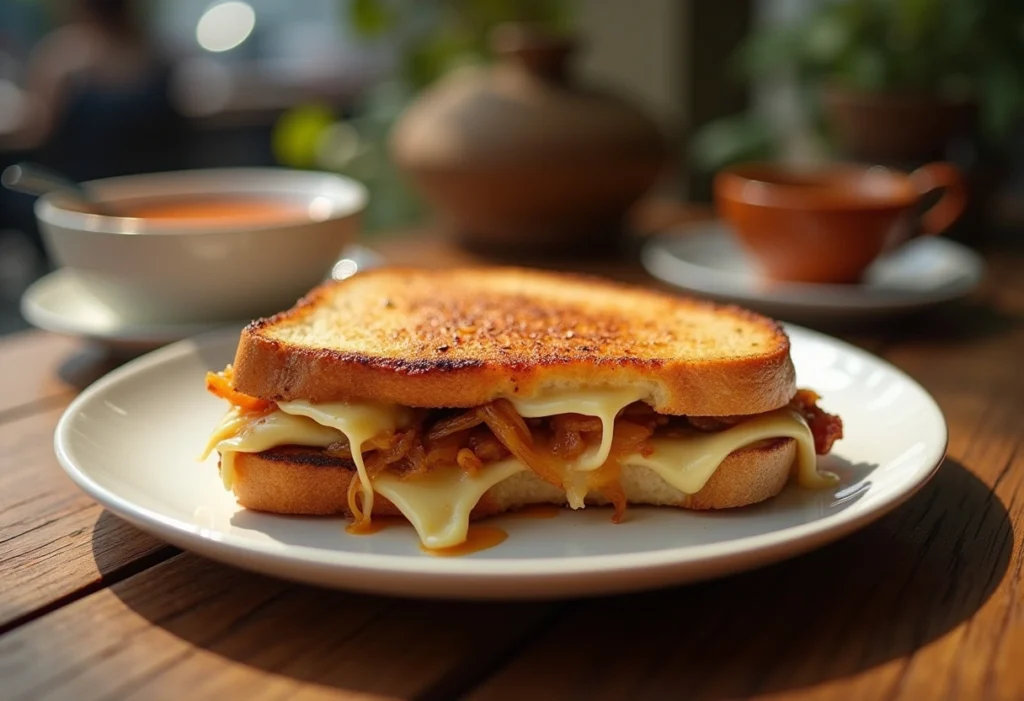
Gourmet Grilled Cheese: Elevating a Classic
Grilled cheese is already an indulgent, comforting meal, but gourmet grilled cheese takes it to the next level by introducing premium cheeses, artisan bread, and creative add-ins. By carefully selecting ingredients and using refined cooking techniques, you can transform this childhood favorite into a restaurant-worthy dish.
Here’s how to elevate your grilled cheese and make it gourmet!
—
1. Choosing High-Quality Cheese for a Gourmet Touch
The key to a gourmet grilled cheese lies in the cheese selection. Instead of American cheese, try artisan, aged, or specialty cheeses with unique textures and flavors. Here are some excellent options:
Gruyère – Nutty, slightly sweet, and melts beautifully.
Brie – Buttery, creamy, and adds a sophisticated touch.
Aged Cheddar – Sharp, bold, and full of depth.
Fontina – Velvety smooth with a mild, earthy taste.
Goat Cheese – Tangy, soft, and perfect for pairing with fruit.
Blue Cheese – Strong, pungent, and ideal for a bold, gourmet twist.
✅ Pro Tip: Mix two or three cheeses for a layered flavor experience. For example, pairing Gruyère with Fontina creates a rich, gooey melt, while adding a touch of blue cheese provides a tangy contrast.
—
2. Upgrading Your Bread for a Gourmet Experience
The right bread can make all the difference in texture and flavor. Instead of standard white sandwich bread, opt for rustic, bakery-style loaves:
Sourdough – Crisp crust with a tangy flavor that balances rich cheese.
Brioche – Buttery, slightly sweet, and soft with a golden crust.
Ciabatta – Light, airy texture that soaks up cheese and butter beautifully.
Multigrain – Adds nutty depth and extra crunch.
Rye – Earthy and slightly spicy, pairs well with sharp cheeses.
✅ Pro Tip: Slice your bread evenly and not too thick—about ½ inch thick is ideal to achieve a crispy outside and a gooey, well-melted inside.
—
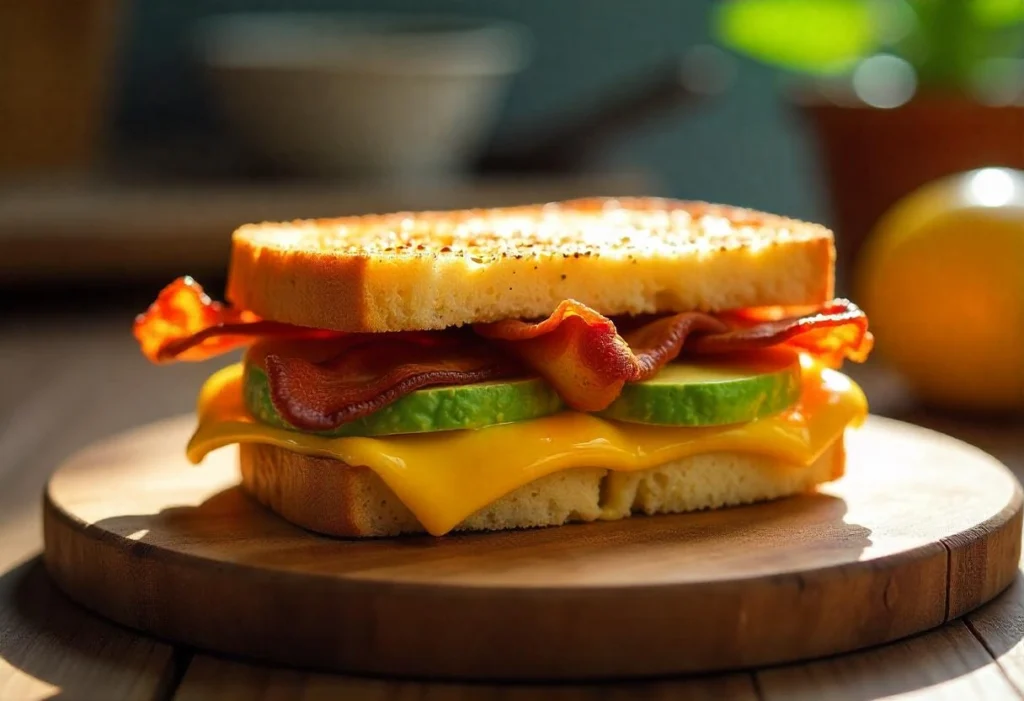
3. Creative Add-Ins for a Gourmet Twist
Adding savory, sweet, or crunchy ingredients can take your grilled cheese from basic to gourmet. Here are some delicious combinations to try:
Savory & Umami Additions
Caramelized onions – Adds a deep, sweet-savory complexity.
Sautéed mushrooms – Earthy and meaty, great with Gruyère or Fontina.
Crispy bacon or prosciutto – Adds crunch and a smoky depth.
Truffle oil – Just a drizzle for an upscale, aromatic touch.
Sweet & Fruity Enhancements
Fig jam or honey – Complements salty cheeses like Brie or blue cheese.
Sliced apples or pears – Adds a crisp, fresh contrast to melted cheese.
Cranberry sauce – Perfect for a holiday-inspired gourmet sandwich.
Crunch & Texture Boosters
Toasted nuts – Walnuts or almonds for a nutty crunch.
Arugula or spinach – A peppery, fresh bite that balances richness.
Panko breadcrumbs – Press into the buttered side of the bread before grilling for extra crispiness.
✅ Pro Tip: Balance is key—choose one or two add-ins that enhance the cheese, rather than overpowering it.
—
4. Perfecting the Cooking Technique for a Gourmet Grilled Cheese
To achieve a crispy exterior and perfectly melted cheese, follow these gourmet cooking tips:
Use a mix of butter and olive oil – This combination prevents burning and adds rich flavor.
Toast on medium-low heat – This ensures the cheese melts fully before the bread gets too dark.
Press the sandwich lightly – Using a spatula, gently press the sandwich for even browning.
Finish in the oven – If the cheese isn’t melting enough, place the sandwich in a 300°F (150°C) oven for a few minutes to let the heat distribute evenly.
✅ Pro Tip: For an extra crispy crust, spread a thin layer of grated Parmesan or Asiago cheese on the outside of the bread before grilling. It forms a delicious golden cheese crust!
—
5. Gourmet Grilled Cheese Pairings & Serving Ideas
A gourmet grilled cheese deserves elevated sides and drinks to complete the experience. Here are some perfect pairings:
Tomato basil soup – A classic combo with a gourmet upgrade.
Arugula salad with balsamic glaze – The peppery greens balance the richness.
Sweet potato fries – A crispy, slightly sweet side that pairs beautifully.
Chilled white wine – A crisp Sauvignon Blanc or Chardonnay complements the cheese.
Craft beer – A hoppy IPA or malty brown ale enhances the bold flavors.
✅ Pro Tip: Serve your gourmet grilled cheese cut diagonally, stacked, or sliced into bite-sized portions for an elegant presentation.
—
Final Thoughts: Turning Grilled Cheese Into a Gourmet Experience
A gourmet grilled cheese is all about premium ingredients, creative combinations, and expert cooking techniques. Whether you elevate it with artisan cheeses, rustic bread, or unique add-ins, you can transform this humble dish into a luxurious, restaurant-quality meal at home.
Experiment with different flavors and textures to create your signature gourmet grilled cheese—and enjoy every crispy, gooey, delicious bite!
Spicy Grilled Cheese: Adding Heat to Your Comfort Food
If you love a bit of heat in your meals, a spicy grilled cheese is the perfect way to elevate this classic sandwich. Adding spice not only enhances the flavor complexity but also creates a delicious contrast between the creamy, gooey cheese and the fiery kick of heat.
In this section, we’ll explore the best cheese pairings, spicy add-ins, and cooking techniques to craft the ultimate spicy grilled cheese sandwich.
—
1. Choosing the Best Cheeses for a Spicy Kick
To balance out the heat, opt for cheeses that melt well and have a rich, creamy texture. Some cheeses naturally have a spicy or smoky flavor, making them ideal for a spicy grilled cheese. Here are some great choices:
Pepper Jack – Infused with jalapeños and chili flakes, this cheese brings a mild to medium heat.
Smoked Cheddar – Adds a deep, smoky flavor that complements spicy ingredients.
Habanero Cheddar – A sharp, extra-spicy cheddar infused with habanero peppers.
Fontina – A mild, buttery cheese that balances out bold spices.
Monterey Jack – Smooth, creamy, and pairs well with spicy toppings.
Queso Chihuahua – A Mexican cheese with great meltability, perfect for layering with spicy flavors.
✅ Pro Tip: Mix one spicy cheese (like Pepper Jack) with a creamy cheese (like Fontina) for the best combination of heat and melt.
—
2. Spicy Add-Ins to Boost the Heat
To truly transform your grilled cheese into a spicy masterpiece, consider adding hot ingredients that complement the flavors of your cheese.
Fresh & Pickled Peppers
Jalapeños – Sliced fresh or pickled for a mild, tangy spice.
Habaneros – Intensely hot with a fruity undertone (use sparingly!).
Serrano Peppers – Slightly spicier than jalapeños with a crisp bite.
Chipotle Peppers in Adobo – Smoky, spicy, and slightly sweet.
Spicy Condiments & Sauces
Sriracha – Adds a tangy, garlicky heat.
Hot Honey – A sweet-spicy glaze that enhances the cheese’s richness.
Buffalo Sauce – Classic, buttery heat that pairs well with cheddar.
Spicy Mayo – A mix of mayo and hot sauce for a creamy kick.
Bold Seasonings
Crushed Red Pepper Flakes – A simple way to sprinkle in extra heat.
Cajun or Creole Seasoning – Adds smoky, peppery spice.
Chili Powder or Smoked Paprika – Deepens the heat and enhances the cheese’s flavor.
✅ Pro Tip: For a balanced heat, pair fresh peppers with a creamy element like spicy mayo or buffalo sauce.
—
3. Choosing the Right Bread for Spicy Grilled Cheese
The right bread can complement and enhance the spicy elements in your sandwich. Here are some excellent choices:
Sourdough – Its slight tanginess helps cut through the heat.
Brioche – A slightly sweet contrast to the spiciness.
Whole Wheat or Multigrain – Adds a nutty depth that pairs well with spicy cheeses.
Ciabatta – Light and airy, great for holding up against melty cheese and hot sauces.
✅ Pro Tip: If you want an extra spicy crust, sprinkle cayenne pepper or chili powder onto the buttered side of the bread before grilling.
—
4. Cooking Tips for a Perfect Spicy Grilled Cheese
To achieve the best texture and flavor, follow these essential grilling tips:
Use butter AND a little hot sauce – Mixing butter with a dash of hot sauce adds a subtle heat to the outer crust.
Grill on medium-low heat – This ensures the cheese melts fully while preventing the bread from burning.
Press lightly with a spatula – Helps the cheese spread evenly and creates a crispy exterior.
Finish in the oven – If the cheese isn’t melting fast enough, place the sandwich in a 300°F (150°C) oven for a few minutes.
✅ Pro Tip: For an extra spicy crunch, press the outside of the sandwich in crushed red pepper flakes before grilling.
—
5. Pairing Ideas for Spicy Grilled Cheese
A spicy grilled cheese pairs well with sides and drinks that balance out the heat. Here are some great options:
Cooling Sides
Classic tomato soup – A creamy, mild soup balances the heat.
Avocado salad – The creamy avocado helps tone down the spice.
Coleslaw – A tangy, slightly sweet slaw adds crunch and relief.
Refreshing Drinks
Iced lemonade – The citrus cuts through the spice.
Milk or a milkshake – Dairy helps neutralize the heat.
A crisp lager or pale ale – Light beers pair well with spicy foods.
✅ Pro Tip: If your grilled cheese is too spicy, add a drizzle of honey or a slice of avocado to mellow out the heat.
—
Final Thoughts: Spice Up Your Grilled Cheese Game
A spicy grilled cheese is the perfect way to take this classic comfort food to the next level. Whether you add hot peppers, fiery sauces, or bold seasonings, you can customize the level of heat to suit your taste.
Experiment with different cheese and spice combinations to create your ultimate spicy grilled cheese masterpiece—and enjoy every gooey, crispy, fiery bite!
What to Serve with Grilled Cheese
Classic Tomato Soup Pairing: The Perfect Companion to Grilled Cheese
Nothing complements a grilled cheese sandwich quite like a warm, comforting bowl of tomato soup. This timeless pairing is beloved for a reason—the creamy, gooey cheese and crispy bread contrast beautifully with the rich, slightly tangy, and velvety texture of the soup. Whether you’re indulging in a classic American grilled cheese or a gourmet variation, tomato soup makes the perfect dipping companion.
Let’s explore why this duo works so well, the best tomato soup recipes, and how to enhance the pairing for an even better experience.
—
1. Why Grilled Cheese and Tomato Soup Are the Perfect Match
The combination of grilled cheese and tomato soup isn’t just about tradition—it’s a pairing rooted in flavor balance and texture contrast:
Creamy vs. Tangy – The creamy, rich cheese inside the sandwich balances out the acidity and tanginess of the tomatoes.
Crispy vs. Velvety – The crispy, buttery bread contrasts with the smooth, silky soup, creating a satisfying bite.
Savory vs. Slightly Sweet – The natural sweetness of tomatoes complements the savory, umami-packed melted cheese.
Temperature Contrast – The hot, melty sandwich and warm, comforting soup create a cozy, well-rounded meal.
✅ Pro Tip: To enhance the flavor balance, add a pinch of sugar or cream to your tomato soup to soften its acidity.
—
2. Best Types of Tomato Soup for Pairing
There’s no single way to make tomato soup, and the best version depends on personal preference and the type of grilled cheese you’re serving. Here are some great options:
Classic Creamy Tomato Soup
A traditional, smooth tomato soup made with tomatoes, onions, garlic, broth, and a touch of cream.
Ideal for American-style grilled cheese with cheddar or Colby Jack.
Roasted Tomato Basil Soup
Uses roasted tomatoes for a deeper, caramelized flavor, enhanced with fresh basil.
Pairs well with a gourmet grilled cheese using mozzarella, provolone, or smoked gouda.
Spicy Tomato Soup
Infused with red pepper flakes, cayenne, or chipotle peppers for a fiery kick.
A great match for spicy grilled cheese featuring Pepper Jack or habanero cheddar.
Chunky Tomato and Vegetable Soup
A heartier soup with diced tomatoes, carrots, celery, and bell peppers.
Works well with a rustic, hearty grilled cheese using multigrain bread and aged cheeses.
✅ Pro Tip: If your soup is too acidic, stir in a small amount of baking soda or a splash of cream to mellow out the flavor.
—
3. How to Enhance the Grilled Cheese and Tomato Soup Experience
To make this classic meal even more indulgent, try these simple upgrades and flavor boosters:
Add Extra Flavor to Your Soup
Stir in a splash of heavy cream or coconut milk for a silkier texture.
Add a dash of balsamic vinegar for a deeper, slightly sweet finish.
Sprinkle in fresh basil or thyme for a fragrant, herby twist.
Blend in roasted red peppers for a smoky, slightly sweet flavor.
Upgrade Your Grilled Cheese for the Perfect Dip
Cut the sandwich into strips – Makes dipping easier and more fun!
Brush the bread with garlic butter – Adds extra richness and depth.
Use a mix of cheeses – Combining mild and sharp cheeses creates more complex flavor.
Try a parmesan crust – Sprinkle parmesan on the buttered side before grilling for a crispy, flavorful crust.
Pair with the Right Drinks
A crisp white wine (like Sauvignon Blanc) complements the tanginess of the tomato soup.
A classic iced tea or lemonade balances out the richness.
A cold beer (like a pale ale) pairs well with both the cheese and the soup’s acidity.
✅ Pro Tip: If you love an extra cheesy experience, stir a little grated cheddar or parmesan into your soup for a cheesy, creamy tomato blend.
—
4. Quick & Easy Homemade Tomato Soup Recipe
Want to make tomato soup from scratch in under 30 minutes? Try this simple recipe!
Ingredients:
2 tbsp butter or olive oil
1 small onion, chopped
2 cloves garlic, minced
1 (28 oz) can of whole peeled tomatoes
1 cup vegetable or chicken broth
1 tsp sugar (to balance acidity)
½ tsp salt & pepper (adjust to taste)
½ cup heavy cream (optional)
Fresh basil for garnish
Instructions:
1. Heat butter in a pot over medium heat. Add chopped onions and cook until soft.
2. Stir in garlic and cook for 30 seconds until fragrant.
3. Add the canned tomatoes (with juices), broth, sugar, salt, and pepper.
4. Bring to a simmer and cook for 15-20 minutes.
5. Use an immersion blender (or regular blender) to puree until smooth.
6. Stir in heavy cream if using, and adjust seasoning.
7. Garnish with fresh basil and serve hot with grilled cheese!
✅ Pro Tip: If you want an extra smoky flavor, use fire-roasted canned tomatoes instead of regular ones.
—
5. Final Thoughts: The Ultimate Comfort Food Duo
A grilled cheese sandwich and a bowl of tomato soup is a combination that never gets old. The warm, gooey cheese and buttery bread, paired with the rich, tangy tomato soup, make for the ultimate comfort meal.
Whether you stick to a classic pairing or get creative with spices, add-ins, and gourmet variations, this meal is guaranteed to satisfy. So, grab your favorite cheese, toast up some bread, and enjoy every crispy, cheesy, tomato-dipped bite!
Side Salads and Dips: Perfect Complements to Your Grilled Cheese
While a grilled cheese sandwich is satisfying on its own, pairing it with side salads and dips can elevate your meal by adding freshness, crunch, and bold flavors. Whether you’re looking for something light and refreshing or rich and indulgent, the right sides can create a well-balanced dining experience.
Let’s explore the best salads and dips to serve alongside your grilled cheese, along with tips to enhance their flavors.
—
1. Why Add a Side Salad or Dip?
A grilled cheese is rich, buttery, and cheesy, so adding a fresh salad or a bold-flavored dip provides contrast and balance. Here’s why they work well together:
Cuts Through the Richness – The acidity in vinaigrettes and fresh vegetables balances out the heaviness of melted cheese and buttered bread.
Adds Texture – A crisp salad or crunchy dip enhances the textural contrast, making each bite more interesting.
Brings Extra Flavor – Tangy, spicy, or herby elements can complement or contrast with the mild, creamy cheese.
Makes the Meal More Nutritious – Adding greens, veggies, and healthy dips turns your grilled cheese into a more wholesome meal.
✅ Pro Tip: Choose sides with acidity, crunch, or spice to create the perfect contrast with your sandwich.
—
2. Best Side Salads for Grilled Cheese
A simple, well-dressed salad can be the perfect companion to a warm, crispy grilled cheese sandwich. Here are some great options:
Classic Arugula Salad with Lemon Vinaigrette
Why it Works: The peppery bite of arugula and the bright acidity of lemon vinaigrette contrast beautifully with the richness of the cheese.
Ingredients:
Arugula
Cherry tomatoes
Shaved parmesan
Lemon juice, olive oil, salt & pepper
✅ Pair with: Gourmet grilled cheese with brie or gouda for a fancy upgrade.
—
Tomato and Cucumber Salad
Why it Works: A light, juicy salad with a touch of vinegar brings a refreshing balance to the sandwich.
Ingredients:
Cherry tomatoes (halved)
Cucumber (sliced)
Red onion (thinly sliced)
Feta cheese
Olive oil, red wine vinegar, oregano
✅ Pair with: Classic American grilled cheese for a fresh contrast.
—
Coleslaw (Classic or Spicy)
Why it Works: The crunchy, tangy texture of coleslaw enhances the crispy sandwich.
Variations:
Classic creamy coleslaw – A mix of cabbage, carrots, and mayo-based dressing.
Spicy slaw – Add sriracha, jalapeños, or a touch of honey mustard for a bold kick.
✅ Pair with: Spicy grilled cheese with pepper jack cheese and jalapeños.
—
Apple and Walnut Salad
Why it Works: The sweetness of apples and the crunch of walnuts provide an elegant contrast to the gooey, salty cheese.
Ingredients:
Mixed greens
Sliced apples (Granny Smith for tartness)
Candied walnuts
Blue cheese or goat cheese
Balsamic vinaigrette
✅ Pair with: Grilled cheese with sharp cheddar or gouda for a perfect sweet-salty balance.
—
3. Best Dips for Grilled Cheese
A good dip can take your grilled cheese experience to another level. Whether you’re looking for something creamy, spicy, or tangy, here are some delicious choices:
Classic Marinara Sauce
Why it Works: Think of this as pizza in dip form—the tomato, herbs, and slight sweetness make it a perfect match for melted cheese.
How to Make It: Warm up a good-quality store-bought marinara or make your own with canned tomatoes, garlic, basil, and olive oil.
✅ Pair with: Mozzarella or provolone grilled cheese for an Italian twist.
—
Spicy Sriracha Mayo
Why it Works: A creamy and spicy dip adds heat and richness, making each bite even more indulgent.
How to Make It:
½ cup mayonnaise
1 tbsp sriracha
1 tsp lime juice
Pinch of garlic powder
✅ Pair with: Spicy grilled cheese with pepper jack or habanero cheddar.
—
Honey Mustard Dip
Why it Works: The sweet and tangy flavors contrast beautifully with the salty, cheesy sandwich.
How to Make It:
¼ cup Dijon mustard
2 tbsp honey
1 tbsp mayonnaise
Pinch of cayenne pepper (optional)
✅ Pair with: Sharp cheddar grilled cheese for a bold, flavorful bite.
—
Pesto Sauce
Why it Works: The fresh, herby notes of basil and garlic bring a bright contrast to the sandwich’s rich, buttery flavors.
How to Make It: Blend together:
1 cup fresh basil leaves
¼ cup parmesan cheese
2 tbsp pine nuts
1 clove garlic
Olive oil (as needed)
✅ Pair with: Grilled cheese with mozzarella or brie for an elevated, gourmet pairing.
—
Caramelized Onion Dip
Why it Works: Sweet, slow-cooked onions add depth and umami, enhancing the grilled cheese experience.
How to Make It:
Sauté 2 large onions in butter until caramelized
Mix with ½ cup sour cream and ¼ cup mayonnaise
Season with salt and a dash of Worcestershire sauce
✅ Pair with: Aged cheddar or gouda grilled cheese for a rich and sweet contrast.
—
4. Final Thoughts: Elevate Your Grilled Cheese Experience
A grilled cheese sandwich is already comforting and satisfying, but adding a side salad or a flavorful dip can take it to the next level. Whether you choose a light, refreshing salad to balance out the richness or a bold, creamy dip to enhance the flavors, these pairings make your meal more exciting, well-rounded, and delicious.
So, next time you make a grilled cheese, don’t stop there—add a tangy vinaigrette, a spicy dip, or a crunchy coleslaw to create the ultimate meal experience!
Creative Beverage Pairings: Elevate Your Grilled Cheese Experience
When it comes to pairing beverages with your grilled cheese sandwich, the right drink can enhance the flavors and textures of the sandwich, creating a more enjoyable and satisfying experience. While classic choices like milk or tomato soup are always popular, branching out with creative beverage options can surprise and delight your taste buds. From refreshing sodas to craft beers and specialty teas, there are endless possibilities to complement your sandwich.
Let’s dive into some unique beverage pairings that will take your grilled cheese experience to the next level:
—
1. Classic Pairings with a Twist
Iced Tea with Lemon and Mint
Why it Works: The crisp, refreshing nature of iced tea helps cut through the richness of the cheese and butter while the zesty lemon adds brightness. Fresh mint brings an aromatic, cooling element to balance out the warmth of the grilled cheese.
How to Prepare: Brew your favorite black tea or green tea, then chill it. Serve with fresh lemon slices and a few sprigs of mint. Add a little honey or simple syrup for sweetness if desired.
Perfect with: Classic grilled cheese or spicy grilled cheese with pepper jack, as the acidity and freshness of the tea complement both the richness and the heat.
—
Tomato Juice
Why it Works: If you’re looking for a refreshing and tangy drink that pairs perfectly with grilled cheese, tomato juice is a great option. Its savory flavor enhances the cheese while offering a similar flavor profile to the classic tomato soup pairing, but with a unique twist.
How to Prepare: Use freshly juiced tomatoes or high-quality store-bought juice. For extra flavor, consider adding a dash of Worcestershire sauce, hot sauce, or celery salt.
Perfect with: Mozzarella or cheddar grilled cheese for a creamy, savory combo.
—
Lemonade with a Kick
Why it Works: Lemonade provides a tangy, citrusy flavor that contrasts beautifully with the richness of the sandwich. Adding a bit of spice—like a pinch of cayenne or a splash of ginger beer—introduces a layer of complexity that keeps the pairing exciting.
How to Prepare: Mix freshly squeezed lemon juice with simple syrup and water, then garnish with sliced ginger or a pinch of cayenne pepper for extra zing.
Perfect with: Grilled cheese with smoked gouda or brie, as the smooth, creamy cheese pairs beautifully with the sharpness of the lemonade.
—
2. Beverage Pairings for Bold Flavors
Craft Beer: IPA or Pale Ale
Why it Works: For a more robust pairing, a hoppy IPA or a crisp pale ale is perfect. The bitter, slightly citrusy notes of the beer cut through the richness of the grilled cheese, while the malty undertones complement the flavor of the bread and cheese.
How to Prepare: Choose an IPA with a balanced bitterness or a pale ale for a more smooth finish. These beers are usually readily available at most craft beer stores.
Perfect with: Grilled cheese with sharp cheddar or aged gouda, as the boldness of the beer can stand up to the strong flavors of the cheese.
—
Cider: Dry or Semi-Sweet
Why it Works: A crisp, refreshing hard cider offers a slightly fruity and tangy note that complements the cheesy goodness of your grilled sandwich. The light carbonation cleanses the palate between bites, allowing you to savor the flavors even more.
How to Prepare: Choose a dry cider for a more crisp taste, or a semi-sweet cider for a slightly more rounded, fruity pairing.
Perfect with: Grilled cheese with brie or blue cheese, as the slight fruitiness of the cider contrasts with the richness of the cheese.
—
3. Indulgent Pairings for a Comforting Meal
Milkshakes
Why it Works: There’s something undeniably comforting about a milkshake with a grilled cheese sandwich. The creamy, cool texture of the milkshake pairs perfectly with the hot, crispy sandwich, creating a perfect contrast in both temperature and texture. Additionally, the sweetness of a milkshake can balance the savory flavors of the sandwich, making for a satisfying meal.
How to Prepare: Blend vanilla ice cream, milk, and a touch of vanilla extract to create a classic milkshake. For extra indulgence, add chocolate syrup or a swirl of peanut butter.
Perfect with: Classic grilled cheese with American or cheddar cheese, as the simplicity of the sandwich lets the milkshake shine.
—
Hot Chocolate with Marshmallows
Why it Works: For a comforting, sweet pairing, nothing beats the combination of hot chocolate and grilled cheese. The creamy, chocolatey richness is a luxurious contrast to the savory, buttery grilled cheese. Adding fluffy marshmallows makes it even more decadent and fun.
How to Prepare: Heat milk, then whisk in cocoa powder, sugar, and a pinch of salt. For a grown-up twist, you can add a bit of cinnamon or even peppermint.
Perfect with: Grilled cheese with creamy fontina or cheddar for a classic comfort food combo.
—
Iced Coffee
Why it Works: If you’re craving a pick-me-up with your grilled cheese, iced coffee is an excellent choice. The slightly bitter notes of coffee balance out the richness of the cheese while providing an energizing lift. Adding a splash of milk or cream creates a velvety smooth texture that complements the crispy bread.
How to Prepare: Brew a strong coffee and chill it. Serve over ice with a splash of cream or milk. If you prefer it sweet, add a little sugar or flavored syrup.
Perfect with: Grilled cheese with sharp cheddar or Swiss for a delightful, unexpected pairing.
—
4. Light and Refreshing Pairings
Sparkling Water with Lime
Why it Works: For a light and refreshing pairing, sparkling water with a squeeze of lime offers a clean, crisp finish that complements the richness of the sandwich. The bubbles cleanse the palate between bites, while the lime adds a refreshing citrus kick.
How to Prepare: Serve sparkling water chilled, with fresh lime slices or a splash of lime juice.
Perfect with: Grilled cheese with mozzarella or gruyère, as the mild flavors of the cheese pair well with the clean taste of sparkling water.
—
Fruit-Infused Water
Why it Works: If you’re looking for something refreshing yet flavorful, fruit-infused water is an ideal choice. By adding fruits like berries, citrus, or cucumber, you create a light, naturally flavored drink that enhances the grilled cheese without overpowering it.
How to Prepare: Simply add slices of fruit or herbs (like mint or rosemary) to a jug of water and refrigerate for an hour to allow the flavors to meld.
Perfect with: Grilled cheese with fresh basil or brie for a refreshing, palate-cleansing option.
—
5. Final Thoughts on Beverage Pairings
The right beverage can elevate your grilled cheese experience from ordinary to extraordinary. Whether you opt for a refreshing iced tea, a bold craft beer, or an indulgent milkshake, the beverage you choose can complement the flavors of the sandwich, provide contrast, and enhance the overall enjoyment of the meal. Don’t hesitate to experiment with different drinks and discover your favorite pairing!
Tips & Tricks for the Crispiest and Gooiest Grilled Cheese
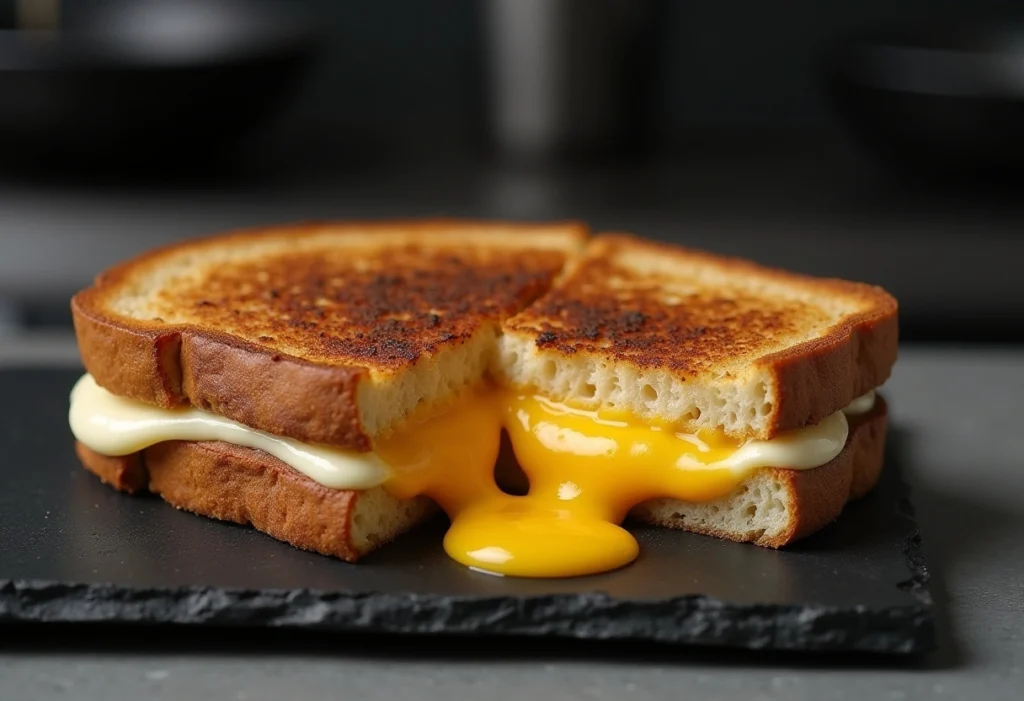
Cheese Pull Secrets: How to Achieve That Perfect Stretchy Melt
One of the most satisfying moments when enjoying a grilled cheese sandwich is the dramatic cheese pull—that moment when you gently pull apart your sandwich and watch the gooey, melted cheese stretch effortlessly. Achieving this perfect cheese pull isn’t just about luck; it requires the right combination of cheese, technique, and heat control. Here’s how you can master the art of the ultimate cheese pull for your grilled cheese sandwich.
—
1. Choose the Right Cheese for the Best Stretch
Not all cheeses melt the same way, and some are naturally stretchier than others. To achieve the best cheese pull, choose high-moisture, semi-soft cheeses with excellent melting properties. Here are some of the best options:
Mozzarella – The king of cheese pulls! Fresh low-moisture mozzarella has the ideal elasticity for a dramatic stretch.
Provolone – Offers a rich, creamy melt with a nice stretch, often used in Philly cheesesteaks for its pull effect.
Monterey Jack – A smooth, mild cheese that melts beautifully and enhances the cheese pull.
Muenster – Creamy and soft with a great stretch factor, perfect for blending with other cheeses.
Gouda (young, not aged) – A mild and creamy cheese that adds a delicious, melty consistency.
Pro Tip: Blend stretchy cheeses (like mozzarella) with flavorful cheeses (like sharp cheddar or gouda) to get the best of both worlds—maximum pull with a rich, savory taste.
—
2. Use Freshly Shredded Cheese for Better Melting
Pre-packaged shredded cheese contains anti-caking agents that can interfere with melting, making the cheese clump instead of stretch. For the smoothest, most consistent melt, always:
Shred your cheese fresh from a block.
Mix different cheeses for a better stretch-to-flavor ratio.
Layer the cheese evenly to ensure uniform melting throughout the sandwich.
—
3. Control Your Heat for the Perfect Melt
The right temperature is crucial for achieving a gooey, stretchy cheese pull without burning your bread. Follow these heat control tips:
Use medium-low heat – Cooking too fast on high heat will toast the bread before the cheese melts properly. A slower cook time ensures an even melt.
Cover the pan – Trapping heat inside the pan helps melt the cheese faster, giving it a stretchier texture.
Use a cast iron or non-stick skillet – These provide even heat distribution and prevent burning.
Flip at the right time – Wait until the first side is golden brown before flipping to let the cheese start melting properly.
—
4. Let It Rest for a Few Seconds Before Pulling Apart
Once your grilled cheese is cooked, don’t immediately slice or pull it apart. Let it rest for 30-60 seconds to allow the cheese to settle into a smooth, stretchy consistency. Cutting too soon might cause the cheese to ooze out prematurely rather than stretch.
For the best cheese pull effect:
1. Let the sandwich sit for 30 seconds.
2. Use a sharp knife to slice diagonally (this maximizes the stretching surface).
3. Gently pull apart both halves to showcase that perfect cheese pull!
—
5. Bonus Trick: Add a Cheese Crust for Extra Texture
For an extra indulgent touch, add a cheese crust by sprinkling grated Parmesan or cheddar on the pan before placing your sandwich down. This forms a crispy, golden cheese skirt, while the inside remains soft, melty, and ready for that amazing cheese pull.
—
Final Thoughts: Mastering the Cheese Pull
Achieving that Instagram-worthy cheese pull isn’t just about looks—it’s also a sign of a well-made grilled cheese sandwich with the perfect melt. By choosing the right cheese, controlling your heat, and letting the sandwich rest before slicing, you’ll create the ultimate gooey, stretchy experience every time. So next time you make grilled cheese, remember these secrets and get ready to pull apart the perfect bite!
Avoiding Common Mistakes: How to Make the Perfect Grilled Cheese Every Time
Even though a grilled cheese sandwich seems simple to make, a few small mistakes can lead to burnt bread, unmelted cheese, or a greasy, soggy mess. To ensure your sandwich turns out crispy, gooey, and perfectly balanced, here are the most common mistakes to avoid and how to fix them.
—
1. Using Too Much or Too Little Butter/Mayo
Mistake: Overloading your bread with butter or mayonnaise can make it greasy and prevent proper browning, while using too little can result in a dry, unevenly toasted sandwich.
How to Fix It:
Use a thin, even layer of softened butter or mayo on both slices of bread to ensure even crisping without excessive greasiness.
If using butter, let it soften at room temperature so it spreads evenly rather than clumping in certain spots.
If using mayonnaise, opt for full-fat mayo for the best crisp texture.
—
2. Cooking on Too High Heat
Mistake: High heat may cook the bread too quickly, leaving it burnt on the outside while the cheese remains cold and unmelted.
How to Fix It:
Cook on medium-low heat to allow the cheese to fully melt while the bread slowly crisps to a golden-brown perfection.
If you notice your bread browning too fast, lower the heat and cover the pan with a lid to trap heat and melt the cheese faster.
—
3. Using the Wrong Cheese
Mistake: Not all cheeses melt well—hard, aged cheeses like Parmesan or feta don’t create that gooey texture you want in a grilled cheese.
How to Fix It:
Choose melty cheeses like cheddar, mozzarella, Monterey Jack, provolone, or Muenster.
If you love the flavor of harder cheeses, mix them with a meltier cheese to get the best of both worlds.
—
4. Not Prepping the Cheese Properly
Mistake: Using thick cheese slices or pre-shredded cheese can cause uneven melting, leading to parts of your sandwich being too gooey while others remain solid.
How to Fix It:
Shred or thinly slice your cheese for even melting.
If using multiple cheeses, layer them evenly so they all melt at the same rate.
—
5. Using the Wrong Bread or Not Prepping It Correctly
Mistake: Certain breads, like ultra-thin slices, can burn before the cheese melts, while dense, thick breads might not crisp up properly.
How to Fix It:
Choose thicker, sturdy bread like sourdough, brioche, or Texas toast to hold up to the heat while crisping perfectly.
Lightly toast the bread first before assembling if you’re using a very soft or thick bread to ensure even cooking.
—
6. Pressing Down Too Hard on the Sandwich
Mistake: While some people like to press their grilled cheese while cooking, pressing too hard can squeeze out the melted cheese and make the sandwich dense rather than airy and crispy.
How to Fix It:
Use gentle pressure with a spatula rather than flattening it completely.
If you love a crispy crust, try using a cast-iron skillet or a panini press for an even golden finish without crushing the sandwich.
—
7. Flipping Too Early or Too Often
Mistake: Constant flipping prevents the bread from developing a crispy, golden-brown crust, leading to a soggy or unevenly toasted sandwich.
How to Fix It:
Cook each side for 3-5 minutes before flipping, allowing the bread to fully brown and the cheese to melt.
Only flip once to maintain even cooking and a crisp exterior.
—
8. Not Letting the Sandwich Rest Before Cutting
Mistake: Cutting into your grilled cheese immediately can cause all the melted cheese to ooze out, leaving your sandwich messy and less gooey inside.
How to Fix It:
Let the sandwich rest for 30-60 seconds after cooking to allow the cheese to settle and become stretchier.
Use a sharp knife to cut cleanly without smashing the sandwich.
—
Final Thoughts: Mastering the Perfect Grilled Cheese
By avoiding these common mistakes, you’ll get a crispy, buttery crust, perfectly melted cheese, and a satisfying bite every time. With proper cheese selection, balanced heat, and careful technique, your grilled cheese will turn out restaurant-quality—whether you’re making a classic version or experimenting with gourmet flavors.
Making Grilled Cheese for a Crowd: Tips for Cooking Multiple Sandwiches at Once
Grilled cheese is a comforting and universally loved dish, but making just one or two sandwiches at a time can be time-consuming when feeding a large family, party guests, or a brunch gathering. The good news is that with the right methods, you can prepare multiple grilled cheese sandwiches at once without sacrificing crispiness or gooey perfection. Here’s how to efficiently make grilled cheese for a crowd while keeping every bite as delicious as a single-serving version.
—
1. Use the Oven for Large Batches
If you’re making six or more sandwiches, the oven is your best friend. This method ensures even cooking and allows you to prepare multiple sandwiches at once without standing over the stove.
How to do it:
Preheat your oven to 425°F (218°C).
Line a baking sheet with parchment paper or lightly grease it to prevent sticking.
Assemble your sandwiches and place them on the baking sheet in a single layer.
Lightly butter or mayo both sides of the bread for crispy results.
Flip halfway through baking for even browning.
Bake for 8-10 minutes, or until golden brown and crispy.
Pro Tip: Place a second baking sheet on top of the sandwiches to press them down slightly, mimicking the effect of a griddle.
—
2. Use a Large Griddle or Electric Skillet
If you prefer stovetop cooking, a large griddle or electric skillet allows you to make four to six sandwiches at a time. This method gives you the golden, crispy crust of a pan-fried sandwich while letting you prepare multiple servings quickly.
How to do it:
Heat your griddle to 325°F (163°C) (medium-low heat).
Butter or mayo both sides of each sandwich.
Place sandwiches on the griddle and cook for 3-5 minutes per side.
Use a spatula to gently press them down while cooking for even crispiness.
If necessary, cook in batches and keep finished sandwiches warm in the oven (set to 200°F or 93°C).
Pro Tip: If you don’t have a griddle, use two large frying pans at the same time to cook more sandwiches in one go.
—
3. Keep Grilled Cheese Warm for Serving
To prevent your grilled cheese sandwiches from getting cold or soggy, you need a method to keep them warm without drying them out.
Best ways to keep them warm:
Oven method: Set your oven to 200°F (93°C) and place cooked sandwiches on a wire rack over a baking sheet. This keeps them crispy while staying warm.
Tented foil method: Loosely tent aluminum foil over the sandwiches to keep heat in without trapping moisture.
Slow cooker method: Line a slow cooker with a towel, set it to warm, and stack sandwiches inside for short-term warming (ideal for serving within 30 minutes).
Avoid: Stacking hot sandwiches directly on top of each other—this can make the bread soggy.
—
4. Prepping Ingredients in Advance
Making grilled cheese for a group is much easier if you prep ahead. This reduces assembly time and helps you stay organized.
How to prep efficiently:
Pre-slice the cheese so it’s ready to go (or buy pre-sliced cheese).
Butter or mayo the bread in advance and stack slices to speed up sandwich assembly.
If using additional toppings, prepare them ahead—caramelized onions, bacon, or tomatoes can be pre-cooked and stored until needed.
Pro Tip: Set up an assembly line where one person butters bread, another adds cheese, and someone else handles cooking. This works great for family gatherings!
—
5. Offer a Grilled Cheese Bar for Variety
For a fun and interactive experience, set up a grilled cheese bar where guests can customize their sandwiches before cooking. This works especially well for parties or casual get-togethers.
Ideas for a DIY grilled cheese station:
Breads: Sourdough, brioche, whole wheat, Texas toast.
Cheeses: Cheddar, mozzarella, provolone, pepper jack, gouda.
Extras: Bacon, ham, caramelized onions, tomato slices, jalapeños.
Spreads: Pesto, garlic butter, sriracha mayo, mustard.
Simply let guests assemble their own sandwiches, then cook them using your preferred large-batch method.
—
Final Thoughts: Effortless Grilled Cheese for a Crowd
With the right techniques, making grilled cheese for a large group doesn’t have to be stressful. Whether you use the oven for hands-free cooking, a griddle for stovetop efficiency, or a grilled cheese bar for fun customization, you can serve crispy, gooey sandwiches to everyone at once. By prepping ingredients in advance and keeping sandwiches warm properly, you’ll ensure every bite is as delicious as the first—without the hassle!
Conclusion: The Ultimate Grilled Cheese Experience
Grilled cheese is the perfect balance of crispy, buttery bread and gooey, melted cheese, making it a timeless comfort food. Whether you’re crafting a classic American grilled cheese, experimenting with gourmet variations, or spicing things up, the key to perfection lies in choosing the right cheese, bread, and cooking technique.
From butter vs. mayo to the best pans and cooking tips, every detail contributes to the ultimate sandwich experience. Pair it with a warm bowl of tomato soup, a fresh side salad, or a creative beverage to elevate your meal even further. And if you’re cooking for a crowd, using an oven or griddle ensures that everyone enjoys a hot, crispy sandwich at the same time.
With these tips, tricks, and flavor inspirations, you’re now ready to make the best grilled cheese sandwich—crispy on the outside, gooey on the inside, and absolutely delicious. So go ahead, fire up your pan, and start grilling!