
There’s nothing quite like the crispy, golden perfection of homemade hash browns. Whether served alongside eggs and bacon or enjoyed on their own, these shredded potato patties are a classic breakfast staple. While store-bought or fast-food versions are convenient, making hash browns from scratch ensures a crispy texture, rich flavor, and no unnecessary additives.
The secret to the best hash browns lies in choosing the right potatoes, properly preparing them, and mastering the cooking technique. With just a few simple steps—shredding, soaking, squeezing, and frying—you can achieve the perfect balance of crispy edges and a tender, flavorful center.
In this guide, we’ll walk you through the entire process, from selecting the right potatoes to cooking them to golden perfection. Get ready to enjoy restaurant-quality hash browns right from your own kitchen!
Choosing the Right Potatoes for Crispy Hash Browns
Why Russet Potatoes Work Best
When making homemade hash browns, choosing the right type of potato is crucial for achieving the perfect texture. While there are many varieties available, Russet potatoes are the best choice for crispy and golden hash browns. Here’s why:
1. High Starch Content for Crispy Texture
Russet potatoes are high in starch and low in moisture, making them ideal for hash browns. The starch helps create a crispy outer layer while keeping the inside soft and tender. When cooked, the natural starch in Russet potatoes caramelizes, resulting in the golden brown, crunchy texture that makes hash browns so delicious.
2. Lower Moisture for Better Frying
Moisture is the enemy of crispiness. Russet potatoes have a lower water content than waxy potatoes (like Yukon Gold or red potatoes), which means they fry up crispier with less effort. Waxy potatoes tend to hold onto moisture, making them softer and preventing that desirable crispy crust from forming.
3. Light and Fluffy Interior
The texture of Russet potatoes is light and fluffy when cooked, which contrasts beautifully with the crispy outer layer. This balance of crunch and tenderness is what makes classic diner-style hash browns so irresistible.
4. Easy to Shred and Handle
Russet potatoes have a firm structure that makes them easy to grate, whether using a box grater or a food processor. They don’t turn mushy or sticky when shredded, allowing you to achieve fine, even strands that cook evenly in the pan.
5. Readily Available and Budget-Friendly
Another advantage of using Russet potatoes is their availability and affordability. They are widely available in grocery stores and tend to be cheaper than other potato varieties, making them a cost-effective choice for homemade hash browns.
Can You Use Other Potato Varieties?
While Russet potatoes are the top choice for classic hash browns, you can experiment with other types:
Yukon Gold: Creamier texture with less crispiness.
Red Potatoes: Hold their shape well but don’t get as crispy.
Sweet Potatoes: A healthier alternative with a slight sweetness, but they require different cooking techniques to get crispy.
If you want crispy, restaurant-quality hash browns, Russet potatoes are your best bet. In the next section, we’ll dive into the essential preparation steps to ensure your hash browns turn out perfectly golden and crispy every time.
Alternatives: Yukon Gold & Other Varieties
While Russet potatoes are the best choice for crispy hash browns, some people prefer using other potato varieties for different textures and flavors. Whether you’re looking for a softer, creamier bite or experimenting with healthier options, here are some popular alternatives to Russet potatoes for making homemade hash browns.
1. Yukon Gold Potatoes – Creamier and Less Crispy
Yukon Gold potatoes are a popular alternative to Russets because of their naturally buttery flavor and smooth texture. These potatoes have a medium starch content and higher moisture levels, which means they won’t get as crispy as Russets but will have a rich, creamy interior.
Pros: Naturally buttery taste, smooth texture, holds its shape well.
Cons: Less crispy than Russet potatoes due to higher moisture content.
Best For: If you prefer softer hash browns with a more delicate bite, Yukon Gold is a great option.
2. Red Potatoes – Holds Shape, Less Crisp
Red potatoes have a waxy texture and a low starch content, which makes them a bit tricky for classic hash browns. Since they contain more moisture, they don’t crisp up as well but hold their shape beautifully. If you like hash browns that are slightly crispy on the outside but tender and structured inside, red potatoes might work for you.
Pros: Holds its shape well, mildly sweet and earthy flavor.
Cons: Doesn’t get as crispy, can become too soft when cooked.
Best For: Those who like hash browns with a firmer texture or prefer a less starchy potato.
3. Sweet Potatoes – A Healthier, Slightly Sweet Option
For a nutrient-packed alternative, sweet potatoes are an excellent choice. They are rich in fiber, vitamins, and antioxidants, making them a healthier substitute. However, sweet potatoes contain more sugar and moisture than regular potatoes, which means they require a different approach to achieve crispiness.
Pros: Naturally sweet, high in fiber and nutrients, great for a healthier version.
Cons: Harder to get crispy, can burn quickly due to sugar content.
Best For: If you want a nutritious twist on traditional hash browns with a touch of natural sweetness.
Tips for Crispy Sweet Potato Hash Browns:
Use arrowroot or cornstarch to absorb excess moisture.
Cook on medium-low heat to prevent burning.
Add savory seasonings like garlic powder, paprika, or cayenne to balance the sweetness.
4. Mixed Potato Hash Browns – The Best of Both Worlds
If you’re torn between crispiness and creaminess, you can combine different potato varieties for a unique texture and flavor. Try mixing Russet potatoes (for crispiness) with Yukon Gold (for a soft, rich interior), or add a bit of sweet potato for a sweet-savory balance.
Pros: Balanced texture and flavor, creative and customizable.
Cons: Requires experimenting with ratios to get the perfect crisp.
Best For: Those who like a mix of crispiness and creaminess in their hash browns.
Which Potato Should You Choose?
For classic, crispy hash browns: Stick with Russet potatoes.
For a creamier texture: Go with Yukon Gold.
For a firmer, structured hash brown: Try red potatoes.
For a healthier alternative: Use sweet potatoes, but adjust the cooking method.
For a unique twist: Experiment with mixing different varieties.
No matter which potato you choose, the key to great hash browns is removing excess moisture, using the right oil, and cooking at the proper temperature. Up next, we’ll cover how to prepare your potatoes to get that perfect golden-brown crispiness!
Should You Peel the Potatoes?
One of the most common questions when making homemade hash browns is whether to peel the potatoes or leave the skin on. While peeling is the traditional method, some people prefer to keep the skin for added texture and nutrients. Here’s a breakdown of the pros and cons of peeling vs. leaving the skin on, and when each option works best.
—
1. Peeling the Potatoes – A Classic, Smooth Texture
Most traditional hash brown recipes call for peeled potatoes, as removing the skin results in a smoother texture and more even cooking. Peeling is ideal if you want:
✔ Pros of Peeling the Potatoes:
More uniform texture – No rough bits from the skin, ensuring a smooth, even cook.
Crispier results – The surface area is completely exposed, allowing for more even browning.
No dirt or imperfections – Peeling removes any blemishes or rough patches on the skin.
✘ Cons of Peeling the Potatoes:
Loss of fiber and nutrients – The skin contains a good amount of fiber, vitamins, and minerals.
Extra prep time – Peeling adds an extra step before shredding.
Best For:
Traditional, crispy hash browns
Restaurant-style hash browns
Kids or picky eaters who prefer a smooth texture
—
2. Leaving the Skin On – A Rustic, Nutritious Twist
If you enjoy a more rustic, homemade feel to your hash browns, keeping the skin on can be a great choice. The skin adds extra flavor, texture, and nutrients, making your hash browns heartier.
✔ Pros of Keeping the Skin On:
More nutrients and fiber – Potato skins contain important vitamins like B6, potassium, and antioxidants.
Saves time – No need to spend extra minutes peeling.
Adds a rustic texture – Gives hash browns a more natural, homemade appearance.
✘ Cons of Keeping the Skin On:
Slightly chewier texture – The skin doesn’t crisp up the same way as peeled potatoes.
Potential dirt or pesticides – If not properly washed, skins may carry dirt or chemical residues.
Less even browning – The skin can create small inconsistencies in crispiness.
Best For:
Rustic-style hash browns
Health-conscious eaters looking for extra fiber
Quick and easy preparation
—
3. How to Get the Best of Both Worlds
If you can’t decide between peeling or keeping the skin, you can try a partial peeling method:
Peel half of the potato and leave some skin on for a mix of crispiness and texture.
Trim off any rough or blemished areas, keeping only the smooth, clean skin.
Use thin-skinned potatoes (like Yukon Gold) for a softer, less chewy texture.
—
4. The Final Verdict: Should You Peel or Not?
Peel the potatoes if you want:
✅ Classic, crispy, smooth hash browns
✅ A more refined, restaurant-style dish
✅ Even browning and consistent texture
Leave the skin on if you want:
✅ A rustic, homemade feel
✅ More fiber and nutrients
✅ Faster prep time with minimal waste
Ultimately, the choice comes down to personal preference. If crispiness is your top priority, peeling is the best option. If you prefer a rustic, healthier version, leaving the skin on works great—just make sure to wash the potatoes thoroughly before shredding.
Now that we’ve decided on whether to peel or not, let’s move on to the key preparation steps for achieving the crispiest homemade hash browns!
Preparing the Potatoes – The Key to Crispy Texture
Shredding the Potatoes Correctly
Shredding is one of the most important steps in making crispy, golden hash browns. The way you shred your potatoes affects their texture, crispiness, and cooking time. Choosing the right shredding tool, technique, and shred size will ensure your hash browns turn out perfect every time.
—
1. Choosing the Best Tool for Shredding
There are a few ways to shred potatoes, but the best tool depends on how finely you want your hash browns to be grated. Here are the most common options:
✔ Box Grater (Manual Grating)
A box grater is the most traditional and accessible method for shredding potatoes.
Best for: Classic, fine shreds that cook quickly and crisp up well.
How to use: Use the large holes on the box grater for evenly sized shreds.
Pros: No electricity required, easy to control the size.
Cons: Requires more effort and can be time-consuming for large batches.
✔ Food Processor (Fast & Efficient)
A food processor with a shredding attachment is the fastest and easiest way to shred potatoes.
Best for: Large batches of hash browns, quick preparation.
How to use: Attach the grating disc (not the blade), insert the potatoes, and process.
Pros: Saves time, produces uniform shreds, less manual effort.
Cons: Requires setup and cleanup, may produce slightly thicker shreds.
✔ Mandoline Slicer with Julienne Blade
A mandoline slicer with a julienne attachment creates long, thin potato strands.
Best for: Hash browns with a unique texture, similar to matchstick fries.
Pros: Produces very fine, uniform shreds.
Cons: Requires careful handling (sharp blades), slower than a food processor.
✔ Knife (For Chunkier Hash Browns or Diced Potatoes)
If you don’t have a grater or food processor, you can finely chop potatoes with a knife for a diced or “home fries” version of hash browns.
Best for: Chunkier, skillet-style hash browns.
Pros: No special tools needed.
Cons: Takes longer and won’t be as crispy as shredded hash browns.
—
2. The Ideal Shred Size for Hash Browns
Fine Shreds: Cook faster, crisp up more easily, and are ideal for thin, crispy hash browns. (Best with a box grater or food processor)
Medium Shreds: A balance between crispiness and a soft interior, often used for diner-style hash browns. (Best with a food processor)
Thick Shreds: Retain more moisture and take longer to cook, best for hash brown patties or skillet-style hash browns. (Best with a mandoline or knife)
For classic, crispy hash browns, aim for medium to fine shreds so they cook evenly and develop a golden-brown crust.
—
3. Tips for Shredding Potatoes the Right Way
✔ Keep the potatoes cold: If your potatoes start feeling sticky or mushy while shredding, chill them in cold water for 10 minutes before grating. Cold potatoes shred better and hold their shape.
✔ Work quickly to prevent browning: Once potatoes are shredded, they start turning brown due to oxidation. To slow this down, immediately rinse them in cold water (covered in the next section).
✔ Grate in batches for even cooking: If making a large batch, don’t pile all the shredded potatoes into the pan at once. Instead, grate and cook in small batches for the crispiest results.
✔ Use a steady grip for safety: When using a box grater or mandoline, hold the potato firmly and grate in a downward motion to prevent cuts.
—
What’s Next? Removing Excess Starch and Moisture
Now that you have perfectly shredded potatoes, the next crucial step is removing excess starch and moisture. This helps prevent soggy hash browns and ensures they crisp up beautifully. In the next section, we’ll cover the best techniques for rinsing, soaking, and squeezing the shredded potatoes for perfect results!
Removing Excess Starch – The Secret to Crispy Hash Browns
One of the most important steps in making crispy homemade hash browns is removing excess starch from the shredded potatoes. Starch is what makes potatoes sticky and gummy when cooked, leading to soggy or unevenly browned hash browns. By properly rinsing and soaking the potatoes, you can achieve a crispier texture and better flavor.
—
1. Why Is Starch Removal Important?
When you cut or shred a potato, it releases surface starch that can make hash browns:
Sticky and clumpy – Shreds will stick together instead of forming a crisp crust.
Soggy instead of crispy – Excess starch traps moisture, preventing proper browning.
Unevenly cooked – The outside may burn before the inside is fully cooked.
Removing starch allows each individual shred to crisp up evenly, giving you golden-brown, restaurant-style hash browns.
—
2. How to Remove Excess Starch from Shredded Potatoes
There are two effective methods for removing starch: rinsing and soaking.
✔ Method 1: Rinsing Under Cold Water (Quick Method)
If you’re short on time, a quick rinse under cold water is enough to wash away most of the surface starch.
How to do it:
1. Place the shredded potatoes in a large bowl or a fine-mesh sieve.
2. Run cold water over them, stirring with your hands to loosen starch.
3. Continue rinsing until the water runs clear instead of milky white.
4. Drain the potatoes well before moving on to the next step (squeezing out moisture).
Best for: When you need a fast starch removal method and don’t have time to soak.
—
✔ Method 2: Soaking in Ice Water (Best for Extra Crispiness)
For the crispiest hash browns, soaking the shredded potatoes in ice water for 10–15 minutes removes even more starch.
How to do it:
1. Fill a large bowl with cold water and ice cubes.
2. Add the shredded potatoes and stir them around.
3. Let them soak for 10 to 15 minutes (or up to 30 minutes for extra crispy hash browns).
4. Drain the potatoes in a colander and rinse them again under cold running water.
5. Proceed to the next step: squeezing out excess moisture for the crispiest texture.
Best for: When you want maximum crispiness and have extra time to prepare.
—
3. Extra Tip: Add a Dash of Vinegar or Salt (Optional)
If you want to enhance crispiness even further, you can add:
✔ A splash of vinegar (1 tsp white vinegar or apple cider vinegar) – Helps prevent oxidation (browning) and tightens the potato structure for better frying.
✔ A pinch of salt in the soaking water – Draws out moisture and enhances flavor.
These are optional but can help improve texture and taste.
—
4. The Next Step: Squeezing Out Moisture
Now that the starch is removed, the potatoes still contain a lot of moisture, which can prevent them from crisping up. The final step before cooking is squeezing out as much liquid as possible. In the next section, we’ll go over the best methods to remove excess water so your hash browns turn out perfectly crispy every time!
Squeezing Out Moisture – The Key to Crispy Hash Browns
After shredding and rinsing the potatoes to remove excess starch, the next crucial step is removing as much moisture as possible. Potatoes naturally contain a lot of water, and if that moisture isn’t removed, it can cause the hash browns to turn soft, mushy, or steam instead of crisping up.
Properly squeezing out the moisture ensures that your hash browns become crispy, golden brown, and evenly cooked. Here’s the best way to do it!
—
1. Why Is Removing Moisture Important?
Excess water in the potatoes can lead to:
Soggy hash browns – Instead of crisping up, they’ll steam and become soft.
Oil splattering – Water and hot oil don’t mix, causing dangerous splattering.
Uneven cooking – Some parts will be too wet to brown properly.
The drier the shredded potatoes, the crisper and crunchier your hash browns will be!
—
2. Best Methods for Squeezing Out Moisture
✔ Method 1: Using a Clean Kitchen Towel (Most Effective)
A clean kitchen towel (tea towel or cheesecloth) is the best tool for removing moisture because it allows you to squeeze tightly without tearing the potatoes.
How to do it:
1. Place the shredded, rinsed potatoes in the center of a clean kitchen towel.
2. Gather the towel’s corners and twist it tightly, forming a ball of shredded potatoes.
3. Over the sink or a bowl, squeeze as hard as possible to extract water.
4. Continue squeezing until very little liquid drips out.
5. Open the towel and fluff the dried potato shreds with a fork before cooking.
Why it works: This method removes the most moisture, leading to the crispiest hash browns.
—
✔ Method 2: Using a Potato Ricer (Easy & Efficient)
If you have a potato ricer (a tool used for making mashed potatoes), it works great for squeezing moisture out of shredded potatoes.
How to do it:
1. Fill the ricer with small batches of shredded potatoes.
2. Press down firmly over the sink, forcing out the liquid.
3. Repeat with the rest of the potatoes.
4. Fluff the potatoes with a fork before frying.
Why it works: This method is quick, easy, and effective, but it works best for small batches.
—
✔ Method 3: Using Paper Towels (Quick but Less Effective)
If you don’t have a kitchen towel or ricer, you can use paper towels to blot and press out moisture.
How to do it:
1. Place the shredded potatoes on a stack of paper towels.
2. Cover with another layer of paper towels and press firmly.
3. Continue pressing or rolling with a rolling pin until most of the moisture is absorbed.
Why it works: It’s quick and convenient, but it doesn’t remove as much moisture as the other methods.
—
3. Extra Tip: Double Squeeze for Extra Crispiness
For super crispy hash browns, you can do a double squeeze:
After the first squeeze, let the shredded potatoes sit for 5 minutes, then squeeze again.
This removes any remaining water that may have been released after the first press.
—
4. What’s Next? Seasoning and Cooking
Now that your potatoes are perfectly shredded, rinsed, and dried, they’re ready for seasoning and cooking. The next step is to choose the right oil, season properly, and use the best frying technique to get that perfect crispy texture.
Let’s move on to the best way to fry homemade hash browns to golden perfection!
Cooking Methods – Pan-Fried, Air Fryer, or Oven-Baked?
Pan-Frying for Diner-Style Crispiness
Now that your shredded potatoes are properly rinsed, drained, and dried, it’s time to cook them to golden perfection. Pan-frying is the best method for achieving diner-style crispy hash browns—golden brown on the outside, tender on the inside, and perfectly textured. The key to success lies in choosing the right pan, using the correct oil, and following the right frying technique.
—
1. Choosing the Right Pan
The pan you use can make a huge difference in how evenly your hash browns cook and how crispy they turn out. Here are the best options:
✔ Cast Iron Skillet (Best for Maximum Crispiness)
Retains heat well and provides even browning.
Develops a natural non-stick surface over time.
Creates extra crispy edges like classic diner-style hash browns.
Requires preheating for the best results.
✔ Stainless Steel Pan (Good for Crisping, Requires More Oil)
Heats evenly and helps with browning.
Hash browns might stick if the pan isn’t properly preheated or oiled.
Works best with a generous amount of oil.
✔ Non-Stick Pan (Easiest for Beginners, Less Crispiness)
Prevents sticking with minimal oil.
Doesn’t provide the same high-heat browning as cast iron.
Best for those who prefer less oil and easier cleanup.
Best choice? A cast iron skillet is the top choice for classic diner-style hash browns with maximum crispiness.
—
2. Picking the Right Oil or Fat
The type of oil or fat you use affects both the flavor and crispiness of your hash browns. Here are the best options:
✔ Vegetable Oil (Neutral Flavor & High Smoke Point)
Provides even frying and crispiness.
Works well with cast iron and stainless steel pans.
✔ Butter (For a Rich, Buttery Flavor)
Adds a delicious golden-brown color.
Can burn at high heat, so best combined with vegetable oil.
✔ Bacon Fat or Duck Fat (For Ultimate Flavor & Crunch)
Creates the crispiest, most flavorful hash browns.
A great option if you love savory, smoky depth in your dish.
Best choice? A mix of vegetable oil and butter gives you both crispiness and rich flavor.
—
3. How to Pan-Fry Hash Browns for Maximum Crispiness
✔ Step 1: Preheat the Pan
Heat your cast iron or stainless steel pan over medium-high heat for at least 2 minutes.
Add 2 to 3 tablespoons of oil or a mix of oil and butter.
Let the oil heat until it shimmers but doesn’t smoke (about 350°F / 175°C).
✔ Step 2: Spread the Shredded Potatoes Evenly
Add the dried, shredded potatoes to the pan.
Flatten them into a thin, even layer (about ¼ to ½ inch thick) using a spatula.
Avoid pressing down too hard—this can make them too dense.
✔ Step 3: Don’t Touch – Let Them Crisp!
Leave them undisturbed for 4 to 5 minutes to develop a golden crust.
If you move them too soon, they won’t have time to crisp up properly.
✔ Step 4: Flip & Cook the Other Side
Once the bottom is golden brown and crispy, carefully flip the hash browns using a spatula.
Cook for another 3 to 4 minutes until the second side is also golden and crispy.
✔ Step 5: Drain & Serve
Transfer the hash browns to a paper towel-lined plate to absorb excess oil.
Season immediately with salt and pepper while they’re hot.
—
4. Pro Tips for Diner-Style Hash Browns
✔ Use a lid for extra softness: If you like hash browns that are crispy on the outside but tender inside, cover the pan with a lid for the first 2 minutes of cooking. Then, remove the lid and let them crisp up.
✔ Flip in sections, not all at once: Instead of flipping the entire hash brown at once, use a spatula to flip in halves or quarters. This makes flipping easier and prevents breakage.
✔ Add seasonings after frying: Salt draws out moisture, so it’s best to season the hash browns after they’ve been cooked, not before.
✔ For extra crispiness, double fry: Cook the hash browns for 3 minutes per side, remove them from the pan, let them rest for a minute, and then return them to the pan for another 2 minutes per side. This gives them an ultra-crispy texture.
—
5. What’s Next? Serving Your Crispy Hash Browns
Now that your hash browns are perfectly crispy and golden brown, it’s time to serve them! In the next section, we’ll explore the best ways to serve hash browns, from classic breakfast plates to creative topping ideas.
Air Fryer Hash Browns – A Healthier, Crispy Alternative
If you love crispy hash browns but want to cut back on oil, the air fryer is a fantastic option. It produces golden-brown, crunchy hash browns with less oil than pan-frying while maintaining a great texture. The circulating hot air crisps up the shredded potatoes evenly on all sides, giving you a lighter yet still satisfying version of this classic breakfast favorite.
—
1. Why Use an Air Fryer for Hash Browns?
Air fryers have become popular for making healthier fried foods, and hash browns are no exception. Here’s why using an air fryer is a great choice:
✔ Crispy Texture with Less Oil – The rapid air circulation crisps up the hash browns beautifully without needing excessive oil.
✔ Even Cooking – No need to worry about uneven browning or flipping carefully like in a skillet.
✔ Healthier Option – Uses up to 80% less oil compared to pan-frying.
✔ Hands-Free Cooking – No standing over the stove, flipping, or monitoring closely. Just set the timer and let the air fryer do the work.
✔ Less Mess, Easy Cleanup – No grease splatters, and most air fryer baskets are non-stick and dishwasher safe.
—
2. Preparing Hash Browns for the Air Fryer
Before air frying, it’s essential to properly shred, rinse, dry, and season the potatoes to ensure they cook evenly and turn out crispy.
✔ Step 1: Shred & Remove Excess Moisture
Use a box grater or food processor to shred Russet potatoes (or another starchy variety).
Rinse the shredded potatoes under cold water until the water runs clear to remove excess starch.
Squeeze out as much moisture as possible using a clean kitchen towel or paper towels.
✔ Step 2: Season & Add Oil
Transfer the dried potatoes to a bowl.
Drizzle with 1 to 2 teaspoons of oil (olive oil, vegetable oil, or avocado oil).
Season with salt, black pepper, and optional garlic powder, onion powder, or smoked paprika for extra flavor.
Toss the potatoes to coat evenly with the oil and seasonings.
—
3. How to Cook Hash Browns in the Air Fryer
✔ Step 1: Preheat the Air Fryer
Preheat the air fryer to 375°F (190°C) for 3 to 5 minutes.
Preheating ensures the hash browns start crisping immediately.
✔ Step 2: Arrange the Hash Browns in the Basket
Lightly grease the air fryer basket with cooking spray or oil to prevent sticking.
Spread the shredded potatoes in a thin, even layer (no more than ½ inch thick).
Avoid overcrowding—air circulation is key to crispiness.
✔ Step 3: Air Fry Until Golden & Crispy
Cook at 375°F (190°C) for 15-18 minutes, flipping or stirring halfway through.
If you want extra crispiness, increase the temperature to 400°F (200°C) for the last 3-5 minutes.
✔ Step 4: Serve Immediately
Once the hash browns are golden and crispy, remove them from the air fryer.
Let them cool for 1-2 minutes, then serve hot with your favorite breakfast dishes.
—
4. Air Fryer Hash Brown Patties vs. Shredded Hash Browns
If you prefer hash brown patties instead of loose shreds, here’s how to do it:
✔ Shape the shredded potatoes into compact patties before placing them in the air fryer.
✔ Lightly press the patties with a spatula before air frying to help them hold together.
✔ Increase the cooking time slightly (18-20 minutes) since patties are thicker than shredded hash browns.
—
5. Pro Tips for the Crispiest Air Fryer Hash Browns
✔ Don’t Skip the Drying Step – Removing moisture ensures your hash browns don’t turn soggy.
✔ Use a Thin Layer – Overcrowding prevents proper crisping. Cook in batches if needed.
✔ Shake or Flip Halfway Through – This ensures even browning on all sides.
✔ Add a Bit More Oil for Extra Crispiness – A light spray halfway through cooking can help.
✔ Experiment with Seasonings – Try adding paprika, cayenne, Parmesan, or dried herbs for variety.
—
6. What’s Next? Serving Your Air-Fried Hash Browns
Now that your hash browns are perfectly crispy, it’s time to serve them! In the next section, we’ll cover delicious serving ideas and toppings to take your hash browns to the next level.

Oven-Baked Hash Browns – A Crispy, Hands-Free Alternative
If you want crispy hash browns without the need for constant flipping or frying, baking them in the oven is an excellent option. Oven-baked hash browns are golden brown, flavorful, and require less oil than pan-frying, making them a healthier and hands-free alternative. This method is also great for making large batches, perfect for feeding a crowd.
—
1. Why Bake Hash Browns in the Oven?
✔ Healthier than Pan-Frying – Uses much less oil, reducing overall fat content.
✔ Even Browning Without Flipping – The oven provides consistent heat, so hash browns cook evenly without needing to flip them.
✔ Hands-Free Cooking – No need to stand by the stove; just pop them in the oven and let them bake.
✔ Great for Large Batches – Perfect for making family-sized portions without crowding a frying pan.
✔ Customizable & Versatile – Works for loose shredded hash browns or hash brown patties.
—
2. Preparing Hash Browns for the Oven
Before baking, it’s important to shred, rinse, dry, and season the potatoes properly to get that crispy texture.
✔ Step 1: Shred & Remove Excess Moisture
Use a box grater or food processor to shred Russet potatoes (or another starchy variety).
Rinse the shredded potatoes under cold water until the water runs clear to remove excess starch.
Squeeze out as much moisture as possible using a clean kitchen towel or paper towels.
✔ Step 2: Season & Add Oil
Transfer the dried potatoes to a mixing bowl.
Drizzle with 2 to 3 tablespoons of oil (olive oil, vegetable oil, or melted butter).
Add salt, black pepper, and optional seasonings like garlic powder, onion powder, smoked paprika, or cayenne pepper.
Toss the potatoes to coat evenly with the oil and spices.
—
3. How to Bake Hash Browns in the Oven
✔ Step 1: Preheat the Oven
Preheat your oven to 400°F (200°C).
If you want extra crispiness, increase the temperature to 425°F (220°C).
Line a baking sheet with parchment paper or lightly grease it with oil to prevent sticking.
✔ Step 2: Spread the Hash Browns Evenly
Arrange the shredded potatoes on the baking sheet in a thin, even layer (about ¼ to ½ inch thick).
Press them down slightly with a spatula to ensure even contact with the pan.
Avoid overcrowding—air circulation is key to crispiness.
✔ Step 3: Bake Until Golden & Crispy
Place the baking sheet in the oven and bake for 20-25 minutes.
After the first 15 minutes, flip or stir the hash browns for even browning.
Bake for another 5-10 minutes or until they are crispy and golden brown.
✔ Step 4: Serve Immediately
Once the hash browns are golden and crispy, remove them from the oven.
Let them cool for 1-2 minutes, then serve hot with your favorite breakfast dishes.
—
4. Making Hash Brown Patties in the Oven
If you prefer hash brown patties instead of loose shreds, here’s how to do it:
✔ Shape the shredded potatoes into compact patties before placing them on the baking sheet.
✔ Press the patties slightly so they hold together while baking.
✔ Increase the baking time to 25-30 minutes, flipping the patties halfway through.
For extra crispiness, you can lightly spray the patties with oil before flipping.
—
5. Pro Tips for Extra Crispy Oven-Baked Hash Browns
✔ Preheat the Baking Sheet – Place the empty baking sheet in the oven while it preheats. Adding the potatoes to a hot pan helps them crisp up faster.
✔ Use Parchment Paper or a Lightly Oiled Pan – This prevents sticking while allowing crisp edges to form.
✔ Don’t Skip the Drying Step – Removing excess moisture ensures your hash browns get crispy, not soggy.
✔ For Extra Crunch, Broil at the End – If your hash browns aren’t crispy enough, broil them for the last 2-3 minutes.
✔ Experiment with Seasonings – Add fresh herbs, Parmesan cheese, or spices for extra flavor.
—
6. What’s Next? Serving Your Oven-Baked Hash Browns
Now that your hash browns are perfectly crispy and golden brown, it’s time to serve them! In the next section, we’ll explore delicious serving ideas and toppings to take your hash browns to the next level.
Tips for Perfectly Golden and Crispy Hash Browns
Avoid Overcrowding the Pan – The Secret to Crispy Hash Browns
One of the most common mistakes when making hash browns is overcrowding the pan. While it might be tempting to cook everything in one batch, too many potatoes in the pan at once will lead to steaming instead of crisping. Proper spacing allows each shred to develop that golden-brown crust that makes hash browns so irresistible.
—
1. Why Overcrowding Ruins Hash Browns
When too many potatoes are packed into the pan, several issues arise:
✔ Traps Moisture → Soggy Hash Browns – Too many potatoes prevent steam from escaping, making them soft instead of crispy.
✔ Uneven Cooking → Some Parts Burn, Others Stay Undercooked – The center of the pan might not brown properly while the edges get too dark.
✔ Less Direct Contact with Heat – The potatoes need direct contact with the hot surface to develop a crisp crust. Overcrowding reduces this contact.
✔ Harder to Flip Properly – A packed pan makes it difficult to turn hash browns cleanly without breaking them.
For the best results, always spread the shredded potatoes in a single, thin layer, ensuring that each piece has enough room to crisp up.
—
2. How to Avoid Overcrowding
✔ Use a Large Enough Pan
A 10- to 12-inch skillet is ideal for one serving.
If making a large batch, use a larger pan or cook in multiple batches.
✔ Cook in Batches for Maximum Crispiness
Instead of trying to fit everything at once, cook in smaller batches.
After cooking the first batch, keep it warm in a 200°F (95°C) oven while frying the next batch.
✔ Spread the Potatoes Evenly
Thin, even layers crisp up better than thick piles. Aim for about ¼ to ½ inch thick.
If your potatoes are too thick, they will cook unevenly, with the outside crisping while the inside stays raw.
—
3. The Best Pan and Heat Settings to Prevent Overcrowding
✔ Choose the Right Pan
Cast Iron Skillet – The best choice for crispy, golden hash browns. Retains heat well and provides an even sear.
Stainless Steel Pan – Works well but needs a little extra oil to prevent sticking.
Non-Stick Pan – Easiest for beginners, but doesn’t develop as deep of a crust.
✔ Use Medium-High Heat
Too low of a temperature = soggy hash browns.
Too high of a temperature = burnt outside, raw inside.
The sweet spot is medium-high heat (around 375°F / 190°C) for a balance of crispiness and even cooking.
—
4. Pro Tips for Perfectly Spaced, Crispy Hash Browns
✔ Preheat the Pan First – Let the pan heat up for at least 2 minutes before adding potatoes.
✔ Use a Spatula to Flatten and Separate – After adding potatoes, gently press down with a spatula to create more contact with the pan.
✔ Avoid Stirring Too Much – Let the hash browns sit undisturbed for at least 4-5 minutes before flipping.
✔ Try Dividing into Smaller Patties – Instead of cooking one large layer, make separate hash brown patties for easier flipping and better crisping.
—
5. What’s Next? The Perfect Flip
Once you’ve given your hash browns enough space to crisp up properly, the next challenge is flipping them without breaking. In the next section, we’ll cover the best flipping techniques to keep your hash browns intact and evenly browned.
Cooking at the Right Temperature – The Key to Perfect Hash Browns
Achieving perfectly crispy hash browns relies heavily on cooking them at the right temperature. If the temperature is too low, your hash browns will turn soggy and greasy. If it’s too high, they can burn on the outside while staying raw in the middle. The right heat allows for a golden, crispy exterior while ensuring the inside is tender and fully cooked. Let’s dive into how to find and maintain that sweet spot for optimal hash brown results.
—
1. Why Temperature Matters for Crispy Hash Browns
✔ Low Temperature = Soggy Hash Browns
When the heat is too low, hash browns begin to absorb excess oil, leading to a greasy, soft texture. The goal is to get the hash browns crisped quickly on the outside, without giving them too much time to soak up oil or moisture.
✔ High Temperature = Burnt Outside, Raw Inside
On the other hand, if the pan is too hot, the outside of the hash browns will char before the inside has time to cook through. You’ll end up with burnt edges and a raw, mushy interior—definitely not the goal!
✔ The Right Temperature = Evenly Crispy, Perfectly Tender
The key to achieving perfectly crispy hash browns is to cook them at a medium-high temperature that allows the outer layer to crisp while ensuring that the interior cooks through evenly.
—
2. The Ideal Cooking Temperature for Hash Browns
✔ Pan-Frying Hash Browns
The perfect pan-frying temperature is between 375°F (190°C) and 400°F (200°C).
At this temperature, the hash browns will golden quickly and crisp up on the outside while still cooking all the way through.
Medium-high heat is ideal—too low, and they’ll absorb oil; too high, and they’ll burn.
Tip: If you’re using a cast iron skillet, which holds heat very well, you may want to start with medium heat and then adjust as needed to prevent burning.
—
3. Checking and Maintaining the Right Temperature
✔ Test the Pan Temperature with a Small Amount of Potatoes
Before adding the entire batch, drop a small amount of shredded potatoes into the pan.
If they sizzle immediately and begin to turn golden within a few minutes, the pan is at the right temperature.
If the potatoes don’t sizzle or if they take too long to cook, the pan is too cool. Increase the heat slightly.
If the potatoes begin to brown too quickly or start to burn, lower the heat slightly.
✔ Use a Cooking Thermometer
If you’re looking for a more precise way to ensure your oil or pan is at the right temperature, use a cooking thermometer. For oil, aim for 375°F (190°C) for perfect crispiness. This ensures that the oil is hot enough to fry the hash browns properly without letting them absorb too much oil.
—
4. How to Maintain Consistent Heat Throughout Cooking
✔ Avoid Overcrowding the Pan
Overcrowding the pan lowers the temperature, causing the hash browns to cook more slowly and unevenly. Spread the hash browns in a single layer and, if necessary, cook in batches. This helps maintain an even temperature and allows each piece to get crispy.
✔ Monitor Heat and Adjust as Needed
Cooking hash browns is a bit of a balancing act. You’ll need to adjust the heat throughout the process:
Start with medium-high heat to get the hash browns cooking quickly.
If the edges start to burn, reduce the heat to medium.
If they aren’t crisping fast enough, increase the heat slightly.
✔ Use the Right Pan for Heat Distribution
The type of pan you use can greatly impact how evenly heat is distributed.
Cast iron skillets hold and maintain heat very well, making them excellent for hash browns.
Stainless steel pans can also work, but they often require a little more attention to avoid hotspots.
Non-stick pans are easy to use but don’t always provide the same crisping ability as cast iron.
—
5. Cooking Hash Browns in the Oven or Air Fryer
If you’re cooking hash browns in the oven or air fryer, temperature control is equally important:
✔ Oven-Baked Hash Browns
Preheat your oven to 400°F (200°C).
To maintain consistent heat, use a baking sheet and spread the hash browns in a thin layer.
If you’re looking for an even crisp, consider flipping the hash browns halfway through.
✔ Air Fryer Hash Browns
Preheat the air fryer to 375°F (190°C).
Air fry for 15-20 minutes, flipping or stirring halfway through to ensure even cooking. The circulating hot air will maintain a constant temperature and evenly crisp your hash browns.
—
6. Pro Tips for Cooking at the Right Temperature
✔ Preheat Your Pan or Oven – Whether you’re pan-frying or baking, make sure to preheat your cooking surface to ensure even cooking from the start.
✔ Use a Thermometer – If you’re unsure, a cooking thermometer is an easy way to ensure you’re at the correct frying temperature.
✔ Avoid Overcrowding – As mentioned earlier, too many potatoes at once will lower the temperature and lead to soggy hash browns.
✔ Adjust Heat as Needed – Keep an eye on your hash browns, adjusting the heat slightly as you go to maintain that perfect golden crispiness.
—
7. What’s Next? Flipping for Perfection
Once you’ve found the right temperature and your hash browns are crisping up beautifully, the next challenge is flipping them without breaking. In the next section, we’ll dive into the best techniques for flipping to ensure your hash browns stay intact and cook evenly.
Seasoning & Add-Ins – Elevating Your Hash Browns with Flavor
Hash browns are simple at their core—just potatoes, oil, and heat—but that doesn’t mean they can’t be packed with flavor. Whether you prefer classic seasoning or like to add extra ingredients for depth, the right mix of spices and add-ins can take your hash browns to the next level. Let’s dive into the seasoning options and some delicious add-ins that can make your hash browns a showstopper at breakfast or brunch.
—
1. Classic Seasoning for Perfect Hash Browns
Even the simplest of seasonings can elevate the flavor of hash browns without overpowering the crispy texture. Classic seasonings enhance the natural flavor of the potatoes while keeping things balanced.
✔ Salt & Pepper
Salt and freshly ground black pepper are the basics for bringing out the flavor of your hash browns.
Add salt before cooking, but be cautious not to overdo it, as the potatoes will absorb it during cooking. Adjust seasoning after cooking if necessary.
Pepper adds a subtle bite, but you can also experiment with white pepper for a milder version.
✔ Garlic Powder
Garlic powder imparts a mild, savory flavor without the raw intensity of fresh garlic. It blends well with the crispy texture of hash browns.
For a deeper garlic flavor, you can also use garlic salt, but be careful not to over-salt the dish.
✔ Onion Powder
Onion powder provides a mild, sweet onion flavor that complements the earthy taste of potatoes.
If you want a more intense onion flavor, you can sauté chopped onions and mix them into the hash browns.
✔ Paprika
Smoked paprika gives hash browns a subtle smokiness, while sweet paprika adds a mild, slightly sweet flavor.
You can also try cayenne pepper or chili powder for a bit of heat.
—
2. Fresh Herb Additions for a Burst of Flavor
Fresh herbs add an extra level of freshness and aroma to your hash browns, making them more complex and aromatic. Choose herbs that pair well with the richness of potatoes.
✔ Fresh Parsley
Chopped fresh parsley adds a burst of color and freshness to your hash browns, balancing the richness of the potatoes.
It also works well with other herbs like chives or dill for an herbaceous flavor profile.
✔ Fresh Chives
Chives offer a subtle, onion-like flavor that pairs beautifully with the crispy texture of hash browns.
Use fresh chives to garnish or mix them into the hash browns for a mild, aromatic touch.
✔ Thyme or Rosemary
Thyme provides a delicate, earthy flavor that complements the starchiness of potatoes.
Rosemary is more assertive, offering a woody and piney aroma that pairs wonderfully with crispy hash browns, especially if you’re pan-frying them in butter.
✔ Cilantro
For a more Latin-inspired flavor, add fresh cilantro to your hash browns. It brings a bright and zesty flavor that contrasts well with the richness of the potatoes.
—
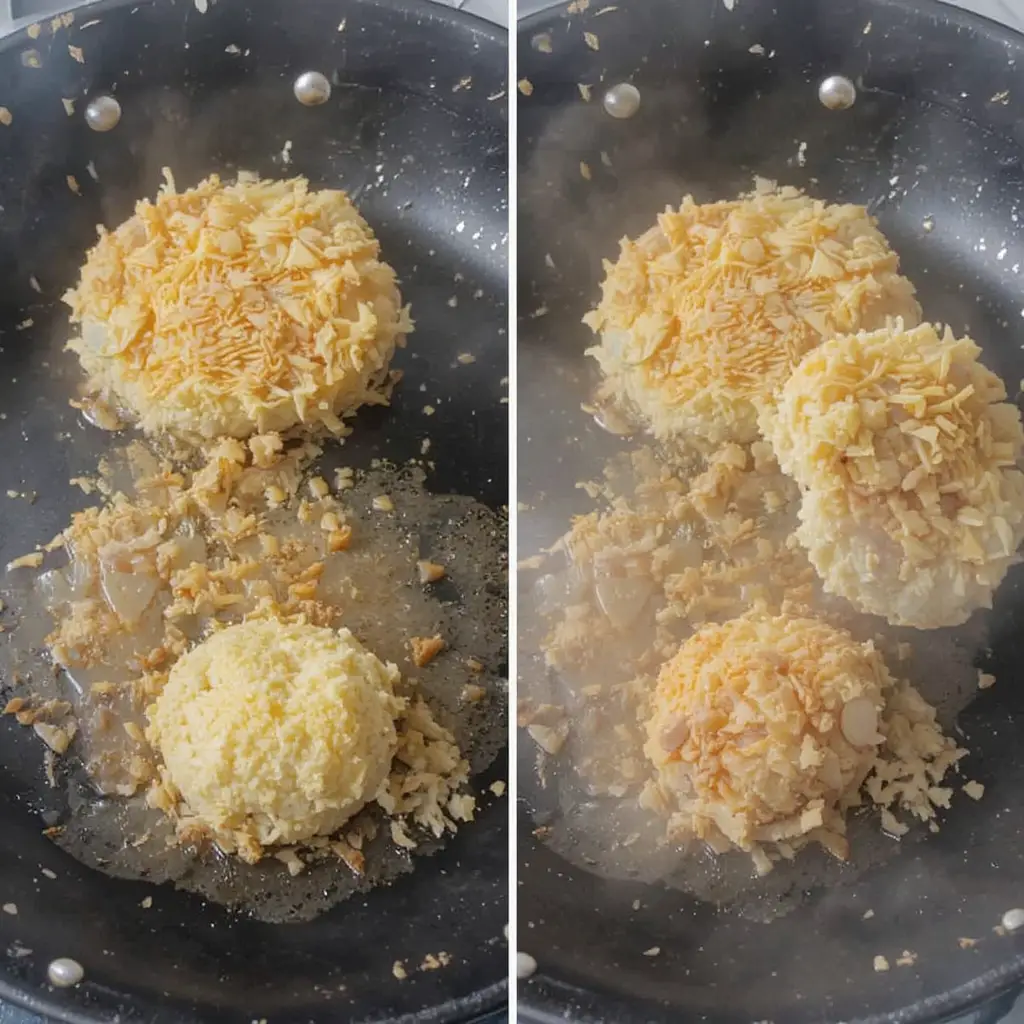
3. Cheese Add-Ins for Creamy, Flavorful Hash Browns
If you’re a cheese lover, adding cheese to your hash browns can turn them into a more indulgent dish. Melted cheese adds richness, flavor, and a gooey texture that balances out the crispiness.
✔ Cheddar Cheese
Cheddar cheese is a popular choice due to its sharp, tangy flavor. It melts beautifully and gives hash browns a creamy texture.
For added flavor complexity, use aged cheddar for a more pronounced sharpness.
✔ Parmesan Cheese
Parmesan adds a salty, umami-packed depth to your hash browns. It crisps up well when mixed with the potatoes, creating a savory, cheesy crust.
Grated or shredded parmesan works best for even coverage.
✔ Gruyère or Swiss Cheese
Gruyère and Swiss are more mild, nutty cheeses that complement the crispiness of hash browns. They melt beautifully and create a smooth texture.
These cheeses can give your hash browns a fancy, restaurant-quality feel.
✔ Cream Cheese or Sour Cream
For a creamy texture, you can mix in a bit of cream cheese or sour cream. This will make your hash browns extra rich and smooth, while also balancing the crispy exterior.
—
4. Protein Add-Ins for a Heartier Breakfast
If you want to turn your hash browns into a more substantial breakfast or brunch, adding protein can make them more filling and satisfying. These add-ins also bring their own flavors, creating a more complex dish.
✔ Bacon
Crispy bacon bits add a salty, smoky flavor to your hash browns, enhancing their overall savory taste.
Cook the bacon first and crumble it before mixing it with the hash browns to ensure even distribution.
✔ Sausage
Cooked sausage—whether it’s pork, turkey, or veggie sausage—adds richness and a spicy kick to your hash browns.
Chop or crumble the sausage into small pieces to evenly incorporate it into the hash browns.
✔ Ham
Diced ham offers a mildly sweet, savory flavor that pairs beautifully with hash browns, giving them an additional layer of depth.
✔ Eggs
Scrambled or fried eggs on top of hash browns add richness and are a classic combination. You can also mix beaten eggs directly into the hash browns before frying to create a soft, fluffy texture.
—
5. Vegetables for Added Texture and Flavor
Vegetables not only enhance the flavor of hash browns but also add texture and color. Try adding some sautéed vegetables to your hash browns for more dimension.
✔ Onions
Sautéed onions provide sweetness and a soft texture that balances the crispy potatoes.
Caramelized onions add a richer, deeper flavor if you want to enhance the savory quality of your hash browns.
✔ Bell Peppers
Diced bell peppers (red, yellow, green) add a burst of color and sweetness to hash browns.
Sauté them before mixing them into your hash browns to ensure they soften and flavor the potatoes.
✔ Spinach or Kale
Wilted spinach or kale adds a fresh, slightly bitter contrast to the richness of hash browns.
You can sauté the greens lightly before folding them into the hash browns.
—
6. How to Add Seasoning & Add-Ins
✔ Pre-Cook Add-Ins for Even Distribution
For ingredients like bacon, sausage, and vegetables, it’s important to cook them separately before adding them to the hash browns. This ensures that everything is cooked through and evenly distributed without adding excess moisture.
✔ Season Before Cooking
To ensure the flavors are well-mixed, it’s best to season the shredded potatoes before frying or baking them. Toss them with your seasonings and oil so that every shred is evenly coated.
✔ Adjust Seasonings After Cooking
Taste your hash browns once they’re done cooking. If they need more salt or pepper, sprinkle on top and gently toss to incorporate. Adding seasonings after cooking ensures they’re not overpowered during the frying process.
—
7. What’s Next? Perfecting the Frying Process
Now that your hash browns are seasoned to perfection, the next step is ensuring that they cook crispy and evenly. In the next section, we’ll discuss how to fry your hash browns to achieve the perfect golden-brown crust while keeping them tender on the inside.
Serving Suggestions & Variations
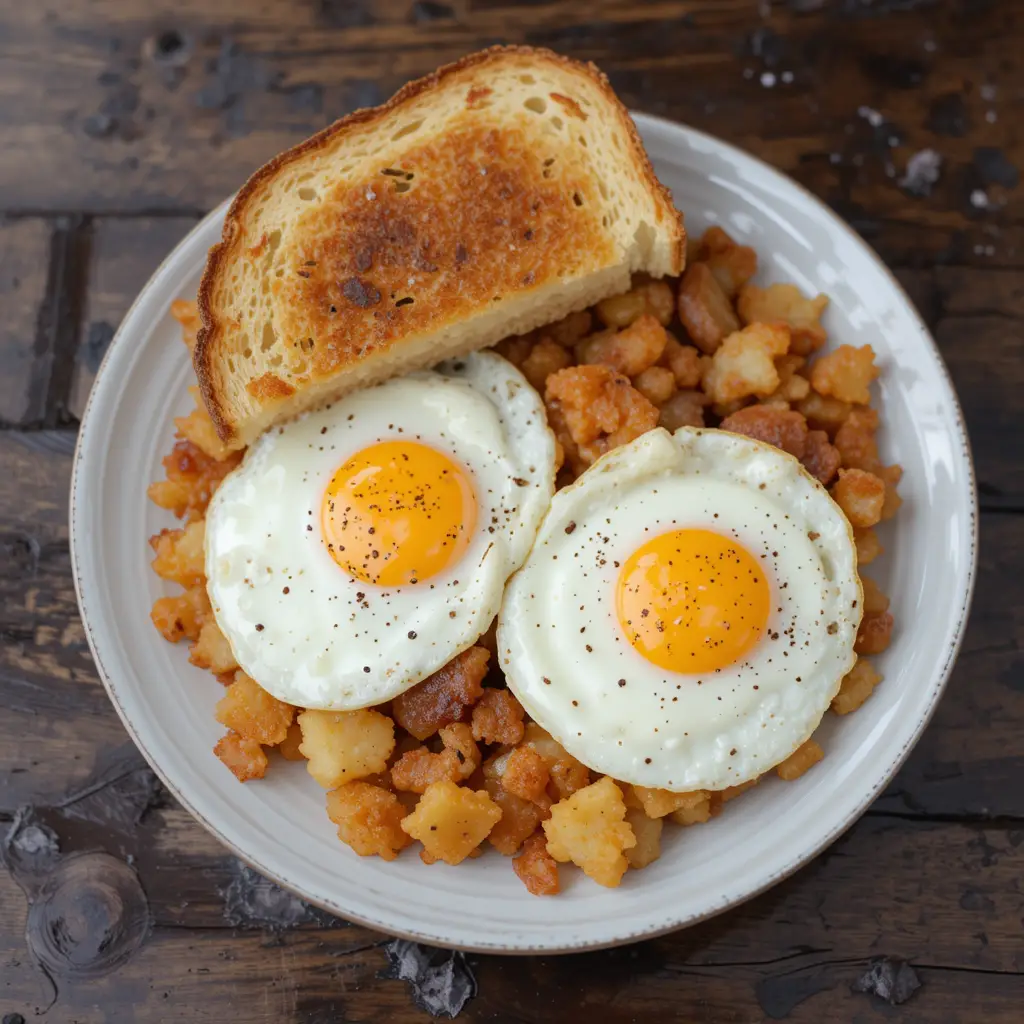
Classic Breakfast Pairings – What to Serve with Your Perfect Hash Browns
Hash browns are a breakfast staple, but they’re also incredibly versatile. Their crispy texture and savory flavor make them the perfect companion for a variety of classic breakfast dishes. Whether you prefer the simplicity of eggs and toast or a more indulgent spread, there are plenty of options to serve alongside hash browns. Here, we’ll explore some classic pairings that will complement your hash browns and elevate your breakfast or brunch experience.
—
1. Eggs – The Ultimate Breakfast Duo
One of the most iconic pairings with hash browns is eggs. The richness and softness of eggs balance out the crispy, starchy texture of the hash browns. There are various ways to prepare eggs that can elevate your hash browns, depending on your preferences.
✔ Scrambled Eggs
Scrambled eggs are creamy and fluffy, making them a perfect contrast to the crunchy hash browns.
Add a sprinkle of cheese, herbs, or even crisp bacon bits to your scrambled eggs to take them up a notch.
Serve them together on a plate for a hearty, comforting breakfast that’s quick and satisfying.
✔ Fried Eggs
A classic sunny-side-up or over-easy egg is a favorite choice to pair with hash browns. The runny yolk adds richness that seeps into the crispy potatoes, creating an irresistible combination.
Over-hard eggs work too if you prefer your yolk fully cooked, providing a firmer texture that contrasts well with the softness of the hash browns.
✔ Poached Eggs
Poached eggs add a delicate touch to your hash browns with their soft whites and gooey yolks. The subtle flavors of poached eggs mix perfectly with the crispy potatoes, making for a refined breakfast choice.
—
2. Bacon – The Crunchy, Savory Companion
Nothing says breakfast like a side of crispy bacon. The salty, smoky flavor of bacon enhances the savory notes of hash browns, creating a perfectly balanced breakfast plate.
✔ Traditional Crispy Bacon
Crisp bacon strips are the most common pairing with hash browns, and for good reason. Their crunchiness mirrors the texture of the hash browns, while the saltiness complements the rich flavor of the potatoes.
Bacon also adds a smoky element that pairs wonderfully with the simple, earthy taste of hash browns.
✔ Bacon Bits or Crumbled Bacon
If you prefer not to have large strips of bacon on your plate, crumbled bacon bits are a great option. You can mix them directly into the hash browns or sprinkle them on top for extra crunch and flavor.
—
3. Sausage – A Hearty, Savory Addition
Sausage adds a savory and sometimes spicy element to your breakfast, making it another classic choice to serve with hash browns. Whether you go with pork, turkey, or veggie sausage, the rich flavors of sausage elevate the dish.
✔ Breakfast Sausage Links or Patties
Breakfast sausage links or patties are packed with flavor and create a satisfying pairing with hash browns.
Whether you prefer mild sausage or something with a kick, the combination of sausage and hash browns is sure to keep you full and satisfied.
✔ Sausage Gravy
If you’re feeling indulgent, serve your hash browns with a generous serving of sausage gravy. The creamy, meaty gravy complements the crispy hash browns and creates a comforting, filling breakfast.
—
4. Toast – For a Simple, Balanced Plate
When you want a simple and classic breakfast, toast is a go-to pairing with hash browns. The crispiness of toast adds another layer of texture, while its neutral flavor provides balance.
✔ Buttered Toast
Buttered toast is an easy, quick option. The rich, buttery flavor complements the crispness of the hash browns without overpowering them.
White, whole wheat, or sourdough toast can all work, depending on your preference. You can also add a touch of jam or honey for a sweet contrast.
✔ Avocado Toast
For a more modern twist, top your toast with mashed avocado for a creamy, healthy pairing with your hash browns.
Squeeze a bit of lemon over the avocado for brightness, and sprinkle with salt, pepper, and crushed red pepper flakes for an extra kick.
—
5. Gravy – Comforting and Rich
If you’re in the mood for something indulgent, gravy is the perfect sauce to serve alongside hash browns. Whether it’s sawyer gravy, brown gravy, or vegetarian gravy, it adds a rich, creamy element that pairs wonderfully with the crisp potatoes.
✔ Country Sausage Gravy
The ultimate comfort food pairing, country sausage gravy poured over crispy hash browns creates a hearty, satisfying breakfast.
The creaminess and spiced sausage flavor of the gravy complements the crunchy texture of the hash browns, making for an indulgent meal.
✔ Brown Gravy
Brown gravy is a savory option that adds a rich, meaty depth to hash browns. It’s ideal for those who prefer a simpler, less creamy sauce with their potatoes.
For a twist, you can mix in some sautéed mushrooms for added flavor.
—
6. Fresh Fruit – A Light, Refreshing Contrast
If you’re looking for a lighter side dish or something to balance the richness of your hash browns, fresh fruit is an excellent choice. The sweetness of fruit contrasts beautifully with the savory, crispy texture of hash browns.
✔ Sliced Fruit
Fresh sliced fruit like berries, melon, or orange slices can brighten up your plate and add a refreshing element to your breakfast.
The tartness of fruit, like grapefruit or pineapple, can offer a nice contrast to the richness of the hash browns.
✔ Fruit Compote or Jam
You can also serve hash browns with a fruit compote or jam on the side for a sweet-savory combo. Try apple compote, strawberry jam, or peach preserves to complement the potatoes.
—
7. What’s Next? Customizing Your Hash Browns
Now that you’ve discovered some classic breakfast pairings, why not make your hash browns even more special by customizing them with additional toppings or variations? In the next section, we’ll explore how to get creative with your hash browns and add your own unique twist to this breakfast favorite.
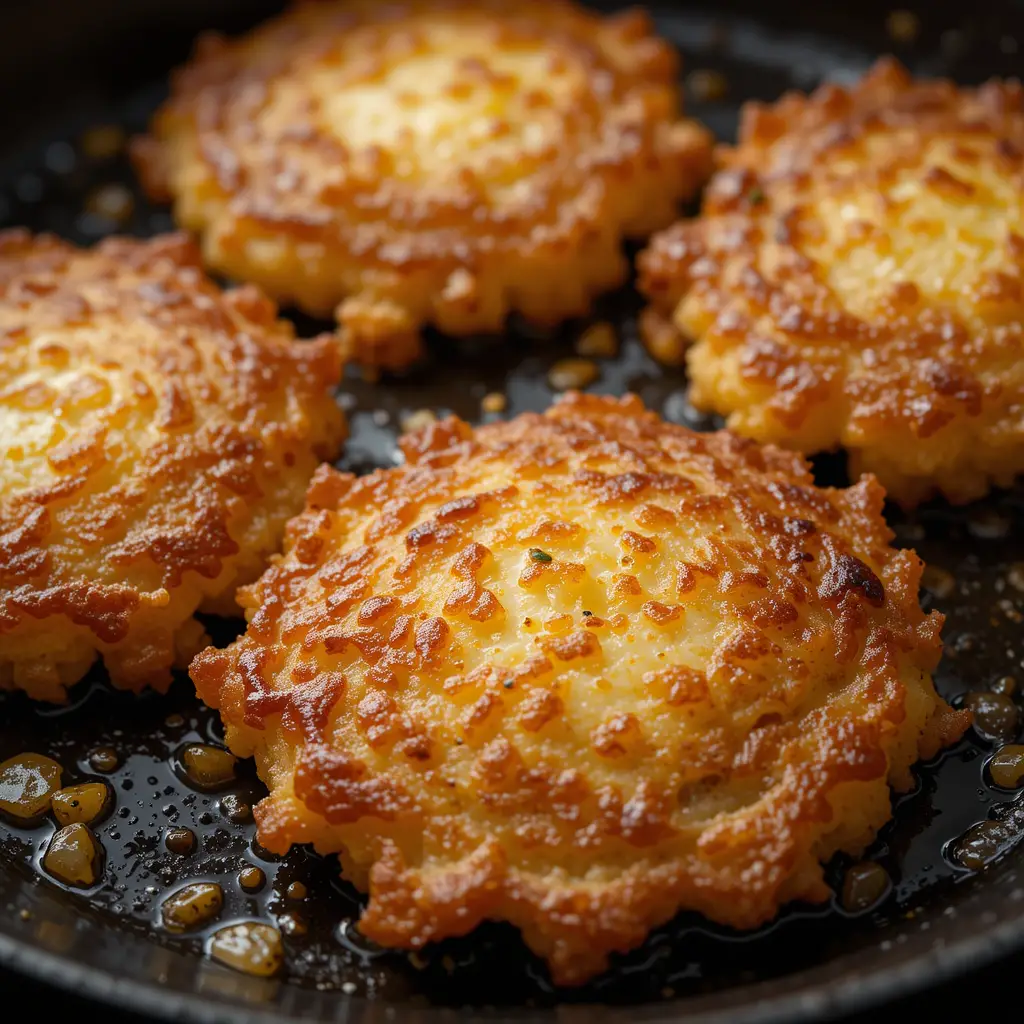
Loaded Hash Browns – Elevate Your Breakfast to New Heights
Loaded hash browns are a fun, indulgent twist on the classic dish, turning a simple side into a hearty, flavorful meal. By adding a variety of toppings, cheeses, proteins, and sauces, you can create a customized, filling breakfast or brunch that is both satisfying and delicious. Whether you’re entertaining guests, treating yourself, or just looking for a creative way to enjoy hash browns, loaded hash browns are a perfect choice.
—
1. Base Layer – Starting with Perfect Hash Browns
The foundation of a great loaded hash brown starts with perfectly crispy, golden-brown potatoes. Whether you choose to pan-fry, bake, or cook them in an air fryer, ensure that your hash browns are crispy on the outside yet tender on the inside. A solid, crunchy base ensures that all the toppings will stay intact without making the hash browns soggy.
✔ Crispy Pan-Fried Hash Browns
Pan-frying in butter or oil gives hash browns a golden-brown, crispy exterior while keeping the inside soft and fluffy.
This method creates the perfect base for adding toppings, as the crispiness holds up well against the weight of added ingredients.
✔ Oven-Baked Hash Browns
If you prefer a hands-off approach, oven-baked hash browns are great for creating a larger batch that can be served to a crowd. They’ll bake evenly and stay crispy for a longer period.
—
2. Cheese – Melty, Gooey Goodness
Cheese is one of the key elements of loaded hash browns, bringing a rich, creamy flavor that melts beautifully into the crispy potatoes. You can opt for a single type of cheese or mix several varieties to create a cheese lover’s dream.
✔ Cheddar Cheese
Sharp cheddar is a popular choice because of its bold flavor and melting qualities. It adds a savory, tangy layer to your loaded hash browns.
For an extra indulgent option, consider aged cheddar for a deeper, more complex taste.
✔ Monterey Jack or Pepper Jack
If you want a milder, creamier cheese, Monterey Jack is a great option. It melts wonderfully and has a smooth, buttery flavor.
For those who enjoy a spicy kick, Pepper Jack cheese offers a flavorful heat that pairs beautifully with hash browns.
✔ Parmesan Cheese
A sprinkle of Parmesan cheese over the top of your loaded hash browns adds a salty, umami-rich finish. It complements other cheeses while providing an extra layer of flavor.
—
3. Proteins – For a Heartier Meal
To turn your loaded hash browns into a more substantial meal, adding a protein is essential. These ingredients can be mixed into the hash browns or layered on top, giving the dish savory richness and heft.
✔ Crispy Bacon
Bacon adds a salty, smoky crunch that contrasts perfectly with the soft, cheesy hash browns. You can chop it into small pieces and scatter it over the top or crumble it for a more evenly distributed topping.
Bacon also complements a variety of other toppings, like eggs, cheese, or even sautéed vegetables.
✔ Breakfast Sausage
Cooked breakfast sausage adds a spicy, savory punch to the hash browns. Whether you use links or crumbled sausage patties, this protein choice pairs wonderfully with cheese and eggs.
For an extra boost of flavor, you can use chorizo or another flavored sausage for a kick of spice.
✔ Grilled Chicken
Grilled chicken can add a lean protein option to your loaded hash browns. Shredded or chopped chicken goes well with cheese, veggies, and a variety of sauces.
For a Mediterranean-inspired take, add some feta cheese and olives along with your chicken.
✔ Ground Beef
Ground beef or ground turkey is a hearty addition to loaded hash browns. The rich, savory flavor of ground meat pairs well with other toppings, and you can season it to match your flavor preferences—spicy, herby, or tangy.
✔ Eggs
A fried or scrambled egg on top of loaded hash browns is an obvious and perfect choice. The runny yolk creates a rich, creamy sauce for the crispy hash browns, adding moisture and richness.
Alternatively, poached eggs add a delicate, soft texture that contrasts nicely with the crispy potatoes.
—
4. Vegetables – Adding Color and Freshness
While cheese and proteins are the stars, vegetables bring color, texture, and freshness to loaded hash browns, balancing out the richness of the other ingredients.
✔ Green Onions
Chopped green onions (also known as scallions) add a fresh, mild onion flavor that pairs well with the savory and cheesy elements of the dish.
Their crunchiness and lightness offer a nice contrast to the heavier ingredients.
✔ Bell Peppers
Sautéed bell peppers (red, yellow, green) provide a sweet, tender addition to your loaded hash browns. They also add vibrant color and a subtle freshness.
For extra flavor, consider using roasted peppers for a smoky note.
✔ Mushrooms
Sautéed mushrooms add a meaty texture and earthy flavor that pairs beautifully with hash browns. Their umami richness works well with the cheese and proteins, creating a fuller flavor profile.
Mushrooms also absorb flavors well, making them a great option for loaded hash browns.
✔ Spinach or Kale
Wilted spinach or sautéed kale adds a healthy dose of greens, providing a bitter contrast to the richness of the potatoes and cheese.
These leafy greens cook down well and add a pop of color to the dish.
—
5. Sauces & Garnishes – Adding the Finishing Touches
The final step in creating loaded hash browns is adding sauces and garnishes to tie everything together. These can enhance the flavors and add an extra layer of moisture or heat.
✔ Sour Cream or Greek Yogurt
Sour cream is a classic topping for loaded hash browns, adding a creamy, tangy element that balances out the richness.
Greek yogurt can be used as a lighter alternative to sour cream, still providing the same creaminess but with extra protein and probiotics.
✔ Hot Sauce
If you like a spicy kick, drizzle on some hot sauce or sriracha to add heat and flavor.
You can also serve your loaded hash browns with a side of hot sauce for those who prefer to adjust the spice level to their taste.
✔ Salsa or Pico de Gallo
For a fresh, zesty element, serve your loaded hash browns with a dollop of salsa or pico de gallo. The tomato, onion, cilantro, and lime flavors complement the richness of the cheese and meat, providing a refreshing contrast.
✔ Avocado or Guacamole
Mashed avocado or guacamole adds a creamy, smooth texture that balances out the crunchiness of the hash browns. The freshness of avocado helps cut through the richness, making it a great topping for a lighter feel.
—
6. Creative Variations on Loaded Hash Browns
While the classic loaded hash brown is always a hit, don’t be afraid to get creative with your toppings and flavors. From Mediterranean-inspired versions to Tex-Mex variations, the possibilities are endless. You could try adding feta cheese, olives, and tomatoes for a Mediterranean twist, or load your hash browns with black beans, jalapeños, and a sprinkle of cheddar for a spicy, South-of-the-Border version.
—
Conclusion
Loaded hash browns are a customizable, satisfying dish that can be enjoyed any time of the day. With a crispy base and endless topping possibilities, they can be as indulgent or as light as you like. Whether you’re keeping it classic with cheese and bacon or going bold with fresh veggies and a fried egg, loaded hash browns are a guaranteed crowd-pleaser that will keep everyone coming back for more.
Making Them Ahead & Storing – Preparing Hash Browns for Convenience
If you’re short on time but want to enjoy fresh, crispy hash browns whenever you like, prepping ahead and knowing how to store them properly can be a game-changer. Whether you want to prepare a big batch for a busy morning, plan for a brunch gathering, or simply make extra for later, storing hash browns properly ensures that they maintain their texture and flavor. Here’s how you can make and store hash browns ahead of time.
—
1. Preparing Hash Browns in Advance
There are several methods for preparing hash browns ahead of time, whether you plan to freeze them for long-term storage or just want to prepare the ingredients to cook later.
✔ Shredding the Potatoes
Start by shredding the potatoes (usually Russet potatoes) using a grater or food processor. You can do this step ahead of time and store the shredded potatoes in the refrigerator or freezer.
To avoid browning, soak the shredded potatoes in cold water immediately after grating. This helps remove the starch and keeps them from oxidizing.
✔ Soaking and Drying
After soaking the potatoes, make sure to dry them thoroughly using paper towels or a clean kitchen towel to remove as much moisture as possible. This step is crucial for achieving crispy hash browns later.
You can complete this soaking and drying step up to a day in advance and store the shredded potatoes in the fridge in an airtight container.
✔ Pre-Cooking the Hash Browns
If you prefer to cook your hash browns in advance, you can partially cook them by pan-frying or baking them until they’re golden but not fully crispy.
After cooking, allow them to cool and store them in the fridge or freezer, depending on when you plan to use them. This step ensures that when you reheat them, the process is quicker and more efficient.
—
2. Storing Hash Browns for Short-Term Use
If you plan to use your hash browns within a few days, storing them in the fridge is the most convenient option. Here’s how to keep them fresh:
✔ Refrigerating Prepared Hash Browns
After shredding and soaking your potatoes, store them in an airtight container or a resealable plastic bag in the fridge. Make sure to keep the potatoes submerged in cold water to prevent browning.
You can store shredded, uncooked potatoes this way for up to 24 hours in the refrigerator. However, it’s best to use them within the same day or the next day for the best texture and flavor.
If you’ve cooked hash browns ahead of time, store them in an airtight container in the refrigerator for up to 3-4 days. Reheat them on the stovetop or in the oven to restore their crispiness.
—
3. Freezing Hash Browns for Long-Term Storage
For long-term storage or to have hash browns ready to go on a busy morning, freezing them is an excellent option. Freezing helps preserve the texture and flavor of the hash browns without compromising their quality.
✔ Freezing Raw Shredded Potatoes
To freeze raw shredded potatoes, rinse the shredded potatoes thoroughly to remove excess starch, then dry them completely.
After drying, place the shredded potatoes in a freezer-safe bag or container and remove as much air as possible to prevent freezer burn.
You can freeze the potatoes for up to 3 months. When you’re ready to cook them, thaw them in the refrigerator overnight, or cook them directly from frozen—just add a few extra minutes of cooking time.
✔ Freezing Cooked Hash Browns
If you’ve already cooked the hash browns, let them cool completely before freezing. Once cooled, place them in a single layer on a baking sheet and freeze them for about 1-2 hours.
After they are firm and frozen, transfer them into a freezer-safe bag or airtight container for storage. This method helps prevent the hash browns from sticking together, so you can easily grab a few at a time.
Frozen cooked hash browns can be stored for up to 3 months. To reheat, bake them in the oven, or pan-fry them until they’re crispy and hot again.
—
4. Reheating Your Hash Browns
Once your hash browns are prepared and stored, you’ll want to know the best methods to reheat them, ensuring they remain crispy and delicious. Here are some options for reheating hash browns:
✔ Reheating in the Oven
Preheat your oven to 400°F (200°C). Place the stored hash browns on a baking sheet in a single layer to ensure even reheating.
For frozen cooked hash browns, bake for 15-20 minutes until they’re heated through and crispy.
If the hash browns were refrigerated, bake for about 10-15 minutes until they reach the desired crispiness.
✔ Reheating on the Stovetop
For a quick reheat, use a skillet over medium heat with a little bit of oil or butter.
Add the refrigerated or frozen hash browns to the skillet, pressing them down gently with a spatula to ensure even heating. Cook for about 5-7 minutes per side until they’re crispy and heated through.
Frozen hash browns might take a little longer than refrigerated ones, so adjust the cooking time as needed.
✔ Reheating in the Air Fryer
The air fryer is an excellent way to reheat hash browns to restore their crispy texture.
Preheat the air fryer to 375°F (190°C), and place the hash browns in the basket in a single layer. Cook for about 5-7 minutes, flipping halfway through. This method works well for both cooked and frozen hash browns.
—
5. Tips for Freezing and Storing Hash Browns
To make your prep and storage even easier, here are a few tips:
✔ Labeling & Dating
When freezing hash browns, always label the bags or containers with the date so you can keep track of how long they’ve been stored. This helps ensure that you use them within the optimal time frame.
✔ Use Freezer-Safe Materials
Use freezer-safe bags or containers to avoid freezer burn and preserve the flavor and texture of the hash browns. Ensure the bags or containers are sealed tightly to prevent exposure to air.
✔ Don’t Overcrowd the Pan When Reheating
Whether you’re reheating in the oven, on the stove, or in the air fryer, avoid overcrowding the pan. Give the hash browns room to crisp up, ensuring they don’t steam and lose their crunch.
—
Conclusion
Making hash browns ahead of time and knowing how to store them properly can save you valuable time while ensuring you always have a delicious breakfast option at hand. By following the right preparation and storage methods, you can enjoy crispy, golden hash browns whenever you like, whether you’re cooking fresh or reheating a batch you’ve made earlier.
Conclusion
Homemade hash browns are a versatile, satisfying dish that can easily be customized to suit any taste or occasion. With a few key tips and techniques, such as choosing the right potatoes, shredding them properly, removing excess moisture, and achieving the perfect crispiness, you can make hash browns that are crispy on the outside and tender on the inside.
Whether you’re enjoying them as a classic breakfast side or loading them up with toppings for a heartier meal, hash browns offer endless possibilities. And with the right preparation and storage techniques, you can make them ahead of time, saving you effort during busy mornings or special gatherings.
By following these tips, you’ll always have delicious, homemade hash browns ready to serve, whether you’re enjoying them fresh or reheating them for a quick, comforting meal.