
If you love burgers with crispy, caramelized edges and a juicy center, then the Smashburger is the ultimate homemade burger experience. Unlike thick, grilled patties, a Smashburger is all about pressing the beef onto a hot surface, creating a deep, rich crust through the Maillard reaction—the same process that gives steak its irresistible sear.
Making a Smashburger at home is surprisingly easy, requiring only a few simple ingredients and the right technique. With 80/20 ground beef, a cast iron skillet, and a sturdy spatula, you can achieve that signature crispy, juicy bite just like your favorite burger joints, such as Shake Shack or Five Guys.
In this guide, you’ll learn everything you need to know to make the perfect Smashburger, from selecting the best ingredients to mastering the smashing technique. Get ready to bring the taste of a classic diner-style burger right into your kitchen!
What Makes a Smashburger So Special?
The Maillard Reaction: The Secret to a Crispy and Flavorful Smashburger
One of the key factors that make a Smashburger so incredibly delicious is the Maillard reaction—a complex chemical process that occurs when proteins and sugars in food are exposed to high heat. This reaction is responsible for the rich, golden-brown crust that forms on the surface of a perfectly cooked burger, giving it an intense depth of flavor and a satisfying crispy texture.
What is the Maillard Reaction?
The Maillard reaction is a type of non-enzymatic browning that happens when amino acids (proteins) and reducing sugars react under high temperatures, typically above 300°F (150°C). This process creates hundreds of new flavor compounds, producing the signature caramelized, nutty, and umami-rich taste that makes grilled meats, roasted coffee, and baked bread so irresistible.
Why is the Maillard Reaction Important for a Smashburger?
Unlike traditional thick burgers, where the meat is often cooked more gently, a Smashburger is designed to maximize surface contact with the hot cooking surface—whether it’s a cast iron skillet, griddle, or flat-top grill. By pressing the patty down firmly onto the heated surface, you create more browning, more crust, and more flavor in a very short cooking time.
Here’s why the Maillard reaction is crucial for a Smashburger:
Creates a Flavorful Crust: The crispy, golden-brown sear locks in the burger’s juices while adding a delicious contrast to the tender inside.
Enhances Umami Taste: The reaction produces compounds that boost the rich, savory taste of the beef.
Delivers the Classic Diner-Style Burger Experience: That deep, caramelized beefy flavor you get from a top-tier burger joint comes from a well-executed Maillard reaction.
How to Maximize the Maillard Reaction in Your Smashburger
To achieve the best possible crust and flavor, follow these key steps:
1. Use a Hot Cooking Surface: Preheat your cast iron skillet or griddle until it’s smoking hot (at least 450°F / 230°C). This ensures immediate browning when the beef hits the pan.
2. Start with a Loose Beef Ball: Don’t pre-shape the patty—using a loosely packed ball of 80/20 ground beef helps maximize surface contact when smashed.
3. Smash Immediately and Firmly: Use a metal spatula or burger press to smash the patty down within 30 seconds of placing it on the skillet. Press hard to spread the beef thin and create maximum crust.
4. Don’t Move or Flip Too Soon: Let the burger cook undisturbed for 1-2 minutes until the edges are deeply browned before flipping. This allows the Maillard reaction to fully develop.
5. Avoid Excess Moisture: Pat dry the beef if needed—excess water can interfere with browning.
By following these steps, you’ll achieve the perfect crispy, flavorful Smashburger every time! The Maillard reaction is what separates a mediocre burger from a restaurant-quality masterpiece, and now you have the knowledge to make it happen in your own kitchen.
Thin and Crispy vs. Thick Burgers: What Makes Smashburgers Unique?
When it comes to burgers, there are two main styles: thin, crispy patties (like Smashburgers) and thick, juicy patties (like gourmet or pub-style burgers). While both have their place in the burger world, Smashburgers stand out because of their intense flavor, crispy texture, and quick cooking time.
In this section, we’ll explore the key differences between thin Smashburgers and thick burgers, helping you understand why the smashing technique creates such a unique and delicious result.
—
What Defines a Smashburger?
A Smashburger is a thin, crispy-edged beef patty created by pressing a ball of ground beef onto a hot griddle or cast iron skillet. This technique maximizes the Maillard reaction, leading to a deep, golden-brown crust with an irresistible crunch. Smashburgers are typically:
Thin and Wide: The patty spreads out when smashed, ensuring even cooking.
Crispy on the Outside: Thanks to high heat and direct skillet contact.
Juicy Inside: Despite being thin, the quick sear locks in moisture.
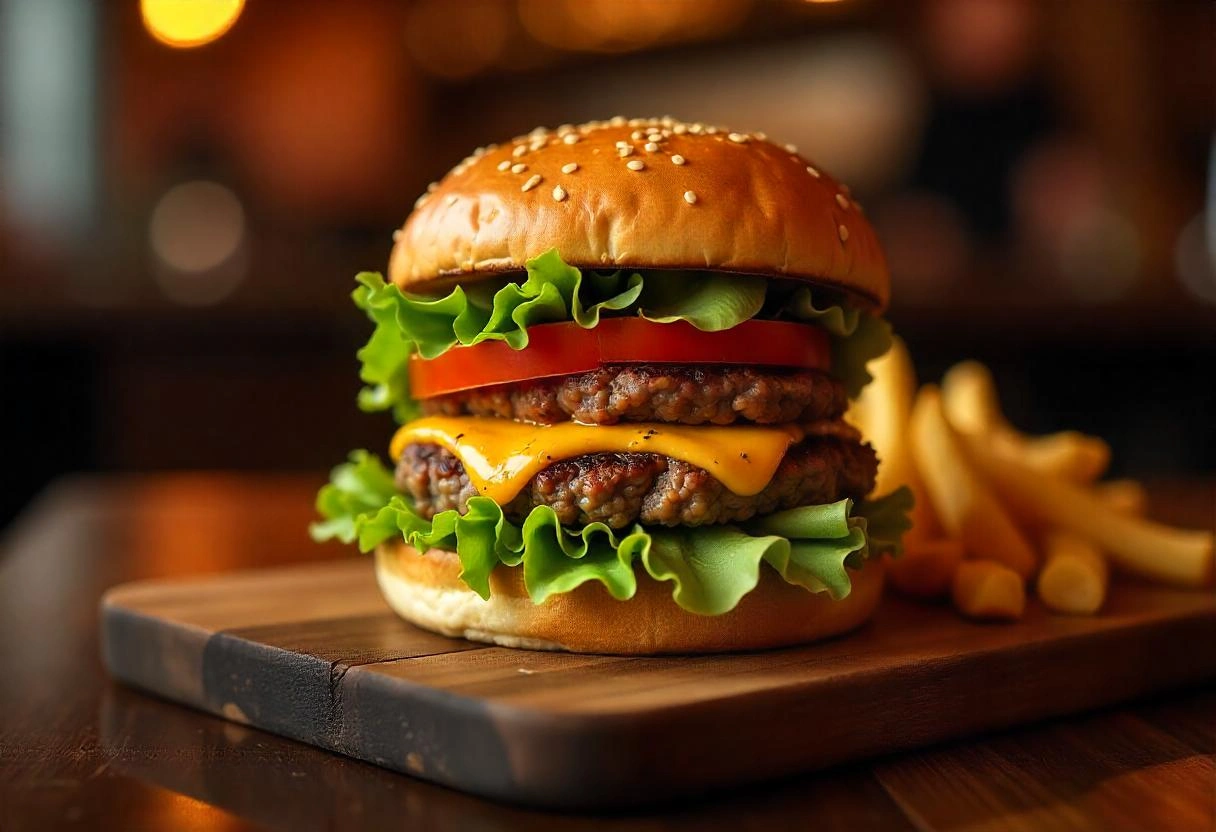
Stacked for Extra Flavor: Many people prefer double Smashburgers to get the perfect meat-to-bun ratio.
—
How Are Thick Burgers Different?
Thick burgers—often called pub-style burgers—are completely different in their approach:
Shaped Before Cooking: Thick patties are formed into a round, compact shape before hitting the grill.
Cooked Slower at Lower Heat: This allows for an evenly cooked interior, often reaching medium-rare to medium doneness.
More Juiciness from Thickness: The thick structure retains more internal moisture.
Less Crust Formation: Because they cook more slowly, they don’t develop the same crispy exterior as a Smashburger.
While thick burgers are great for those who enjoy a juicy, meaty bite, they lack the signature crunch and caramelization that make Smashburgers stand out.
—
Why Thin and Crispy Smashburgers Are So Popular
Smashburgers have gained a huge following because they offer a fast, flavorful, and nostalgic burger experience. Here’s why they are often preferred over thick burgers:
1. More Surface Area = More Flavor
Since Smashburgers are thin and wide, they have more contact with the hot cooking surface. This leads to more browning and crispy texture, something thick burgers can’t achieve as well.
2. Cooks Faster, Stays Juicy
A Smashburger is usually ready in 2-3 minutes, compared to thick burgers that take much longer to cook evenly. The fast cooking time prevents the burger from drying out.
3. Better Meat-to-Bun Ratio
Thick burgers can overwhelm the bun, making each bite too heavy. A thin Smashburger balances perfectly with brioche or potato buns, plus it allows for stacking multiple patties for the best texture and flavor combination.
4. Classic Diner-Style Appeal
Many famous fast-food chains like Shake Shack, Five Guys, and Smashburger use thin, crispy patties to create their signature burgers. The nostalgic, all-American taste of a well-made Smashburger is hard to beat!
—
Which One Should You Choose?
Go for a Smashburger if you love crispy, flavorful, fast-cooking burgers that are easy to eat and packed with umami goodness.
Go for a Thick Burger if you prefer a hefty, juicy bite with a slightly pink center.
Ultimately, both styles have their own appeal, but if you’re looking for the ultimate combination of crispy edges and juicy flavor, a Smashburger is the way to go!
Fast-Cooking Process: Why Smashburgers Cook So Quickly
One of the biggest advantages of making a Smashburger is how quickly it cooks. Unlike thick burgers that require slow, even cooking to prevent a raw center, Smashburgers are designed for high heat, rapid cooking, and maximum flavor development in just a few minutes.
The secret to this fast-cooking process lies in the thinness of the patty, the high heat of the cooking surface, and the smashing technique. Let’s dive into why Smashburgers cook so fast and how to ensure you get the perfect crispy, juicy burger every time.
—
Why Does a Smashburger Cook Faster Than a Thick Burger?
1. Thin Patties = Less Cooking Time
Smashburgers are pressed down to a very thin layer—about ¼ inch thick.
Because of this, heat penetrates the meat almost instantly, cooking the patty in 1-2 minutes per side.
Thick burgers, on the other hand, take longer because heat needs more time to reach the center of the patty.
2. High Heat Creates Instant Browning
Smashburgers are cooked on a very hot surface, typically 450°F to 500°F (230°C to 260°C).
This ensures the Maillard reaction happens quickly, creating a deep, crispy crust without overcooking the inside.
A lower temperature, like the one used for thick burgers, would result in a slower cook and a less crispy exterior.
3. No Need for Flipping Back and Forth
Smashburgers only need to be flipped once.
Once the first side is browned (about 1-2 minutes), you flip it, add cheese, and cook for another 30-60 seconds.
Thick burgers often require flipping multiple times to cook evenly without burning.
4. Increased Surface Contact = Faster Cooking
The patty is smashed down so it makes full contact with the skillet or griddle.
This allows heat to transfer evenly across the entire surface, ensuring a uniform cook without cold spots.
Thick burgers often have uneven cooking, with the exterior done before the inside is fully cooked.
—
Step-by-Step Breakdown of the Smashburger Cooking Process
1. Preheat the Cooking Surface
Heat a cast iron skillet or griddle over high heat for a few minutes until it’s smoking hot.
A properly heated pan is crucial for quick searing and maximum browning.
2. Smash the Patty Immediately
Place a loosely formed ball of beef (80/20 ground beef) onto the skillet.
Within 30 seconds, use a sturdy metal spatula or burger press to smash it down into a thin layer.
Hold for 10-15 seconds to ensure full contact with the surface.
3. Let It Cook Without Moving
Allow the patty to cook undisturbed for 1-2 minutes.
The edges will start to brown and get crispy, thanks to the Maillard reaction.
Do not press down again—smash only once to avoid losing juices.
4. Flip Once and Add Cheese
Use a sharp-edged spatula to scrape the patty off the skillet and flip it.
Immediately add a slice of cheese so it melts while the second side cooks.
Cook for another 30-60 seconds, then remove from heat.
5. Assemble and Serve Immediately
Place the patty on a buttered and toasted bun with your favorite toppings.
Enjoy your hot, crispy, and juicy Smashburger right away!
—
Why a Fast Cook Time is an Advantage
Retains More Juiciness – The quick sear locks in juices, preventing dryness.
Prevents Overcooking – Since it cooks so fast, it won’t turn dry like thick burgers can.
Makes Cooking Multiple Burgers Easy – You can cook multiple patties in minutes, perfect for serving a crowd.
No Special Equipment Needed – Unlike thick burgers that may require thermometers to check doneness, Smashburgers are foolproof—just cook until crispy and browned.
—
Final Thoughts
The fast-cooking nature of a Smashburger is one of its biggest strengths. In less than 5 minutes, you can have a perfectly crispy, juicy, and flavorful burger with minimal effort. By following the right steps—using high heat, smashing at the right time, and flipping only once—you’ll get that diner-quality Smashburger right in your own kitchen!
Ingredients You Need for the Best Smashburger
Ground Beef Choice: Selecting the Best Meat for a Perfect Smashburger
The quality of your Smashburger depends heavily on the type of ground beef you use. Since Smashburgers are thin and cook quickly, choosing the right beef ensures your burger is juicy, flavorful, and has the perfect crispy texture. Unlike thick burgers, where the interior can stay pink and juicy, a Smashburger needs the right fat content and grind size to prevent it from drying out.
In this section, we’ll break down the best beef choices, why fat content matters, and how to achieve the perfect blend for your homemade Smashburgers.
—
1. The Best Fat-to-Lean Ratio for Smashburgers
The fat content in ground beef is crucial because it adds flavor, moisture, and helps create a crispy crust. The best ratio for Smashburgers is:
80/20 Ground Beef (Best Choice)
This means 80% lean meat and 20% fat—the perfect balance for juicy and flavorful burgers.
The fat renders as the burger cooks, keeping it from drying out while enhancing browning and crispiness.
Most burger joints and fast-food chains use 80/20 beef for their Smashburgers.
85/15 Ground Beef (Acceptable Alternative)
Leaner than 80/20, with slightly less fat, which means less juiciness and flavor.
Can still work, but you might need to add butter or oil to maintain moisture.
90/10 or Leaner (Not Recommended)
These blends have too little fat, making the burger dry and lacking flavor.
Since Smashburgers cook quickly, they rely on fat for moisture—without it, they can become tough.
✅ Conclusion: Stick with 80/20 ground beef for the best results.
—
2. Fresh vs. Pre-Packaged Ground Beef
The texture and freshness of the beef also affect the final outcome. Here’s how different types compare:
Freshly Ground Beef (Best Choice)
If possible, buy freshly ground beef from a butcher or grind it yourself.
It has a looser texture, which helps in forming the perfect smashable patty without being dense.
Fresh beef also tastes better and holds moisture better than pre-packaged versions.
Store-Bought Ground Beef
Pre-packaged ground beef works fine but may be more compacted.
If using store-bought, gently loosen it before forming patties to improve texture.
Avoid over-handling, as it can make the meat tough.
✅ Tip: If you can, ask your butcher for a coarse grind of chuck roast with an 80/20 ratio for the best Smashburgers.
—
3. Best Cuts of Beef for Grinding Your Own
If you want to take your Smashburgers to the next level, grinding your own beef allows you to control the flavor and texture. The best cuts for homemade ground beef are:
Chuck Roast (Best Overall)
Naturally 80/20, making it perfect for burgers.
Has great beefy flavor and enough fat for juiciness.
Brisket (Rich & Beefy)
Adds extra depth of flavor and a slight smoky taste.
Best when mixed with chuck (e.g., 70% chuck, 30% brisket).
Short Rib (Extra Juicy)
High in marbling, making burgers extra juicy and tender.
Ideal when blended with chuck for a more premium burger.
Sirloin (Leaner, More Meaty Flavor)
Less fat but adds a strong beefy taste.
Best when combined with fattier cuts like chuck or brisket.
✅ DIY Blend:
For restaurant-quality Smashburgers, try this mix:
70% Chuck Roast
20% Brisket
10% Short Rib
Grind the meat using a coarse setting to maintain a loose, tender texture.
—
4. How to Handle and Prepare Ground Beef for Smashburgers
Do NOT Overwork the Meat
When forming patties, be gentle. Overworking makes them dense.
Simply roll the meat into 2-oz to 3-oz balls without pressing too hard.
No Seasoning Before Cooking
Unlike traditional burgers, do not mix salt or spices into the beef before smashing.
Season only the outer surface after smashing to prevent a tough texture.
Keep the Beef Cold
Cold fat melts slower, leading to juicier burgers.
Refrigerate the meat until right before cooking for best results.
—
Final Thoughts: Choosing the Best Ground Beef for Smashburgers
✅ 80/20 ground chuck is the best choice for a juicy, crispy Smashburger.
✅ Freshly ground beef is better than pre-packaged for loose texture and better flavor.
✅ Grinding your own beef using chuck, brisket, and short rib can take your Smashburgers to restaurant quality.
✅ Handle the meat gently and keep it cold for the best results.
By selecting the right ground beef and following these tips, you’ll get crispy, juicy, and flavorful Smashburgers every time!
Best Cheese for Smashburgers: Choosing the Perfect Melt
Cheese is an essential part of a great Smashburger. The right cheese should be ultra-melty, flavorful, and complement the crispy, juicy patty without overpowering it. Since Smashburgers cook quickly, the cheese also needs to melt fast to fully integrate with the meat.
In this section, we’ll explore the best cheese options, why they work, and some creative alternatives to elevate your homemade Smashburgers.
—
1. Classic Choice: American Cheese (Best Overall)
✅ Why It’s the Best:
Perfect meltability – American cheese is designed to melt quickly and evenly.
Creamy texture – It creates a gooey, smooth layer on top of the patty.
Mild, buttery flavor – It enhances the burger without overpowering the beefy taste.
Used in most fast-food smashburgers – This is the cheese found in classic diner and fast-food burgers like Shake Shack, Five Guys, and In-N-Out.
✅ Best Brand:
Kraft Singles or Velveeta for a classic taste.
Land O’Lakes Extra Melt American Cheese (used in many burger joints).
🔥 Pro Tip: Add the cheese immediately after flipping the patty to ensure it fully melts before serving.
—
2. Cheddar: Sharp and Bold Flavor
If you prefer a stronger cheesy bite, cheddar is a great choice. It adds a sharp, tangy flavor that pairs well with the rich beefiness of a Smashburger.
✅ Best Type:
Mild or Medium Cheddar – Melts better than sharp cheddar.
White Cheddar – A creamier, slightly milder alternative.
Processed Cheddar (Cheddar-Melt or American Cheddar Blend) – Melts easier than natural cheddar.
⚠️ Things to Watch Out For:
Sharp cheddar doesn’t melt as well and may become oily.
To improve melting, choose pre-sliced cheddar or a blend with American cheese.
—
3. Swiss Cheese: A Mild, Nutty Alternative
Swiss cheese has a smooth, slightly nutty flavor that works well if you want a more sophisticated taste in your Smashburger.
✅ Best Type:
Baby Swiss – Creamier and melts better than traditional Swiss.
Processed Swiss (like Alpine Lace) – Has better meltability.
🔥 Pro Tip: Pair Swiss cheese with caramelized onions and mushrooms for an elevated Smashburger.
—
4. Pepper Jack: Spicy and Creamy
If you love a little heat, Pepper Jack cheese is a fantastic option. It combines the creaminess of Monterey Jack with spicy flecks of jalapeño, habanero, and chili peppers.
✅ Why It’s Great:
Melts well like American cheese.
Adds a spicy kick without overwhelming the burger.
Pairs perfectly with smoky or grilled toppings like bacon or chipotle mayo.
🔥 Pro Tip: Use Pepper Jack if you’re making a spicy Smashburger with toppings like jalapeños, spicy aioli, or hot sauce.
—
5. Blue Cheese: Bold and Gourmet
If you’re looking for something bold and unique, blue cheese brings an intense tanginess that enhances the burger’s richness.
✅ Best Way to Use It:
Crumble it on the patty instead of using slices.
Mix it with a bit of cream or butter to improve meltability.
Pair it with bacon and caramelized onions for a gourmet experience.
⚠️ Things to Watch Out For:
Blue cheese has a strong, pungent flavor—not everyone likes it.
It doesn’t melt as smoothly as American or cheddar.
—
6. Mozzarella or Provolone: Mild and Stringy
Mozzarella and provolone are mild, creamy cheeses that provide a stretchy, stringy melt.
✅ Best Type:
Low-moisture mozzarella (melts better than fresh mozzarella).
Aged provolone (slightly sharper, more flavorful).
🔥 Pro Tip: Use mozzarella or provolone in Italian-inspired Smashburgers with marinara sauce and fresh basil.
—
7. Gouda: Smoky and Buttery
Smoked gouda is a rich, creamy cheese with a slightly smoky flavor. It pairs beautifully with bacon, BBQ sauce, or caramelized onions.
✅ Why It’s Great:
Creamy texture, melts well.
Adds depth of flavor without being overpowering.
🔥 Pro Tip: Use gouda in a BBQ Smashburger with crispy bacon and BBQ sauce.
—
How to Properly Melt Cheese on a Smashburger
To get perfectly melted cheese, follow these steps:
1. Flip the Patty First
Smashburgers cook fast, so flip the patty before adding cheese.
2. Add Cheese Immediately After Flipping
The residual heat from the burger will start melting the cheese.
3. Use a Lid or Dome for Extra Melting
Cover the burger with a metal lid or heatproof bowl for 15-30 seconds to trap heat and speed up melting.
4. Stack Patties for Double Cheeseburgers
If making a double Smashburger, stack the patties while still hot so the cheese melts between them.
—
Final Thoughts: Which Cheese Should You Use?
The best cheese depends on your taste preferences and the style of Smashburger you want to create:
✅ For a classic Smashburger, American cheese is the best choice.
✅ For extra flavor, mix and match cheeses—try cheddar with American, or gouda with Swiss for a unique twist.
✅ For gourmet burgers, experiment with blue cheese, gouda, or Pepper Jack to create new flavor profiles.
By picking the right cheese, you can take your homemade Smashburgers to the next level of flavor and texture!
Burger Buns Matter: Choosing the Perfect Base for Your Smashburger
A great Smashburger isn’t just about the patty—it’s also about the bun. The right bun can enhance the texture, absorb flavors, and hold everything together, while the wrong one can make the burger too dry, soggy, or hard to eat.
Since Smashburgers have thin, crispy-edged patties, the bun needs to be soft yet sturdy, allowing the focus to remain on the beef and toppings while still providing the right structure and mouthfeel.
Let’s explore the best burger bun options, how to prepare them, and why they make a difference in your homemade Smashburger.
—
1. Best Burger Buns for Smashburgers
Not all buns are created equal! Here are the best choices for an authentic, restaurant-quality Smashburger experience:
🍞 Potato Buns (Best Choice)
✅ Why They Work:
Soft, fluffy texture that complements crispy Smashburger patties.
Slightly sweet flavor that balances the savory beef.
Strong enough to hold the burger without falling apart.
Used in popular burger joints like Shake Shack.
🔥 Pro Tip: Toast potato buns lightly to add a crisp layer while keeping the inside soft.
—
🍞 Brioche Buns (Rich & Buttery Choice)
✅ Why They Work:
Buttery, slightly sweet taste that adds richness to the burger.
Soft, yet holds up well against juicy patties and toppings.
Ideal for gourmet-style Smashburgers with specialty sauces.
⚠️ Watch Out: Brioche buns can be too soft and rich for some people. If using a lot of sauce, toast them well to prevent sogginess.
🔥 Pro Tip: Butter and toast the cut side for a golden, crispy bite.
—
🍞 Sesame Seed Buns (Classic Diner Style)
✅ Why They Work:
The old-school diner burger bun, often used in fast-food chains.
Light and airy, allowing the patty flavor to shine.
The sesame seeds add extra nuttiness and texture.
🔥 Pro Tip: If you want a true fast-food experience, opt for sesame seed buns and a simple build.
—
🍞 Martin’s Potato Rolls (Shake Shack-Style)
✅ Why They Work:
Extra fluffy and slightly sweet, giving an authentic Shake Shack vibe.
Perfect for thin Smashburger patties, enhancing juiciness.
Easy to find in most grocery stores.
🔥 Pro Tip: If you want your burger to taste like Shake Shack, Martin’s potato rolls are a must!
—
🍞 Hawaiian Rolls (Sweet & Unique Choice)
✅ Why They Work:
Sweeter than potato buns, giving a unique contrast to the savory patty.
Ultra-soft texture, making each bite smooth and tender.
Best for smaller, slider-style Smashburgers.
🔥 Pro Tip: Use King’s Hawaiian Rolls for mini Smashburgers or party sliders!
—
2. Why Toasting the Bun is Essential
Toasting your bun elevates the texture and flavor of the burger. A lightly crisped surface prevents sogginess and adds a subtle crunch that enhances the Smashburger’s bite.
✅ How to Toast a Burger Bun:
1. Butter the cut side of the bun.
2. Toast on a skillet or griddle over medium heat for 30-60 seconds until golden brown.
3. (Optional) Toast with mayo instead of butter for an even crispier result.
🔥 Pro Tip: Toasting helps create a barrier against sauces and juices, keeping your bun from getting soggy.
—
3. Avoid These Common Bun Mistakes
⚠️ Too Thick Buns:
If the bun is too thick, it can overwhelm the burger patty and make each bite too “bready.”
Smashburgers are thin, so the bun should be light and proportional.
⚠️ Hard or Dry Buns:
Artisan rolls or ciabatta buns may be too tough for a Smashburger.
A good bun should be soft and slightly squishy to match the patty’s texture.
⚠️ Untoasted Buns:
If the bun isn’t toasted, it can soak up too much sauce and fall apart.
Always toast for extra flavor and structure.
—
4. The Perfect Bun-to-Burger Ratio
A great Smashburger should have a balanced bun-to-patty ratio:
Bun too big? The burger might feel dry and heavy.
Bun too small? The patty will overpower it, making it messy.
✅ Ideal Ratio: The bun should be just slightly larger than the patty to hold everything together without overwhelming the meat.
🔥 Pro Tip: If your bun is too tall, lightly squish it down before assembling to create a better bite experience.
—
Final Thoughts: The Bun Makes a Difference
A great Smashburger deserves a great bun! Here’s a quick bun guide based on your style preference:
✅ For the best experience, go with a potato or brioche bun, lightly toasted with butter.
✅ For an authentic diner feel, opt for sesame seed buns.
By choosing the right bun and toasting it properly, you can create a next-level Smashburger that’s crispy, juicy, and packed with flavor!
Toppings & Sauce: Elevating Your Smashburger to the Next Level
While the crispy, juicy patty is the star of the show, the right toppings and sauce can take your Smashburger from good to absolutely mouthwatering. The key is to choose ingredients that complement the rich beefy flavor without overpowering the burger’s signature crispiness.
A Smashburger isn’t overloaded with toppings like a gourmet burger—it follows a “less is more” approach, focusing on balance, freshness, and texture.
Let’s dive into the best toppings, must-try sauces, and expert tips to craft the perfect Smashburger.
—
1. Classic Smashburger Toppings
The best toppings are simple, fresh, and enhance the beef’s flavor rather than compete with it. Here are the top choices for an authentic Smashburger experience:
🧅 Thinly Sliced Onions (Griddled or Fresh)
✅ Why They Work:
Adds a sweet, caramelized flavor when cooked on the griddle with the beef.
Adds a sharp, crunchy bite when used raw.
Essential for Oklahoma-style Smashburgers, where the patty is smashed directly onto a pile of onions.
🔥 Pro Tip: If griddling onions, press them into the beef patty while cooking for the ultimate flavor infusion.
—
🥒 Pickles (Tangy & Crunchy)
✅ Why They Work:
Cuts through the richness of the beef with acidity and crunch.
Adds textural contrast and a slight saltiness.
Dill pickles are the classic choice, but sweet pickles or bread-and-butter pickles can add a twist.
🔥 Pro Tip: Try smash pickles—lightly pressing pickles into the bun so they don’t slide around while eating.
—
🍅 Tomatoes (Only for Thick Burgers)
✅ Why They Work:
Adds juiciness and freshness to balance out the crispy, fatty patty.
Works best with thicker burgers, as thin Smashburgers might get overpowered.
⚠️ Watch Out: Tomatoes can make the burger too wet, so use thin slices and pat them dry before adding.
🔥 Pro Tip: If using tomatoes, sprinkle them with a little salt to bring out their natural sweetness.
—
🥬 Lettuce (For a Fresh Crunch)
✅ Why It Works:
Adds a light, crispy texture without overpowering the burger.
Iceberg lettuce is the best choice for crunch, while butter lettuce adds a softer, delicate bite.
🔥 Pro Tip: If using lettuce, place it under the patty to prevent the bottom bun from getting soggy.
—
2. Best Smashburger Sauces
A good sauce ties everything together, adding extra flavor, moisture, and richness. Here are the best sauce options for a Smashburger:
🔥 Smash Sauce (The Ultimate Choice)
✅ What’s in it?
Mayo (creamy base)
Ketchup (adds sweetness)
Mustard (adds tanginess)
Dill pickle juice (for acidity)
Smoked paprika & garlic powder (extra flavor)
🔥 Why It Works: This sauce is perfectly balanced—creamy, tangy, slightly sweet, and packed with umami. It’s a signature sauce at many burger joints.
🔥 Pro Tip: Make Smash Sauce ahead of time and let it sit in the fridge for at least 30 minutes to allow the flavors to blend.
—
🟡 Mustard (Classic Diner-Style Choice)
✅ Why It Works:
Adds sharp tanginess that enhances the beef flavor.
Works best when smashed directly onto the patty while cooking, like an Oklahoma-style Smashburger.
🔥 Pro Tip: Try a “mustard-fried” Smashburger by spreading mustard on one side of the patty before flipping—it caramelizes into a delicious, tangy crust.
—
🍅 Ketchup (Simple & Sweet)
✅ Why It Works:
A timeless pairing with beef, adding a slight sweetness.
Works well in combination with mustard and mayo.
🔥 Pro Tip: Mix ketchup with mayo for a quick burger sauce if you’re short on time.
—
🤍 Mayo (Creamy & Rich)
✅ Why It Works:
Adds creaminess and enhances juiciness.
Used in many fast-food style Smashburgers.
🔥 Pro Tip: Try garlic aioli for a fancier twist—just mix mayo with minced garlic and lemon juice.
—
3. Optional Gourmet Toppings for a Twist
Want to get creative? Here are some next-level toppings to make your Smashburger stand out:
🧀 Caramelized Onions (Sweet & Savory Upgrade)
Cooked low and slow until golden brown and soft.
Adds deep umami flavor to complement the crispy beef.
🔥 Pro Tip: Cook onions in butter and a splash of balsamic vinegar for an extra depth of flavor.
—
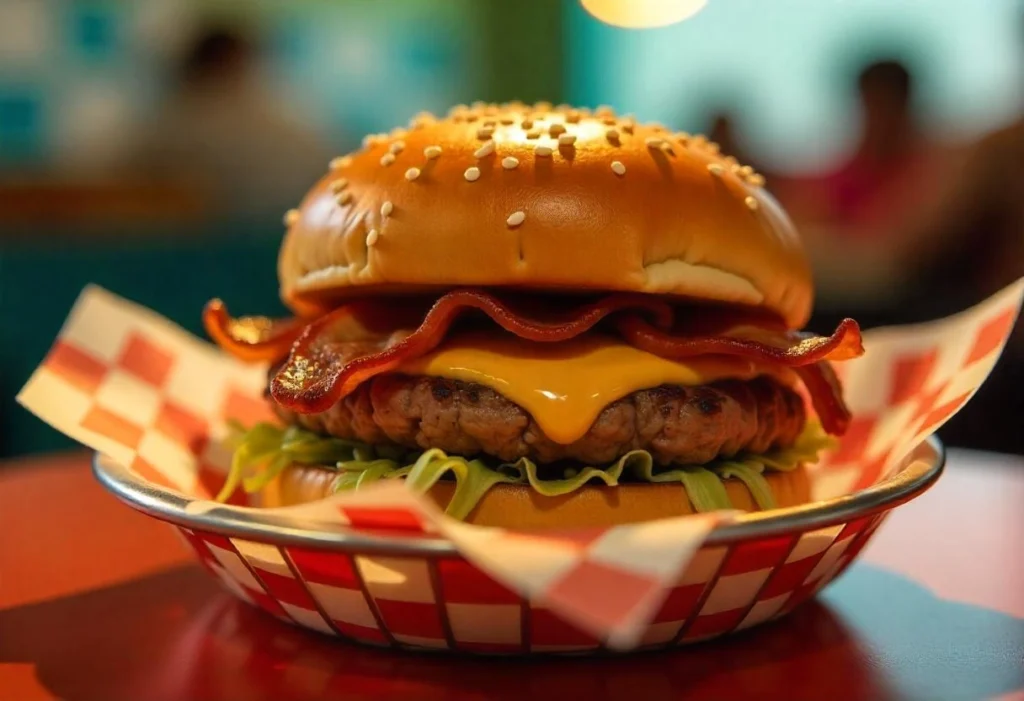
🥓 Crispy Bacon (For an Extra Crunch)
Adds saltiness, crispiness, and smoky flavor.
Pairs perfectly with cheddar or American cheese.
🔥 Pro Tip: Use thin-cut, crispy bacon so it doesn’t overpower the burger.
—
🍄 Sautéed Mushrooms (Umami Boost)
Adds earthy richness that pairs well with melted cheese.
Works great with Swiss cheese for a steakhouse-style burger.
🔥 Pro Tip: Sauté mushrooms in butter, garlic, and Worcestershire sauce for the best flavor.
—
🥑 Avocado or Guacamole (For a Creamy Twist)
Adds buttery texture and a mild, nutty taste.
Works well with pepper jack cheese for a Southwestern twist.
🔥 Pro Tip: Mash avocado with lime juice and salt for a quick, creamy topping.
—
Final Thoughts: The Perfect Topping Balance
When choosing toppings for a Smashburger, remember: less is more. Since the patty is thin and crispy, too many toppings can make it soggy or overpower the pure beef flavor.
✅ For a classic Smashburger:
American cheese
Griddled onions
Pickles
Smash sauce
✅ For a gourmet twist:
Swiss cheese
Caramelized onions
Sautéed mushrooms
Garlic aioli
✅ For a bold, tangy flavor:
Cheddar cheese
Mustard-fried patty
Extra pickles
Crispy bacon
By choosing the right toppings and sauce, you can create a perfectly balanced Smashburger that’s crispy, juicy, and absolutely delicious!
Step-by-Step Guide to Making a Smashburger
Step 1: Prep the Ingredients – Setting Yourself Up for Smashburger Success
Before you start smashing patties on a hot griddle, it’s crucial to have all your ingredients prepped and ready to go. Since Smashburgers cook extremely fast, you won’t have time to slice toppings, melt butter, or mix sauces while they’re on the griddle. Proper prep ensures smooth cooking and the best results.
Let’s break down each ingredient and how to prepare it for the perfect Smashburger.
—
1. Choose & Portion the Ground Beef
The most important part of a great Smashburger is the beef. The right fat ratio, freshness, and portion size all impact the final burger’s taste and texture.
🔹 Select the Right Beef
✅ Go for 80/20 Ground Beef:
80% lean beef, 20% fat is the ideal ratio for juicy, flavorful Smashburgers.
Higher fat content creates that crispy Maillard crust while keeping the inside juicy.
Too lean (like 90/10) will result in dry and tough burgers.
✅ Fresh, Not Frozen:
Freshly ground beef has better texture and juicier results.
If you must use frozen, thaw it completely and pat it dry before forming patties.
—
🔹 Portion the Patties (No Pre-Shaping!)
Unlike traditional burgers, Smashburgers start as loose meatballs rather than pre-shaped patties.
✅ Weigh and Roll the Meatballs:
Use a kitchen scale to portion 2 oz to 3 oz (56g to 85g) meatballs per patty.
Roll them loosely—do not compact them too much, or they won’t smash properly.
🔥 Pro Tip:
If making a double Smashburger, use two smaller patties (2 oz each) instead of one large one. This creates more crispy edges and a better texture.
—
2. Slice and Prep the Toppings
Since Smashburgers cook in under 2 minutes, you’ll want all your toppings ready to go before you start cooking.
🔹 Onions: Thinly Sliced for Maximum Flavor
If making an Oklahoma-style Smashburger, slice onions paper-thin.
Griddled onions: Smash them into the patty for a sweet, caramelized taste.
Raw onions: Add them on top for a crisp, sharp bite.
🔥 Pro Tip: Use a mandoline slicer to get super-thin, even slices.
—
🔹 Pickles: Essential for Tang & Crunch
Use dill pickles for a classic Smashburger flavor.
Slice them thin so they don’t overwhelm the burger.
🔥 Pro Tip: Dry pickles with a paper towel to prevent the bun from getting soggy.
—
🔹 Lettuce & Tomatoes (If Using)
Use iceberg lettuce for the best crunch.
Slice tomatoes thinly to avoid making the burger too wet.
Pat tomatoes dry with a paper towel before adding them.
🔥 Pro Tip: Place lettuce under the patty to protect the bun from soaking up grease.
—
3. Prep the Cheese: The Melting Secret
🔹 Best Cheese Options
American Cheese (Best Choice) – Melts perfectly and adds creamy richness.
Cheddar – Sharp and flavorful but doesn’t melt as well.
Swiss – Great for a gourmet touch, pairs well with mushrooms and caramelized onions.
Pepper Jack – Spicy option for those who like heat.
🔥 Pro Tip: Pre-peel cheese slices before cooking for quick placement on the patties.
—
4. Butter and Toast the Buns
🔹 Choose the Right Bun
Potato Buns – Soft and slightly sweet (best choice).
Brioche Buns – Rich and buttery.
Classic Hamburger Buns – A simple, budget-friendly option.
✅ Butter the Inside for Extra Flavor
Melt butter and brush it on the cut sides of the buns.
Toast them cut-side down on a griddle for 30-60 seconds until golden brown.
🔥 Why It Matters:
A toasted bun adds texture and prevents sogginess.
The buttery flavor complements the crispy beef crust.
—
5. Make the Smash Sauce (Optional, But Highly Recommended!)
A good Smash Sauce takes your burger to the next level. It’s creamy, tangy, and slightly smoky, making every bite more delicious.
🔹 Classic Smash Sauce Recipe
½ cup mayo (creamy base)
2 tbsp ketchup (adds slight sweetness)
1 tbsp yellow mustard (adds tanginess)
1 tbsp dill pickle juice (for acidity)
½ tsp garlic powder
½ tsp smoked paprika
✅ Mix everything together and refrigerate for at least 30 minutes to let the flavors blend.
🔥 Pro Tip: Make extra and store it in the fridge for up to a week—it’s great on fries too!
—
Final Prep Checklist Before Cooking ✅
Before you start smashing, double-check:
✔️ Meatballs are portioned and ready (no pre-smashing!).
✔️ Toppings are sliced and prepped (onions, pickles, lettuce, tomatoes).
✔️ Cheese is unwrapped and ready (no fumbling mid-cook!).
✔️ Buns are buttered and toasted (so they’re warm and crispy).
✔️ Smash sauce is mixed and ready to spread.
✔️ Griddle or pan is HOT before adding the beef.
Once everything is ready, you can move on to Step 2: Searing & Smashing the Patties!
Step 2: Heat Your Cooking Surface – The Key to a Perfect Smashburger
One of the most crucial steps in making a great Smashburger is getting your cooking surface hot enough. The signature crispy, caramelized crust on a Smashburger comes from a process called the Maillard reaction, which only happens at high temperatures. If your pan or griddle isn’t hot enough, the patties will steam instead of sear, resulting in a bland, soggy burger instead of a crispy, juicy one.
Here’s how to ensure your cooking surface is properly heated for maximum flavor and texture.
—
1. Choose the Right Cooking Surface
Smashburgers require a flat, even surface that can retain high heat. Traditional grills with grates aren’t ideal because the patties will fall apart and won’t develop that crispy crust. Here are the best options:
🔹 Best Cooking Surfaces for Smashburgers
✅ Flat-Top Griddle (Best Option)
Distributes heat evenly for consistent searing.
Allows you to cook multiple patties at once.
Perfect for smashing because there’s no edge like a pan.
✅ Cast-Iron Skillet (Great Alternative)
Retains high heat and creates an intense sear.
Can be used indoors on a stovetop.
Slightly smaller cooking area compared to a griddle.
✅ Stainless Steel Skillet
Works well if preheated properly.
Doesn’t retain heat as long as cast iron but still gets the job done.
🔥 Avoid Nonstick Pans: They can’t handle the high heat needed for a proper sear and may get damaged.
—
2. Preheat to the Right Temperature
The ideal cooking temperature for a Smashburger is 450°F to 500°F (230°C to 260°C). This ensures the patty sizzles on contact, creating that crispy, golden-brown crust.
🔹 How to Preheat Your Cooking Surface
✅ For a Griddle:
Turn the heat to high and let it preheat for 5-10 minutes.
Test by flicking a few drops of water onto the surface—they should instantly sizzle and evaporate.
✅ For a Cast-Iron Skillet:
Place the skillet on the stove over medium-high heat.
Let it heat for at least 5 minutes before adding any oil or beef.
✅ For a Stainless Steel Pan:
Heat over medium-high for 5-7 minutes.
To check readiness, add a drop of water—if it skitters across the surface, it’s ready.
🔥 Pro Tip: If using an infrared thermometer, aim for a surface temperature between 450-500°F for the perfect smash.
—
3. Use the Right Cooking Fat (Optional but Helpful!)
Smashburgers don’t need a lot of added fat since the beef already has enough, but a thin layer of oil or butter can enhance the crust.
🔹 Best Oils for Cooking Smashburgers
Neutral oils with high smoke points work best:
✅ Canola oil
✅ Vegetable oil
✅ Avocado oil
🔥 Pro Tip: A very thin coating of oil prevents sticking and helps distribute heat evenly. Avoid using too much, or the burgers will fry instead of sear.
🔹 Butter for Extra Flavor
For an extra rich, nutty flavor, you can add a small pat of butter to the cooking surface right before smashing the patties.
Be careful—butter burns quickly at high temperatures, so mix it with a little oil for best results.
—
4. Test the Heat Before Cooking
Before placing your patties on the surface, do a quick heat test:
✅ Water Test: Flick a drop of water onto the pan—if it sizzles and evaporates instantly, it’s ready.
✅ Oil Test: If using oil, look for a slight shimmering effect before adding the beef.
🔥 Pro Tip: If the pan is smoking excessively, it’s too hot—reduce the heat slightly and wait a minute before cooking.
—
Final Pre-Cooking Checklist
Before moving on to Step 3: Smashing the Patties, make sure:
✔️ Your griddle or skillet is properly preheated (450-500°F).
✔️ You’ve chosen the right cooking surface (griddle, cast iron, or stainless steel).
✔️ You’ve added a thin layer of oil or butter (if needed).
✔️ You’ve done a quick heat test to confirm the surface is sizzling hot.
Once everything is ready, it’s time to smash those patties!
Step 3: Smash the Burger – Creating That Iconic Crispy Crust
Smashing is the defining technique of a Smashburger, and getting it right is essential for achieving the signature thin, crispy, and deeply flavorful patty. The goal is to press the beef onto a hot cooking surface to maximize contact, creating an incredible seared crust while locking in juiciness.
Let’s break down the right way to smash and the common mistakes to avoid!
—
1. Why Smashing is Important
Unlike traditional burgers, where patties are gently shaped before cooking, Smashburgers start as loosely packed meatballs and are flattened only once when they hit the hot griddle or skillet.
Smashing achieves three things:
✅ Maximum surface contact → Ensures a deep golden-brown crust from the Maillard reaction.
✅ Crispy edges → The beef spreads out, creating delicious lacy, caramelized bits.
✅ Fast cooking time → The thin patty cooks evenly in just a couple of minutes.
🔥 Pro Tip: The key to a great Smashburger is smashing once and never touching it again until it’s time to flip.
—
2. The Right Way to Smash a Burger
🔹 Step 1: Place the Meatball on the Hot Surface
Take a pre-portioned beef ball (2-3 oz) and place it directly onto the hot griddle or pan.
Make sure there is at least 2 inches of space between each meatball to allow room for spreading.
🔥 Pro Tip: If making a double Smashburger, place two meatballs side by side.
—
🔹 Step 2: Smash Immediately (Within 30 Seconds)
Using a heavy-duty spatula or burger press, press straight down onto the meatball firmly for about 10 seconds.
The goal is to flatten it to about ¼-inch thick—the thinner, the crispier.
Apply even pressure so the patty spreads out uniformly.
✅ Best Tools for Smashing:
Metal spatula with a sharp edge → Helps press evenly and scrape up crispy bits.
Burger press or bacon press → Provides extra pressure for a perfectly thin patty.
🔥 Pro Tip: Place a parchment paper square between the spatula and meat to prevent sticking.
—
🔹 Step 3: Hold the Smash for 10 Seconds
Keeping constant pressure for about 10 seconds helps the burger make full contact with the pan.
This is when the Maillard reaction kicks in, forming a rich, crispy crust.
🚫 What NOT to do:
Don’t smash multiple times—you only want to press once to maintain juiciness.
Don’t flip too early—wait until the crust is fully developed.
🔥 Pro Tip: If the spatula is sticking, use a second spatula to press down for extra leverage.
—
🔹 Step 4: Season Immediately
Right after smashing, sprinkle salt and pepper onto the patty.
Seasoning after smashing ensures the salt sticks to the surface and enhances the crust.
✅ Best Seasoning Options:
Classic: Salt & black pepper
Extra flavor: Garlic powder, smoked paprika, or onion powder
🔥 Pro Tip: Avoid adding seasoning before smashing—it can draw out moisture and prevent proper browning.
—
3. The Perfect Smashburger Texture
When done correctly, a Smashburger patty should have:
✔️ A deep golden-brown crust with crispy, lacy edges.
✔️ A juicy, flavorful center (not dry or overcooked).
✔️ No thick, undercooked parts—Smashburgers should be thin and evenly cooked.
If the patty is gray or wet-looking, your surface wasn’t hot enough or you didn’t smash hard enough.
🔥 Pro Tip: If making a double Smashburger, don’t smash the second patty on top of the first—cook them separately, then stack with cheese in between.
—
Final Smash Checklist ✅
Before moving on to Step 4: Flipping & Melting the Cheese, check:
✔️ You smashed immediately after placing the patty on the surface.
✔️ The patty is thin and evenly spread (¼-inch thick).
✔️ You only smashed once (no pressing after initial smash).
✔️ The burger has a rich golden-brown crust (not gray or steamed).
✔️ Seasoning was added right after smashing for the best flavor.
Once you’ve nailed the smash, it’s time to flip and melt that perfect cheese layer!
Step 4: Add Cheese & Assemble – Bringing It All Together
Now that your Smashburger patties have developed a crispy, golden-brown crust, it’s time to add the cheese and assemble your perfect burger. This step is all about melting the cheese properly, layering the right toppings, and ensuring your burger is stacked for the best flavor and texture.
Let’s break it down step by step!
—
1. Adding Cheese at the Right Moment
Timing is everything when it comes to melting cheese on a Smashburger. Since the patties cook quickly, you want to add the cheese immediately after flipping to give it time to melt before assembly.
🔹 When to Add Cheese
As soon as you flip the patty, place a slice of cheese on top.
Let it melt while the burger finishes cooking (30-45 seconds).
Covering the patty with a lid or metal bowl can speed up the melting process.
🔥 Pro Tip: If making a double Smashburger, add cheese to both patties for maximum flavor!
—
2. Choosing the Best Cheese for Smashburgers
Not all cheeses melt the same way. For the ultimate gooey, melty texture, choose cheeses that are known for excellent melting properties.
🔹 Best Cheeses for Smashburgers
✅ American Cheese (Classic Choice) – Melts smoothly and creates a creamy texture.
✅ Cheddar Cheese – Sharp, tangy, and melts well if sliced thin.
✅ Swiss Cheese – Adds a mild nuttiness with a great melt.
✅ Pepper Jack Cheese – Spicy kick with a smooth, melty texture.
✅ Provolone Cheese – Mild, creamy, and perfect for extra richness.
🚫 Cheeses to Avoid: Hard cheeses like Parmesan or Feta don’t melt well and won’t create the signature gooey effect.
🔥 Pro Tip: For extra gooey cheese, place a small ice cube next to the patty and cover it with a lid—the steam will help melt the cheese faster!
—
3. Toasting the Bun (Don’t Skip This Step!)
A soft yet slightly crispy bun makes all the difference in a Smashburger. Toasting the bun helps:
✔️ Add extra texture and prevent sogginess.
✔️ Enhance flavor by bringing out the natural sweetness of the bread.
✔️ Create a sturdier base for all the juicy toppings.
🔹 How to Toast the Buns Perfectly
✅ Spread butter on the cut sides of each bun.
✅ Place them face-down on the same griddle or pan used for the patties.
✅ Toast for 30-60 seconds until golden brown and slightly crispy.
🔥 Pro Tip: If making multiple burgers, toast the buns before cooking the patties so everything is ready for quick assembly.
—
4. Assembling the Smashburger
Now it’s time to layer your burger correctly for the best bite every time. The order of toppings can make a big difference in how flavors blend together!
🔹 Classic Smashburger Layering Order
1️⃣ Bottom Bun – Provides a sturdy base.
2️⃣ Smashburger Patty with Melted Cheese – The star of the show!
3️⃣ Second Patty (If Making a Double) – Extra juiciness and flavor.
4️⃣ Toppings (Lettuce, Tomato, Onions, Pickles, etc.) – Adds crunch and freshness.
5️⃣ Smash Sauce or Condiments (Mayo, Mustard, Ketchup, Special Sauce, etc.) – Enhances flavor and moisture.
6️⃣ Top Bun – The finishing touch to hold everything together.
🔥 Pro Tip: If using lettuce, place it above the burger patty to prevent the bottom bun from getting soggy.
—
5. Smash Sauce – The Secret Ingredient
A great Smashburger isn’t complete without a killer sauce! The best Smashburger sauces are creamy, tangy, and slightly sweet to balance the crispy, savory patty.
🔹 Easy Smashburger Sauce Recipe
½ cup mayo
2 tbsp ketchup
1 tbsp mustard
1 tbsp finely chopped pickles (or pickle juice)
½ tsp garlic powder
½ tsp smoked paprika
½ tsp Worcestershire sauce
➡️ Mix everything together and spread it on the top and bottom buns for the best flavor.
🔥 Pro Tip: Let the sauce sit for 10-15 minutes before using so the flavors blend perfectly.
—
Final Assembly Checklist ✅
Before serving, check that:
✔️ The cheese is fully melted and gooey.
✔️ The bun is lightly toasted for extra flavor.
✔️ Toppings and sauce are layered for the perfect bite.
✔️ Everything is assembled quickly so the burger stays hot and fresh.
Now, your perfect homemade Smashburger is ready to enjoy!
Pro Tips for the Perfect Smashburger Every Time
Don’t Overwork the Meat – Keep It Loose for Maximum Juiciness
One of the biggest mistakes people make when preparing Smashburger patties is handling the ground beef too much. Unlike traditional burgers, where shaping the patty is crucial, Smashburgers rely on loosely packed meat to achieve their signature crispy exterior and juicy interior.
Let’s break down why less handling = better burgers and how to prepare the beef correctly.
—
1. Why You Shouldn’t Overwork the Meat
When you knead, press, or compact the ground beef too much, several things happen:
🚫 Tougher Texture – Overworked meat becomes dense and chewy instead of light and juicy.
🚫 Less Crust Formation – Compact patties don’t smash properly, reducing surface contact and preventing a crispy crust.
🚫 Loss of Juiciness – The more you handle the beef, the more natural fat and moisture get squeezed out.
🔥 Pro Tip: The best Smashburger patties should look slightly rough and uneven before smashing—this helps create crispy, craggy edges when cooked!
—
2. The Right Way to Handle Ground Beef
To keep your Smashburgers light and juicy, follow these simple steps:
🔹 Step 1: Use Cold Ground Beef
Keep the ground beef chilled until just before forming the patties.
Cold fat stays solid longer, helping retain juiciness as it cooks.
🔹 Step 2: Gently Divide the Meat
Instead of forming firm patties, divide the beef into loose portions (2-3 oz each).
Avoid squeezing, pressing, or compacting the meat.
🔹 Step 3: Form Loose Meatballs (Not Patties!)
Roll the beef into rough, loose meatballs using the lightest touch possible.
Don’t worry if they aren’t perfectly round—they’ll spread out when smashed.
🔥 Pro Tip: If the beef sticks to your hands, lightly wet them with cold water before handling the meat.
—
3. The Difference Between Smashburgers & Traditional Burgers
To understand why overworking the meat is a problem, compare Smashburgers to regular burgers:
🔥 Pro Tip: If your Smashburger patty looks too smooth and uniform, you may have overhandled the meat!
—
4. Common Mistakes to Avoid
🚫 Don’t knead or press the meat into a tight ball.
🚫 Don’t add binders like egg or breadcrumbs—Smashburgers don’t need them.
🚫 Don’t season the beef before forming it into balls—this can draw out moisture and make the meat tougher.
🚫 Don’t pre-shape the patties—the smashing process should form the patty naturally.
✅ Instead, gently portion the beef, keep it cold, and smash it straight onto the hot cooking surface for the best results.
By handling the meat as little as possible, you’ll get crispy, juicy Smashburgers every time!
Use High Heat – The Key to Crispy, Juicy Smashburgers
One of the most important factors in making a perfect Smashburger is high heat. The intense heat ensures that the patty develops a deep, golden-brown crust while remaining juicy inside. This is because high heat activates the Maillard reaction, which enhances flavor and creates the signature crispy edges.
Let’s dive into why high heat is crucial, the best cooking surfaces to use, and how to achieve perfectly cooked Smashburgers every time.
—
1. Why High Heat is Essential for Smashburgers
Unlike traditional burgers, where slower cooking helps retain moisture, Smashburgers need rapid, high-heat cooking to get their signature crust. Here’s why:
🔥 The Maillard Reaction – High heat triggers browning and caramelization, which intensifies the beefy, umami-rich flavor.
🔥 Crispy Edges – The rapid sear locks in juices and creates crispy, craggy edges.
🔥 Quick Cooking Time – Smashburgers are thin, so they cook fast—usually within 1-2 minutes per side.
🔥 Juiciness is Retained – Cooking over high heat ensures the meat stays juicy without drying out.
🚫 Low heat is a common mistake—it causes the meat to steam rather than sear, resulting in a pale, soggy burger instead of a crispy, flavorful one.
—
2. Choosing the Best Cooking Surface for High Heat
To maximize the heat and sear, you need the right cooking surface. Here are the best options for making Smashburgers at home:
🔹 1. Cast-Iron Skillet (Best for Indoor Cooking)
✅ Retains and distributes high, even heat.
✅ Creates a dark, crispy crust on the patty.
✅ Works great on stovetops.
🔹 2. Flat-Top Griddle (Best for Cooking Multiple Burgers)
✅ Large surface area allows for several patties at once.
✅ Even heat ensures all burgers cook uniformly.
✅ Similar to what diners and burger joints use.
🔹 3. Outdoor Grill with a Griddle Plate
✅ Allows for smoky, charred flavors.
✅ Griddle insert prevents patties from falling through the grates.
✅ Works well for backyard BBQs.
🔥 Pro Tip: If using a regular frying pan, preheat it for a few minutes until it’s smoking hot before smashing the burgers.
—
3. How to Properly Preheat for Maximum Heat
Achieving the right temperature before cooking is key. Here’s how to properly preheat your cooking surface:
🔹 Preheating Steps
1️⃣ Set your stove or grill to high heat (at least 450-500°F / 230-260°C).
2️⃣ Let the pan or griddle heat for 3-5 minutes—it should be very hot before adding the beef.
3️⃣ Test if it’s ready by sprinkling a few drops of water on the surface:
If they sizzle and evaporate instantly, it’s hot enough.
If they sit and bubble, let it heat longer.
4️⃣ Add a small amount of oil or butter (optional) to enhance browning and prevent sticking.
🔥 Pro Tip: Never place the meat on a cold or lukewarm surface—it won’t develop the crispy crust that makes Smashburgers so good!
—
4. Searing the Smashburger to Perfection
Once the cooking surface is blazing hot, it’s time to smash and sear:
🔥 Smash the burger ball within the first 30 seconds of placing it on the griddle.
🔥 Press firmly for 10-15 seconds to create maximum contact with the heat.
🔥 Let it cook undisturbed for 1-2 minutes until the edges start to crisp.
🔥 Flip once—don’t press it again after flipping, or you’ll lose the juiciness.
🚫 Avoid flipping too early—if you flip before the crust forms, you’ll lose the Maillard reaction and end up with a less flavorful burger.
—
5. Common Mistakes to Avoid
🚫 Cooking at medium or low heat – This prevents the burger from crisping up properly.
🚫 Not preheating the pan/griddle – A lukewarm surface = a soggy, steamed burger.
🚫 Flipping too soon – You need at least 60-90 seconds on the first side to develop the best crust.
🚫 Pressing down after flipping – This squeezes out the juices instead of keeping them inside.
🔥 Pro Tip: If your Smashburgers aren’t getting crispy, increase the heat or switch to a better heat-retaining surface like cast iron.
—
Final Thoughts: High Heat = Smashburger Perfection
Using high heat is what separates an okay burger from an exceptional Smashburger. It’s the secret to getting:
✔️ A perfectly crisp, golden-brown crust
✔️ Juicy, flavorful beef with no dryness
✔️ That signature diner-style burger texture
By preheating properly, using the right cooking surface, and smashing at the right time, you’ll achieve the ultimate crispy, juicy Smashburger every time!
Smash Once, Not Twice – The Key to a Perfect Crust
One of the biggest mistakes people make when cooking Smashburgers is smashing them more than once. While it might be tempting to press down on the patty after flipping, doing so squeezes out the flavorful juices and prevents the burger from developing its signature crispy crust.
In this section, we’ll explore why smashing once is crucial, how to do it properly, and common mistakes to avoid for the perfect Smashburger.
—
1. Why You Should Only Smash Once
When making a Smashburger, you’re aiming for maximum surface contact with the hot cooking surface to create that crispy, flavorful crust. Smashing at the right time helps achieve this, but smashing again can ruin it.
Here’s why you should only smash once:
🔥 Enhances the Maillard Reaction – Smashing the patty early creates more surface area for browning, leading to better flavor.
🔥 Locks in Juices – Once the crust forms, smashing again releases moisture, making the burger dry.
🔥 Preserves the Burger’s Structure – Pressing too much can make the patty too thin, leading to overcooking.
🚫 Common Mistake: Some people think smashing multiple times will make the burger crispier. In reality, it just pushes out fat and juices, leading to a dry, less flavorful patty.
—
2. When and How to Smash Properly
Timing is everything when smashing a burger. Here’s the right technique:
🔹 Step 1: Place the Beef Ball on the Hot Surface
Once your skillet or griddle is blazing hot, place a loosely formed beef ball onto the cooking surface.
Avoid seasoning at this point—seasoning too early can draw out moisture.
🔹 Step 2: Smash Immediately (Within the First 30 Seconds)
Use a heavy spatula or burger press to firmly press the beef ball down into the griddle.
Apply even pressure for 10-15 seconds—this ensures maximum surface contact with the hot surface.
The patty should be thin, but not too thin—aim for about ¼ inch (6mm) thick.
🔹 Step 3: Let It Cook Without Moving It
Don’t touch, press, or move the patty while it’s cooking.
It needs at least 60-90 seconds to develop a golden-brown crust.
Once the edges turn crispy and you see juices rising, it’s ready to flip.
🔥 Pro Tip: If your burger isn’t getting crispy, your heat might be too low, or you didn’t smash hard enough on the first press.
—
3. What Happens If You Smash Again?
If you press down on the burger after the initial smash, you ruin the texture and flavor. Here’s what happens:
🚫 You Lose the Juices – The burger’s natural fats escape, making it dry.
🚫 You Destroy the Crust – The crispy Maillard reaction layer gets disturbed, leading to less flavor.
🚫 You Compress the Patty Too Much – This makes it overly thin and tough instead of crispy and juicy.
🔥 Pro Tip: Instead of smashing again, focus on getting the first smash right—press down firmly the first time and then let the burger do its thing.
—
4. Common Mistakes to Avoid
🚫 Smashing too late – If you wait too long, the burger will already have started cooking, and it won’t spread properly.
🚫 Smashing after flipping – This forces out the moisture and ruins the crust.
🚫 Pressing unevenly – Use a flat spatula or burger press to ensure even pressure.
✅ Instead, smash hard once, then let the burger cook undisturbed for the best results.
—
5. Final Thoughts: One Smash for the Perfect Burger
Mastering the one-time smash technique is what separates an okay Smashburger from an incredible one. By following these rules, you’ll get:
✔️ A beautifully crispy, golden-brown crust
✔️ Juicy, flavorful meat that isn’t overcooked
✔️ A perfectly textured burger with the ideal balance of crispiness and tenderness
So remember—smash once, not twice—and you’ll get a Smashburger that rivals the best burger joints!
Butter-Toast the Buns – The Secret to a Perfect Smashburger
A great Smashburger isn’t just about the beef—it’s also about the bun. The best Smashburgers are served on buttery, toasted buns, which add flavor, texture, and help hold the burger together. Toasting the bun creates a crispy surface that enhances every bite, prevents sogginess, and adds a rich, nutty taste.
In this section, we’ll discuss why toasting matters, the best types of buns to use, and how to butter-toast them perfectly for the ultimate Smashburger experience.
—
1. Why Butter-Toasting the Bun is Essential
Many people overlook the importance of toasting the bun, but it makes a huge difference in both texture and flavor. Here’s why:
🔥 Prevents a Soggy Burger – Smashburgers are juicy, and without toasting, the bun can absorb too much moisture and fall apart.
🔥 Adds a Crispy, Golden Texture – The slight crunch from a toasted bun contrasts perfectly with the soft interior.
🔥 Enhances Flavor with Butter – Butter adds a rich, nutty depth that elevates the burger.
🔥 Improves Structural Integrity – A toasted bun holds up better to toppings and sauces, preventing a messy burger.
🚫 Skipping the toasting step can leave you with a bland, soggy, or flimsy bun—not ideal for a top-tier Smashburger!
—
2. Choosing the Best Bun for a Smashburger
Not all buns are created equal. The best buns for a Smashburger should be soft yet sturdy, with just the right amount of chewiness. Here are some top options:
🔹 1. Potato Buns (Best Choice!)
✅ Soft, slightly sweet flavor that complements the beef.
✅ Holds up well to juices and toppings.
✅ Used by many top burger joints (Shake Shack, for example).
🔹 2. Brioche Buns (For a Buttery, Rich Option)
✅ Rich and buttery with a slightly sweet taste.
✅ Light and fluffy, great for a gourmet-style Smashburger.
✅ Slightly less sturdy than potato buns but still a solid choice.
🔹 3. Martin’s Sandwich Rolls (Classic Diner-Style Choice)
✅ Soft yet durable, ideal for pressing down on a Smashburger.
✅ Toasts beautifully and has a mild, slightly sweet flavor.
✅ A favorite among classic American burger lovers.
🚫 Avoid dense, crusty buns like ciabatta or baguettes—they don’t complement the Smashburger’s texture and can be too chewy.
—
3. How to Butter-Toast Your Buns for the Best Results
Toasting the buns properly is just as important as choosing the right type. Here’s a step-by-step guide to getting the perfect butter-toasted bun:
🔹 Step 1: Choose Your Butter
Unsalted butter – Best for control over salt levels.
Salted butter – Adds extra flavor and enhances the bun.
Garlic or herb butter – If you want a little extra depth.
🔥 Pro Tip: You can also use mayonnaise instead of butter—it toasts well and adds a tangy richness.
🔹 Step 2: Melt the Butter
In a small pan, melt about 1-2 tablespoons of butter over medium heat.
For extra flavor, add a pinch of salt or a dash of garlic powder.
🔹 Step 3: Spread the Butter Evenly
Using a brush or a spoon, spread a thin, even layer of melted butter onto the cut side of the bun.
Make sure not to soak the bun—too much butter can make it greasy instead of crisp.
🔹 Step 4: Toast on a Hot Surface
Heat a griddle, skillet, or flat-top pan over medium-high heat.
Place the buns cut-side down on the hot surface.
Press lightly with a spatula to ensure even toasting.
Toast for 30-60 seconds, or until golden brown and crisp.
🔥 Pro Tip: If you’re cooking the Smashburger on a griddle, toast the buns on the same surface to soak up some of the beef’s flavor!
—
4. Common Mistakes to Avoid When Toasting Buns
🚫 Using too much butter – This can make the bun greasy and heavy.
🚫 Not preheating the pan – If the pan isn’t hot, the bun will absorb butter instead of crisping up.
🚫 Over-toasting – A little crunch is great, but burning the bun will overpower the burger.
🚫 Skipping the toasting step – This results in a soggy, unstructured burger.
🔥 Pro Tip: If you’re making multiple Smashburgers, keep the toasted buns warm by placing them on a wire rack inside a low-temperature oven (200°F/95°C) until serving.
—
5. Final Thoughts: Butter-Toasting for the Ultimate Smashburger
A perfectly butter-toasted bun can transform your Smashburger from good to great. By choosing the right bun, using just the right amount of butter, and toasting it until golden brown, you’ll get:
✔️ A flavorful, slightly crispy surface that enhances every bite.
✔️ A bun that holds up to the juiciness of the burger without getting soggy.
✔️ A delicious contrast of textures—buttery crunch on the outside, soft and fluffy inside.
Next time you make a Smashburger, don’t skip this step—your taste buds will thank you!
Best Sides & Drinks to Pair with Your Smashburger
Classic Fries & Onion Rings – The Perfect Side Dishes for a Smashburger
No Smashburger experience is complete without the perfect side dish. While there are plenty of creative options, nothing beats classic fries or crispy onion rings alongside your juicy, crispy burger. These two timeless sides provide the ideal balance of texture, flavor, and satisfaction, making your homemade Smashburger meal feel like a true diner-style feast.
In this section, we’ll explore what makes fries and onion rings the best sides, different variations to try, and tips for making them perfectly crispy at home.
—
1. Why Fries & Onion Rings Are the Perfect Pairing
Fries and onion rings complement a Smashburger for several reasons:
🍟 Crunchy Contrast – Both fries and onion rings add a crispy texture that pairs well with the soft bun and juicy patty.
🍟 Saltiness Enhances Flavor – The light saltiness of fries and the savory bite of onion rings elevate the burger’s taste.
🍟 Classic Diner Vibes – These sides bring a nostalgic, comforting feel to your meal, just like your favorite burger joint.
🍟 Easy to Share – They’re perfect for serving family-style or enjoying with friends.
Now, let’s dive into how to make restaurant-quality fries and onion rings at home!
—
2. How to Make Perfect Classic French Fries
Crispy, golden fries are a must-have with a Smashburger. The key to making restaurant-quality fries at home is the double-fry method, which ensures they’re perfectly crispy on the outside and fluffy on the inside.
🔹 Ingredients:
✔️ 3-4 large russet potatoes
✔️ Vegetable oil (for frying)
✔️ Salt (to taste)
✔️ Optional: Garlic powder, paprika, or parmesan for extra flavor
🔹 Step-by-Step Instructions:
Step 1: Cut the Potatoes
Peel (optional) and cut potatoes into thin strips, about ¼-inch thick for classic fries.
Soak them in cold water for at least 30 minutes (or up to overnight) to remove excess starch—this helps them crisp up!
Step 2: First Fry (Low Heat Cooking)
Heat oil in a deep fryer or heavy pot to 325°F (163°C).
Drain and pat dry the fries completely before frying.
Fry in small batches for 3-4 minutes, just until they turn soft and slightly golden.
Remove and let them cool on a wire rack.
Step 3: Second Fry (Crisping Up!)
Increase oil temperature to 375°F (190°C).
Fry the pre-cooked fries again for 2-3 minutes, until golden brown and crispy.
Remove, drain excess oil, and immediately sprinkle with salt or seasoning of choice.
🔥 Pro Tip: If you prefer oven-baked fries, coat them lightly in oil and bake at 425°F (218°C) for 25-30 minutes, flipping halfway through.
—
3. How to Make the Best Crispy Onion Rings
If you love a crispy, golden onion ring, making them at home is easier than you think. A light, crispy batter ensures they stay crunchy without being too heavy.
🔹 Ingredients:
✔️ 2 large onions (yellow or sweet onions work best)
✔️ 1 cup all-purpose flour
✔️ ½ cup cornstarch (makes them extra crispy)
✔️ 1 teaspoon baking powder
✔️ 1 teaspoon salt
✔️ ½ teaspoon paprika or cayenne (for a little spice)
✔️ 1 cup buttermilk (or regular milk)
✔️ 1 egg
✔️ 1-2 cups panko breadcrumbs (for extra crunch)
✔️ Vegetable oil (for frying)
🔹 Step-by-Step Instructions:
Step 1: Slice the Onions
Peel the onions and slice into ½-inch rings.
Separate them into individual rings and soak in buttermilk for 20-30 minutes—this helps tenderize them and improves batter adhesion.
Step 2: Prepare the Batter
In a bowl, whisk together the flour, cornstarch, baking powder, salt, and paprika.
In another bowl, beat the egg and mix with buttermilk.
In a third bowl, place the panko breadcrumbs for the final coating.
Step 3: Coat and Fry the Onion Rings
Remove onion rings from buttermilk, letting excess drip off.
Dip each ring in the flour mixture, then back into the buttermilk-egg mixture, and finally coat with panko breadcrumbs.
Heat oil to 350°F (175°C) and fry in small batches for 2-3 minutes per side, until golden brown and crispy.
Remove and drain on paper towels.
🔥 Pro Tip: If you want a lighter coating, skip the breadcrumbs and just use the flour batter.
—
4. Flavor Variations to Try
If you want to mix things up, here are some fun ways to upgrade your fries and onion rings:
🍟 Fries Variations:
Garlic Parmesan Fries – Toss hot fries in garlic butter and grated parmesan.
Spicy Cajun Fries – Season with Cajun spice blend for extra heat.
Truffle Fries – Drizzle with truffle oil and sprinkle with fresh parsley.
🧅 Onion Rings Variations:
Beer-Battered Onion Rings – Use a beer-based batter instead of buttermilk for a light, airy texture.
Buffalo Onion Rings – Toss fried rings in a spicy buffalo sauce before serving.
Cheesy Onion Rings – Sprinkle with grated parmesan or cheddar right after frying.
—
5. Final Thoughts: The Perfect Pairing for a Smashburger
When paired with a juicy, crispy Smashburger, golden fries or crispy onion rings complete the meal. By following these simple steps, you can achieve restaurant-quality sides at home that rival your favorite burger joint.
✔️ Crispy, golden fries with a soft interior.
✔️ Crunchy, flavorful onion rings with the perfect coating.
✔️ Endless ways to customize and add extra flavor!
So next time you’re making a Smashburger, don’t forget to serve it with a side of fries or onion rings—your taste buds will thank you!
Milkshakes & Sodas – The Ultimate Smashburger Beverages
A juicy, crispy Smashburger deserves the perfect classic diner-style beverage to wash it down. Whether you prefer a rich and creamy milkshake or an ice-cold soda, these drinks complement the bold flavors of a Smashburger and elevate your meal to a full-on American diner experience.
In this section, we’ll explore why milkshakes and sodas pair so well with Smashburgers, how to make them at home, and fun variations to try.
—
1. Why Milkshakes & Sodas Are the Perfect Pairing
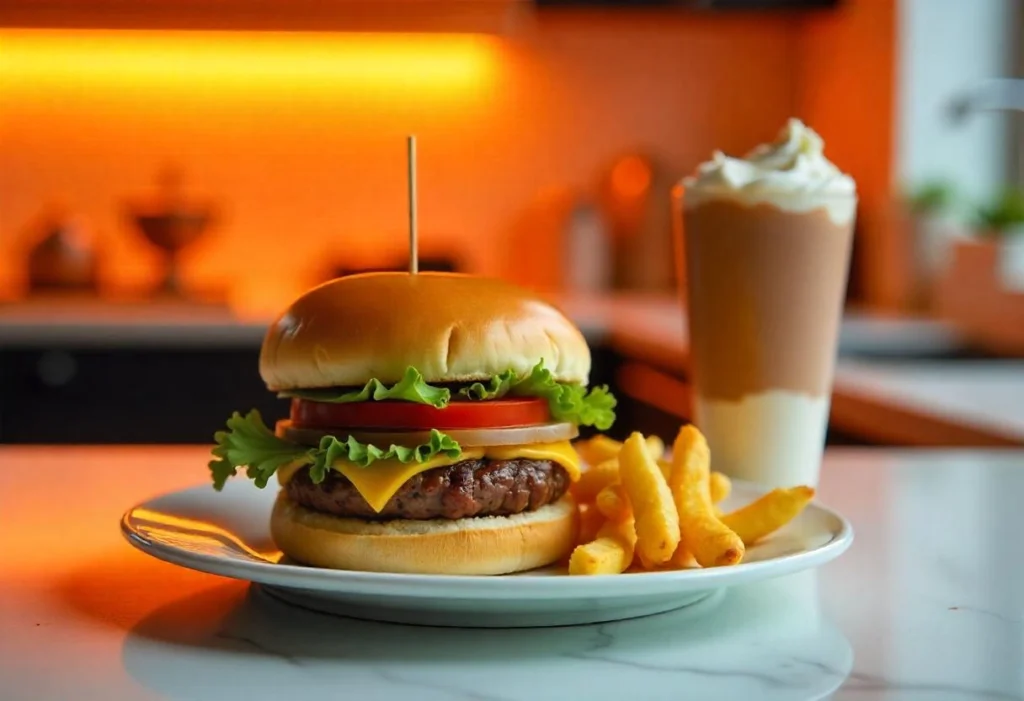
There’s a reason why burgers, fries, and a cold drink are a classic trio. The contrast between hot, crispy food and cold, refreshing drinks enhances the overall experience.
🍔 Milkshakes Balance the Savory Flavors – The creamy sweetness of a milkshake cuts through the richness of a Smashburger, creating a satisfying contrast.
🍔 Sodas Add Refreshing Fizz – The carbonation in sodas helps cleanse the palate between bites, preventing the burger’s fattiness from feeling overwhelming.
🍔 Classic Diner Nostalgia – A burger with a milkshake or soda brings back memories of old-school diners, drive-ins, and fast food joints.
Now, let’s dive into how to make the best milkshakes and sodas at home!
—
2. How to Make the Perfect Classic Milkshake
A thick, creamy milkshake is one of the best beverages to pair with a Smashburger. It’s sweet, smooth, and indulgent—the perfect contrast to the crispy beef patty and buttery bun.
🔹 Ingredients (Serves 1-2):
✔️ 2 cups vanilla ice cream (or any flavor of choice)
✔️ ½ cup whole milk (adjust for thickness)
✔️ 1 teaspoon vanilla extract (optional, for extra flavor)
✔️ Whipped cream (for topping)
✔️ Optional: Chocolate syrup, fruit, or cookies for mix-ins
🔹 Step-by-Step Instructions:
Step 1: Blend the Ingredients
In a blender, combine the ice cream, milk, and vanilla extract.
Blend on medium speed until smooth and creamy. If you want a thicker shake, add more ice cream. For a thinner shake, add more milk.
Step 2: Customize Your Flavor
Chocolate Milkshake: Add chocolate syrup before blending.
Strawberry Milkshake: Blend with fresh or frozen strawberries.
Oreo Milkshake: Crush Oreo cookies and mix them in.
Step 3: Serve & Garnish
Pour into a tall glass, top with whipped cream, and add a drizzle of syrup or sprinkles if desired.
Serve with a straw and enjoy with your Smashburger!
🔥 Pro Tip: Want a boozy version? Add a shot of bourbon, Kahlúa, or Baileys for an adult twist!
—
3. Homemade Classic Sodas & Refreshing Alternatives
While store-bought sodas are always an easy choice, making homemade soda is a fun way to control sweetness and flavors.
🔹 Classic Soda Pairings for a Smashburger
🥤 Coca-Cola or Pepsi – The caramel-like sweetness and fizz cut through the burger’s richness.
🥤 Root Beer – A classic diner choice that pairs beautifully with grilled, smoky flavors.
🥤 Cream Soda – A slightly sweeter, vanilla-flavored soda that complements a savory Smashburger.
🥤 Ginger Ale or Lemon-Lime Soda – Light and refreshing, perfect for cutting through a rich meal.
🔹 How to Make Homemade Soda
If you want to make a natural soda at home, you only need sparkling water, fresh fruit juice, and a little sweetener.
Classic Lemon-Lime Soda (Homemade Sprite):
✔️ 1 cup sparkling water
✔️ 2 tablespoons fresh lemon juice
✔️ 2 tablespoons fresh lime juice
✔️ 1 tablespoon simple syrup (or honey)
✔️ Ice cubes
👉 Mix everything together in a glass and enjoy a refreshing, homemade soda!
Homemade Cola Alternative:
✔️ 1 cup sparkling water
✔️ ½ teaspoon vanilla extract
✔️ ½ teaspoon cinnamon
✔️ 2 tablespoons simple syrup (or brown sugar)
✔️ 1 tablespoon fresh lemon juice
👉 Combine all ingredients and adjust sweetness to taste. Serve over ice!
🔥 Pro Tip: Want a healthier alternative? Try iced tea, lemonade, or flavored sparkling water instead of soda.
—
4. Fun Variations & Unique Twists
If you want to go beyond the classics, here are some creative milkshake and soda ideas to pair with your Smashburger:
🥤 Unique Milkshake Flavors:
Salted Caramel Shake – Blend caramel sauce into vanilla ice cream, then top with sea salt.
Peanut Butter Banana Shake – Mix peanut butter and banana with vanilla ice cream for a rich, nutty flavor.
S’mores Shake – Blend vanilla ice cream with chocolate syrup and graham crackers, then top with toasted marshmallows.
🍹 Unique Soda Alternatives:
Cherry Cola Float – Add a scoop of vanilla ice cream to a glass of cherry cola.
Raspberry Lemonade Soda – Mix lemonade with sparkling water and fresh raspberries for a fruity twist.
Spicy Ginger Soda – Combine fresh ginger juice with lime juice and club soda for a zesty kick.
—
5. Final Thoughts: Elevate Your Smashburger Meal
A Smashburger meal isn’t complete without the perfect drink! Whether you prefer a classic milkshake or a refreshing soda, the right beverage enhances the flavors of your burger and makes your meal feel like an indulgent treat.
✔️ Milkshakes add a creamy, sweet contrast to the crispy burger.
✔️ Sodas refresh your palate with their fizzy, bubbly texture.
✔️ Homemade versions allow for endless customization and healthier options.
Next time you make a Smashburger at home, whip up a thick milkshake or a classic soda to enjoy the ultimate burger experience!
Coleslaw or Pickles – The Perfect Crunchy Sides for a Smashburger
A juicy, crispy Smashburger is already packed with flavor, but pairing it with the right side dish can take your meal to the next level. If you’re looking for something refreshing, crunchy, and slightly tangy to balance out the richness of your burger, coleslaw and pickles are two of the best choices.
Both coleslaw and pickles bring acidity and crunch, which help cut through the fatty, savory beef patty while adding a delicious contrast to every bite. But which one is the better choice? Let’s explore the flavor profiles, textures, and best ways to enjoy each with your Smashburger.
—
1. Why Coleslaw is a Great Side for a Smashburger
Coleslaw is a cool, creamy, and crunchy side dish that adds freshness to your meal. It consists of shredded vegetables (usually cabbage and carrots) mixed with a tangy dressing, which can be creamy (mayonnaise-based) or vinegar-based.
🔹 How Coleslaw Enhances a Smashburger:
🥗 Refreshing Contrast – The cold, crisp veggies balance the hot, crispy burger.
🥗 Creamy or Tangy Options – A mayo-based slaw adds richness, while a vinegar-based slaw adds sharp acidity.
🥗 Adds Extra Crunch – A well-made slaw retains its crunch, providing a satisfying bite.
🥗 Customizable Flavors – You can adjust the seasonings to match your burger (spicy, sweet, or smoky).
🔥 Pro Tip: Instead of serving coleslaw on the side, try adding it directly to your Smashburger for extra crunch and a creamy, tangy kick!
—
2. Best Coleslaw Recipes for a Smashburger
🔸 Classic Creamy Coleslaw (Best for Rich, Juicy Smashburgers)
✔️ Ingredients:
2 cups shredded green cabbage
1 cup shredded purple cabbage (for color)
½ cup grated carrots
½ cup mayonnaise
1 tablespoon Dijon mustard
1 tablespoon apple cider vinegar
1 teaspoon sugar
Salt and pepper to taste
👉 Instructions:
Mix all the ingredients in a bowl.
Let it sit for at least 30 minutes in the fridge to develop flavors.
🔥 Pairing Tip: This coleslaw works best with cheeseburgers since the mayo dressing complements melty cheese.
—
🔸 Tangy Vinegar Coleslaw (Best for Cutting Through Richness)
✔️ Ingredients:
2 cups shredded cabbage (green and purple mix)
½ cup shredded carrots
3 tablespoons apple cider vinegar
1 tablespoon olive oil
1 teaspoon honey or sugar
½ teaspoon salt
½ teaspoon black pepper
👉 Instructions:
Whisk vinegar, oil, honey, salt, and pepper together.
Toss with shredded veggies and let it marinate for 20 minutes before serving.
🔥 Pairing Tip: This slaw is lighter and tangier, making it perfect if your burger has bacon or BBQ sauce.
—
3. Pickles – The Ultimate Burger Sidekick
Pickles are a classic burger companion for a reason! Their briny, tart, and slightly sweet flavor helps cut through the richness of the beef and cheese. Whether served on the side or layered onto your Smashburger, they add a delicious crunch and a burst of acidity.
🔹 How Pickles Enhance a Smashburger:
🥒 Cuts Through Fat – The acidity helps balance the richness of the beef.
🥒 Adds a Crunchy Bite – The firm texture contrasts the soft bun and juicy patty.
🥒 Enhances Flavor – The slight saltiness and tang bring out the beef’s umami notes.
🥒 Comes in Different Varieties – Sweet, sour, spicy, or garlicky pickles can all add a different twist.
🔥 Pro Tip: Want extra pickle flavor? Use pickle juice in your burger sauce for a tangy boost!
—
4. Best Pickles for a Smashburger
Not all pickles are the same! Here are the best types of pickles to pair with your burger:
🔸 Dill Pickles (Classic & Tangy)
✔️ The most common burger pickle, with a bold, sour, and garlicky taste.
✔️ Works well with cheeseburgers, bacon burgers, or classic mustard-based sauces.
🔸 Bread & Butter Pickles (Sweet & Tangy)
✔️ Slightly sweeter than dill pickles, adding a mild contrast to a salty burger.
✔️ Pairs well with spicy burgers or BBQ-style toppings.
🔸 Spicy Pickles (For Heat Lovers)
✔️ Pickled with jalapeños, red pepper flakes, or chili brine.
✔️ Ideal for those who like a little heat in their burger.
🔸 Homemade Quick Pickles (For Custom Flavor)
If you want fresh, crisp pickles with a custom flavor, making quick pickles at home is easy!
✔️ Quick Pickle Recipe:
1 cup sliced cucumbers
½ cup white vinegar
½ cup water
1 teaspoon salt
1 teaspoon sugar
½ teaspoon garlic powder
½ teaspoon dill (optional)
👉 Instructions:
Mix the vinegar, water, salt, and sugar until dissolved.
Pour over the cucumbers and let them sit in the fridge for at least 1 hour.
🔥 Pairing Tip: Quick pickles are best for customizing your flavor—make them sweeter, spicier, or extra garlicky to match your burger!
—
5. Coleslaw vs. Pickles: Which One Should You Choose?
Both coleslaw and pickles are excellent sides for a Smashburger, but which one you choose depends on your taste preference:
✔️ Choose Coleslaw If:
You want a creamy or tangy side that adds freshness.
You like the crunch of shredded vegetables in every bite.
You enjoy a balanced contrast to a hot, crispy burger.
✔️ Choose Pickles If:
You want a briny, tangy bite that cuts through richness.
You love the snap of a crunchy, firm texture.
You prefer a quick and easy addition to your plate.
🔥 Best of Both Worlds? Why choose just one? Try adding pickles to your burger and serving coleslaw on the side for the ultimate flavor and texture balance!
—
Final Thoughts: Elevate Your Smashburger with the Right Side
Coleslaw and pickles both bring something special to a Smashburger meal. Whether you go for creamy slaw, tangy vinegar slaw, or crunchy pickles, you’ll enhance the texture, contrast, and overall experience of your burger.
Next time you make a Smashburger at home, don’t forget to add a crunchy side!
Conclusion: The Ultimate Smashburger Experience
Making the perfect Smashburger at home is easier than you think! By focusing on high-quality ingredients, the right cooking techniques, and simple yet flavorful toppings, you can achieve a crispy, juicy, and restaurant-quality burger right in your own kitchen.
From choosing the best ground beef to mastering the smashing technique, every step plays a crucial role in getting that signature crispy crust and juicy interior. Pairing it with butter-toasted buns, melty cheese, and classic toppings takes your burger to the next level, while sides like fries, coleslaw, pickles, or a refreshing milkshake complete the ultimate meal.
With these tips and tricks, you’re now ready to impress your family and friends with the best homemade Smashburger they’ve ever had. So, heat up your griddle, grab your spatula, and get smashing!
What’s your favorite way to enjoy a Smashburger? Let us know in the comments!