
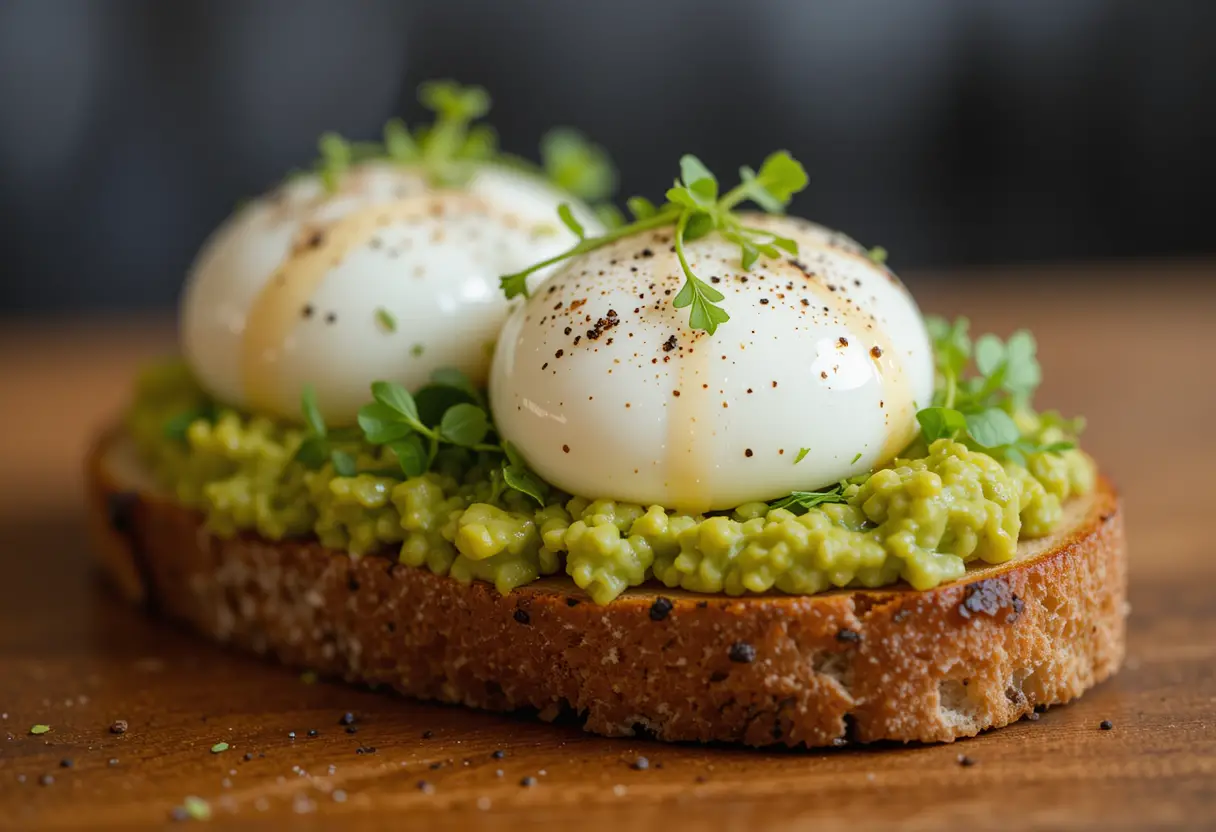
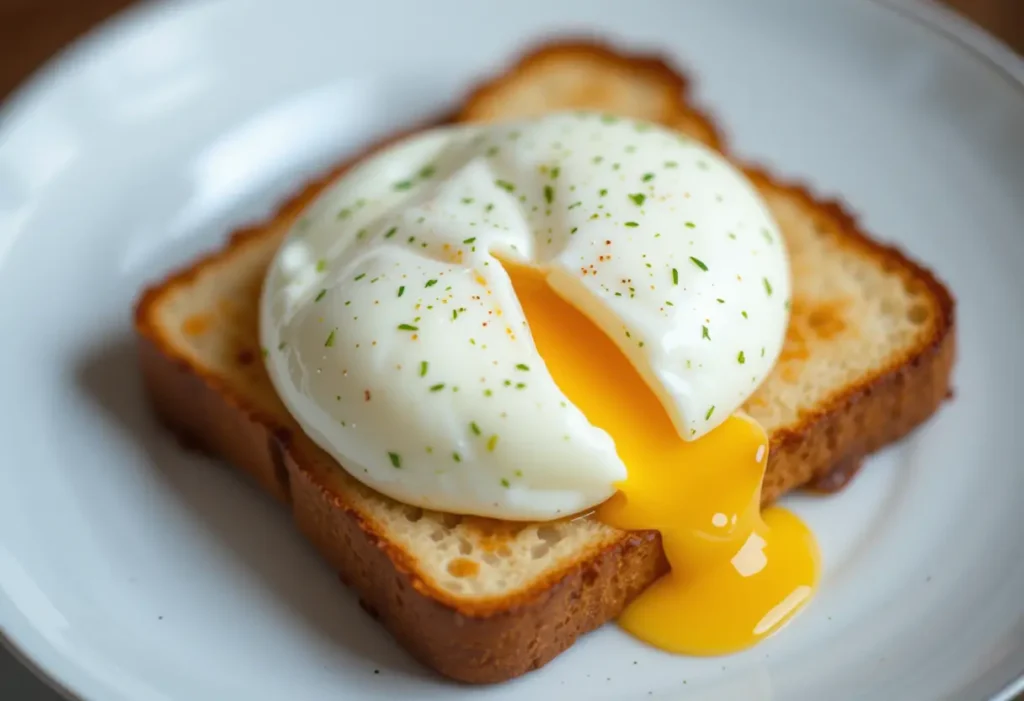
Poached eggs are a breakfast classic known for their tender whites and runny yolks. This gentle cooking method involves simmering eggs in water, resulting in a delicate, flavorful dish that can be enjoyed on its own or as a topping for various meals. Poaching eggs might seem tricky at first, but with the right technique and a few helpful tips, anyone can master this method and achieve perfect poached eggs every time. Whether you’re adding them to avocado toast, a salad egg, or a hearty breakfast plate, poached eggs elevate any dish with their rich taste and silky texture. In this post, we’ll walk you through how to poach eggs like a pro, ensuring flawless results every time.
What is Poaching and Why is it the Perfect Egg Cooking Method?
Perfect Egg Cooking Method
Poaching eggs is often considered one of the best methods for cooking eggs due to the delicate texture and rich flavor it yields. Unlike frying or boiling, poaching allows the egg to retain its natural shape and tenderness, creating a creamy yolk and a soft, delicate white. This makes poached eggs an ideal choice for those looking for a healthier, lighter alternative to other egg-cooking methods that often involve oil or butter.
Why Poaching is Considered the Perfect Method
Poaching preserves the egg’s natural flavor and nutrients. Because there is no direct contact with high heat, the egg whites remain tender without becoming rubbery, and the yolk stays runny, creating that classic “perfect poached egg” experience. It also retains all the vitamins and minerals found in the egg, making it a great choice for anyone looking to enjoy a nutritious, low-fat breakfast.
Moreover, poached eggs don’t require additional fats, making them a heart-healthy option compared to fried eggs. The gentle cooking process ensures that the egg’s proteins set properly, giving you a beautifully cooked egg without the risk of overcooking, which can sometimes lead to a tough or rubbery texture with other methods.
Poaching vs. Other Cooking Methods
When comparing poaching to other popular egg-cooking techniques, such as boiling or scrambling, there are several advantages. For example, boiling eggs often results in a hard shell that can be challenging to peel, while poached eggs are soft and have a smooth texture with no shell to worry about. Scrambled eggs, while delicious, can sometimes turn out dry or overcooked, especially when cooked at high heat. Poaching, on the other hand, ensures that eggs remain moist and tender, even when cooked for a longer time.
In summary, poaching eggs provides a more refined and healthier option for those who appreciate the full, pure taste of eggs without compromising on texture. Whether served over toast, with vegetables, or as part of a more elaborate dish, poached eggs elevate any meal with their versatility and satisfying, rich flavor.
The Benefits of Poached Eggs
Poached eggs are not only a delicious and elegant addition to many dishes, but they also offer several notable health and culinary benefits. These advantages make poaching one of the best methods for cooking eggs, whether you’re a health-conscious eater or someone who enjoys experimenting in the kitchen. Below are some of the key benefits of poached eggs:
1. Nutritious and Low in Calories
One of the primary benefits of poached eggs is that they are incredibly nutritious while remaining low in calories. Eggs themselves are packed with high-quality protein, essential amino acids, and vitamins like B12, vitamin D, and riboflavin. Poaching, unlike frying or scrambling, doesn’t require any oil or butter, so the calorie content stays low, making poached eggs a great option for anyone looking to maintain a healthy diet or control calorie intake.
The method also preserves more of the egg’s nutrients compared to other cooking techniques that use high heat, such as frying. The delicate poaching process ensures that vitamins and minerals like vitamin A, folate, and iron remain intact, which is especially beneficial for anyone seeking a nutrient-dense meal.
2. Heart-Healthy Option
Because poached eggs are cooked without added fats or oils, they are considered a heart-healthy option. Many traditional egg dishes, like scrambled or fried eggs, often use butter or oil to enhance flavor, which can add unhealthy fats to the meal. Poached eggs, however, have no added fats and can fit seamlessly into a low-fat or cholesterol-conscious diet. This makes them ideal for people who want to enjoy eggs while maintaining a heart-healthy lifestyle.
3. Easy to Digest
Poached eggs are often easier to digest than their fried or boiled counterparts. The gentle cooking method allows the egg whites to remain soft and tender, making them easier on the stomach. For those with sensitive digestion, poached eggs provide a lighter option without compromising on flavor or protein content.
The runny yolk in a poached egg is rich in nutrients that are quickly absorbed by the body, and the overall texture is more delicate than other cooking methods, making it a suitable choice for people who experience digestive discomfort.
4. Supports a Balanced, High-Protein Diet
Eggs are a fantastic source of high-quality protein, which is essential for muscle growth, repair, and overall bodily function. Poached eggs are a great addition to a balanced diet, as they provide all the benefits of protein without the added fats found in fried eggs. Whether you’re an athlete looking for a healthy breakfast or someone trying to increase protein intake, poached eggs are a great choice for any meal.
Additionally, because poached eggs are versatile, they can be paired with a variety of nutrient-dense foods, such as vegetables, whole grains, and lean proteins, further boosting the nutritional value of your meals.
5. Low in Fat
For those trying to reduce their fat intake, poached eggs are an excellent choice. Unlike fried eggs, which require the use of butter or oil, poached eggs are naturally low in fat. This makes them a great option for people following a low-fat diet, or anyone who wants to minimize unhealthy fat consumption while still enjoying the benefits of eggs.
—
In conclusion, poached eggs offer numerous benefits that go beyond just taste. They are a healthy, heart-friendly, and easily digestible option that can be enjoyed as part of a nutritious and balanced diet. By incorporating poached eggs into your meals, you can enjoy the full flavor and nutritional value of eggs without the added fat and calories that come with other cooking methods.
Why Poaching Eggs is a Popular Choice for Health-Conscious Individuals
Poaching eggs has become increasingly popular among health-conscious individuals due to its ability to preserve the natural nutrients of the egg while minimizing the need for added fats or oils. The health benefits of poaching eggs make them an appealing option for anyone looking to maintain a balanced, low-fat, and nutrient-rich diet. Here are some of the key reasons why poaching is a top choice for those focused on their health:
1. Minimal Use of Added Fats
One of the primary reasons poached eggs are favored by health-conscious individuals is that they are cooked without the need for added fats like butter or oil. In many traditional cooking methods, such as frying or scrambling, eggs are often cooked in oil or butter to enhance flavor and texture. While this can make eggs taste delicious, it also adds unnecessary calories and unhealthy fats, which can be detrimental to heart health and overall well-being when consumed in excess.
Poaching, however, relies solely on water (and sometimes a small amount of vinegar) to cook the egg, making it an ideal method for those looking to reduce their intake of unhealthy fats while still enjoying the delicious taste of eggs.
2. Low-Calorie Option
For individuals aiming to maintain or lose weight, poached eggs are a low-calorie option that is both satisfying and nutritious. A poached egg typically contains fewer calories than a fried egg or scrambled egg cooked in butter, while still providing a good source of protein and other essential nutrients. By opting for poached eggs, health-conscious eaters can enjoy a filling meal without overloading on calories, which makes them a great choice for anyone following a calorie-conscious diet.
Additionally, poached eggs can be paired with other low-calorie foods, like leafy greens or whole grains, to create a balanced and nutrient-dense meal that helps individuals stay within their daily calorie goals.
3. Preserved Nutrients and Vitamins
Poaching eggs allows them to retain a higher concentration of their natural nutrients compared to other cooking methods. When eggs are fried or scrambled at high temperatures, some of their vitamins, like vitamin B12, folate, and vitamin D, can degrade. The gentle poaching method, however, ensures that the egg whites remain tender and the yolks retain their rich, nutrient-packed content.
For example, the egg yolk is a powerhouse of essential nutrients, including vitamins A, D, E, and K, as well as healthy fats that are crucial for the body’s function. Poaching preserves these nutrients without subjecting them to the extreme heat found in frying or grilling, making poached eggs a nutrient-dense choice for those who want to optimize their health.
4. High in Protein, Low in Carbs
Eggs are a high-quality source of protein, which is essential for muscle building, repair, and overall bodily function. Poached eggs provide all the protein benefits of eggs without the carbs or added sugars found in processed breakfast foods. For individuals following low-carb or ketogenic diets, poached eggs are an excellent option to include in meals, as they align with the macronutrient goals of such dietary plans.
Protein also plays a significant role in satiety, helping to keep hunger at bay for longer periods. This makes poached eggs a great choice for anyone looking to control their appetite and reduce snacking throughout the day.
5. Digestibility and Gentle on the Stomach
Another reason poached eggs are a popular choice for health-conscious individuals is that they are gentle on the stomach and easy to digest. The soft texture of poached eggs, especially the runny yolk, makes them a good option for people with sensitive digestive systems or those recovering from illness. Unlike fried eggs, which can sometimes cause discomfort due to the high-fat content, poached eggs are less likely to cause indigestion or bloating, making them a safer choice for people with digestive concerns.
Additionally, the lack of added fats means that poached eggs are less likely to exacerbate issues related to acid reflux or heartburn, which can be triggered by fatty or greasy foods.
6. Supports Healthy Weight Management
Poached eggs are a versatile and protein-packed food that can support healthy weight management. Protein-rich foods like poached eggs help stabilize blood sugar levels, reduce hunger, and maintain lean muscle mass. They are an excellent addition to a balanced breakfast or meal, especially when paired with vegetables, whole grains, or healthy fats.
For those following weight loss or weight maintenance programs, poached eggs provide a satisfying option that doesn’t sacrifice flavor or nutritional value. Their high protein content keeps you feeling full longer, helping to curb unnecessary cravings and overeating throughout the day.
—
In summary, poaching eggs offers a range of health benefits that make them a popular choice for individuals focused on maintaining a healthy, balanced lifestyle. By cooking eggs without added fats, preserving their nutrients, and offering a high-protein, low-calorie option, poached eggs help support a variety of health goals, from weight management to heart health. For anyone looking to eat clean and feel their best, poached eggs are a smart and delicious choice to include in any meal.
Essential Tips for Perfect Poached Eggs Every Time
Water Temperature
Water temperature plays a crucial role in the success of poaching eggs. Achieving the perfect poached egg relies heavily on maintaining the right water temperature throughout the cooking process. Too high or too low of a temperature can result in poorly cooked eggs, with tough whites or undercooked yolks. Here’s a deeper dive into why water temperature is so important and how to get it just right.
1. The Importance of Simmering, Not Boiling
When poaching eggs, the ideal water temperature is just below boiling—around 180°F to 190°F (82°C to 88°C). At this temperature, the water is simmering, meaning small bubbles form but do not rapidly break the surface. This is crucial because the gentle heat allows the egg whites to coagulate properly, creating a tender texture while keeping the yolk soft and runny.
Boiling water, on the other hand, can be too harsh for delicate eggs. At boiling temperature (212°F or 100°C), the turbulent water can cause the egg whites to break apart, leading to an unevenly cooked egg. It can also lead to a rubbery texture in the egg whites and an overcooked yolk, ruining the desired creamy, runny consistency.
2. Why the Right Temperature Ensures Even Cooking
At the ideal poaching temperature (around 180°F to 190°F), the water is hot enough to cook the egg but not so hot that it causes the egg to toughen. When eggs are added to the simmering water, the whites begin to firm up gently while the yolk remains protected inside the shell of the white. If the water temperature is too low (below 180°F), the egg may take longer to cook, and the whites can remain loose or watery, not fully setting. This can lead to an undercooked, unsatisfactory poached egg.
Maintaining this steady simmer ensures that each part of the egg cooks evenly, with the whites setting while keeping the yolk perfectly runny in the center. For the best results, it’s important to monitor the temperature of the water throughout the process to maintain consistency.
3. How to Test and Maintain the Right Temperature
Maintaining the right water temperature can be tricky, especially without a thermometer. Here are a few methods to help you monitor the temperature of the water without any fancy tools:
Look for Small Bubbles: As the water heats up, watch for small bubbles forming at the bottom of the pan. Once you see the bubbles rise and gently break the surface, the water is at the right temperature for poaching.
Stirring the Water: Before adding your eggs, give the water a gentle stir to create a vortex. This will help guide the eggs into a uniform shape and keep them from sticking together. This step is easier when the water is at the ideal simmering temperature, as it will create a smooth current without excessive turbulence.
Adjusting the Heat: If you’re cooking multiple eggs or need to adjust the heat, it’s important to make slight changes. If the water temperature starts to rise too high, simply reduce the heat to bring it back to a simmer. Conversely, if the water cools down too much, increase the heat slightly to maintain a steady simmer.
4. Why Too Hot or Too Cold Water Affects the Egg’s Texture
Too Hot (Boiling): As mentioned, boiling water can cause the egg whites to become tough, rubbery, and unevenly cooked. The intense heat also makes it difficult to maintain the soft, tender consistency of the whites. Additionally, the fast-moving water can break the delicate egg whites apart, leading to a messy, unattractive poached egg with a disrupted shape.
Too Cold: If the water is too cold, the egg will not cook quickly enough, leading to undercooked whites that are slimy or watery. The longer cooking time also results in an egg that is more likely to stick to the pan or clump together with other eggs, making the poaching process much more difficult. A cold cooking environment will not allow the egg whites to firm up properly, leading to inconsistent results.
5. Using a Thermometer for Precision (Optional)
If you want to be extra precise in achieving the perfect poached egg, using a thermometer is a reliable way to monitor water temperature. Simply place the thermometer in the water and adjust the heat to maintain a steady 180°F to 190°F (82°C to 88°C) throughout the cooking process. This is especially helpful if you’re poaching multiple eggs in succession and want to ensure consistent results every time.
—
In conclusion, water temperature is one of the most important factors in poaching eggs. A simmering temperature between 180°F and 190°F allows the egg whites to set gently, creating a soft, smooth texture while keeping the yolk runny and perfectly cooked. By carefully monitoring the water temperature and adjusting the heat as needed, you can ensure that your poached eggs turn out perfectly every time.
Adding Vinegar
Adding vinegar to the water when poaching eggs is a common practice that can significantly improve the results, especially for those new to poaching. While it’s not absolutely necessary, vinegar plays an important role in ensuring that the egg whites cook properly and maintain their shape. Here’s an in-depth look at why vinegar is beneficial and how to use it effectively when poaching eggs.
1. Helps the Egg Whites Coagulate
The primary reason vinegar is added to the poaching water is that it helps the egg whites coagulate (or set) faster. Eggs contain proteins that, when exposed to heat, denature and form a solid structure. However, the process can be slow, and without the help of vinegar, the egg whites may spread out in the water, resulting in a less neat and tidy poached egg.
Vinegar, which is mildly acidic, helps to lower the pH of the water. This acidity accelerates the coagulation process of the egg whites, causing them to firm up more quickly. This prevents the egg whites from dispersing too much into the water and helps them retain a more compact, uniform shape. The result is a much cleaner poached egg with firm, smooth whites and a runny yolk.
2. Prevents the Egg Whites from Spreading
When poaching eggs without vinegar, the egg whites can sometimes spread out into the water, making it difficult to form a neat and tidy poached egg. This can happen especially if the egg isn’t particularly fresh, as older eggs tend to have looser whites. Vinegar helps to counteract this by encouraging the egg whites to set quickly and stay together.
The acid in the vinegar interacts with the proteins in the egg whites, causing them to coagulate faster and prevent the whites from spreading too much. This ensures that the poached egg retains its shape and looks more polished when served.
3. Why Vinegar Works Best with Fresh Eggs
While vinegar can help coagulate egg whites, it works most effectively with fresh eggs. Fresh eggs have thick, firm whites that are more likely to stay together during poaching, but adding vinegar can make the process even smoother by speeding up the setting of the whites. On the other hand, older eggs, which tend to have thinner, more watery whites, can benefit even more from vinegar, as it helps bind the whites more effectively and prevents them from dispersing in the water.
If you’re working with older eggs, the vinegar will provide extra assistance in keeping the egg whites intact and more manageable while poaching.
4. How Much Vinegar to Use
You don’t need a lot of vinegar to see results. The typical recommendation is to add about 1–2 teaspoons of vinegar per liter (or quart) of water. Too much vinegar can impart a noticeable flavor to the egg, so it’s best to err on the side of caution and use just enough to help the egg whites set. A mild vinegar, like white vinegar or apple cider vinegar, is generally preferred, as they are less likely to affect the flavor of the egg.
However, if you prefer to avoid the flavor of vinegar, you can use a very small amount—just enough to slightly acidify the water without leaving any trace of the taste. Some people choose to experiment with different types of vinegar, like rice vinegar, which has a very mild flavor, to see if they can achieve the desired result while keeping the flavor neutral.
5. Is Vinegar Always Necessary?
While vinegar is a helpful tool for poaching eggs, it’s not absolutely necessary for everyone. Some people prefer to poach eggs without vinegar, relying instead on water temperature and freshness of the eggs to maintain the shape and texture. Fresh eggs, in particular, may not require vinegar, as they naturally have thick, firm whites that hold their shape well.
That said, for beginners or those struggling with the whites dispersing in the water, vinegar is a great tool to help ensure success. It’s especially helpful in situations where you want a quicker, cleaner poach or when using eggs that might not be as fresh.
6. Alternatives to Vinegar
If you don’t want to use vinegar but still need something to help the egg whites set, there are a few alternatives to consider:
Lemon Juice: Like vinegar, lemon juice is also acidic and can serve the same function in poaching eggs. Add a small splash of fresh lemon juice to the water for similar results without using vinegar.
Salt: While salt won’t help with coagulation in the same way vinegar does, adding a pinch of salt to the water can sometimes help the egg whites retain their shape by making the water denser, though it’s not as effective as vinegar.
—
In summary, adding vinegar to the poaching water helps to speed up the coagulation of the egg whites, preventing them from spreading and ensuring a neater, more uniform poached egg. The acidity in the vinegar accelerates the setting of the whites, which is particularly useful for fresher eggs or when working with less-than-perfect eggs. While vinegar is not strictly necessary, it’s a helpful tool for achieving consistently good results, especially for beginners or those looking for a foolproof poaching technique. By using just the right amount of vinegar, you can enjoy perfectly poached eggs with smooth, firm whites and a runny yolk every time.
Egg Freshness
The freshness of your eggs plays a significant role in the quality of your poached eggs. Fresh eggs have firmer whites and yolks, which results in a better texture and cleaner poach. As eggs age, the egg whites become thinner and more watery, making it harder to achieve that perfect poached egg shape. Here’s a deeper dive into how egg freshness affects poaching and how you can tell if your eggs are fresh enough for poaching.
1. Why Fresh Eggs Make Better Poached Eggs
Fresh eggs are key to achieving perfectly poached eggs with well-defined whites and a runny yolk. The reason for this is that the egg white (albumen) in a fresh egg is thick and tight around the yolk. When poaching, the whites coagulate more easily and form a compact, smooth structure around the yolk, which helps the egg keep its shape.
As eggs age, the egg white becomes thinner and more watery due to the natural breakdown of proteins over time. This causes the egg whites to spread out in the poaching water, resulting in a less tidy poach and a less appealing presentation. The more spread-out the whites, the less control you have over the final shape of the poached egg. Fresh eggs, on the other hand, help the whites stay together and retain their shape during poaching, giving you a cleaner, more uniform egg.
2. How to Test for Freshness: The Water Test
One of the best ways to test the freshness of an egg is by using the “water test.” This simple method involves placing your eggs in a bowl of cold water and observing how they behave:
Fresh Eggs: A fresh egg will sink to the bottom and lay flat on its side. This is because the egg’s contents are still compact, and the egg has minimal air inside.
Slightly Older Eggs: Eggs that are a few days old but still good for consumption will stand upright at the bottom of the bowl. These eggs may not be as ideal for poaching due to the looser whites, but they can still be used for other cooking methods.
Old Eggs: If the egg floats to the top of the water, it is no longer fresh and is likely too old to be used for poaching or any other recipes where you need tight, firm whites. This occurs because the air cell inside the egg expands as it ages, causing the egg to become buoyant.
While eggs that float should be discarded, those that sink flat are perfect for poaching, ensuring the best possible texture and shape.
3. How Older Eggs Affect Poaching
As eggs age, the egg whites lose their viscosity and become thinner. This causes them to spread out more in the water during poaching, resulting in an unevenly shaped egg. Older eggs may have runny whites that don’t hold together well, leading to an unattractive appearance and inconsistent cooking. The yolk also becomes more fragile and less centered, making it prone to breaking or becoming overcooked.
The thin, watery whites of older eggs can also make it more difficult to achieve the perfect poached egg texture, as they take longer to coagulate and may not form the clean boundary between the yolk and whites that is characteristic of a well-poached egg.
While older eggs can still be used for scrambled eggs, hard boiling, or baking, they’re not the best choice for poaching if you want pristine results. For the best poached eggs, always choose the freshest eggs available.
4. How Freshness Affects the Runny Yolk
Egg freshness not only affects the appearance of the egg whites but also the consistency of the yolk. With fresh eggs, the yolk tends to remain intact and centered, allowing you to achieve that perfect runny center when poaching. The thick egg whites surrounding the yolk keep it in place and help ensure that the yolk remains runny and not overcooked.
As eggs age, the yolk becomes weaker, and it is more likely to break during poaching. Older eggs may result in a yolk that is less runny or even completely cooked through, especially if the egg white has spread too much in the water.
5. Using Older Eggs for Poaching (Tips)
While fresh eggs are ideal for poaching, you can still use older eggs if you follow a few tips to get the best possible result:
Add Vinegar: When using older eggs, it’s particularly important to add vinegar to the poaching water. The vinegar helps the thinner whites coagulate more quickly, keeping them together during the poaching process. This can help prevent the egg whites from dispersing too much in the water.
Use a Gentle Poaching Method: If your eggs are slightly older, consider using a gentler poaching method, like creating a vortex in the water. This helps keep the egg together and may reduce the spreading of the whites. Lower the heat to maintain a gentle simmer instead of a full boil.
Poach in a Smaller Pot: To help older eggs hold their shape better, consider poaching one egg at a time in a smaller pot with a small amount of water. This minimizes the area the egg can spread into and gives the whites more control.
6. How Fresh Eggs Improve the Overall Poaching Process
Using fresh eggs is especially beneficial when you need to cook multiple eggs in succession. Since fresh eggs hold their shape well, they are less likely to merge or overlap in the water, which can lead to a messy result. Fresh eggs also reduce the chances of eggs breaking apart in the water, making the entire poaching process smoother and less stressful.
When preparing poached eggs for a crowd or for a dish like eggs Benedict, using fresh eggs ensures that each egg will come out with a beautiful shape and perfect consistency, making the process more efficient and predictable.
—
In summary, the freshness of your eggs is one of the most important factors in poaching success. Fresh eggs have thick, compact whites that cook evenly and hold together well, leading to a tidy and delicious poached egg. They also preserve the runny yolk, which is a hallmark of a perfect poached egg. By performing a simple freshness test and selecting the freshest eggs possible, you’ll increase your chances of achieving a flawless poached egg every time. While older eggs can still be used for poaching, they may require additional techniques, like adding vinegar or adjusting the poaching method, to achieve optimal results.
The Step-by-Step Process of Poaching an Egg
Step 1: Prepare the Water and Vinegar Solution
The first step in poaching eggs is preparing the water and vinegar solution, which sets the stage for achieving perfectly poached eggs. While the process is relatively simple, getting the water ready correctly is crucial for the outcome of your poached eggs. Here’s a step-by-step guide to preparing the ideal poaching environment with the right balance of water and vinegar.
1. Choose the Right Pot and Water Volume
Start by selecting a wide, shallow pan or pot that provides enough space for your eggs to float and cook without overcrowding. The water should be deep enough to submerge the eggs completely, typically around 3–4 inches (7–10 cm) of water, but not so deep that the eggs will be difficult to manage. A larger surface area also ensures that the water temperature remains consistent as you add the eggs.
Next, fill the pot with cold water. It’s important to start with cold water because this gives you better control over the temperature, allowing you to gradually heat the water to the ideal simmering point (180°F to 190°F or 82°C to 88°C). Starting with cold water prevents the water from overheating too quickly, which can lead to a boiling mess instead of a gentle simmer.
2. Add Vinegar to the Water
Once the pot is filled with water, it’s time to add vinegar. Vinegar is essential for helping the egg whites coagulate quickly, which ensures that your poached eggs have a neat, clean shape. The acidity of vinegar lowers the pH of the water, which accelerates the process of denaturing the proteins in the egg whites. This causes the whites to firm up quickly, preventing them from spreading out in the water.
For every liter (or quart) of water, add about 1 to 2 teaspoons of vinegar. White vinegar is most commonly used because it has a neutral flavor and doesn’t impart any noticeable taste to the eggs. Apple cider vinegar can also be used if you prefer a milder, slightly fruity acidity. The vinegar should not be overpowering—just enough to make the water slightly acidic but not to the point of affecting the egg’s flavor.
3. Stir the Water to Dissolve the Vinegar
Once the vinegar is added, give the water a gentle stir to ensure the vinegar is evenly distributed throughout the water. This helps the acid circulate and ensures that all areas of the water will be equally effective in helping the egg whites coagulate quickly. Stirring also helps prevent the vinegar from clumping at the bottom of the pan, ensuring that every part of the water is at the right acidity level.
4. Heat the Water to the Ideal Simmering Temperature
After stirring, it’s time to begin heating the water. Turn the heat to medium-high and watch closely as the water begins to heat up. The goal is to bring the water to a gentle simmer, not a boil. Boiling water (212°F or 100°C) is far too aggressive for poaching eggs, and the constant bubbles will disrupt the delicate egg whites. You want the water to reach a temperature of 180°F to 190°F (82°C to 88°C)—this is the ideal range for poaching eggs.
To check for the right temperature, look for small bubbles just starting to form at the bottom of the pan and gently rise to the surface. You should not see large, rolling bubbles. The water should remain calm with only slight movement on the surface. At this point, your water is at the perfect temperature for poaching.
If you don’t have a thermometer, you can test the temperature by dipping a spoon into the water—if it feels warm but not hot enough to be uncomfortable, it’s likely in the ideal range. Alternatively, you can use the “swirl” method: when the water starts to form a gentle vortex with a slight whirlpool, it’s a sign the water is close to the right temperature.
5. Adjust the Heat as Needed
Once the water reaches the ideal simmering point, lower the heat slightly to maintain that gentle simmer throughout the poaching process. You may need to adjust the heat during the cooking process, as the temperature of the water can fluctuate when you add eggs to the pot. If the water starts to boil or bubble too vigorously, reduce the heat immediately. Conversely, if the water starts cooling down and the bubbles disappear, you can increase the heat slightly.
Maintaining a consistent temperature is crucial for ensuring that the eggs cook evenly and do not become tough or rubbery. The vinegar will help keep the egg whites from dispersing into the water, but the temperature will determine how well the whites set and how well the yolk remains runny.
—
In summary, preparing the water and vinegar solution is an important first step in poaching eggs. By choosing the right pot, adding the correct amount of vinegar, and carefully controlling the temperature of the water, you set yourself up for success in achieving perfectly poached eggs. The vinegar aids in coagulating the egg whites, while the right temperature ensures a gentle cook, resulting in eggs with tender whites and a runny yolk. By following these steps, you’re on your way to poaching eggs like a pro.
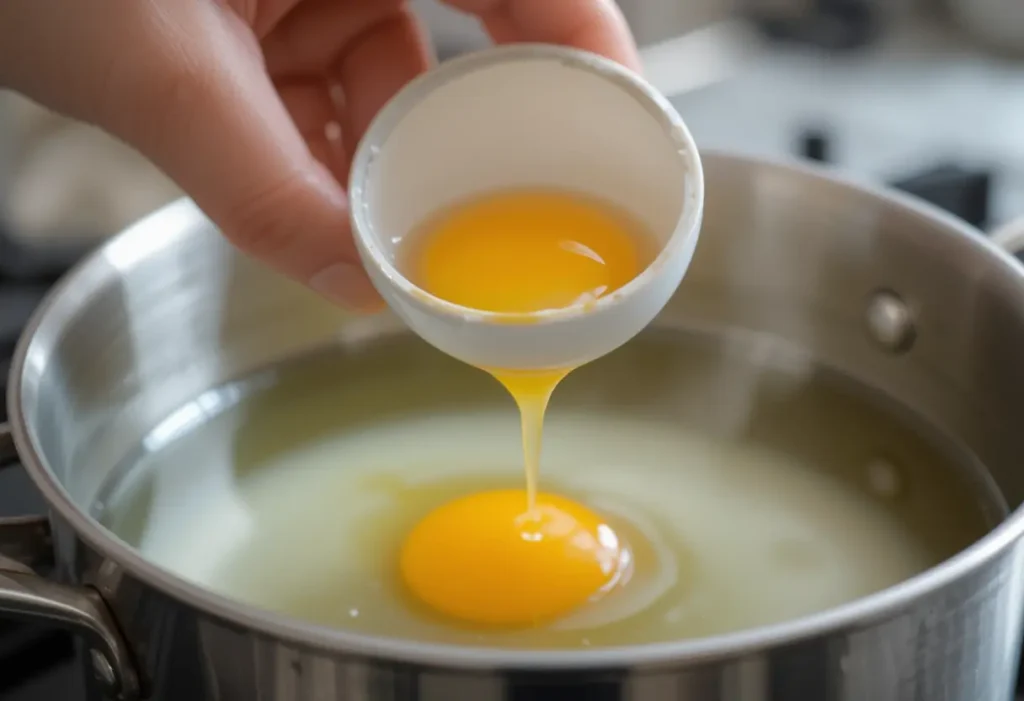
Step 2: Crack the Egg into a Cup or Bowl for Easy Transfer
Cracking the egg into a separate cup or bowl before transferring it to the poaching water is a crucial step in ensuring that your poached eggs come out perfectly. This step helps avoid any potential mess and makes it easier to gently lower the egg into the simmering water without disturbing the delicate whites. Here’s a more detailed look at why this step is important and how to do it effectively.
1. Preventing Shell Fragments in the Water
One of the main reasons to crack your egg into a cup or bowl first is to prevent any shell fragments from ending up in the poaching water. If you crack the egg directly into the water, there’s a higher chance that small pieces of eggshell will break off and float in the pot. These fragments not only make the process messier but can also be difficult to remove once the egg is in the water, potentially affecting the overall appearance and cleanliness of your poached egg.
By cracking the egg into a small bowl or cup first, you have a chance to inspect it and make sure no shell bits have made their way into the egg. If you do find any pieces of shell, you can easily remove them before transferring the egg into the water.
2. Ensuring a Gentle Transfer to the Water
Cracking the egg into a bowl or cup allows you to transfer it into the poaching water more gently and with greater control. If you were to crack the egg directly into the pot, it could break apart or fall in too quickly, disrupting the poaching water and causing the egg whites to spread out.
When you use a cup or bowl, you can hold the egg just above the water’s surface and gently slide it in. This allows you to lower the egg in slowly and precisely, keeping the whites contained and preventing them from dispersing. The gentle approach is key to getting a neat and tidy poached egg with well-formed whites and a centered yolk.
3. Using a Small Cup or Ramekin for Easier Handling
For ease of use, choose a small cup or ramekin to crack the egg into. The cup should have smooth sides, allowing you to easily slide the egg into the water without splashing or spilling. Some people prefer using a shallow ramekin because it provides more surface area for the egg and makes it easier to slide the egg into the water in a controlled manner. The key is to pick a container that allows you to gently tip the egg into the water without much effort or risk of breaking the yolk.
4. Reducing the Risk of Breaking the Yolk
Another important benefit of cracking the egg into a cup or bowl first is reducing the risk of accidentally breaking the yolk. If you crack the egg directly into the water or pan, the yolk could easily break upon impact, leading to a less-than-ideal poached egg with a messy appearance.
When you crack the egg into a bowl, you can inspect it for any cracks in the yolk before transferring it. If the yolk is intact, you can gently slide the egg into the water with the confidence that it will stay whole. This step is especially helpful if you’re working with multiple eggs and want to make sure each one remains intact and well-formed during the poaching process.
5. Cracking Eggs One at a Time
It’s also important to crack and transfer the eggs one at a time, especially if you’re poaching multiple eggs. Cracking all your eggs into bowls and then transferring them at once can lead to overcrowding in the pot, which can make it harder to manage each egg’s cooking process. By cracking them one at a time, you give each egg the attention it deserves and prevent them from sticking together or becoming difficult to separate once in the water.
Additionally, cracking each egg individually into a separate container helps you keep track of any that might have a less-than-perfect appearance, such as an egg with a weak yolk or a broken white. This also allows you to choose the best eggs for poaching, giving you a higher chance of success.
6. Using a Fine-Mesh Strainer for Extra Precision
For extra precision, some people like to use a fine-mesh strainer or sieve to gently strain the egg before transferring it into the cup or bowl. This step is especially helpful when using eggs that are a bit older. As eggs age, the whites become thinner and more watery, and straining the egg allows you to remove any excess runny whites that might otherwise spread too much in the water.
By straining the egg, you can ensure that only the firmer, thicker whites are left, giving you better control over the poaching process and resulting in a more neatly shaped poached egg. This is a particularly helpful step if you’re trying to poach older eggs or want to ensure the most optimal result for each egg.
—
In summary, cracking the egg into a cup or bowl before transferring it into the poaching water is a simple but vital step for achieving perfect poached eggs. This method helps prevent shell fragments from getting into the water, ensures a gentle and controlled transfer, and reduces the risk of breaking the yolk. By taking the time to crack the egg separately, you’re giving yourself greater control over the poaching process and setting yourself up for a beautiful, well-formed poached egg every time. Whether you’re poaching one egg or several, this step is a key part of creating eggs with smooth whites and a runny yolk.
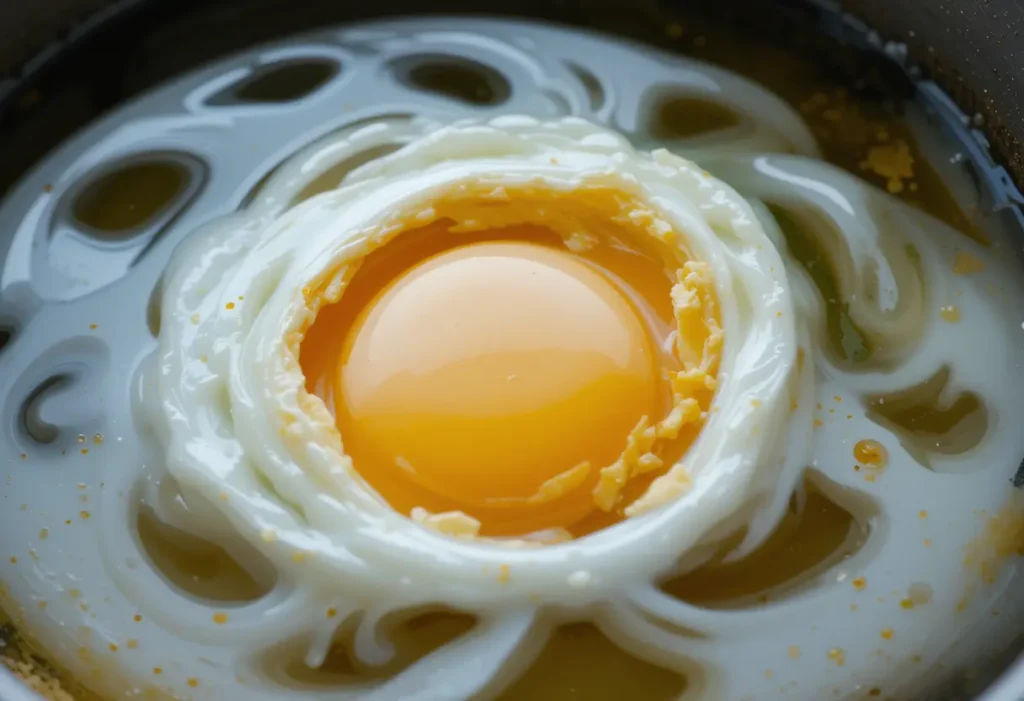
Step 3: Create a Vortex in the Water and Gently Slide the Egg In
Creating a vortex in the water before adding the egg is a technique often used by professional chefs to ensure a perfectly shaped poached egg. This step is essential for preventing the egg whites from spreading out too much and for helping the egg cook evenly. The vortex helps keep the egg compact and allows the whites to wrap around the yolk, resulting in a neat and well-formed poached egg with a centered yolk and tender whites. Here’s how to master this important step.
1. Why a Vortex is Crucial for Poaching Eggs
When poaching eggs, you want the whites to hold together and form a smooth, compact shape around the yolk. If the egg is added directly to the water without creating a vortex, the egg whites can spread out too much, causing the egg to look messy and uneven. The vortex helps solve this problem by using the natural motion of the water to pull the egg whites toward the yolk.
When the vortex is created, it causes the water to move in a circular motion, which gently swirls the egg around its center. This motion encourages the egg whites to gather around the yolk, keeping them neatly contained and preventing them from dispersing too much in the water. As a result, the egg cooks more uniformly, and the final poached egg has a perfectly round shape.
2. How to Create a Vortex
To create a vortex, use a spoon or a whisk to stir the simmering water in a circular motion just before adding the egg. Here’s a step-by-step guide to making the perfect vortex:
Use a Spoon or Whisk: Take a large spoon or a whisk and stir the water gently. Move the spoon in a circular motion, either clockwise or counterclockwise, to create a whirlpool effect. It’s important that the motion is smooth and consistent, creating a strong enough vortex to pull the egg into the center but not too vigorous that the water starts boiling or splashing. The vortex should be gentle, like a slow swirl.
Wait for the Right Moment: Allow the vortex to settle and form a steady, swirling motion in the water. The whirlpool effect should last for a few seconds. Once you see the water spinning nicely and evenly, it’s time to add the egg.
3. Gently Slide the Egg into the Center of the Vortex
Once the vortex is created, you’ll need to carefully add the egg. This is where the control gained by cracking the egg into a separate cup or bowl comes into play. Here’s how to gently slide the egg into the water:
Position the Egg Near the Water’s Surface: Hold the cup or bowl with the egg close to the water’s surface. This reduces the distance the egg has to travel and prevents it from hitting the bottom of the pot too hard. You want to gently lower the egg into the water without disturbing the vortex too much.
Lower the Egg into the Center of the Vortex: Slowly and gently tip the egg into the center of the vortex. As you do this, the swirling motion of the water will help pull the egg whites around the yolk, ensuring a neat, round shape. The key is to be gentle and steady to avoid breaking the yolk or disrupting the formation of the egg.
Don’t Drop the Egg: While it may be tempting to drop the egg directly into the water, doing so can cause the whites to spread out too much, making it harder to control the shape of the poached egg. Instead, slide the egg in gently and allow the vortex to guide the whites around the yolk.
4. What Happens Once the Egg Is in the Water?
As soon as the egg enters the water, the vortex will continue to swirl, and the egg whites will begin to set. The swirling motion of the water gently wraps the egg whites around the yolk, helping them coagulate quickly. This results in a well-formed poached egg with a neat, smooth white layer and a runny, centered yolk.
You’ll notice that the vortex effect will begin to dissipate once the egg is added, and the water will settle into a gentler simmer. At this point, you can leave the egg to cook undisturbed for a few minutes, allowing the whites to firm up while keeping the yolk soft and runny.
5. How Long Should You Wait for the Perfect Poached Egg?
Once the egg is in the water, keep a close eye on the cooking time. The vortex method helps the egg cook more evenly, so you should aim for about 3 to 4 minutes of cooking time for a perfectly poached egg with a soft, runny yolk. The egg whites should be firm to the touch, while the yolk will remain tender and gooey.
For a firmer yolk, you can leave the egg in the water for another minute or two, but be cautious, as leaving it too long will result in a fully cooked yolk. If you’re poaching multiple eggs, make sure to repeat the vortex technique for each one to ensure that the eggs don’t stick together or become difficult to manage.
6. Additional Tips for a Smooth Vortex and Perfect Egg
Control the Water Temperature: The vortex technique works best when the water is at the correct simmering temperature (180°F to 190°F or 82°C to 88°C). Too hot, and the water will cause the egg to cook too quickly and become tough; too cold, and the egg will spread out in the water and not form properly.
Gentle Stirring: If the vortex starts to slow down or disappear before adding the egg, you can gently stir the water again to revitalize the swirling motion. Be sure to stir gently so you don’t disrupt the process too much.
One Egg at a Time: When creating the vortex, it’s best to poach one egg at a time. This allows you to focus on the shape and structure of each egg, ensuring perfect results. If you’re cooking multiple eggs, repeat the vortex process for each one to maintain control over the cooking process.
—
In summary, creating a vortex in the poaching water is a simple but effective technique that helps you achieve perfectly poached eggs with firm whites and runny yolks. The swirling motion of the water helps keep the egg whites contained around the yolk, resulting in a clean, smooth poach. By gently sliding the egg into the center of the vortex, you ensure a well-formed egg that cooks evenly, allowing you to enjoy a professional-quality poached egg every time. With this step, you’ll be able to take your poaching technique to the next level and create eggs that look as great as they taste.
Step 4: Cook for 3-4 Minutes and Remove with a Slotted Spoon
Once you’ve gently slid the egg into the water and the vortex has helped contain the whites around the yolk, the next step is crucial for ensuring the perfect poached egg: cooking it for 3 to 4 minutes and then removing it with a slotted spoon. This period of cooking is where the magic happens— the egg whites set while the yolk remains soft and runny. Here’s an in-depth look at what happens during this phase and how to execute it perfectly.
1. The Importance of Timing (3 to 4 Minutes)
The cooking time for poached eggs is critical, as it’s what determines the texture of both the egg whites and the yolk. Generally, poached eggs should cook for about 3 to 4 minutes for an ideal result. Here’s what happens during this time:
After 3 minutes: The whites will be set and firm to the touch, while the yolk will remain soft and runny. This is the perfect balance for a poached egg with a delicate, creamy texture inside and a tender, fully-cooked white exterior.
After 4 minutes: The whites will be fully set, and the yolk will still be runny but slightly thicker than after 3 minutes. For those who like a slightly more cooked yolk but still enjoy some degree of runniness, this timing is ideal.
Over 4 minutes: If the egg is left in the water for longer than 4 minutes, the yolk will begin to cook through, resulting in a firmer consistency. While the egg will still be delicious, it will no longer have the soft, runny center that defines the poached egg.
It’s important to remember that timing can vary slightly based on factors such as the temperature of the water and the size of the egg, so a bit of practice may be necessary to get your preferred level of doneness.
2. Keep an Eye on the Water Temperature
While your egg is cooking, it’s important to maintain the right temperature in the water. The water should remain at a gentle simmer (180°F to 190°F or 82°C to 88°C). If the water is too hot, the egg may cook too quickly, causing the whites to become rubbery or the yolk to solidify. If the water is too cool, the whites may spread out, and the egg may not cook properly.
You can adjust the heat slightly during the cooking process if needed, but avoid letting the water reach a full boil. Gentle bubbling and slight movement on the surface are ideal. If you notice the water temperature fluctuating, try to make small adjustments to keep the simmer consistent.
3. Why a Slotted Spoon Is Essential
A slotted spoon is a vital tool for removing poached eggs from the water. This specialized spoon allows you to lift the egg out gently without causing the delicate whites to break apart. Here’s why it’s so important:
Drain Excess Water: A slotted spoon has holes that allow excess water to drain away from the egg as you lift it out. This helps prevent the egg from becoming too watery and ensures that you’re left with a clean, dry poached egg.
Prevent Egg Breakage: Because poached eggs are soft and delicate, using a regular spoon or utensil might risk breaking the whites or yolk. The slotted spoon’s gentle design allows you to lift the egg without applying too much pressure. The wide, shallow shape also supports the egg, preventing it from falling apart during removal.
Ease of Handling: A slotted spoon provides control, allowing you to carefully scoop underneath the egg and raise it out of the water slowly. This reduces the risk of splashing hot water or disturbing the poached egg’s shape.
4. How to Remove the Poached Egg from the Water
Once the egg has cooked for 3 to 4 minutes, it’s time to remove it from the water with a slotted spoon. Here’s how to do it step-by-step:
Position the Spoon: Gently slide the slotted spoon into the simmering water. Hold the spoon at a slight angle, and carefully guide it underneath the egg without disturbing its position in the water.
Lift Slowly: Once the spoon is beneath the egg, lift it out slowly and steadily, being mindful not to drop the egg or let it slip from the spoon. You should feel the egg gently resting on the spoon as you lift it out.
Drain Excess Water: Hold the spoon over the pot for a few seconds to let the excess water drain away. Gently shake the spoon to remove any lingering water that might have collected around the egg.
Place on a Plate or Serving Dish: Once the egg is properly drained, place it on a plate or serving dish. If you’re poaching multiple eggs, repeat this process for each one. The poached egg should now have a smooth, neat appearance, with a firm white exterior and a soft, runny yolk inside.
5. What to Do If the Egg Is Overcooked
Sometimes, despite your best efforts, the egg might end up overcooked, especially if you’re still getting used to the timing. If this happens, don’t worry—it’s still edible, and you can use it in other dishes, like salads, sandwiches, or egg bowls, where a firmer yolk might be desirable. The texture of the egg whites will still be soft, and the yolk will have a creamy, custard-like consistency.
If you prefer a perfectly runny yolk every time, it may take a few attempts to dial in the ideal timing based on your equipment and the type of eggs you’re using. Don’t be discouraged—poaching eggs is a skill that improves with practice!
—
In summary, Step 4—cooking the egg for 3 to 4 minutes and removing it with a slotted spoon—is the critical phase where you achieve that perfect balance of firm whites and a runny yolk. By maintaining the right water temperature, keeping an eye on the cooking time, and using a slotted spoon to gently lift the egg, you ensure that the egg remains intact and is removed with ease. Timing is essential here, as it determines the texture of the egg, and with a little practice, you’ll be able to achieve consistently perfect poached eggs.
Alternative Techniques for Poaching Eggs
While the traditional method of creating a vortex in simmering water is a popular and effective way to poach eggs, there are several other techniques that can also produce excellent results. These alternative methods might appeal to you if you’re looking for a different approach or if you’re working with specific kitchen equipment. Here’s an exploration of some popular alternative techniques for poaching eggs.
1. Poaching Eggs in a Silicone Cup or Egg Poacher
One of the easiest and most foolproof methods for poaching eggs is using silicone cups or egg poacher trays. These handy kitchen tools allow you to poach eggs without worrying about the water temperature, vortex, or the delicate technique of gently sliding eggs into the water.
How it Works: Silicone egg poachers are small, flexible cups that you place in a pot of simmering water. You crack an egg into the cup and let it cook until the whites are set, and the yolk remains soft.
Advantages: This method is incredibly easy, especially for beginners. The egg is contained within the cup, so it won’t spread out in the water, and you can poach multiple eggs at once. It also eliminates the need for the vortex technique, as the egg is contained and protected from the swirling water.
Disadvantages: The texture of the egg might differ slightly from the traditional method. The egg may be a bit more “contained” and less delicate in shape compared to a hand-poached egg. Some egg poachers also use plastic, so it’s essential to choose BPA-free options for health reasons.
2. Poaching Eggs in a Mesh Strainer (or Slotted Spoon)
This technique is similar to the traditional vortex method but with the added advantage of a more controlled and less intimidating process. Instead of creating a vortex, you place the egg directly into a mesh strainer or slotted spoon before lowering it into the water.
How it Works: Crack the egg into a mesh strainer that’s held above the simmering water. Allow the egg white to drain for a few seconds before lowering the strainer gently into the water. This technique reduces the amount of watery egg white that might spread out in the water, resulting in a more compact egg white.
Advantages: By allowing the excess egg white to drain off in the strainer, this method ensures the egg stays more compact, and the whites cook evenly. It also minimizes the risk of spreading whites, and it’s a great option for people who want a simpler process without worrying about the vortex.
Disadvantages: The downside is that this technique requires a bit of extra equipment (a mesh strainer or slotted spoon) and a more hands-on approach compared to the simple vortex method. If not handled gently, there’s still a risk of the egg breaking in the strainer.
3. Oven Poached Eggs (Baked Poached Eggs)
Oven poaching is a hands-off technique that produces poached eggs with a slightly different texture, but they are still creamy and delicious. This method is ideal if you’re preparing poached eggs for a crowd or if you don’t want to stand over the stove.
How it Works: Preheat the oven to around 350°F (175°C). Fill a muffin tin or a ramekin with a little water and crack an egg into each compartment. Bake in the oven for about 12–15 minutes, or until the egg whites are fully set but the yolk is still soft.
Advantages: This method is incredibly easy and allows you to make multiple poached eggs at once without worrying about water temperature or timing. It’s great for breakfast buffets or serving a crowd. It’s also an ideal technique for busy mornings when you don’t want to stand over a pot of simmering water.
Disadvantages: Oven-poached eggs don’t have the same delicate texture as those poached in water. The whites tend to be a bit firmer, and the yolk may be slightly thicker than the traditional method. However, this can still be a great option depending on your preferences.
4. Microwave Poached Eggs
If you’re in a hurry or want to simplify the process even further, microwave poaching is a fast and convenient alternative. While it doesn’t give you the same traditional texture as stovetop poaching, it can be a good option for busy mornings.
How it Works: To microwave a poached egg, fill a microwave-safe bowl with about half a cup of water and crack an egg into it. Cover the bowl with a microwave-safe plate or lid, and microwave on high for about 1 to 1.5 minutes, checking for doneness. Be careful to not overcook the egg, as the microwave can quickly turn the yolk from runny to hard.
Advantages: The microwave method is the fastest poaching technique, taking only 1-2 minutes. It’s perfect if you’re looking for a quick meal or want a low-maintenance way to prepare eggs.
Disadvantages: The texture of microwave poached eggs can be different from the traditional method. The whites may become slightly rubbery, and the yolk can be difficult to control in terms of consistency. Additionally, it might take some trial and error to find the perfect time for the desired egg doneness.
5. Poaching Eggs in a Steamer
Steaming is another hands-off approach to poaching eggs that allows for a uniform texture without much effort. It’s an alternative technique to boiling, using steam to cook the eggs gently.
How it Works: To poach eggs in a steamer, you simply bring water to a boil in a pot, then place a steaming rack or basket above the water. Crack the eggs into small, heat-safe bowls (or directly into silicone egg cups), then place the bowls on the steamer rack. Cover and steam for about 4 to 5 minutes, depending on your desired egg consistency.
Advantages: This method is particularly useful if you’re looking to cook multiple eggs at once and don’t want to deal with the mess of boiling water. The eggs will cook gently and evenly, with the whites firming up while the yolk remains soft.
Disadvantages: Like with oven poaching, steamed poached eggs may not have the same delicate texture as those cooked in water, and the cooking time may vary based on the size of the egg and the steaming setup. Steaming may also be less ideal if you don’t have a steaming basket or rack.
6. Sous Vide Poached Eggs
Sous vide poaching is an advanced technique often used by chefs to cook eggs to the perfect level of doneness. This method involves cooking the eggs in a water bath at a precise temperature for an extended period, resulting in perfectly poached eggs every time.
How it Works: Set your sous vide machine to a temperature between 145°F and 150°F (63°C to 66°C). Place your eggs in the water bath for 45 minutes to 1 hour. Once the time is up, remove the eggs from the bath, crack them open, and serve. The low-temperature cooking method ensures a silky smooth texture with a perfectly runny yolk.
Advantages: Sous vide poaching offers unparalleled precision and consistency, making it a great choice for professional kitchens or those who want to experiment with different egg textures. It guarantees a perfect poached egg with no guesswork involved.
Disadvantages: The main downside is that sous vide equipment can be expensive, and the process takes longer than other methods. It’s not the most practical choice for quick meals but is perfect for those looking to achieve professional-quality poached eggs with minimal effort once the setup is complete.
—
In summary, there are several alternative techniques for poaching eggs, each with its own advantages and challenges. Whether you opt for the simplicity of silicone cups, the speed of the microwave, or the precision of sous vide, there’s a method to suit every preference and kitchen setup. Each of these techniques offers a unique twist on the classic poached egg, so feel free to experiment and find the method that works best for you.
Common Mistakes to Avoid When Poaching Eggs
Boiling Water and Its Role in Poaching Eggs
When it comes to poaching eggs, water temperature plays a crucial role in achieving the perfect results. The term “boiling water” can often be misunderstood in the context of poaching because you’re not looking for a rapid, rolling boil, as it can cause the egg whites to disperse uncontrollably. Instead, it’s the careful management of the water’s temperature that ensures your poached eggs come out with tender whites and a perfectly runny yolk. Let’s dive deeper into how water temperature impacts the poaching process and why gentle simmering is the key to success.
1. The Difference Between Boiling and Simmering
Many people associate boiling water with cooking, but when poaching eggs, the ideal water temperature is just below the boiling point. Here’s what you need to know:
Boiling Water: Water boils at 212°F (100°C) at sea level, and it’s characterized by large, vigorous bubbles rapidly breaking the surface of the water. While boiling water is great for things like pasta or rice, it’s too aggressive for poaching eggs. If you poach eggs in full boiling water, the violent movement of the water can break apart the delicate egg whites, causing them to spread out in the water and lose their shape.
Simmering Water: Simmering water, on the other hand, is a gentler state of boiling, usually between 180°F and 190°F (82°C to 88°C). At this temperature, the water should have small bubbles rising slowly to the surface, not a rapid boil. Simmering water allows the egg whites to cook delicately and form around the yolk, creating a smooth, tender texture while keeping the yolk soft and runny.
In short, you want to avoid a full boil. Instead, keep the water at a gentle simmer to poach eggs successfully.
2. Why Water Temperature Is Critical for Poaching Eggs
The water temperature is vital in poaching eggs because it determines how quickly the egg whites set. If the water is too hot, the egg whites cook too quickly on the outside but remain raw in the center. On the other hand, if the water is too cold, the whites won’t cook properly, and the egg will become watery and lack the firm texture that defines a good poached egg.
At the optimal temperature of 180°F to 190°F, the egg whites cook slowly, allowing them to firm up without being overcooked. This is what gives poached eggs their characteristic soft, tender whites that encase the luscious runny yolk.
3. How to Achieve the Right Temperature for Poaching
Achieving the right water temperature requires some careful attention, but it’s not difficult once you understand the basics. Here are a few tips to help you control your water temperature for perfect poaching:
Use a Thermometer: To ensure your water is at the ideal poaching temperature, you can use a kitchen thermometer to measure the temperature of the water. This guarantees that you’re not working with water that’s too hot or too cool, which can ruin your poached eggs.
Test the Water Without Eggs: Before you start poaching eggs, bring the water to a near-boil, then reduce the heat to a simmer. You can test the water’s readiness by gently stirring it. If the water is bubbling lightly and has small, steady bubbles rising from the bottom, you’re in the right range for poaching. Alternatively, you can test with a spoon—if you place the spoon in the water and it creates small bubbles without vigorous agitation, the water is at the ideal temperature for poaching.
Visual Cues: If you don’t have a thermometer, you can rely on visual cues. Look for small, gentle bubbles at the bottom of the pot, with slight movement in the water. The water should not have a rolling boil, and it should remain calm with just subtle, steady bubbling.
Control the Heat: You can adjust the heat slightly to maintain the right temperature throughout the poaching process. If you notice the water starts to boil too rapidly, reduce the heat to bring it back down to a simmer. Keeping the water at a steady, simmering temperature is crucial for achieving uniform poaching results.
4. Impact of Overheating or Underheating the Water
Overheating: If the water temperature exceeds the optimal range of 190°F, it can cause the egg whites to become tough and rubbery. The water’s aggressive movement can break the whites apart, making the poached egg look messy with ragged edges and scattered whites. This might also lead to the yolk cooking too quickly, resulting in a less runny center.
Underheating: If the water is too cold (below 180°F), the whites will not cook properly, and the egg may become watery or uneven. The egg whites might spread out in the water instead of staying intact around the yolk, leaving you with a less visually appealing egg. The yolk might also remain too runny and undercooked.
5. Why You Should Avoid a Full Boil
A rapid, full boil should be avoided in the poaching process for several reasons:
Breaks the Egg Apart: When water is boiling vigorously, it creates turbulence, which can disturb the delicate egg and cause the whites to spread out or break off, ruining the shape of the poached egg.
Uneven Cooking: The turbulent water can cause uneven cooking, with the outside of the egg cooking too quickly and the inside remaining raw. A full boil doesn’t give the egg whites enough time to cook evenly and firm up before the yolk begins to cook too much.
By gently simmering the water at the ideal temperature, you allow the egg to cook evenly, creating smooth, tender whites with a soft, runny yolk in the center. This slow, controlled cooking method is key to producing consistently perfect poached eggs.
—
In Conclusion
Boiling water may sound like the right technique for cooking eggs, but when it comes to poaching, it’s all about simmering the water at a gentle, consistent temperature. A full boil is too harsh for delicate eggs, causing them to break apart and cook unevenly. Instead, simmering water just below boiling point is the key to perfectly poached eggs. By carefully controlling the water temperature and watching for signs of simmering rather than boiling, you can master the art of poaching eggs and achieve consistent, delicious results every time.
Overcooking Poached Eggs and How to Avoid It
Overcooking is one of the most common pitfalls when poaching eggs, and it’s easy to do if you’re not careful with the timing and water temperature. The delicate nature of poached eggs means that just a few seconds can make a huge difference in the final result. Overcooked poached eggs have a rubbery texture, firm whites, and a yolk that’s no longer runny. In this section, we’ll explore how overcooking happens, why it’s a problem, and how to avoid it for perfectly poached eggs every time.
1. What Happens When Eggs Are Overcooked?
When poached eggs are overcooked, the texture and taste are significantly impacted. Here’s what happens to the egg when it spends too much time in the water:
Rubbery Whites: The egg whites, which should be soft and delicate, become tough and rubbery if they cook for too long. Instead of the silky smooth texture that defines a perfectly poached egg, overcooked whites can have a chewy, almost rubbery consistency that is unpleasant to eat.
Firm Yolk: The yolk of the egg, which is ideally runny and creamy, will begin to firm up the longer the egg stays in the hot water. Overcooked poached eggs often have a yolk that is more set and less flavorful than the perfect, runny yolk you’re aiming for.
Loss of Creamy Texture: The beauty of a poached egg lies in the contrast between the firm egg whites and the soft, runny yolk. Overcooking disrupts this balance, and the resulting egg can feel dry or tough. The yolk may lose its rich, velvety texture, making it less enjoyable.
2. Why Does Overcooking Happen?
Overcooking typically happens for a few reasons:
Too Much Time in the Water: If you leave your eggs in the simmering water for too long, the heat will continue to cook the egg, even after the whites have set. The longer the egg sits in the water, the firmer both the whites and the yolk will become. The ideal poaching time is around 3–4 minutes for soft, runny eggs. Going beyond this timeframe risks turning the egg into a hard-cooked egg.
High Water Temperature: If the water is too hot, the eggs cook too quickly, resulting in a firm texture. It’s important to keep the water just below boiling—around 180°F to 190°F (82°C to 88°C)—to allow the egg whites to cook gently while preserving the runny yolk.
Not Timing Properly: Poaching eggs requires careful timing, as the cooking process happens relatively quickly. If you’re not keeping track of the time or lose track of when you put the egg in the water, you could end up with overcooked eggs. A kitchen timer can help ensure accuracy.
Cooking Multiple Eggs: If you’re poaching multiple eggs at once, they may take a little longer to cook because the water temperature can drop when you add several eggs at once. If the water temperature decreases too much, it could lead to uneven cooking, and you might end up leaving the eggs in the water longer than intended.
3. How to Avoid Overcooking Poached Eggs
The good news is that overcooking is easily avoidable with a few simple precautions. Here are some tips to help you avoid overcooked poached eggs:
Stick to the Ideal Cooking Time: The perfect poached egg should be cooked for about 3–4 minutes. This allows the whites to set while keeping the yolk perfectly runny. After 4 minutes, check the eggs by gently pressing on the whites. If they’re firm but not rubbery, and the yolk still gives way when lightly pressed, the egg is done.
Use a Timer: To ensure you don’t overcook your eggs, use a kitchen timer or a stopwatch. You can set the timer to 3 minutes when you place the egg in the water, then check the egg at 3 minutes. If you prefer a slightly firmer yolk, you can leave it for an additional 30 seconds to a minute, but be cautious not to exceed 4 minutes.
Control Water Temperature: Keeping your water at the right temperature is key to poaching eggs without overcooking. Use a thermometer to check that the water is around 180°F to 190°F (82°C to 88°C). If the water is too hot, reduce the heat to bring it back to a simmer. If you don’t have a thermometer, watch for small bubbles rising slowly from the bottom of the pan as a sign that the water is at the right temperature.
Remove Eggs Promptly: Once your egg reaches the desired doneness, remove it from the water immediately using a slotted spoon. Don’t let it sit in the hot water any longer than necessary, as the residual heat will continue to cook the egg. The longer it stays in the water, the firmer it will get.
Poach One Egg at a Time: If you’re new to poaching eggs, it’s a good idea to poach one egg at a time. This way, you can pay closer attention to the water temperature and cooking time without the distraction of multiple eggs. As you become more skilled, you can try poaching multiple eggs simultaneously.
Use a Timer or Spoon to Check: To help prevent overcooking, gently spoon out the egg after 3 minutes to check its consistency. You can press lightly on the egg whites to see if they’ve set. If they’re soft but firm to the touch, it’s time to remove the egg. If you’re unsure, err on the side of undercooking—you can always put it back in the water for a few more seconds if needed.
4. How Overcooking Affects the Egg’s Flavor and Appearance
Not only does overcooking affect the texture, but it also impacts the flavor and overall appearance of the egg:
Flavor: Overcooked eggs tend to lose some of their natural sweetness and delicate flavor. The yolk becomes less creamy, and the whites take on a somewhat rubbery taste that detracts from the egg’s natural richness. A perfectly poached egg has a fresh, mild flavor that is lost when overcooked.
Appearance: An overcooked poached egg will often have a tough, dry white that looks far less appetizing than a perfectly cooked one. The yolk, instead of remaining bright yellow and runny, may appear more opaque and thick. The egg will lose the smooth, rounded shape that makes poached eggs so visually appealing.
5. What to Do if You Overcook Poached Eggs
If you accidentally overcook your poached eggs, don’t worry—it’s a learning experience. While the texture might not be ideal, you can still salvage the eggs by incorporating them into other dishes where the texture won’t matter as much. For example, you can chop up overcooked poached eggs and add them to salads, sandwiches, or even breakfast burritos. The flavor is still there, even if the texture isn’t perfect.
—
In Conclusion
Overcooking poached eggs is a common mistake that can lead to rubbery whites, firm yolks, and a loss of flavor. The key to avoiding overcooking is to control the cooking time, water temperature, and remove the eggs from the water as soon as they’re done. By paying close attention to the cooking process and using a timer, you can ensure that your poached eggs remain tender and creamy with a perfectly runny yolk every time.
Not Using Fresh Eggs: Why Freshness Matters for Poached Eggs
The freshness of your eggs is a crucial factor in achieving the perfect poached egg. While it might seem like any egg can be poached, fresh eggs are far superior for this delicate cooking technique. Using older eggs can lead to frustrating results, such as watery whites, spread-out eggs, and less-than-ideal texture. In this section, we’ll explore why fresh eggs are essential for poaching, how to tell if your eggs are fresh, and how to maximize your egg’s potential.
1. Why Freshness Is Important for Poaching Eggs
Fresh eggs are key to creating poached eggs that hold their shape, have tender whites, and boast a perfectly runny yolk. Here’s why:
Tighter Egg Whites: Fresh eggs have thicker, firmer whites that hold their shape better when poached. The egg white (also known as albumen) surrounds the yolk and sets into a smooth, delicate layer when cooked in hot water. Fresh eggs contain less water, which helps the whites coagulate quickly and firmly around the yolk. As a result, the egg retains its spherical shape, and the whites don’t spread out too much in the water.
Less Likely to Spread: As eggs age, the egg white becomes more watery and thinner. This results in a weaker structure, and when poaching, older eggs are much more likely to spread out in the water, losing their shape and becoming less visually appealing. Fresh eggs are less likely to break apart in the water and stay together, creating a neat and compact poached egg.
Better Control Over Poaching: With fresh eggs, you have more control over the poaching process. The firmer whites allow for a more predictable cooking outcome, ensuring that the egg white cooks evenly and doesn’t turn into a messy, stringy mess in the water. Older eggs, on the other hand, may cause the whites to disperse unevenly, creating an unpredictable and unsatisfactory result.
Visually Attractive Poached Eggs: Fresh eggs give you poached eggs that are perfectly round, with smooth whites that encapsulate the golden, runny yolk. Older eggs often result in misshapen, less visually appealing eggs that look ragged and uneven. The perfect poached egg, with its delicate structure and rounded edges, is achievable only with fresh eggs.
2. How Fresh Eggs Affect the Poaching Process
Using fresh eggs for poaching helps create a more predictable and controlled cooking process. Here’s how fresh eggs improve the poaching experience:
Cleaner Egg Whites: The fresher the egg, the more likely it is that the whites will set into a clean, firm texture when poached. The albumen, which is thicker and denser in fresh eggs, provides a more stable base for the yolk to stay centered and intact during cooking. This leads to a smoother, more even poaching process with minimal risk of the egg whites becoming stringy or dispersed in the water.
Tighter Eggshell Membrane: In fresh eggs, the membrane that surrounds the egg white is more intact and tighter. As a result, the egg whites are less likely to leak out into the water when cracked open. Older eggs have weaker membranes, which can lead to the egg whites seeping out into the water, leaving behind a cloudy mess instead of a neat, clean poached egg.
Runny Yolk and Tender Whites: Fresh eggs also help you achieve the perfect balance of a runny yolk and soft whites. The thicker whites hold their structure while cooking, allowing you to maintain the delicate texture of the egg without overcooking it. In contrast, with older eggs, the whites are more fragile, and they can cook unevenly, causing the yolk to firm up faster and result in a less desirable texture.
3. How to Tell If Your Eggs Are Fresh
If you’re unsure whether your eggs are fresh enough for poaching, there are several simple ways to test their freshness before you cook them:
The Water Test: One of the easiest methods to check an egg’s freshness is by placing it in a bowl of cold water. Fresh eggs will sink to the bottom and lie flat on their sides. As eggs age, the air cell inside the egg grows larger, causing the egg to float or tilt upwards. If your egg floats, it’s a sign that it is no longer fresh and should not be used for poaching.
The Crack Test: When you crack the egg into a bowl, observe the egg whites and yolk. Fresh eggs have firm, cohesive whites that stay close to the yolk and a rounded, plump yolk. In contrast, older eggs tend to have more watery whites that spread out and thin out, and the yolk may appear flatter and less distinct. If your egg looks spread out when cracked, it’s likely not fresh enough for poaching.
The Smell Test: Although this is a more extreme test, if you crack the egg open and it emits an unpleasant odor, it’s an indication that the egg is no longer fresh and should not be used. Eggs with a foul smell should be discarded immediately.
4. How to Store Eggs for Maximum Freshness
To ensure that your eggs stay fresh for as long as possible, proper storage is key. Here are a few tips to keep your eggs at their freshest:
Store Eggs in the Coldest Part of the Fridge: Eggs should always be stored in the refrigerator, ideally in the coldest part of the fridge, which is typically the back of the bottom shelf. Keeping eggs at a consistent temperature slows down the aging process and preserves their freshness for longer.
Keep Eggs in Their Carton: The eggshell is porous, which means eggs can absorb odors from other foods in the fridge. Keep eggs in their original carton to minimize exposure to odors and maintain freshness. The carton also helps prevent the eggs from cracking and provides an extra layer of protection.
Avoid Storing Eggs in the Door: Many people store eggs in the door of the fridge, but this is not ideal. The door tends to have the most temperature fluctuations, which can cause eggs to age faster. Instead, store eggs in the main part of the fridge, where the temperature is more stable.
Use Eggs Within Their Expiry Date: While eggs can last several weeks beyond their “sell by” or “use by” date, it’s always best to use eggs while they are still fresh. If you plan to poach eggs, make sure they are within a few days of the expiration date for the best results.
5. Alternatives for Fresh Eggs
If you find yourself without fresh eggs but still want to poach, there are some alternatives to consider:
Store-Bought Liquid Eggs: Some stores sell liquid egg whites or whole eggs in cartons. These products are pasteurized and often have a longer shelf life. While they can be a convenient option, they may not yield the same results as fresh eggs when poaching. The texture of the whites can be more watery, and the yolk may not hold its shape as well.
Farm Fresh Eggs: If you live near a farm or have access to a local farm market, farm-fresh eggs are an excellent option. These eggs are often much fresher than store-bought eggs and provide superior results when poaching.
Freeze Eggs for Later Use: If you have a surplus of fresh eggs and want to store them for later, you can freeze eggs. To do so, crack the eggs into a bowl, beat them lightly, and pour them into an ice cube tray or airtight container. While frozen eggs can be a bit tricky for poaching (because the texture may change slightly), they can still be used in cooking or baking when fresh eggs are not available.
—
In Conclusion
Using fresh eggs is one of the most important factors in achieving perfectly poached eggs. Fresh eggs have firmer whites that hold their shape in the water, allowing you to create smooth, round eggs with tender whites and a runny yolk. Older eggs, on the other hand, tend to spread out in the water, resulting in uneven cooking and unsightly eggs. To ensure the best poached eggs, always use the freshest eggs you can find, and keep an eye on their storage to maintain their quality. Fresh eggs are the foundation of a perfectly poached egg, so don’t skip this step when aiming for the best results.
Creative Ways to Serve Poached Eggs
Poached Egg on Toast: A Simple and Delicious Classic
Poached eggs on toast is a timeless breakfast or brunch favorite that perfectly combines the simplicity of crispy toast with the rich, creamy texture of a perfectly poached egg. This dish is not only delicious but also versatile, making it a go-to meal for many people seeking a quick and nutritious start to their day. Whether you’re in the mood for a light snack or a hearty breakfast, poached eggs on toast can be easily customized to suit any flavor preference.
In this section, we’ll explore why poached eggs on toast is such a beloved dish, how to make it perfectly every time, and some variations and topping ideas to elevate this simple meal into something extraordinary.
1. Why Poached Egg on Toast is So Popular
Poached eggs on toast are incredibly popular for several reasons. Here are some of the key factors that make this dish a favorite:
Quick and Easy: Poached eggs on toast are simple to prepare and require minimal ingredients. With just a few basic items—eggs, bread, and butter or olive oil—you can create a satisfying meal in less than 10 minutes. This makes it an ideal option for busy mornings or when you want something delicious without spending too much time in the kitchen.
Perfect Balance of Textures: One of the main attractions of poached eggs on toast is the contrast in textures. The crispy, golden-brown toast provides a crunchy base, while the soft, delicate poached egg adds creaminess. When you cut into the poached egg, the runny yolk seeps onto the toast, creating a flavorful, luxurious topping.
Healthy and Nutritious: Poached eggs are a healthy protein-rich option that can be paired with whole-grain or sourdough bread for added fiber and nutrients. The dish can be customized with a variety of toppings, like avocado, spinach, or tomatoes, to further boost its nutritional value. Poached eggs on toast offer a balanced meal that provides both energy and nourishment.
Customizable: This dish can be easily adapted to suit a variety of tastes. Whether you prefer adding extra seasoning, spices, or toppings like cheese, vegetables, or herbs, poached eggs on toast can be tailored to fit any flavor profile. It’s a versatile canvas that allows you to get creative with different combinations and variations.
2. How to Make the Perfect Poached Egg on Toast
Making poached eggs on toast may seem like a simple task, but there are a few key steps that will help you perfect the dish. Here’s how to make the best poached egg on toast every time:
Step 1: Choose the Right Bread
The bread you choose plays an important role in the dish. Opt for a thick, sturdy slice of bread like sourdough, whole-grain, or ciabatta. These types of bread provide a solid foundation for the poached egg, allowing it to hold its shape and not get soggy too quickly. Toast the bread until it’s golden and crispy, but not overly crunchy, as you still want it to have a slight chew.
Step 2: Poach the Egg Perfectly
Follow the instructions for poaching eggs to ensure you get a perfectly cooked egg with firm whites and a runny yolk. Once your egg is poached, remove it gently from the water using a slotted spoon, making sure to drain any excess water. If you want to add an extra layer of flavor, you can season the egg with a pinch of salt and pepper while it’s still warm.
Step 3: Assemble the Dish
Place the poached egg on the freshly toasted bread. If you like, you can add a little spread, like butter, avocado, or cream cheese, to the toast before placing the egg on top. The creaminess of these spreads complements the egg and adds additional flavor.
Step 4: Add Garnishes and Seasoning
Top your poached egg on toast with seasonings like freshly cracked black pepper, a sprinkle of salt, or a dash of hot sauce for some heat. Fresh herbs, such as parsley, chives, or basil, can also add a burst of flavor and color. If you’re in the mood for something more savory, you can add sautéed spinach, mushrooms, or grilled tomatoes as a topping. The toppings can enhance the flavor profile and make the dish feel more gourmet.
3. Variations on Poached Egg on Toast
While the classic poached egg on toast is delicious on its own, there are endless variations you can try to mix things up. Here are a few ideas to elevate your dish:
Avocado Poached Egg on Toast: For a creamy, nutritious twist, add mashed avocado on your toast before placing the poached egg on top. The rich texture of the avocado pairs perfectly with the delicate poached egg, and it adds a healthy dose of fats and vitamins. You can even top it off with chili flakes or lemon zest for extra flavor.
Poached Egg on Smashed Sweet Potato Toast: Swap regular bread for mashed sweet potato as the base. Roasted or boiled sweet potato can be spread onto toast, creating a slightly sweet and savory base for your poached egg. This variation adds additional nutrients and fiber, making it a hearty option for breakfast or lunch.
Poached Egg on Toast with Spinach and Feta: If you’re looking for a more savory version, sautéed spinach and crumbled feta cheese make a perfect pairing with poached eggs. The saltiness of the feta, combined with the earthy flavor of the spinach, complements the richness of the egg. This variation is great for those seeking a more filling, Mediterranean-inspired meal.
Bacon and Poached Egg on Toast: For meat lovers, adding crispy bacon to your poached egg on toast is a delicious and indulgent option. The saltiness and crispiness of the bacon contrast nicely with the soft egg and toast. This hearty dish makes for a satisfying breakfast or brunch option.
Poached Egg on Toast with Tomato and Basil: For a fresh and light version, top your poached egg on toast with sliced tomatoes and fresh basil leaves. A drizzle of olive oil and balsamic vinegar can also elevate the flavors, making this version a perfect summer breakfast or brunch.
Spicy Poached Egg on Toast: Add a little heat to your poached egg on toast by drizzling some sriracha or hot sauce on top. You can also sprinkle chili flakes or paprika for a spicy kick. This variation is great for those who like bold, fiery flavors to complement the creamy egg yolk.
4. Health Benefits of Poached Eggs on Toast
Poached eggs on toast can be more than just a tasty treat—they can also offer several health benefits. When made with whole-grain bread and fresh eggs, this dish can provide a balanced meal rich in protein, healthy fats, and fiber. Here are some health benefits of this simple dish:
High in Protein: Eggs are an excellent source of high-quality protein, which is essential for building and repairing tissues, supporting immune function, and maintaining healthy skin and hair. The protein in the poached egg helps keep you feeling full and satisfied for longer.
Rich in Healthy Fats: When paired with healthy fats, such as avocado or olive oil, poached eggs on toast provide a good source of monounsaturated fats that support heart health and help maintain healthy cholesterol levels.
Packed with Fiber: Whole-grain bread, when used as the base, is a great source of fiber, which supports digestion and helps regulate blood sugar levels. Fiber also promotes a feeling of fullness, making the dish more filling and satisfying.
Nutrient-Rich: Poached eggs contain a variety of vitamins and minerals, including vitamin D, vitamin B12, and iron. These nutrients support bone health, energy production, and overall well-being.
5. Serving Poached Eggs on Toast
Poached eggs on toast are perfect for a quick breakfast, brunch, or light dinner. You can serve them on their own or as part of a larger meal, with sides like fruit, yogurt, or a salad. This dish also makes an excellent addition to a brunch spread, where guests can top their toast with poached eggs and other toppings of their choice.
Poached egg on toast can also be served as a base for more elaborate dishes, such as shakshuka, eggs benedict, or a savory egg and vegetable bowl. Its versatility makes it a great dish to experiment with and personalize according to your tastes and dietary preferences.
—
In Conclusion
Poached egg on toast is a simple yet satisfying dish that combines the richness of a perfectly poached egg with the crunch of toast. Whether you prefer it classic or with creative toppings, this dish is easy to prepare, customizable, and nutritious. It’s a great way to enjoy eggs in their purest form while experimenting with different flavors and textures. Whether you’re looking for a quick breakfast or a leisurely brunch, poached eggs on toast will never disappoint.